About Realms and Realm Sequences
Realms are connections between the Secure Firewall Management Center and the user accounts on the servers you monitor. They specify the connection settings and authentication filter settings for the server. Realms can:
-
Specify the users and user groups whose activity you want to monitor.
-
Query the user repository for user metadata on authoritative users, as well as some non-authoritative users: POP3 and IMAP users detected by traffic-based detection and users detected by traffic-based detection, a TS Agent, or ISE/ISE-PIC.
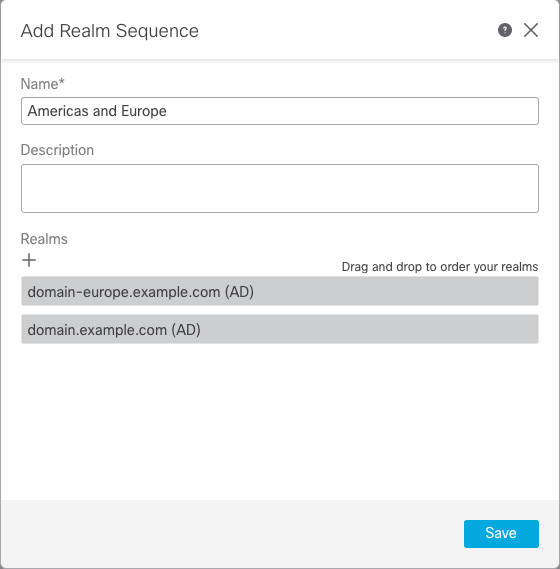
(Microsoft AD realm only.) A realm sequence is an ordered list of two or more Active Directory realms to use in identity policy. When you associate a realm sequence with an identity rule, the system searches the Active Directory domains in order from first to last as specified in the realm sequence.
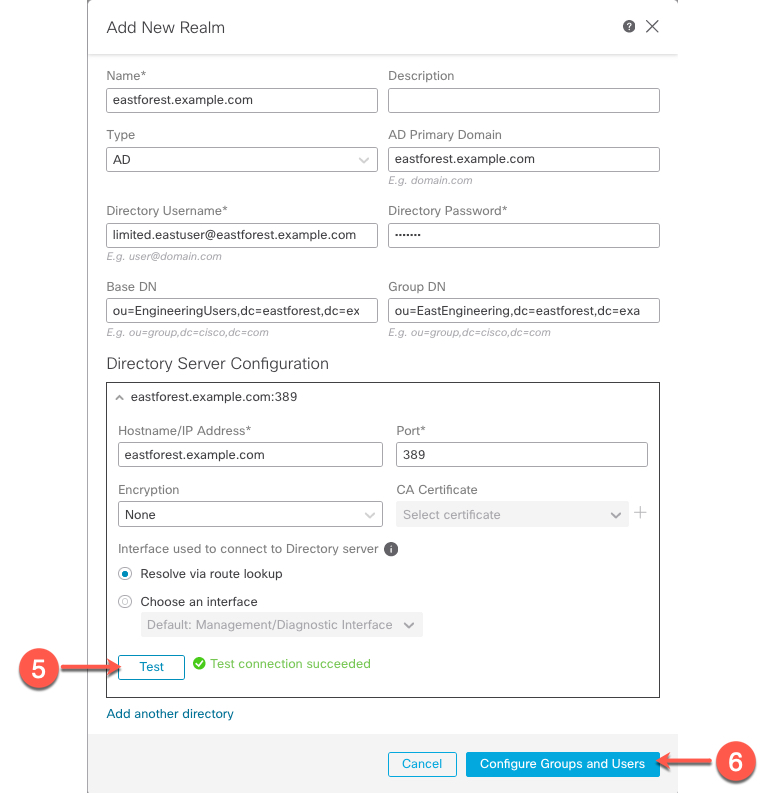
You can add multiple domain controllers as directories in a realm, but they must share the same basic realm information. The directories in a realm must be exclusively LDAP or exclusively Active Directory (AD) servers. After you enable a realm, your saved changes take effect next time the management center queries the server.
To perform user awareness, you must configure a realm for any of the supported server types. The system uses these connections to query the servers for data associated with POP3 and IMAP users, and to collect data about LDAP users discovered through traffic-based detection.
The system uses the email addresses in POP3 and IMAP logins to correlate with LDAP users on an Active Directory, Microsoft Azure Active Directory, or OpenLDAP. For example, if a managed device detects a POP3 login for a user with the same email address as an LDAP user, the system associates the LDAP user’s metadata with that user.
To perform user control, you can configure any of the following:
-
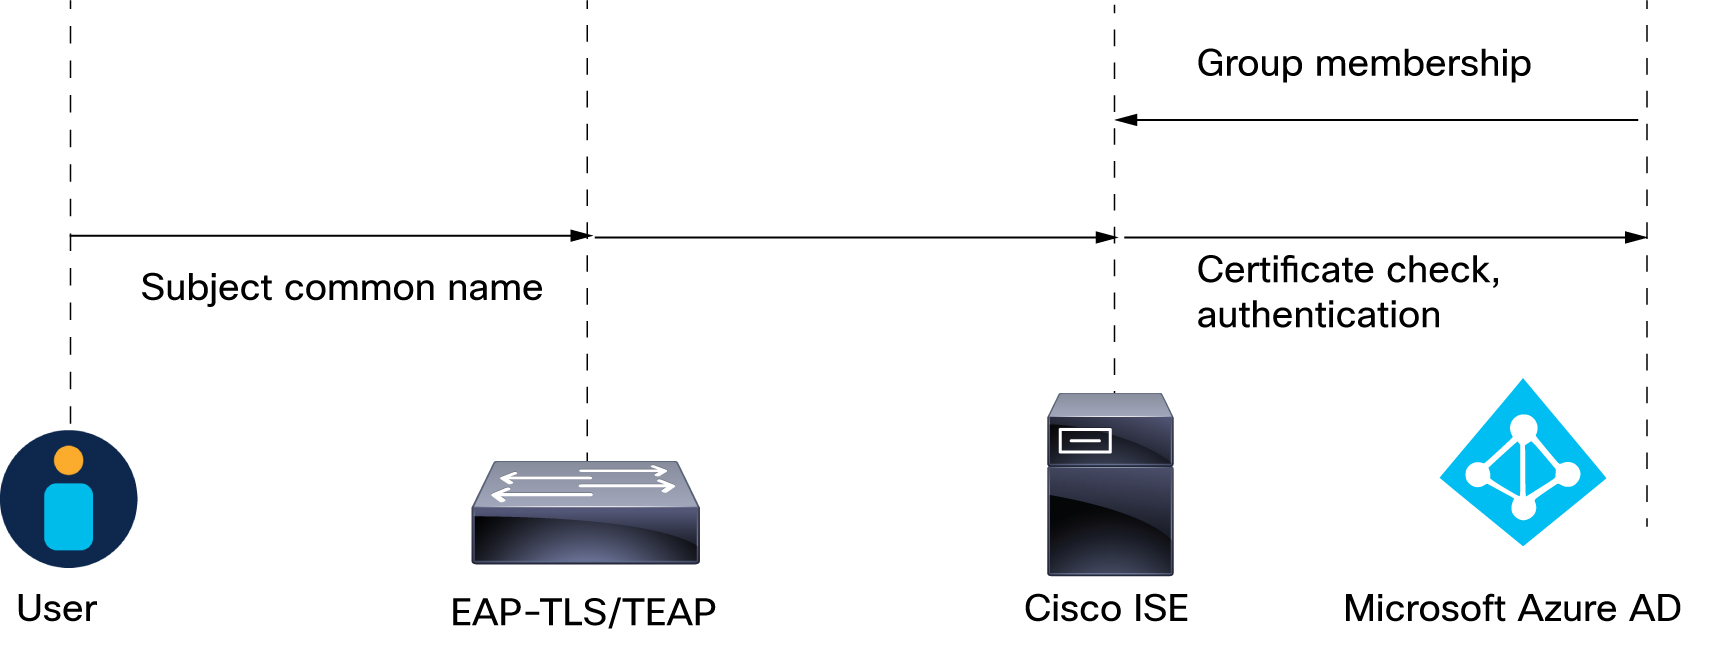
A realm or realm sequence for an Active Directory, Microsoft Azure Active Directory, server, or for ISE/ISE-PIC

Note
Configuring a Microsoft AD realm or realm sequence is optional if you plan to configure SGT ISE attribute conditions but not user, group, realm, Endpoint Location, or Endpoint Profile conditions; or if you use your identity policy only to filter network traffic.
Realm sequence is not available for Microsoft Azure AD realms.
-
A realm or realm sequence for a Microsoft AD server for the TS Agent.
-
For captive portal, an LDAP realm.
A realm sequence is not supported for LDAP.
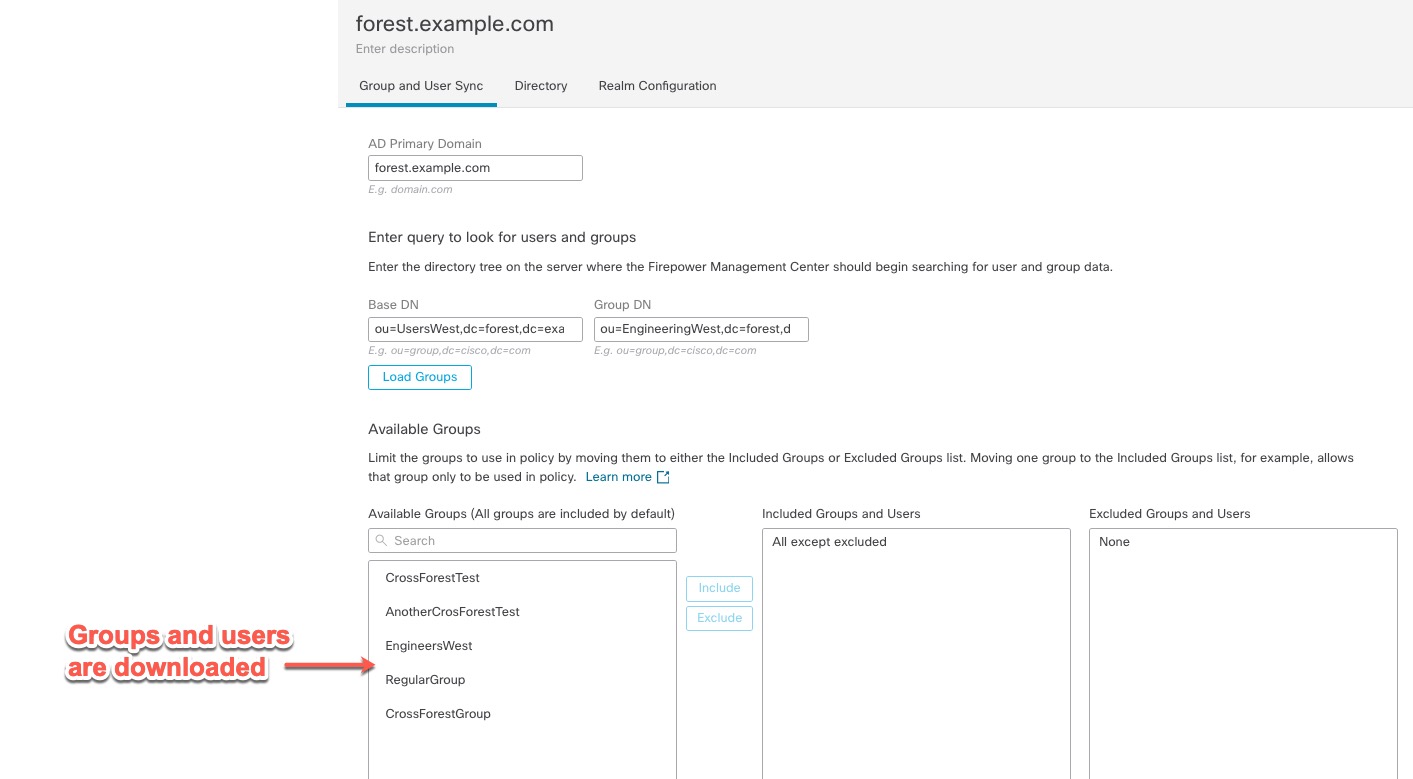
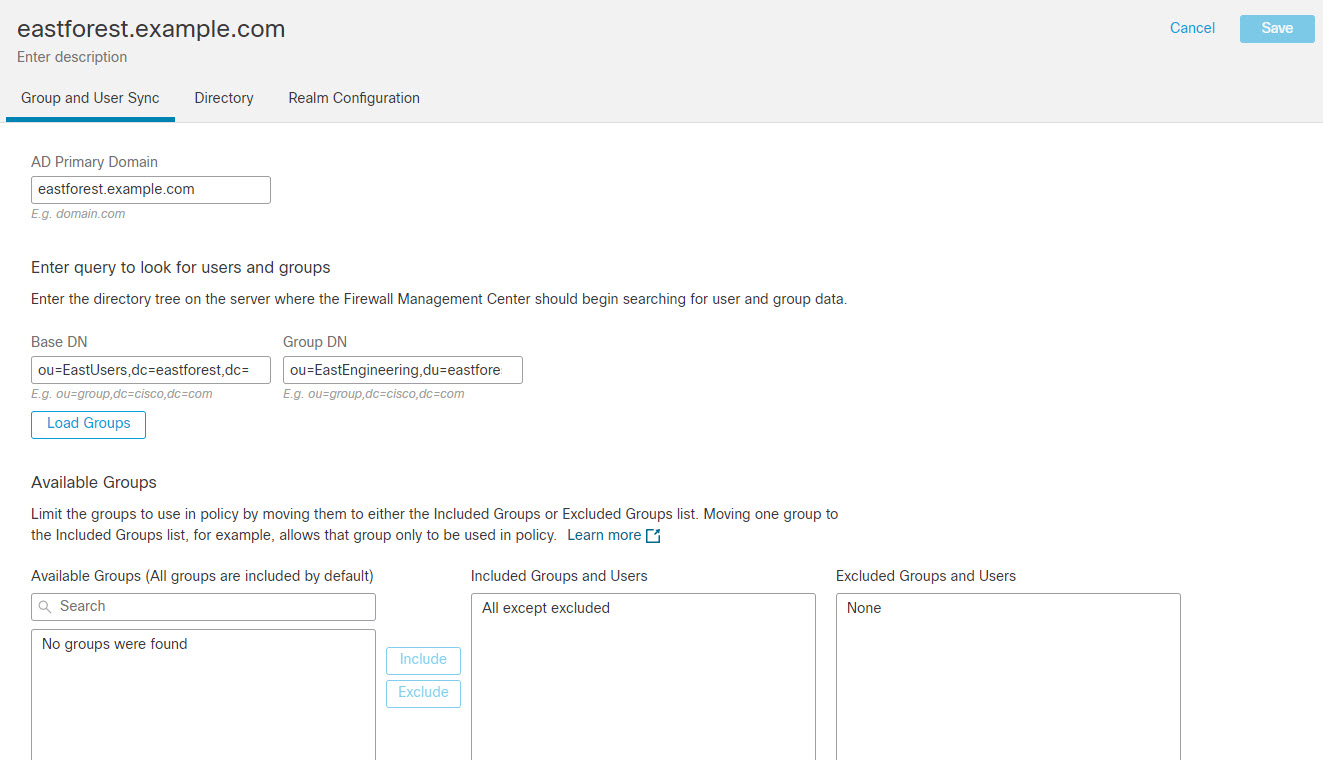
You can nest Microsoft AD groups and the management center downloads those groups and the users they contain. You can optionally restrict which groups and users get downloaded as discussed in Create an LDAP Realm or an Active Directory Realm and Realm Directory.
About User Synchronization
You can configure a realm or realm sequence to establish a connection between the management center and an LDAP or Microsoft AD server to retrieve user and user group metadata for certain detected users:
-
LDAP and Microsoft AD users authenticated by captive portal or reported by ISE/ISE-PIC. This metadata can be used for user awareness and user control.
-
POP3 and IMAP user logins detected by traffic-based detection, if those users have the same email address as an LDAP or AD user. This metadata can be used for user awareness.
The management center obtains the following information and metadata about each user:
-
LDAP user name
-
First and last names
-
Email address
-
Department
-
Telephone number
Important |
To reduce latency between the management center and your Active Directory domain controller, we strongly recommend you configure a realm directory (that is, domain controller) that is as close as possible geographically to the management center. For example, if your management center is in North America, configure a realm directory that is also in North America. Failure to do so can cause problems such as timeout downloading users and groups. |
About User Activity Data
User activity data is stored in the user activity database and user identity data is stored in the users database. The maximum number of users you can store and use in access control depends on your management center model. When choosing which users and groups to include, make sure the total number of users is less than your model limit. If your access control parameters are too broad, the management center obtains information on as many users as it can and reports the number of users it failed to retrieve in the Tasks tab page of the Message Center.
To optionally limit the subnets on which a managed device watches for user awareness data, you can use the configure identity-subnet-filter command as discussed in the Cisco Secure Firewall Threat Defense Command Reference.
Note |
If you remove a user that has been detected by the system from your user repository, the management center does not remove that user from its users database; you must manually delete it. However, your LDAP changes are reflected in access control rules when the management center next updates its list of authoritative users. |
Realms and Trusted Domains
When you configure a Microsoft Active Directory (AD) realm in the management center, it is associated with a Microsoft Active Directory or LDAP domain.
A grouping of Microsoft Active Directory (AD) domains that trust each other is commonly referred to as a forest. This trust relationship can enable domains to access each other's resources in different ways. For example, a user account defined in domain A can be marked as a member of a group defined in domain B.
Note |
Trusted domains apply to Microsoft Active Directory domains only. They do not apply to either Microsoft Azure Active Directory or LDAP domains. |
The system and trusted domains
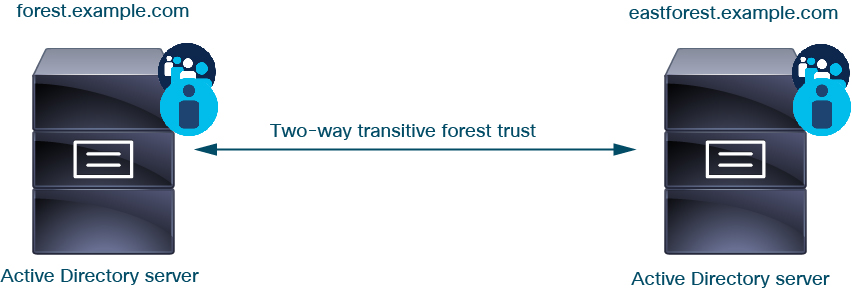
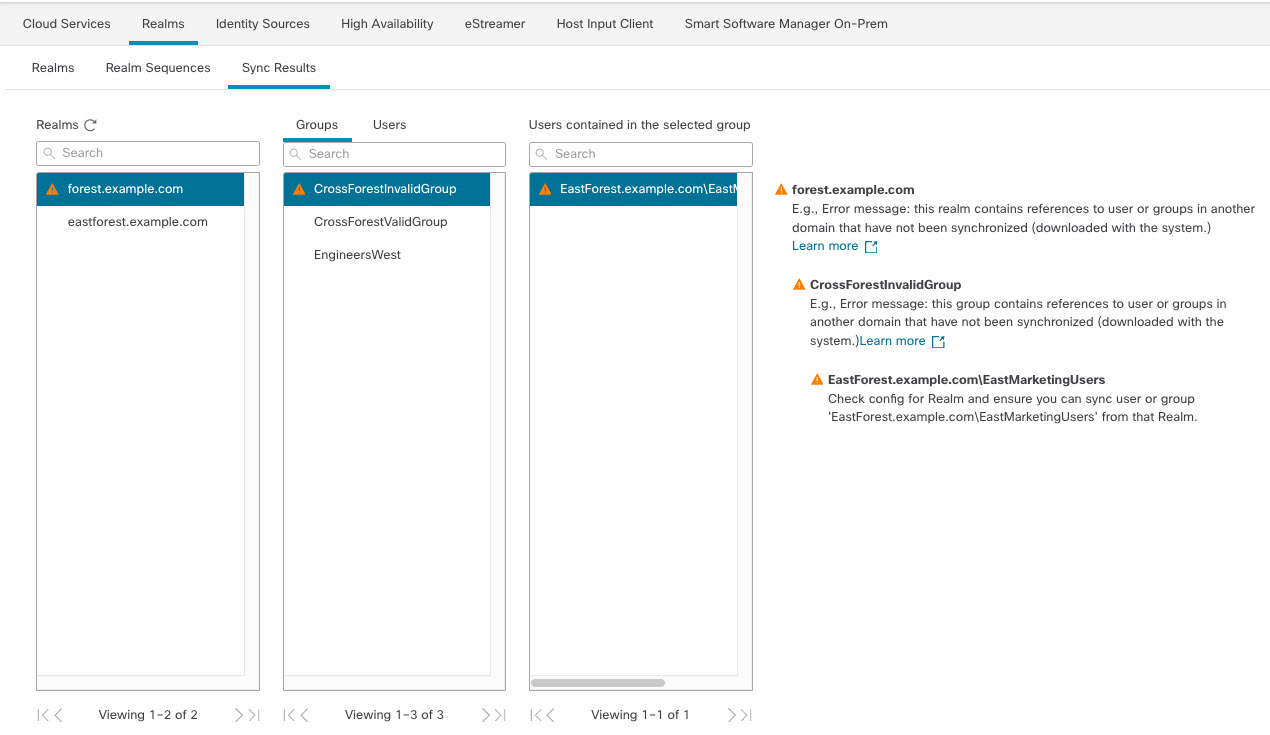
The system supports AD forests that are configured in a trust relationship. There are several types of trust relationships; this guide discusses two-way, transitive forest trust relationships. The following simple example shows two forests: forest.example.com and eastforest.example.com . Users and groups in each forest can be authenticated by AD in the other forest, provided you configure the forests that way.
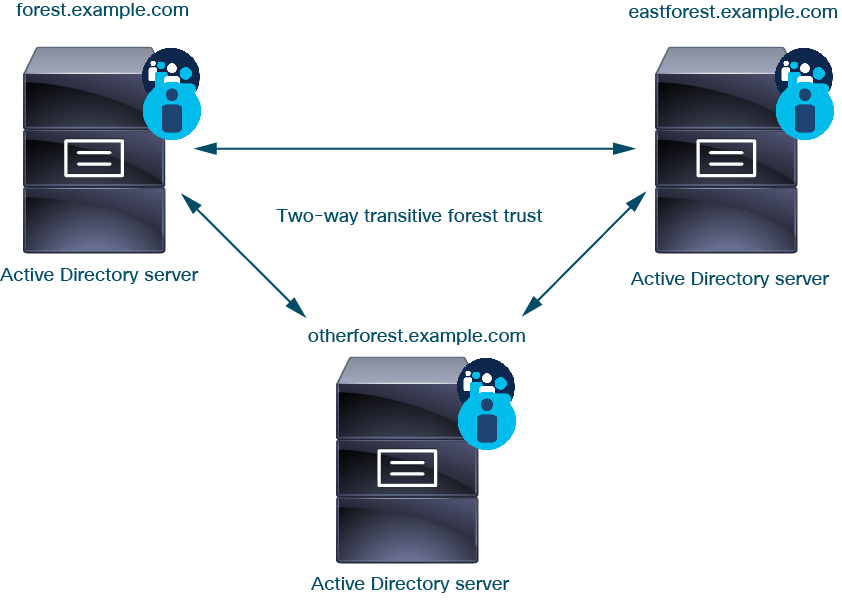
If you set up the system with one realm for each domain and one directory for each domain controller, the system can discover up to 100,000 foreign security principals (users and groups). If these foreign security principals match a user downloaded in another realm, then they can be used in access control policy.
You need not configure a realm for any domain that has no users you wish to use in access control policies.
To continue the example, suppose you have three AD forests (one of which could be a subdomain or an independent forest), all set up as two-way transitive forest relationships, all users and groups are available in all three forests as well as in the system. (As in the preceding example, all three AD domains must be set up as realms and all domain controllers must be configured as directories in those realms.)
Finally, you can set up the management center to be able to enforce identity policies on users and groups in a two-forest system with two-way transitive forest trust. Suppose each forest has at least one domain controller, each of which authenticates different users and groups. For the management center to be able to enforce identity policies on those users and groups, you must set up each domain containing relevant users as management center realm and each domain controller as management center directory in the respective realm.
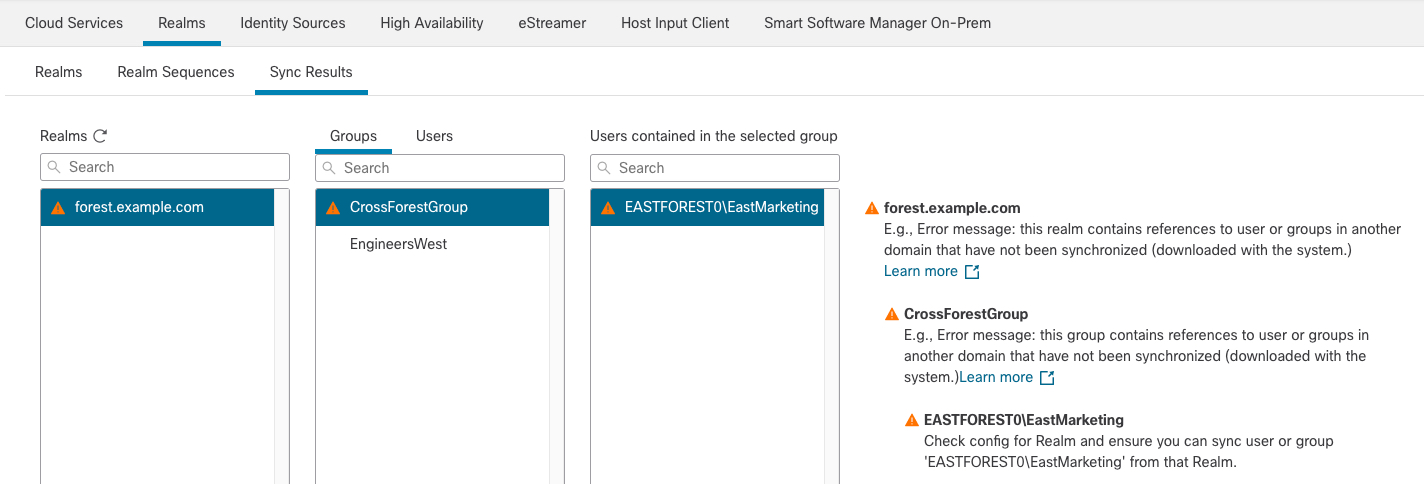
Failure to properly configure the management center prevents some of the users and groups from being able to be used in policies. You will see warnings when you try to synchronize users and groups in that case.
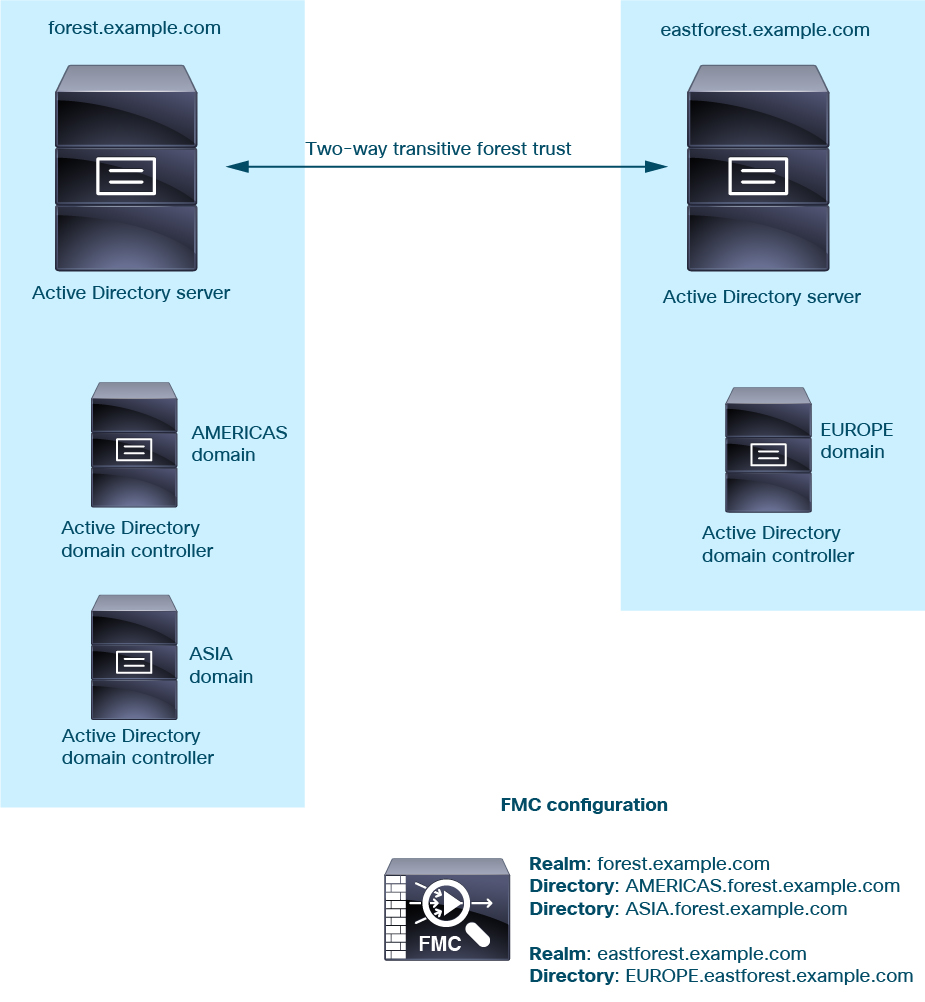
Using the preceding example, set up the management center as follows:
-
Realm for any domain in forest.example.com that contains users you want to control with access control policies
-
Directory in the realm for AMERICAS.forest.example.com
-
Directory in the realm for ASIA.forest.example.com
-
-
Realm for any domain in eastforest.example.com that contains users you want to control with access control policies
-
Directory in the realm for EUROPE.eastforest.example.com
-
Note |
The management center uses the AD field msDS-PrincipalName to resolve references to find user and group names in each domain controller. msDS-PrincipalName returns a NetBIOS name. |
Supported Servers for Realms
You can configure realms to connect to the following types of servers, providing they have TCP/IP access from the management center:
|
Server Type |
Supported for ISE/ISE-PIC data retrieval? |
Supported for TS Agent data retrieval? |
Supported for captive portal data retrieval? |
|---|---|---|---|
|
Microsoft Active Directory on Windows Server 2012, 2016, and 2019 |
Yes |
Yes |
Yes |
|
Microsoft Azure AD |
Yes |
No |
No |
|
OpenLDAP on Linux |
No |
No |
Yes |
An Active Directory Global Catalog server is not supported as a realm directory. For more information about the Global Catalog Server, see Global Catalog on learn.microsoft.com.
Note |
If the TS Agent is installed on a Microsoft Active Directory Windows Server shared with another passive authentication identity source (ISE/ISE-PIC), the management center prioritizes the TS Agent data. If the TS Agent and a passive identity source report activity by the same IP address, only the TS Agent data is logged to the management center. |
Note the following about your server group configurations:
-
To perform user control on user groups or on users in groups, you must configure user groups on the LDAP or Active Directory server.
-
Group names cannot start with S- because it is used internally by LDAP.
Neither group names nor organizational unit names can contain special characters like asterisk (
*), equals (=), or backslash (\); otherwise, users in those groups or organizational units are not downloaded and are not available for identity policies. - To configure an Active Directory realm that includes or excludes users who are members of a sub-group on your server, note
that Microsoft recommends that Active Directory has no more than 5000 users per group in Windows Server 2012. For more information,
see Active Directory Maximum Limits—Scalability on MSDN.
If necessary, you can modify your Active Directory server configuration to increase this default limit and accommodate more users.
-
To uniquely identify the users reported by a server in your Remote Desktop Services environment, you must configure the Cisco Terminal Services (TS) Agent. When installed and configured, the TS Agent assigns unique ports to individual users so the system can uniquely identify those users. (Microsoft changed the name Terminal Services to Remote Desktop Services.)
For more information about the TS Agent, see the Cisco Terminal Services (TS) Agent Guide.
Supported Server Object Class and Attribute Names
The servers in your realms must use the attribute names listed in the following table for the management center to retrieve user metadata from the servers. If the attribute names are incorrect on your server, the management center cannot populate its database with the information in that attribute.
|
Metadata |
Management Center Attribute |
LDAP ObjectClass |
Active Directory Attribute |
OpenLDAP Attribute |
|---|---|---|---|---|
|
LDAP user name |
Username |
|
samaccountname |
cn uid |
|
first name |
First Name |
givenname |
givenname |
|
|
last name |
Last Name |
sn |
sn |
|
|
email address |
|
userprincipalname (if mail has no value) |
|
|
|
department |
Department |
department distinguishedname (if department has no value) |
ou |
|
|
telephone number |
Phone |
telephonenumber |
telephonenumber |
Note |
The LDAP ObjectClass for groups is group, groupOfNames, (group-of-names for Active Directory) or groupOfUniqueNames. |
For more information about ObjectClasses and attributes, see the following references:

 )
)


 )
)
 )
) )
)

 (Download Now), then click
  )
)
 )
) )
)
 )
)
 Feedback