Upgrading Existing ND Cluster to This Release

Prerequisites and Guidelines

Before you upgrade your existing Nexus Dashboard cluster:

  • Ensure that you have read the target release's Release Notes for any changes in behavior, guidelines, and issues that may affect your upgrade.

  • Note that after you upgrade to this release, you can no longer change the number of services enabled in your cluster.

    Beginning with release 3.1.1, each cluster has a "deployment mode" which defines the combination of enabled services and cannot be changed after the cluster is deployed or upgraded. In other words, you will not be able to add or remove services after upgrading to this release without redeploying the cluster. If you were planning to add or remove services in your cluster, we recommend doing so before upgrading to this release.


    Note


    In some cases, a deployment mode supported in this release may have not been supported in a prior release (for example, cohosting Insights and Orchestrator is not supported in virtual clusters in release 3.0.1). In this case, if you have a single service (such as Insights) deployed in your current cluster but you plan to add another service (such as Orchestrator) after the upgrade:

    1. Disable existing Insights service in your current cluster.

    2. Install the additional Orchestrator service in your current cluster.

    3. Enable the Orchestrator service in your current cluster.

      At this point you would have both Insights and Orchestrator in your current cluster with Insights disabled and Orchestrator enabled. Note that you must not enable both services at the same time if it is not a supported configuration in your current release.

    4. Disable the Orchestrator service and proceed with the upgrade.


  • If you are running Nexus Dashboard Insights service in a 4-node or 5-node physical cluster, you can simply upgrade the cluster and the service to this release as you typically would and continue using the 4-node or 5-node cluster.

    This release of Nexus Dashboard with Nexus Dashboard Insights supports only 3-node and 6-node profiles for greenfield deployments. However, if you are upgrading an existing 4-node or 5-node cluster from an earlier release without changing your current scale, you can continue using it with this release.

  • If you are upgrading a physical Nexus Dashboard cluster, ensure that the nodes have the minimum supported CIMC version for the target Nexus Dashboard release.

    Supported CIMC versions are listed in the Nexus Dashboard Release Notes for the target release.

    CIMC upgrade is described in detail in the "Troubleshooting" article in the Nexus Dashboard documentation library.

  • If you are upgrading a virtual Nexus Dashboard cluster deployed in Linux KVM, you must enable the Copy host CPU configuration option in the Virtual Machine Manager UI.

    This release supports CentOS 7.9 or Red Hat Enterprise Linux 8.6 with the following Kernel and KVM versions:

    • For CentOS 7.9, Kernel version 3.10.0-957.el7.x86_64 and KVM version libvirt-4.5.0-23.el7_7.1.x86_64

    • For RHEL 8.6, Kernel version 4.18.0-372.9.1.el8.x86_64 and KVM version libvert 8.0.0

  • If you are upgrading a virtual Nexus Dashboard cluster deployed in VMware ESX, ensure that the ESX version is still supported by the target release.

    This release supports VMware ESXi 7.0, 7.0.1, 7.0.2, 7.0.3, 8.0.


    Note


    If you need to upgrade the ESX server, you must do that before upgrading your Nexus Dashboard. ESX upgrades are outside the scope of this document, but in short:

    1. Upgrade one of the ESX hosts as you typically would with your existing Nexus Dashboard node VM running.

    2. After the host is upgraded, ensure that the Nexus Dashboard cluster is still operational and healthy.

    3. Repeat the upgrade on the other ESX hosts one at a time.

    4. After all ESX hosts are upgraded and the existing Nexus Dashboard cluster is healthy, proceed with upgrading your Nexus Dashboard to the target release as described in this document.


  • Ensure that your current Nexus Dashboard cluster is healthy.

    You can check the system status on the Overview page of the Nexus Dashboard's Admin Console or by logging in to one of the nodes as rescue-user and ensuring that the acs health command returns All components are healthy.

  • If you are upgrading from release 3.0(1), you must disable all services running in the cluster before upgrading to this release.

    If you are upgrading from release 3.1(1), you do not need to disable the services.

    Note that because of the unified installation introduced in release 3.1(1), all of your existing services will be automatically upgraded to the versions compatible with this Nexus Dashboard release while preserving their configuration. The services will also be automatically re-enabled after the upgrade is completed.

  • You must perform configuration backups of your Nexus Dashboard and services before the upgrade to safeguard data and minimize any potential risk before proceeding with the upgrade.

  • Ensure that no configuration changes are made to the cluster, such as adding secondary or standby nodes, while the upgrade is in progress.

  • Nexus Dashboard does not support platform downgrades.

    If you want to downgrade to an earlier release, you will need to deploy a new cluster and reinstall the services.
Supported Upgrade Paths

Prior to Nexus Dashboard release 3.1(1), the platform software and individual services could be upgraded independent of each other but within a specific set of supported version combinations. Because of that, prior releases' documentation provided specific upgrade paths across multiple releases to ensure compatibility between all components at each upgrade stage.

This requirement has now been removed due to a much tighter coupling between the Nexus Dashboard and individual services with only a single version of each service compatible with each version of the platform. As a result, as long as you are currently on the minimum required version of the Nexus Dashboard software (listed in Prerequisites and Guidelines), you can upgrade both the platform and all currently enabled services directly to this release.

The following table provides a few example scenarios for specific deployment combinations:

Table 1.

Current Nexus Dashboard Release

Compatible Services

(depending on form factor and cluster size, you may have one or more of these services currently enabled)

Upgrade Workflow

3.0(1)

Fabric Controller: 12.1(3)

Orchestrator: 4.2(x)

Insights: 6.3(1)

Upgrade directly to release 3.1.1 as described in the following section.

All services will be automatically upgraded along with the platform.

2.3(2d)

Fabric Controller: 12.1(2)

Orchestrator: 4.1(x)

Insights: 6.2(x)

  1. If you are running Orchestrator release 4.1(1) or earlier, upgrade the Orchestrator service to release 4.1(2) first.

    If you do not have the Orchestrator service enabled, skip this step.

    Note


    When upgrading from Nexus Dashboard release 2.3.2d with Orchestrator service enabled, the Orchestrator service must be version 4.1(2) or later to upgrade directly to Nexus Dashboard 3.1(1).

  2. Upgrade from release 2.3(2d) to release 3.1(1).

    All services will be automatically upgraded along with the platform.

2.3(2b)

Fabric Controller: 12.1(2)

Orchestrator: 4.1(x)

Insights: 6.2(x)

  1. Upgrade the Nexus Dashboard platform only to release 2.3(2d) as described in Nexus Dashboard Deployment Guide, Release 2.3.x

  2. If you are running Orchestrator release 4.1(1) or earlier, upgrade the Orchestrator service to release 4.1(2) first.

    If you do not have the Orchestrator service enabled, skip this step.

    Note


    When upgrading from Nexus Dashboard release 2.3.2d with Orchestrator service enabled, the Orchestrator service must be version 4.1(2) or later to upgrade directly to Nexus Dashboard 3.1(1).

  3. Upgrade from release 2.3(2d) to release 3.1(1).

    All services will be automatically upgraded along with the platform.

Any release prior to 2.3(2b)

Fabric Controller: 12.1(1) or earlier

Orchestrator: 4.0(2) or earlier

Insights: 6.1(3) or earlier

  1. Upgrade the Nexus Dashboard platform to release 2.3(2d) as described in Nexus Dashboard Deployment Guide, Release 2.3.x

  2. Upgrade the individual services to any version compatible with Nexus Dashboard release 2.3(2d) as you previously would using the upgrade paths or minimum version requirements described in the service-specific documentation:

  3. Upgrade from release 2.3(2d) to release 3.1(1).

    All services will be automatically upgraded along with the platform.

Upgrading Nexus Dashboard

This section describes how to upgrade an existing Nexus Dashboard cluster.


Note


The following steps illustrate the upgrade workflow from Nexus Dashboard release 3.0(1). If you are upgrading from release 2.3(x), the UI may differ slightly but the upgrade workflow and functionality remains the same.


Before you begin

Procedure


Step 1

Download the Nexus Dashboard image.

  1. Browse to the Software Download page.

    https://software.cisco.com/download/home/286327743/type/286328258

  2. Choose the Nexus Dashboard version you want to download.

  3. Download the Nexus Dashboard image for your target release.

    Note


    The upgrade process is the same for all Nexus Dashboard form factors and uses the Nexus Dashboard ISO image (nd-dk9.<version>.iso). In other words, even if you used the virtual form factors (such as the ESX .ova) or a cloud provider's marketplace for initial cluster deployment, you must still use the .iso image for upgrades.

  4. Host the image on a web server in your environment.

    We recommend hosting the image on a server in your environment. When you upload the image to your Nexus Dashboard cluster, you will have an option to provide a direct URL to the image, which can significantly speed up the process.

Step 2

Log in to your current Nexus Dashboard's Admin Console as an Administrator user.

Step 3

Disable any existing services installed in the cluster.

Note


You must disable all services before you upgrade the cluster. You must not delete any services after disabling them. The disabled services will be automatically re-activated once the upgrade process is complete.

  1. From the main navigation menu, select Services (release 2.3.2) or Operate > Services (release 3.0.1 or later).

  2. In the service's tile, click the actions () menu and choose Disable.

  3. Repeat this step for all services deployed in the cluster.

Step 4

Delete any existing upgrade images from your cluster.

If this is the first time you're upgrading your cluster, you can skip this step.

If you had previously upgraded your cluster to your current version, you must delete all previous upgrade images.

Note


In release 2.3.2, this page is located under Operations > Firmware Management instead.

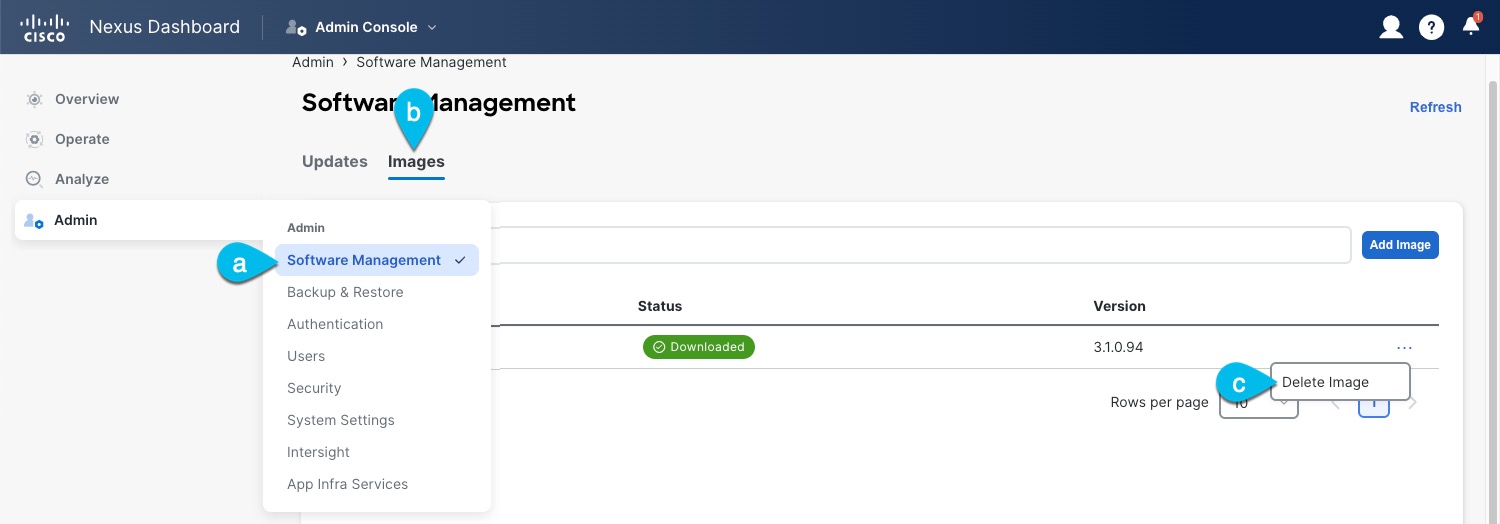
  1. Navigate to Admin > Software Management.

  2. Select the Images tab.

  3. From the actions menu () next to an existing upgrade image, choose Delete Image.

  4. Repeat this step for all existing upgrade images.

Step 5

Upload the new image to the cluster.

  1. In the Admin > Software Management page's Images tab, click Add Image.

  2. In the Add Software Image window, select whether the image is Local on your machine or Remote on a web server.

  3. Click Choose file or provide the URL to the image you downloaded in the first step.

  4. Click Upload to add the image.

  5. Wait for the image status to change to Downloaded.

    The image will be uploaded to the Nexus Dashboard cluster, unpacked, processed, and made available for the upgrade. The whole process may take several minutes and you will be able to see the status of the process in the Images tab.

Step 6

Set up the upgrade.

  1. Navigate to Admin > Software Management.

    Note


    In release 2.3.2, this page is located under Operations > Firmware Management instead.

  2. Select the Updates tab.

  3. Click Set Up Update.

    Note


    If you had upgraded your cluster before, the page shows the previous upgrade's details instead. In that case, click the Modify Details button in the top right of the page to provide new upgrade information.

    The Firmware Update screen opens.

  4. In the Setup > Version selection screen, select the firmware version you uploaded and click Next.

  5. In the Setup > Confirmation screen, verify the details and click Validate.

    The setup goes through a number of preparation and validation stages to ensure successful upgrade. This may take several minutes to complete.

  6. After the validation is complete, click Install.

    The installation progress window is displayed. You can navigate away from this screen while the update is in progress. To check on the update status at a later time, navigate to the Software Management screen and click Continue.

    This step may take up to 20 minutes, during which the upgrade will set up the required Kubernetes images and services but will not switch the cluster to the new version. The cluster will continue to run the existing version until you activate the new image in the next step.

Step 7

Activate the new image.

If you never navigated away from the upgrade screen, simply click Activate to activate the new image, otherwise:

  1. Navigate back to the Admin > Software Management screen.

    In release 2.3.2, this page is located under Operations > Firmware Management instead.

  2. In the Last Update Status tile, click Continue.

  3. In the Firmware Update > Install screen, click Activate.

    After you click Activate, the cluster will bring down the background services, which may take several minutes, and then restart. Note that all nodes will restart simultaneously during the activation stage and it may take up to 20 additional minutes for all the cluster services to start and the GUI to become available after the nodes restart:

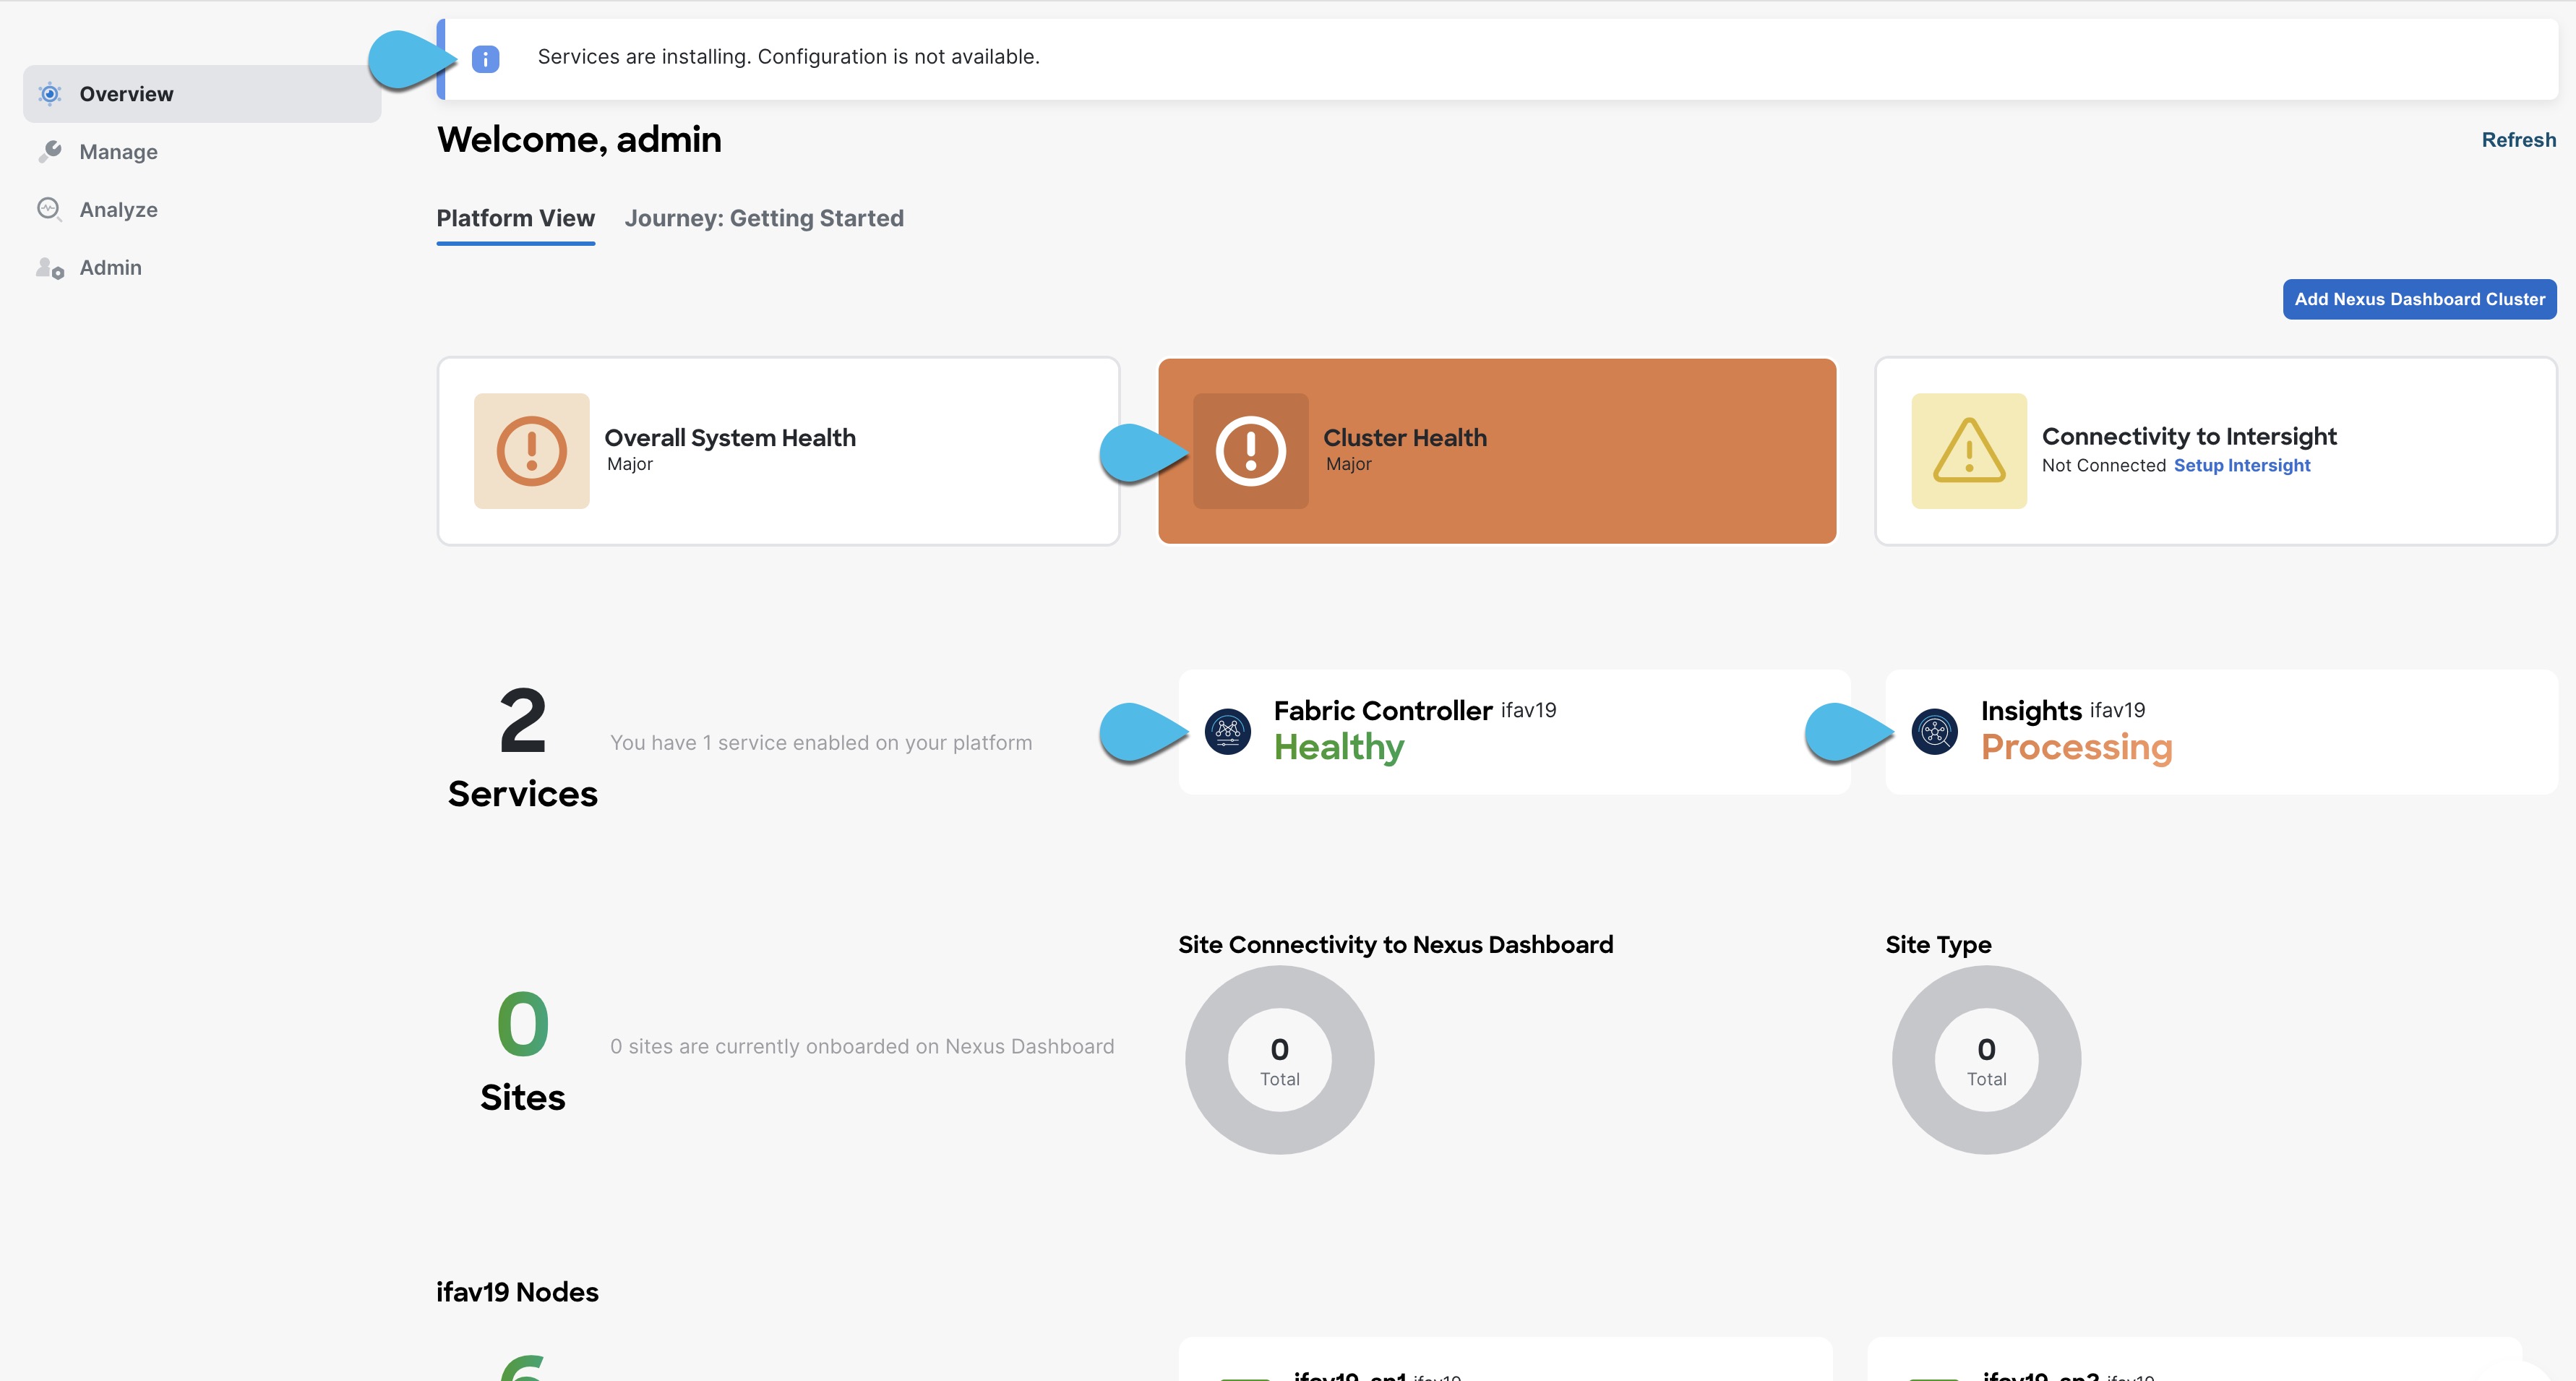
    You can check the Overview page for the progress and service status:

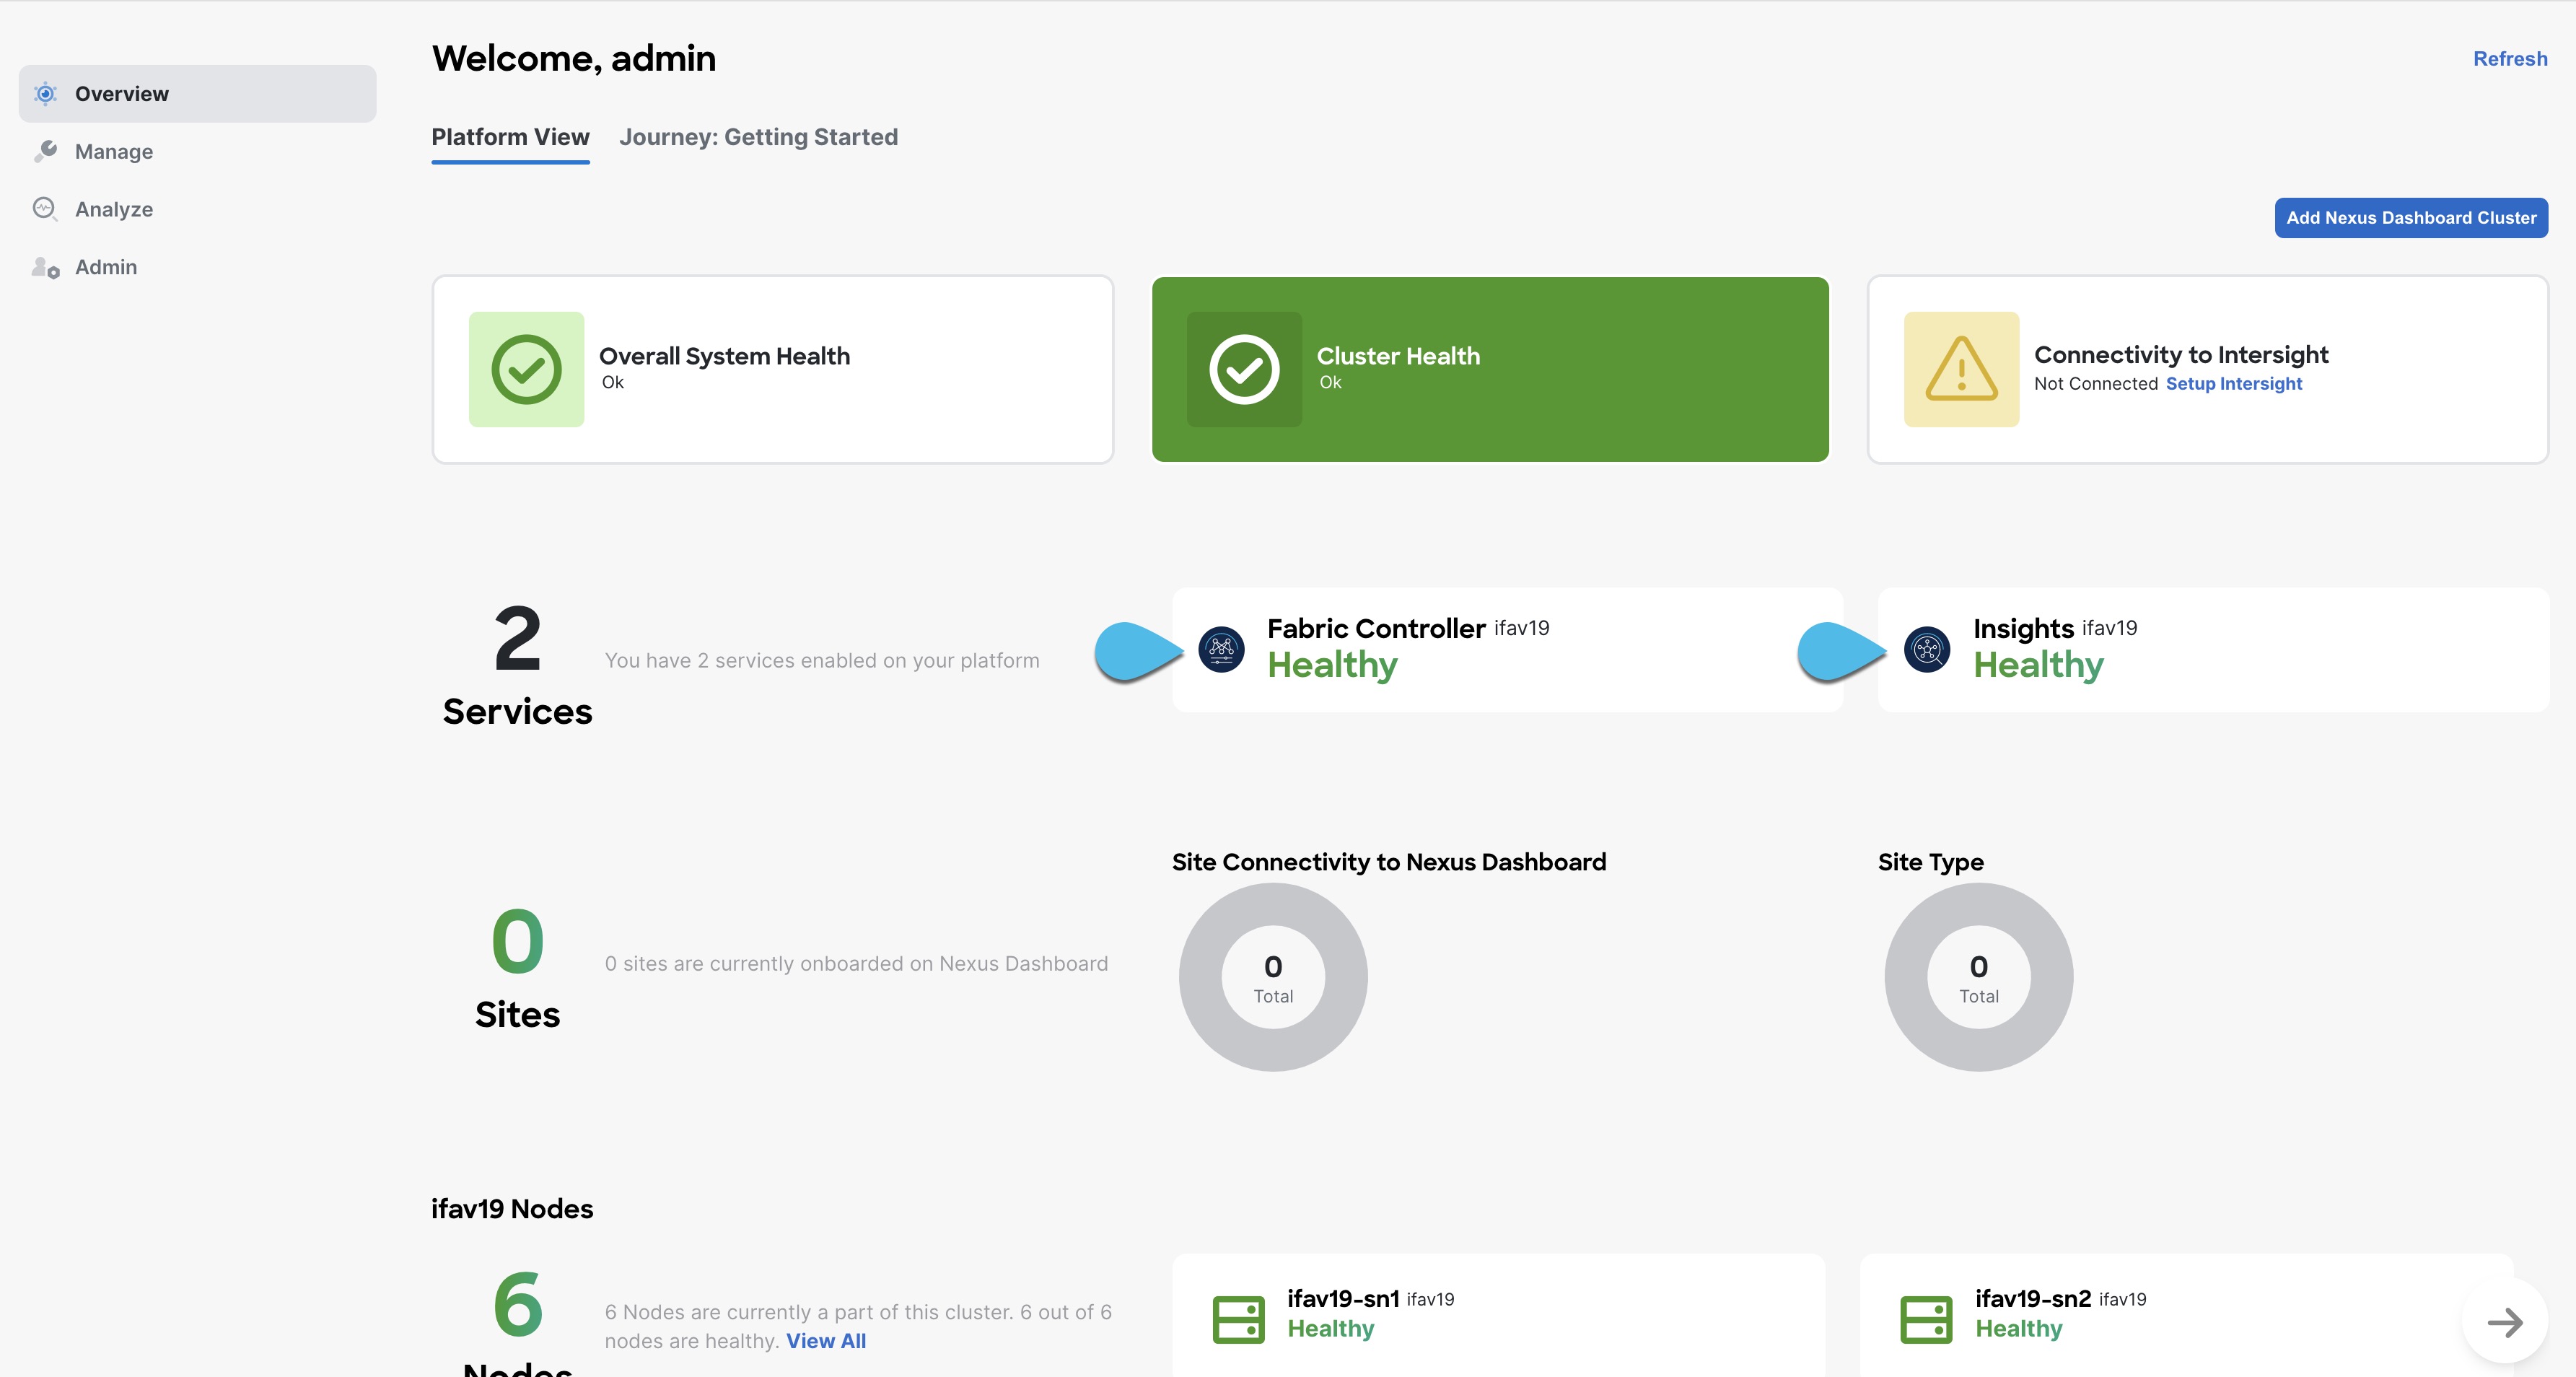
    Once the upgrade is finalized, any existing services will show as Healthy in the Overview page:

Step 8

(Optional) Migrate to the new UCS-C225-M6 hardware.

Note


If you do not plan to replace your Nexus Dashboard nodes with the new UCS-C225-M6 servers, you can skip this step.

To migrate your existing Nexus Dashboard cluster deployed using UCS-C220-M5 hardware, you can simply add a new UCS-C225-M6 node as a stadby node to the existing cluster and fail over one of the older nodes. Then repeat the process one node at a time for the remaining nodes of the older cluster. Adding and using stadby nodes is described in detail in the "Infrastructure Management" article in the Nexus Dashboard documentation library.


Troubleshooting Upgrades

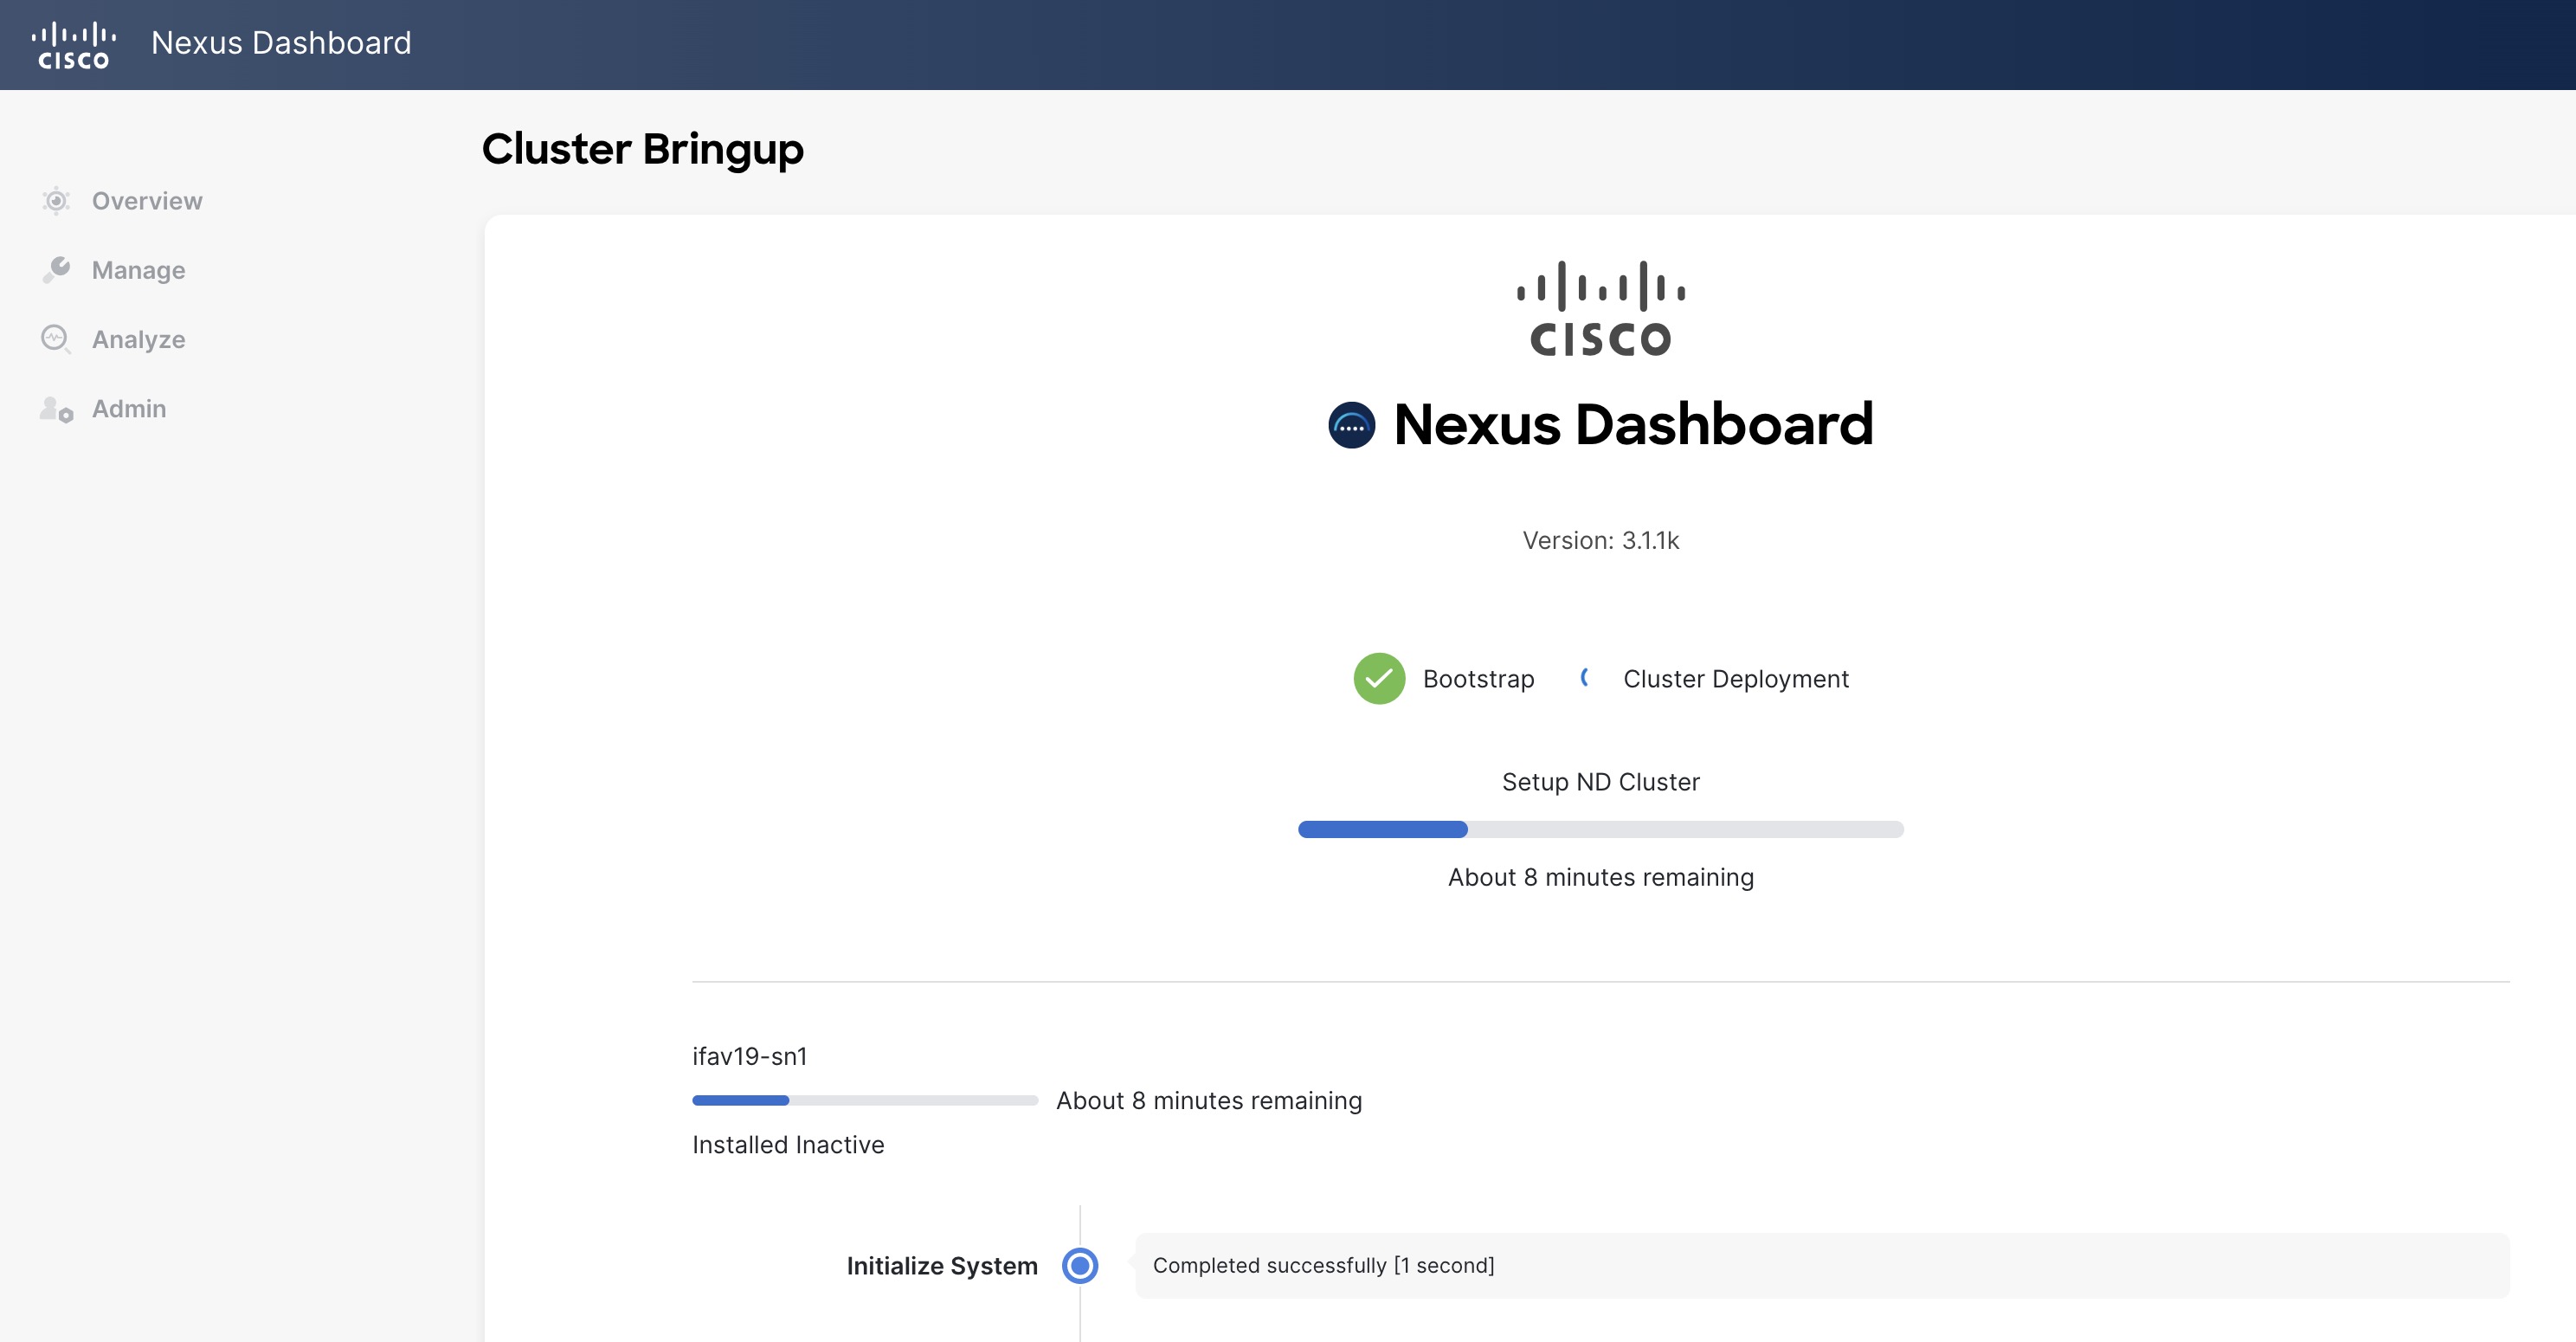
After all the nodes restart during new image activation stage described in the previous section, you may log in to the GUI to check the status of the upgrade workflows. Initially, you can see the bootstrap process similar to the initial cluster deployment and once the nodes come up, you can see additional information about service activation in the GUI's Overview page.

In case the upgrade fails for any reason, the GUI will display the error and additional workaround steps. However, if you are unable to resolve the issues through the GUI, you can re-try the upgrade manually by logging in to the nodes as the rescue-user and running the commands described in this section.

Procedure


Step 1

Log in to all of your Nexus Dashboard cluster nodes as the rescue-user.

You will need to perform recovery commands on all nodes simultaneously, so log in to each node before continuing with the next step.

Step 2

Ensure that you are logged in to all nodes as the rescue-user.

Step 3

Run the required commands depending on the specific scenarios.

If the upgrade failed where one or more nodes did not reboot and are still running a older release, you can attempt a manual upgrade; however, you must contact Cisco TAC for assistance with the manual upgrade because this requires root access that only Cisco TAC can generate.

Step 4

Wait for the installer to finish on all nodes.

Step 5

Restart all nodes simultaneously using the acs reboot command.

After the nodes restart, you can log into the UI to see the bootstrap progress similar to regular UI-based upgrades.

Step 6

After the node upgrade tasks are completed, verify that the nodes are healthy and you can log into the UI.

Once the bootstrap process completes, you can view the Nexus Dashboard UI as you typically would.

You can check the Overview page for overall system health and the Manage > Software Management page to see the current Running version.

In addition, verify the services' status in the Analyze > Service Status page.