Site Management
With Cisco Nexus Dashboard, you can on-board multiple Cisco ACI, Cisco Cloud ACI, and Cisco NDFC or DCNM fabrics as individual sites to the same cluster. Once the fabrics are on-boarded, they can be used by the applications running on the same Cisco Nexus Dashboard cluster.
To add a site, you need its controller’s in-band or out-of-band IP address and credentials. The type of the IP address you will use for site onboarding depends on the Nexus Dashboard services that will use the site and is described in detail in the following sections. Sites added to the Cisco Nexus Dashboard cluster are not enabled in the services by default, so you will need to explicitly enable them directly from each service’s own GUI.
After you on-board one or more sites to your Nexus Dashboard, you can view them in the Nexus Dashboard GUI by selecting Sites from the left navigation sidebar. You can also use the Sites page to launch directly into any of the site’s GUIs by clicking the Open link next to the site’s name.
If you are using remote authentication to login to your Nexus Dashboard and you have the same login domain and user configured in the site you are launching, you will be able to login to the site’s GUI automatically without having to re-authenticate yourself.
Adding Sites
-
Fabric connectivity must be already configured.
-
If adding a Cisco NDFC or DCNM site, the site must be running Release 11.5(1) or later.
-
If adding a Cisco NDFC or DCNM site on a cloud Nexus Dashboard cluster hosted in AWS or Azure, you must configure inbound rules on the data interface.
-
If adding a Cisco APIC or Cloud APIC site, the site must be running Release 4.2(4) or later.
-
If adding a Cisco APIC site, EPG/L3Out for Cisco Nexus Dashboard data network IP connectivity must be pre-configured.
Refer to Fabric Connectivity for more information.
-
If adding a Cisco APIC site and planning to deploy Cisco NIR application:
-
IP connectivity from Cisco Nexus Dashboard to Cisco APIC in-band IP over data network must be configured.
-
IP connectivity from Cisco Nexus Dashboard to the leaf nodes and spine nodes in-band IPs must be configured.
-
To add a site:
-
Navigate to your Nexus Dashboard’s Admin Console.
-
From the main navigation menu, select Admin Console.
-
Add a site.

-
From the main navigation menu, select Sites.
-
In top right of the main pane, click Add Site.
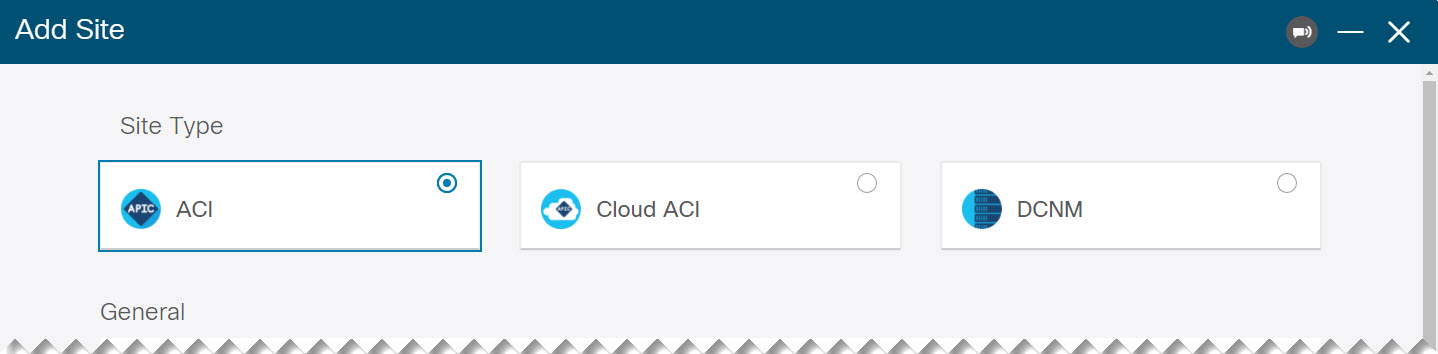
The Add Site screen opens.
-
-
Select the type of site you want to add.

Note
 While Cisco Nexus Dashboard supports on-boarding all three types of fabrics, for specific fabric types and versions compatible with your services, see the Services Compatibility Matrix.
-
ACI — for on-premises ACI sites managed by Cisco APIC
-
Cloud ACI — for cloud ACI sites managed by Cisco Cloud APIC
-
DCNM — for on-premises sites managed by Cisco NDFC or DCNM
-
-
Provide the site’s information.
-
If adding an
ACIsite, provide the following:-
Site Name — used throughout the Nexus Dashboard GUI when referring to this site.
-
Host Name/IP Address — used to communicate with the Cisco APIC.
If you will use the site with Nexus Dashboard Orchestrator service only, you can provide either the in-band or out-of-band IP address of the APIC. If you will use the site with Nexus Dashboard Insights as well, you must provide the in-band IP address.
Note
When providing the address, do not include the protocol (http://orhttps://) as part of the URL string or site addition will fail.
-
User Name and Password — login credentials for a user with
adminprivileges on the site you are adding. -
(Optional) Login Domain — if you leave this field empty, the site’s local login is used.
-
(Optional) In-Band EPG — required when connecting to an ACI fabric via an EPG and bridge domain. For more information on fabric connectivity, see Fabric Connectivity.
If you plan to use this site with the Nexus Dashboard Insights service, you must provide the node management In-Band EPG.
-
-
If adding a
Cloud ACIsite, provide the following:-
Site Name — used throughout the Nexus Dashboard GUI when referring to this site.
-
Host Name/IP Address — used to communicate with the Cisco Cloud APIC.
Note
When providing the address, do not include the protocol (http://orhttps://) as part of the URL string or site addition will fail.
-
User Name and Password — login credentials for a user with
adminprivileges on the site you are adding. -
(Optional) Login Domain — if you leave this field empty, the site’s local login is used.
-
(Optional) Enable Proxy — enable this setting if your cloud site is reachable via a proxy.
Note
Proxy must be already configured in your Nexus Dashboard’s cluster settings. If the proxy is reachable via management network, a static management network route must also be added for the proxy IP address. For more information about proxy and route configuration, see Cluster Configuration.
-
-
If adding a
DCNMsite, provide the following:-
Host Name/IP Address — used to communicate with the Cisco NDFC or DCNM.
This must be the in-band IP address of DCNM.
Note
When providing the address, do not include the protocol (http://orhttps://) as part of the URL string or site addition will fail.
-
User Name and Password — login credentials for a user with
adminprivileges on the site you are adding. -
Sites on DCNM — click Add Sites to select the DCNM fabrics managed by the controller you provided.
-
-
-
Click Add to finish adding the site.
-
(Optional) Click on the Geographical Location map to specify where the site is located.
-
(Optional) Repeat these steps for any additional sites.
Editing Sites
To edit a site:
-
Navigate to your Nexus Dashboard’s Admin Console.
-
From the main navigation menu, select Admin Console.
-
From the main navigation menu, select Sites.
-
From the Actions (…) menu for the site you want to edit, select Edit Site.
The Edit Site screen opens.
-
In the Edit Site screen, make the required changes.
-
To remove a security domain, click the Delete icon next to an existing domain.
-
To add one or more security domains, click +Add Security Domain.
-
To re-provision the site, check the Re-register Site checkbox and provide the required information.
Re-registering a site may be required for Cisco Cloud APIC sites used with Nexus Dashboard Orchestrator in case the Cloud APIC’s public IP address changes.
You can also use this option if you changed the IP address information for a DCNM fabric managed by the Orchestrator service.
Note
Re-registering a site is not supported for the Nexus Dashboard Insights service.
-
-
Click Save to save the changes
Deleting Sites
-
Ensure that the site is not used by any applications installed in your Nexus Dashboard.
Deleting a site will cause an interruption to all applications using this site.
-
When a Cisco ACI fabric is added as a site to Nexus Dashboard, some policies may be created in the Cisco APIC. If the Nexus Dashboard is clean rebooted without deleting the on-boarded site, the policies created on Cisco APIC will not be deleted. To clean up these policies on Cisco APIC, the site should be re-added and deleted.
To remove one or more sites:
-
Navigate to your Nexus Dashboard’s Admin Console.
-
From the main navigation menu, select Admin Console.
-
From the main navigation menu, select Sites.
-
From the Actions (…) menu for the site you want to remove, select Remove Site.
-
In the Confirm Delete window, provide the login information for the site
-
Click OK to remove the site.
 Feedback