Deploying the Tenant
Once the underlay and overlay connectivity is established between the sites, you must then deploy the endpoint network/VPC/VNet to establish communication between tenant endpoints deployed in the on-premises and in the cloud sites.
NDO uses the notions of schemas and templates for defining VRFs and networks. In the context of NDFC, VRFs are used to isolate one tenant from another. All the endpoint networks (subnets) of one tenant are mapped to the respective VRF. The same notion of VRFs can also be extended to the cloud, where a VRF corresponds to a VPC in AWS and a VNet in Azure.
The following procedures for deploying the tenant applies to all the topologies previously described and leverage the specific infra config deployed, and also applies for any of the following use cases.
 Note |
NDO has a pre-built |
Procedure
|
Step 1 |
In NDO, navigate to . 
The Tenants window appears. 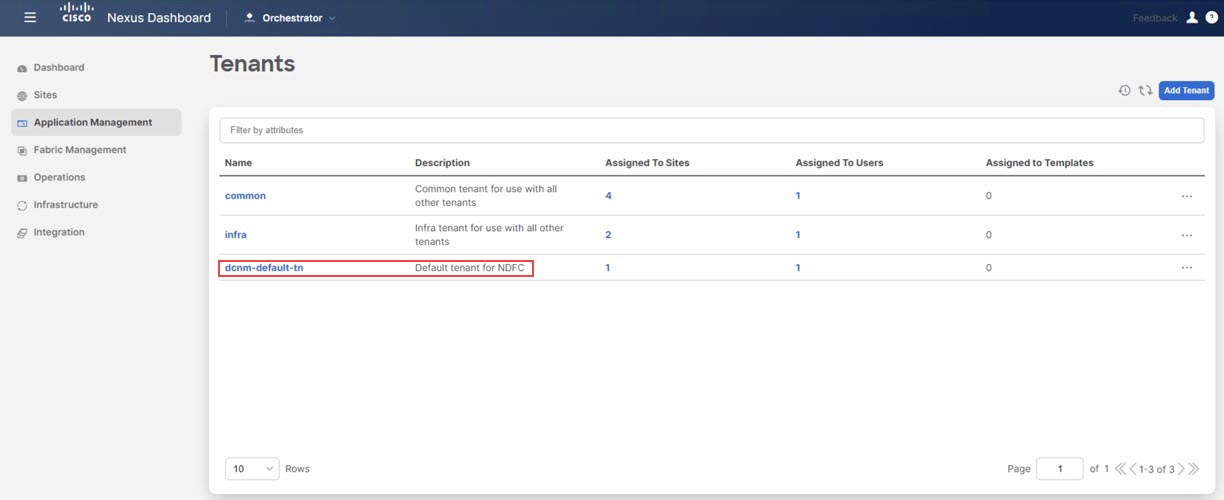
|
|
Step 2 |
Click the The Update Tenant page for the 
|
|
Step 3 |
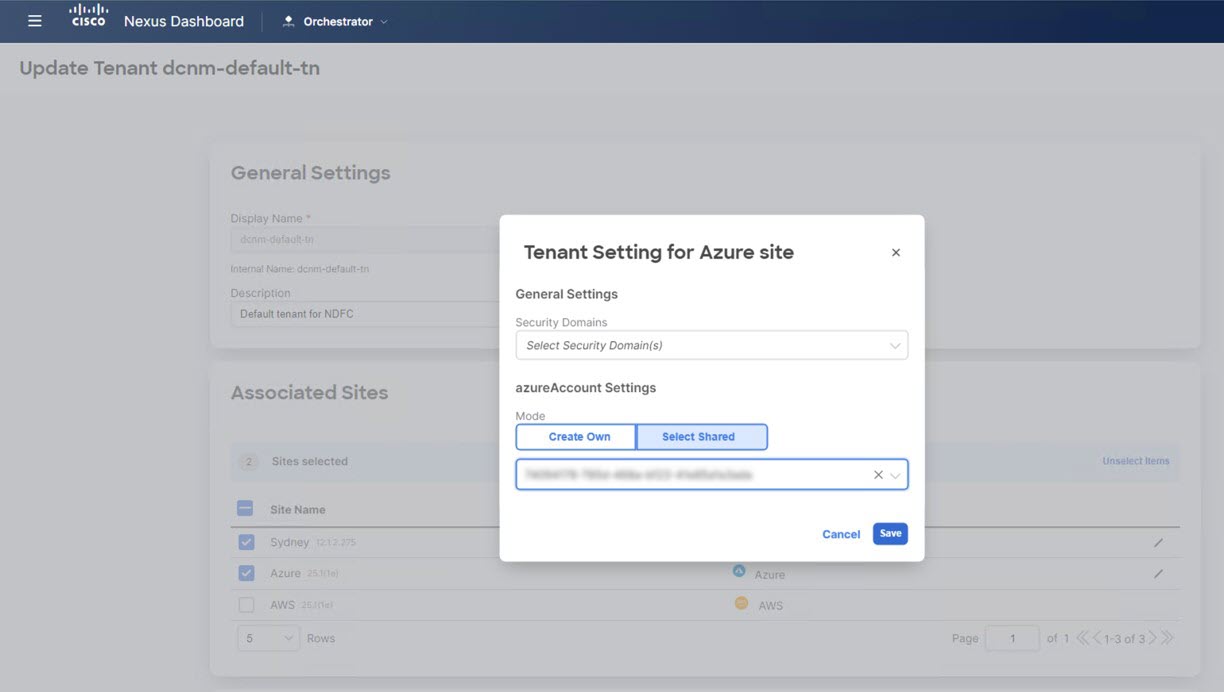
Select the sites shown in the screen. Note that the external fabric site does not appear in the list. The external site is only used to provide connectivity between the on-premises site to the cloud sites and there are no end hosts in the external fabric, so no tenant deployment required for the external fabric. 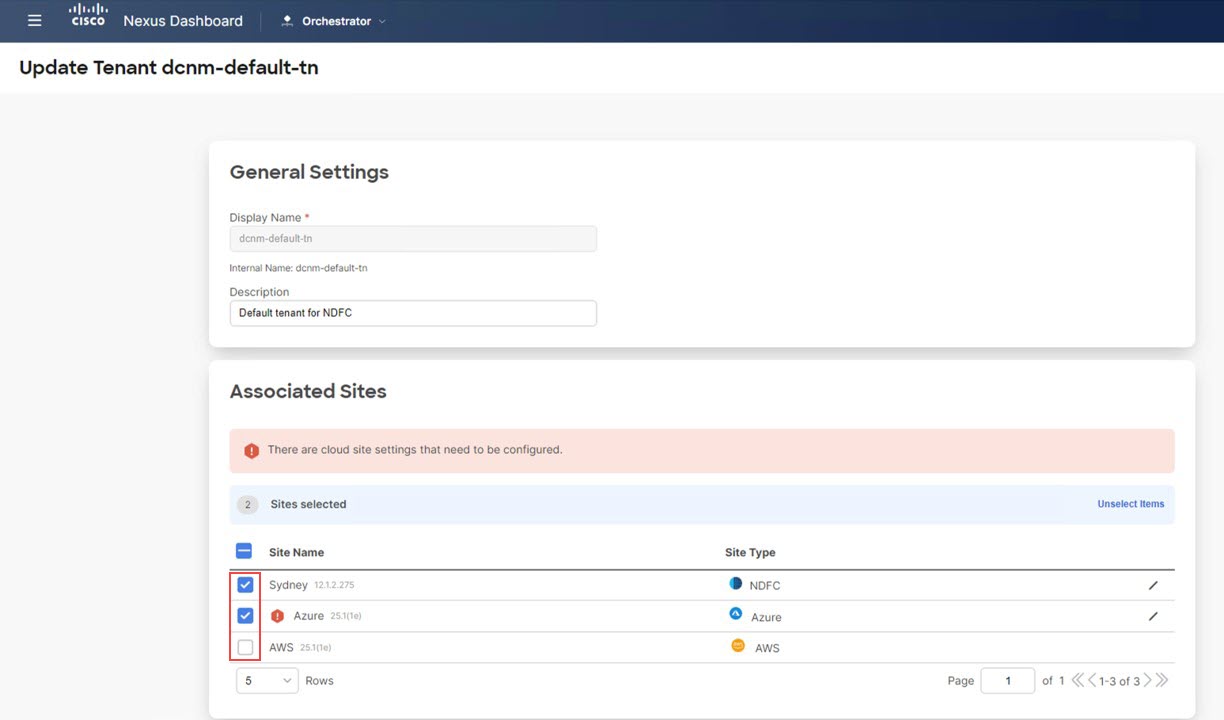
|
|
Step 4 |
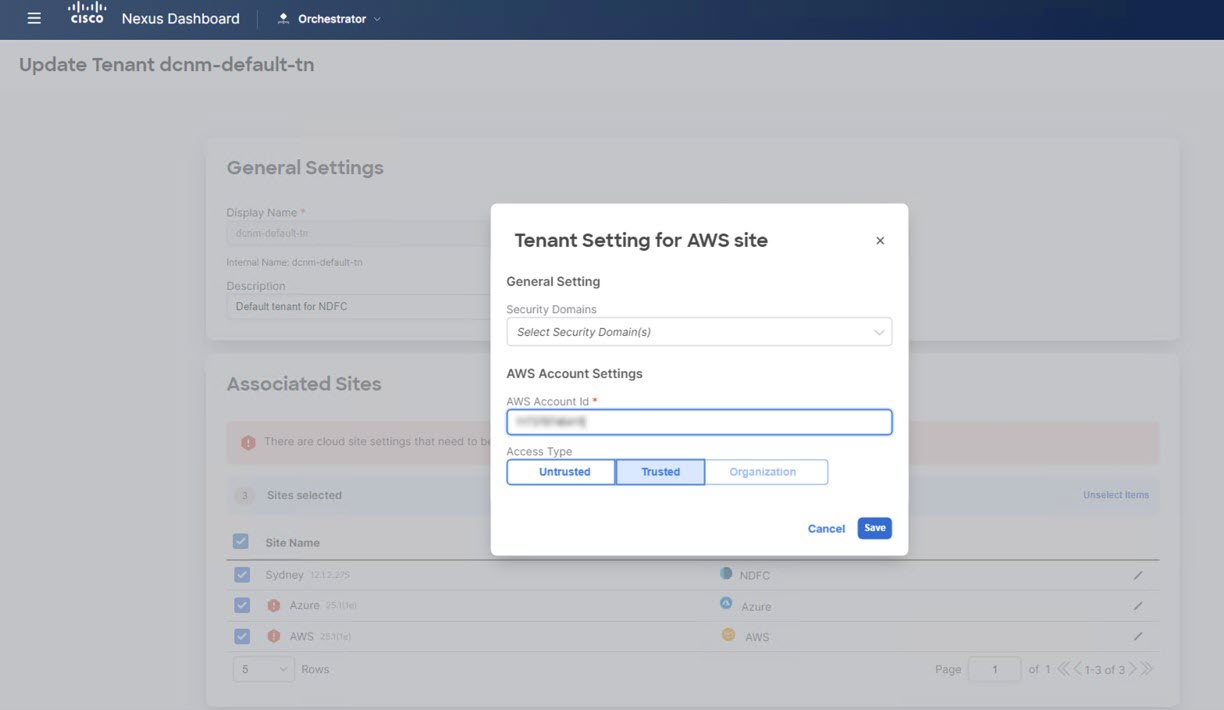
For the cloud sites, click the Edit button (the pencil icon) and provide the necessary information for each cloud account. You need an additional account for AWS for the user tenant, but for Azure, you can use the same subscription as the Azure infra tenant.
|
|
Step 5 |
Verify the tenants were deployed correctly. For example, in the figure below, the 
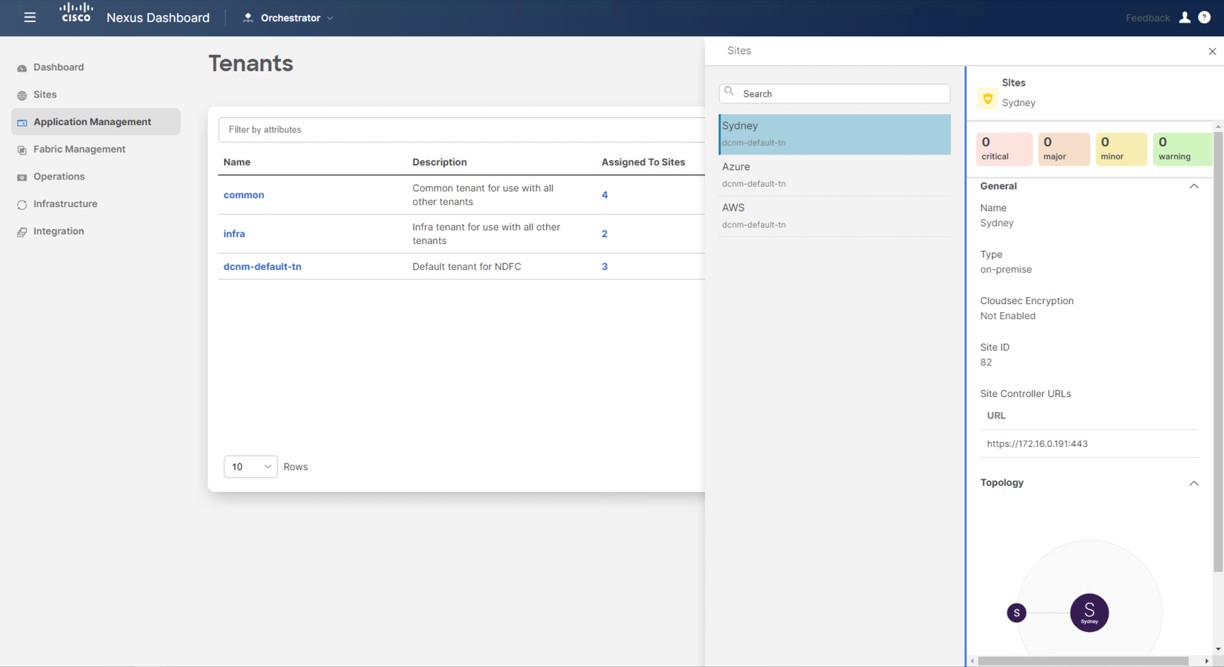 You can also check the 

|
What to do next
Configure one or both of the following use cases:
 Feedback