Upgrading From Application Services Engine

Prerequisites and Guidelines

Before you upgrade an existing Cisco Application Services Engine, Release 1.1.3 cluster to Cisco Nexus Dashboard:

  • Ensure that you have read the target release's Release Notes for any changes in behavior, guidelines, and issues that may affect your upgrade.

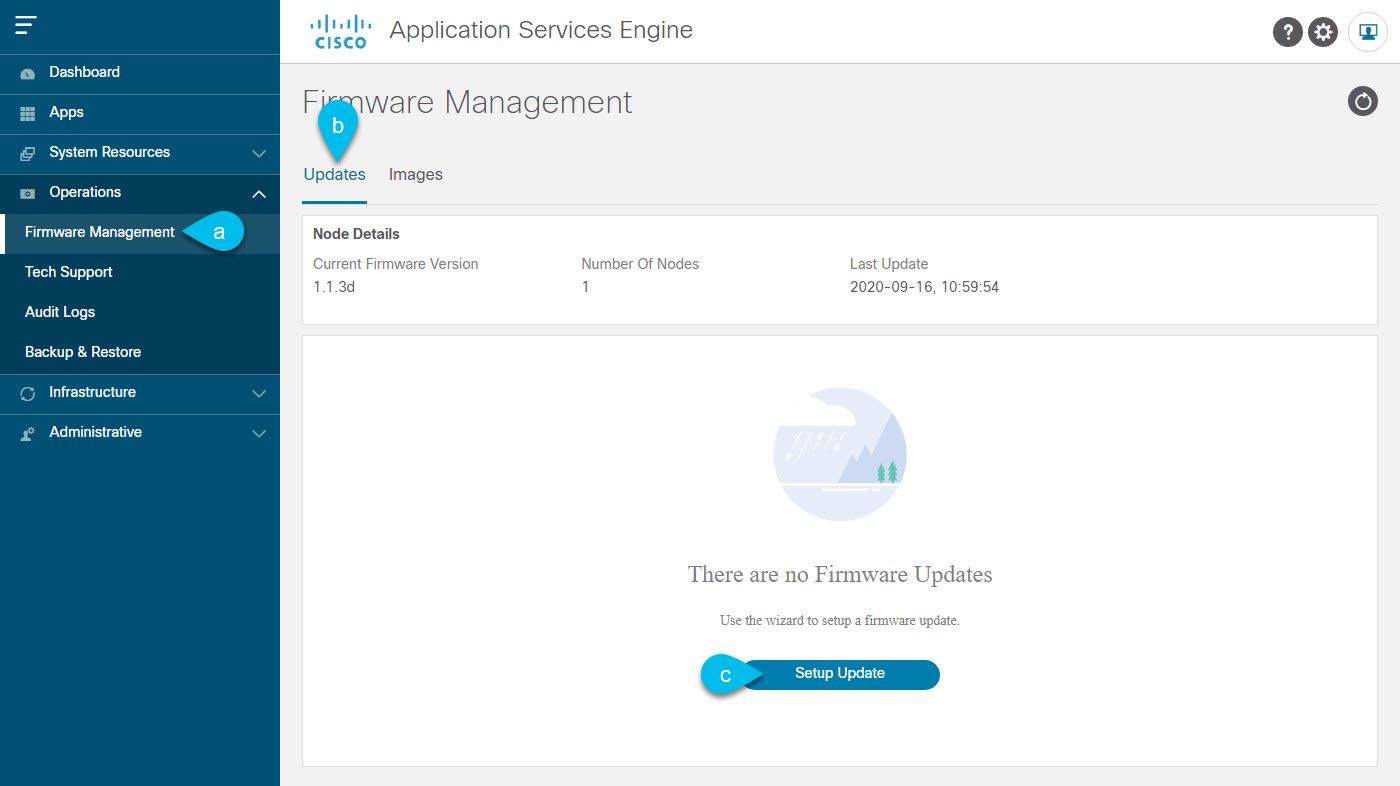
  • You must be running Cisco Application Services Engine, Release 1.1.3d as a physical appliance.

    If you are already running Cisco Nexus Dashboard, follow the steps described in Upgrading Nexus Dashboard instead.

    Upgrading from earlier releases of Application Services Engine is not supported and you would need to deploy a new cluster as described in earlier chapters in this document.

    If your Application Services Engine is deployed in VMware ESX, Linux KVM, or Amazon Web Services, you cannot upgrade to Nexus Dashboard.

  • The upgrade process is the same for all Nexus Dashboard form factors.

    Regardless of whether you deployed your cluster using physical servers, VMware ESX OVA, or in Azure or AWS cloud, you will use the target release's ISO image to upgrade.

  • Ensure that your current Application Services Engine is healthy.

  • If you have any disabled applications on the existing Application Services Engine cluster, we recommend deleting them before upgrading to Nexus Dashboard.

  • If you have Multi-Site Orchestrator application running in your Application Services Engine cluster, you must uninstall it before upgrading the cluster to Nexus Dashboard.

    Migrating to Multi-Site Orchestrator running on Nexus Dashboard consists of multiple steps, which include platform upgrade, application installation, configuration restore, and cloud site upgrades. We strongly recommend following the MSO migration procedure detailed in the "Migrating Existing Cluster to Nexus Dashboard" chapter of the Multi-Site Deployment Guide.

  • After upgrading to Nexus Dashboard release 2.0.2, we recommend upgrading all the applications to their latest versions.

  • Downgrading from Nexus Dashboard release 2.0.2 is not supported.

Upgrading From Application Services Engine

This section describes how to upgrade an existing Application Services Engine, Release 1.1.3d cluster to Nexus Dashboard.

Before you begin

Procedure


Step 1

Download the Nexus Dashboard image.

  1. Browse to the Software Download page.

    https://software.cisco.com/download/home/286327743/type/286328258

  2. Choose the Nexus Dashboard version you want to download.

  3. Download the Cisco Nexus Dashboard image (nd-dk9.<version>.iso).

    Note


    You must download the .iso image for all upgrades, even if you used the VMware ESX .ova image or a cloud provider's marketplace for initial cluster deployment.

  4. (Optional) Host the image on a web server in your environment.

    When you upload the image to your Nexus Dashboard cluster, you will have an option to provide a direct URL to the image.

Step 2

Log in to your current Application Services Engine GUI as an Administrator user.

Step 3

Upload the new image to the cluster.

  1. Navigate to Operations > Firmware Management.

  2. Select the Images tab.

  3. From the Actions menu, click Add Image.

Step 4

Select the new image.

  1. In the Add Firmware Image window, select Local.

    Alternatively, if you hosted the image on a web server, choose Remote instead.

  2. Click Select file and select the ISO image you downloaded in the first step.

    If you chose to upload a remote image, provide the file path for the image on the remote server.

  3. Click Upload to add the image.

    The image will be uploaded to the Application Services Engine cluster, unpacked, processed, and made available for the upgrade. The whole process may take several minutes and you will be able to see the status of the process in the Images tab.

Step 5

Wait for the image status to change to Downloaded.

You can check the status of the image download progress in the Images.

Step 6

Set up the update.

  1. Navigate to Operations > Firmware Management.

  2. Select the Updates tab.

  3. Click Setup Update.

Step 7

Provide update details.

  1. In the Version Selection screen, select the firmware version you uploaded, then click Next.

  2. In the Confirmation screen, verify the details, then click Begin Install.

    The installation progress window is displayed. You can navigate away from this screen while the update is in progress. To check on the update status at a later time, navigate to the Firmware Management screen and click View Details in the Last Update Status tile.

Step 8

Activate the new image.

  1. Navigate back to the Operations > Firmware Management screen

  2. In the Last Update Status tile, click View Details.

  3. Click Activate.

  4. In the Activation Confirmation window, click Continue.

    It may take up to 20 additional minutes for all the cluster services to start and the GUI to become available. The page will automatically reload when the process is completed.