Configuring and Validating Radio Channel and Bandwidth

Configuring Operating Channel from CLI

To configure operating channel, use the following CLI command.
  1. Configure the wireless device with radio interface number < 1 or 2 >

    Device# configure dot11Radio <interface>
  2. Set the operating channel id between 1 to 256.

    Device# configure dot11Radio <interface> channel <channel id>
  3. End of configuration mode.

    Device (configure dot11Radio <interface> channel <channel id>)# end

    Example:

    Device# configure dot11Radio [1|2] channel <1 to 256>

Configuring Channel Bandwidth from CLI

To configure channel bandwidth , use the following CLI commands and procedure.
  1. Configure the wireless device with radio interface number <1 or 2>.

    Device# configure dot11Radio <interface>
  2. Set channel bandwidth in MHz and currently supported bandwidth values are 20, 40, 80, 160 MHz. Radio 1 supports 20, 40 and 80 MHz bandwidths (example: configure dot11Radio 1 band-width). Radio 2 supports 20, 40, 80, and 160 MHz bandwidths (example: configure dot11Radio 2 band-width).

    Device# configure dot11Radio <interface> band-width [20|40|80|160]
  3. End of configuration mode.

    Device (configure dot11Radio <interface> band-width [20|40|80|160])# end

    Example:

    Device# configure dot11Radio [1|2] band-width [ 20|40|80|160]

Validating Operating Channel and Bandwidth from CLI

To validate radio channel and bandwidth, use the following show commands.

Device# show dot11Radio <interface> config

Example:

Device# show dot11Radio 1 config
Interface : enabled
Mode : fluidmax secondary
Frequency : 5180 MHz
Channel : 36
Channel width : 40 MHz
Device# show dot11Radio 2 config
Interface : enabled
Mode : fluidity
Frequency : 5785 MHz
Channel : 157
Channel width : 40 MHz

Configuring Radio Channel and Bandwidth from GUI

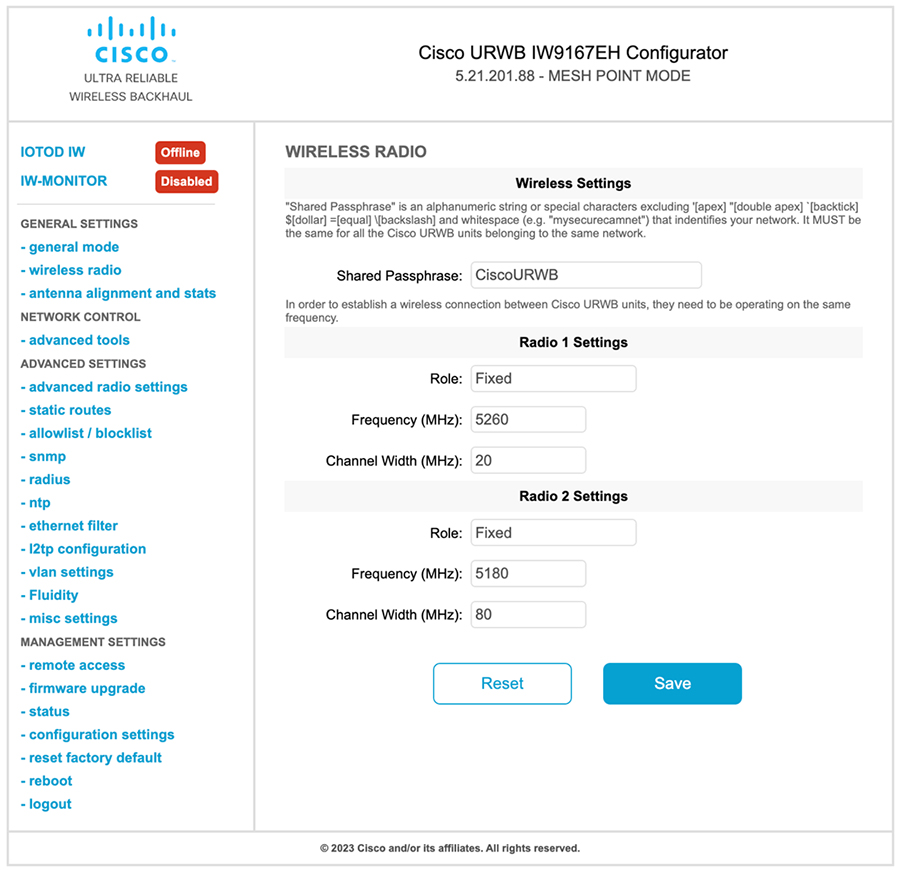
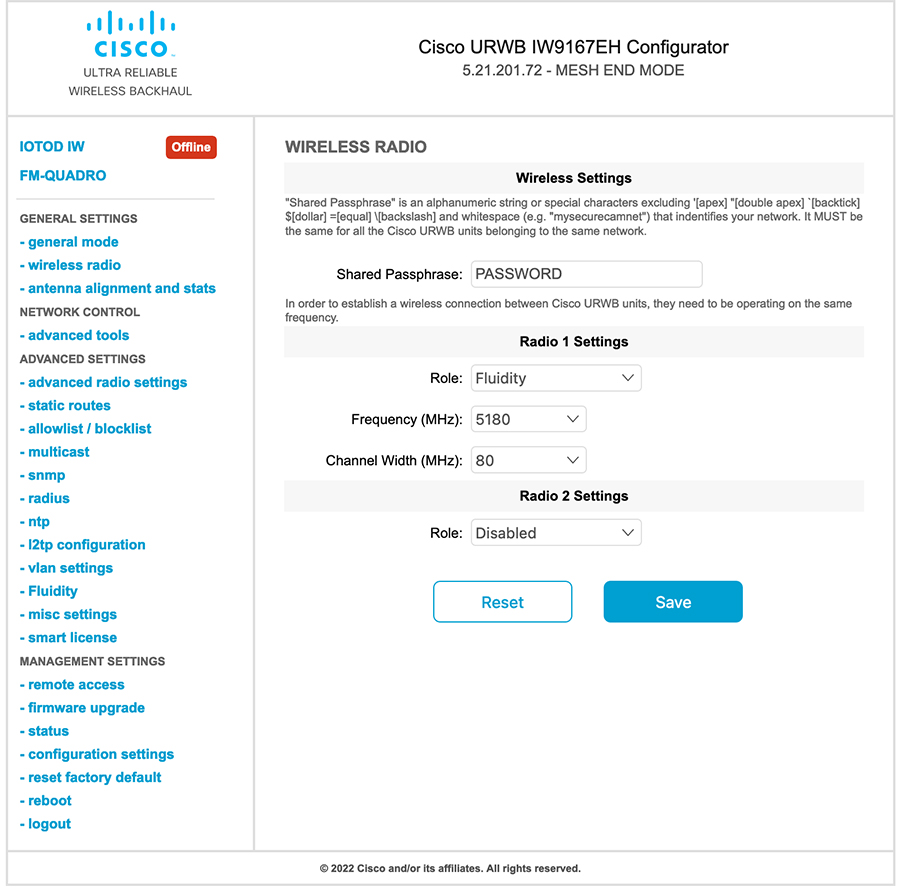
To Configure radio channel and bandwidth from GUI, set operating channel ID, radio mode as Fluidity or fixed infrastructure and set radio frequency range and bandwidth (supported bandwidth values are 20, 40, 80, 160 MHz) in MHz.

The below images show the configuration of radio channel and bandwidth.

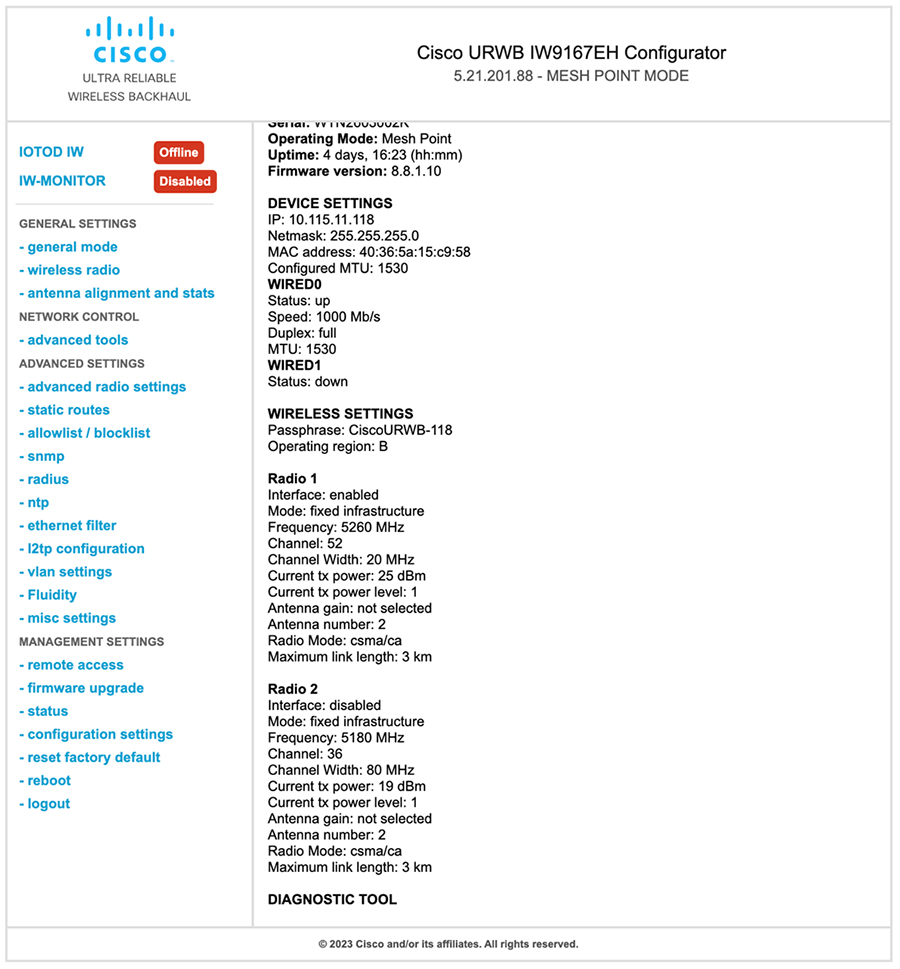
The below image shows the status of radio channel and bandwidth configuration and specific information of each wireless interface.

Configuring Fluidity from GUI

To configure a Fluidity mode from GUI, follow the below scenarios.

Set the radio role to Fluidity, as shown in the diagram below.

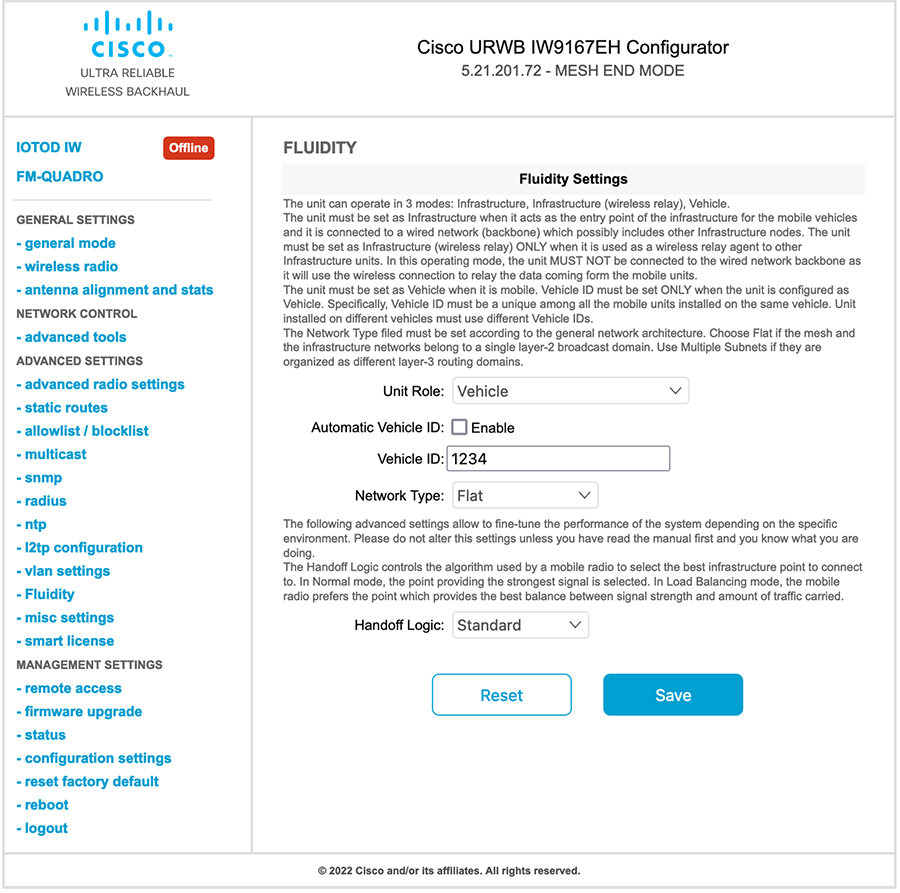
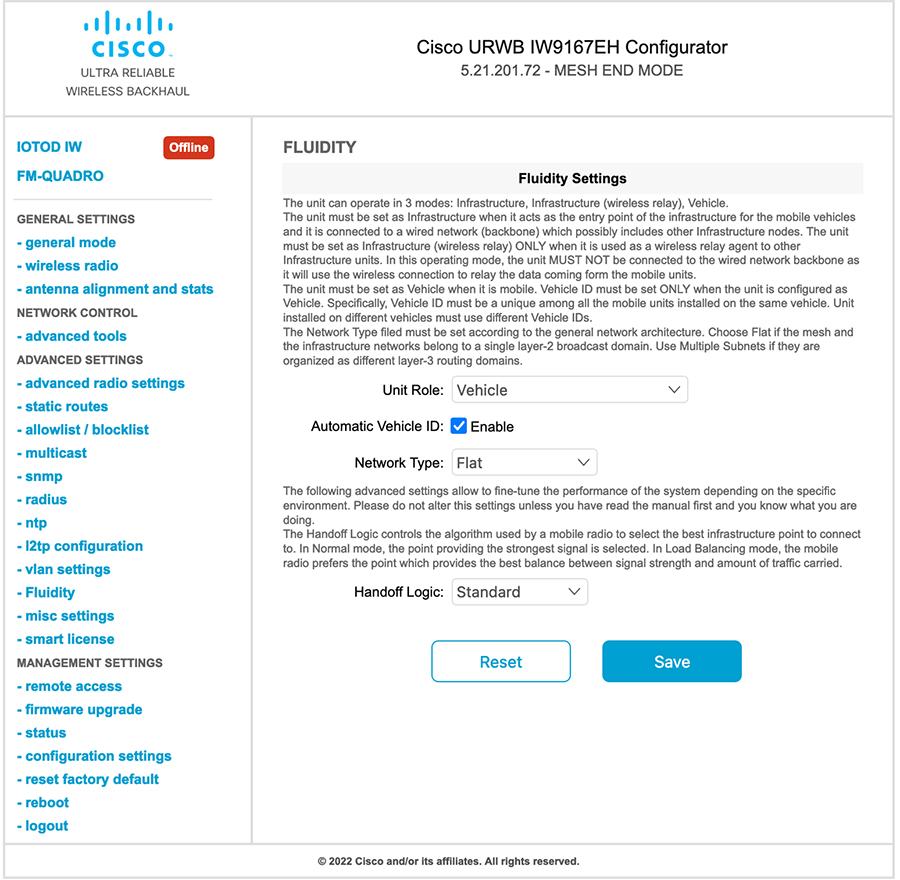
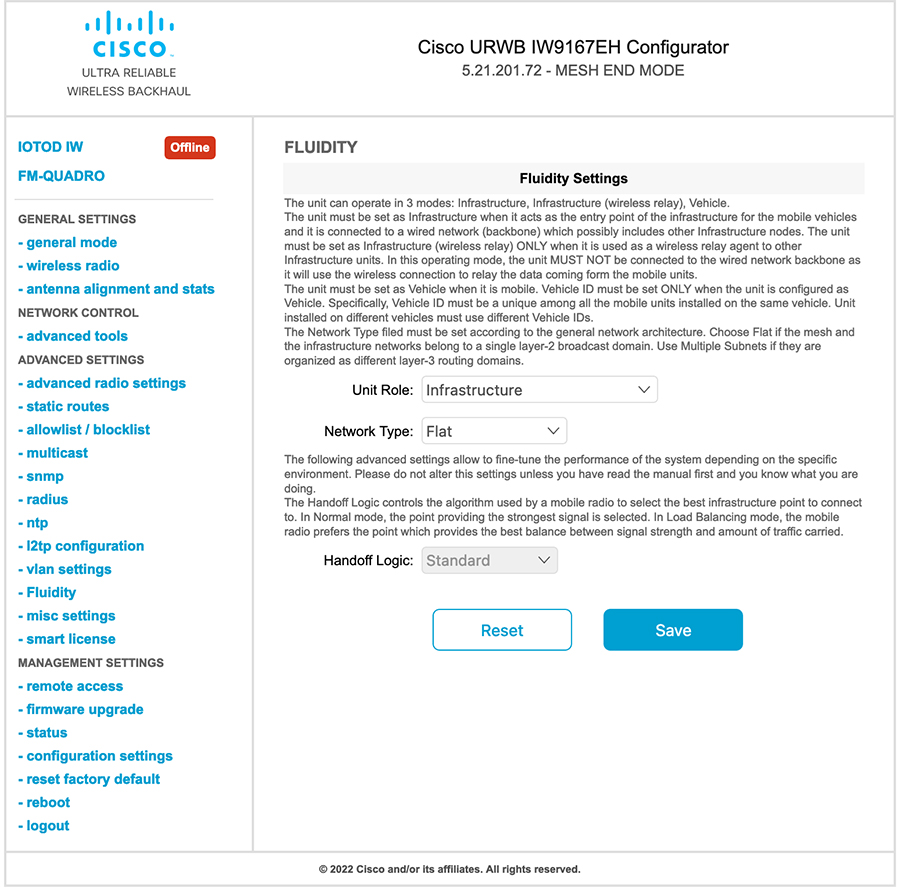
After setting radio role as Fluidity, make unit role as one of following mode that is infrastructure, infrastructure (wireless relay) and Vehicle. Vehicle ID must be a unique among all the mobile units installed on the same Vehicle and if unit installed on different vehicles must use different Vehicles ID's. Vehicle ID set automatically for mobile units if automatic vehicle ID enabled.

The below GUI Fluidity configuration shows wireless interface unit role configured as infrastructure mode.

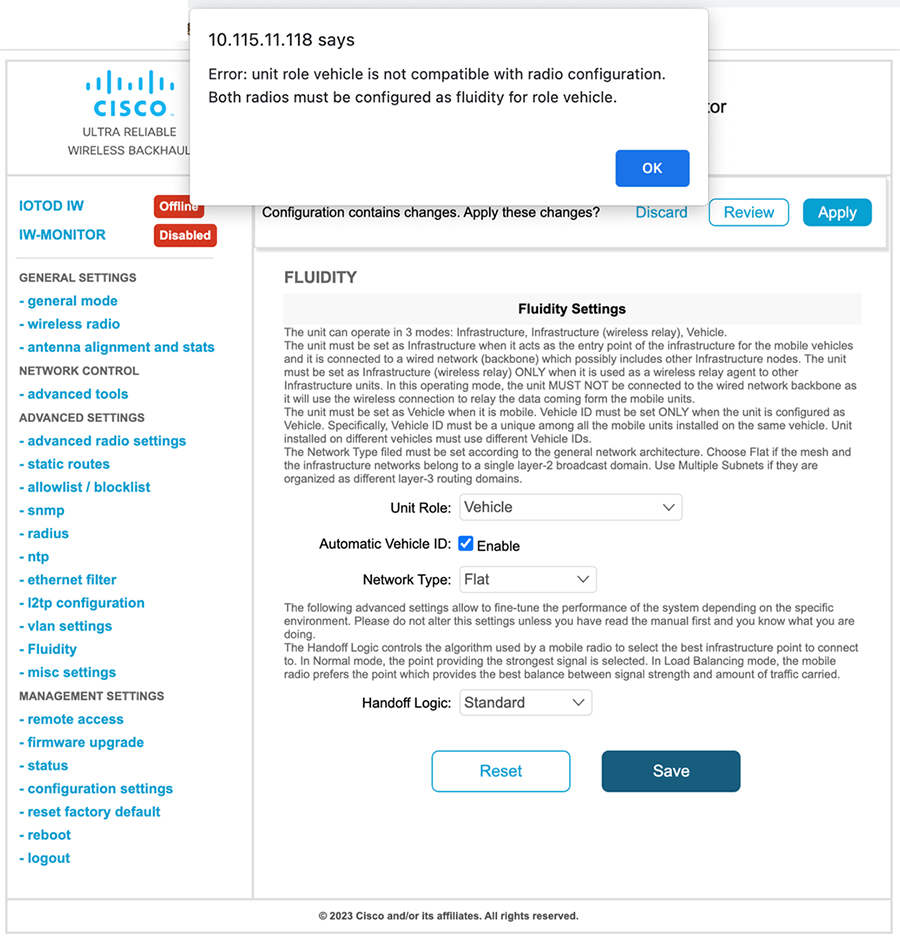
The below GUI shows, both radios must be configured as Fluidity for role vehicle. if one wireless interface is configured in fixed mode and the other one is configured in Fluidity mode then unit role vehicle cannot be selected.