Removing and Installing the Compute Node Covers
The top covers for both the primary and secondary can be removed to allow access to internal components, some of which are field-replaceable. The green button on the top cover releases the cover so that it can be removed from the chassis.
The top cover for the primary and secondary are not interchangeable, so you must replace the primary's cover on the primary, and the secondary's cover on the secondary. The top covers cannot be installed the wrong way.
Both the primary and secondary have sheetmetal top covers to protect the compute node's components. Both covers are removed the same way, but the primary contains additional labels that the secondary does not.
The procedure to replace the top cover is the same regardless of which one you are removing or installing.
To replace the top cover, use the following procedures.
Installing a Compute Node Cover
Use this task to install a removed top cover for the UCS X410c M7 compute node.
Procedure
|
Step 1 |
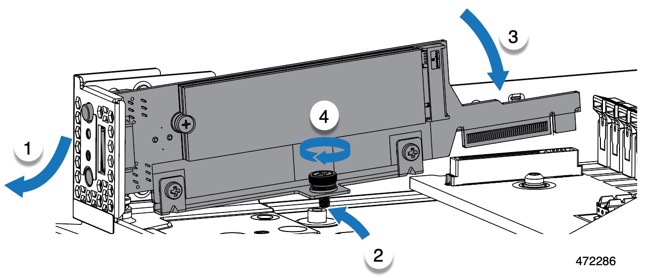
When you install the top cover, the groves on the top cover must catch the stopper pins on the inside of the compute node's sidewalls.
|
||
|
Step 2 |
Insert the cover at an angle so that the rear of the cover contacts the stopper pins on the compute node. |
||
|
Step 3 |
Lower the cover's front edge and keep it flat while you slide it forward.
 When the top cover is correctly installed, the release button clicks and the top cover sits flush on the compute node. |
Removing a Compute Node Cover
When removing and installing the top covers, make sure to replace the primary's top cover on the primary, and the secondary's top cover on the secondary.
To remove the cover of the UCS X410c M7 compute node, follow these steps:
Procedure
|
Step 1 |
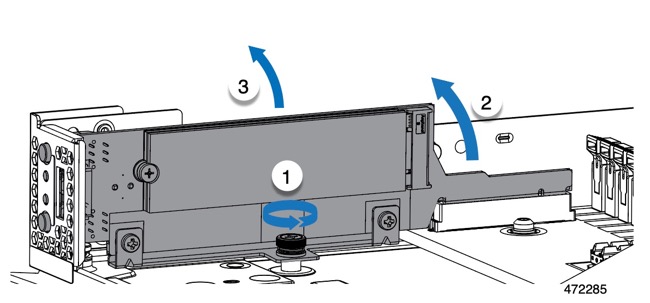
Press and hold the release button down. |
|
Step 2 |
Simultaneously lift the front edge and slide the rear end off of the compute node. By sliding the cover back, you enable the front edge to clear the metal lip on the rear of the front mezzanine module.  |
















 Feedback