About Configuration Deployment
All device configuration is managed by the management center and then deployed to the managed devices.
Configuration Changes that Require Deployment
The system marks out-of-date policies with red status text that indicates how many of its targeted devices need a policy update. To clear this status, you must re-deploy the policy to the devices.
Deployment Required
Configuration changes that require a deployment include:
-
Modifying an access control policy: any changes to access control rules, the default action, policy targets, Security Intelligence filtering, advanced options including preprocessing, and so on.
-
Modifying any of the policies that the access control policy invokes: the SSL policy, network analysis policies, intrusion policies, file policies, identity policies, or DNS policies.
-
Changing any reusable object or configuration used in an access control policy or policies it invokes:
-
network, port, VLAN tag, URL, and geolocation objects
-
Security Intelligence lists and feeds
-
application filters or detectors
-
intrusion policy variable sets
-
file lists
-
decryption-related objects and security zones
-
-
Updating the system software, intrusion rules, or the vulnerability database (VDB).
Keep in mind that you can change some of these configurations from multiple places in the web interface. For example, you can modify security zones using the object manager (), but modifying an interface type in a device’s configuration () can also change a zone and require a deployment.
Deployment Not Required
Note that the following updates do not require a deployment:
-
automatic updates to Security Intelligence feeds and additions to the Security Intelligence global Block or Do Not Block list using the context menu
-
automatic updates to URL filtering data
-
scheduled geolocation database (GeoDB) updates
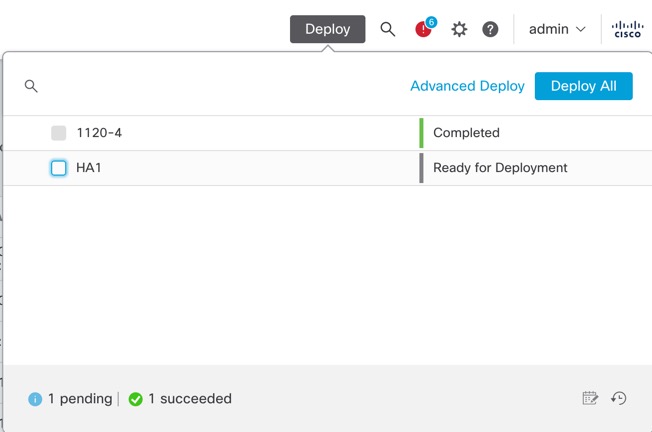
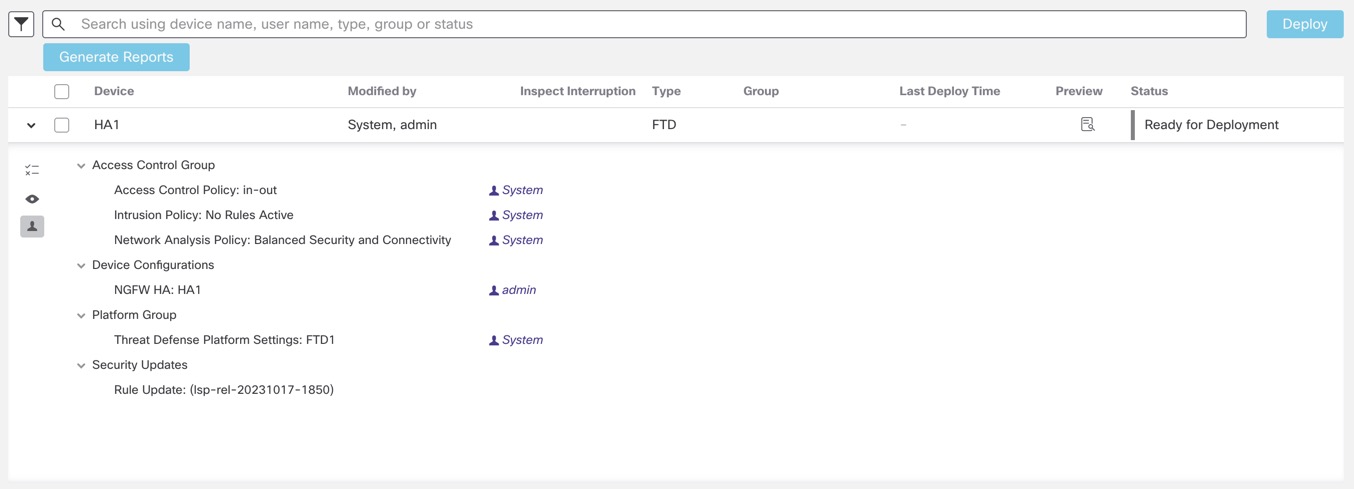
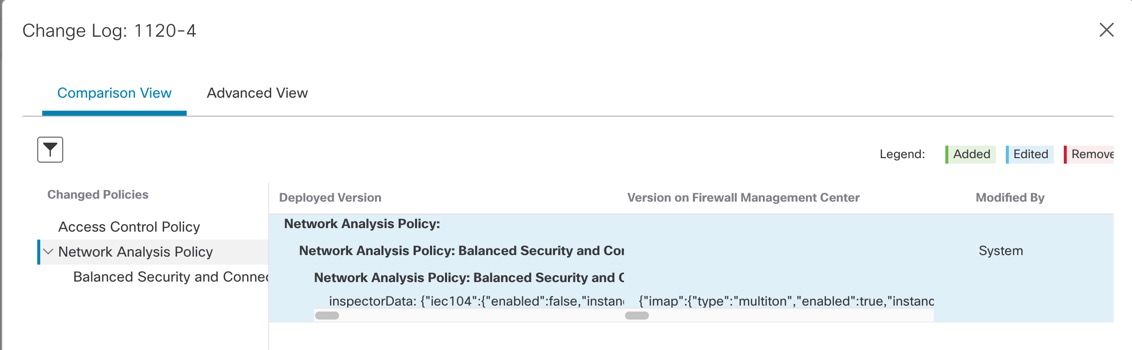
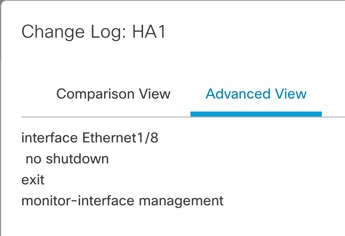
Deployment Preview
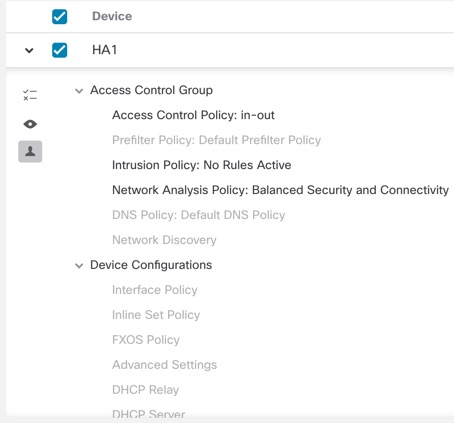
Preview provides a snapshot of all the policy and object changes to be deployed on the device. The policy changes include the new policies, changes in the existing policies, and the deleted policies. The object changes include the added and modified objects which are used in policies. The unused object changes are not displayed because they are not deployed on the device.
The preview shows all the default values, even when they are not altered, along with the other configured settings when an interface or a platform settings policy is added for the first time. Similarly, the high availability-related policies and default values for settings are shown, even when they are not altered, in the first preview after a high availability pair is configured or disrupted.
To view changes due to an auto rollback, see Edit Deployment Settings.
Unsupported Features
-
Object additions and attribute changes are displayed in the preview only if the objects are associated with any device or interface. Object deletions are not displayed.
-
Preview is not supported for the following policies:
-
High availability
-
Network discovery
-
Network analysis
-
Device settings
-
-
User information at the rule level is not available for intrusion policies.
-
The preview does not show the reordering of rules across policies.
For DNS policies, reordered rules appear in the preview list as rule additions and deletions. For example, moving a rule from position 1 to position 3 in the rule order is displayed as if the rule was deleted from position 1 and added as a new rule in position 3. Similarly, when a rule is deleted, the rules under it are listed as edited rules as they have changed their positions. The changes are displayed in the final order in which they appear in the policy.
-
Preview is not supported in the following HA scenarios:
-
If a device was in standalone mode and if a chain is made, then an auto-deployment is triggered. For that particular job, preview is not supported. On hover over the Preview (
 ), a message is displayed that it is a HA bootstrap deployment, and
no preview is supported.
), a message is displayed that it is a HA bootstrap deployment, and
no preview is supported.
-
Configuration groups - Consider a flow in which a device was initially standalone. Subsequently, three deployments took place. In the fourth deployment, the device was a HA bootstrap deployment. After these, the user deploys devices 5, 6, and 7. The deployment 7 is an HA break deployment, and the user deploys devices 8, 9, and 10.
In this flow, the preview between 3 and 5 is not supported because 4 was a HA deployment. Similarly, the preview between 8 and 3 is also not supported. Preview is supported only from 3 to 1, 7,6, 5, 4, and 10, 9, and 8.
-
If a device is broken (HA is broken) then the new device is considered as a fresh device.
-
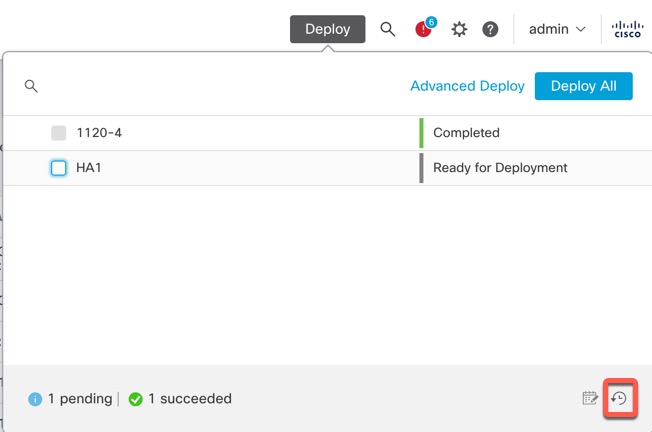
Selective Policy Deployment
The management center allows you to select a specific policy within the list of all the changes on the device that are due for deployment and deploy only the selected policy. Selective deployment is available only for the following policies:
-
Access control policies
-
Intrusion policies
-
Malware and file policies
-
DNS policies
-
Identity policies
-
SSL policies
-
QoS policies
-
Prefilter policies
-
Network discovery
-
NAT policies
-
Routing policies
-
VPN policies
There are certain limitations to selectively deploying policies. Follow the contents in the table below to understand when selective policy deployment can be used.
|
Type |
Description |
Scenarios |
|---|---|---|
|
Full deployment |
Full deployment is necessary for specific deploy scenarios, and the management center does not support selective deployment in such scenarios. If you encounter an error in such scenarios, you may choose to proceed by selecting all the changes for deployment on the device. |
Scenarios wherein a full deployment is required are:
|
|
Associated policy deployment |
The management center identifies interdependent policies which are interlinked. When one of the interlinked policies is selected, the remaining interlinked policies are automatically selected. |
Scenarios wherein an associated policy is automatically selected:
Scenarios wherein multiple policies are automatically selected:
|
|
Interdependent policy changes (shown using color-coded tags) |
The management center dynamically detects dependencies in-between policies, and between the shared objects and the policies. The interdependency of the objects or policies is shown using color-coded tags. |
Scenarios wherein color-coded interdependent policies or objects are automatically selected:
|
|
Access Policy Group specifications |
Access Policy Group policies are listed together in the preview
window under Access Policy Group when you
click Show or Hide Policy
( |
The scenarios and the expected behavior for Access Policy Group policies are:
|
 )
)System Username
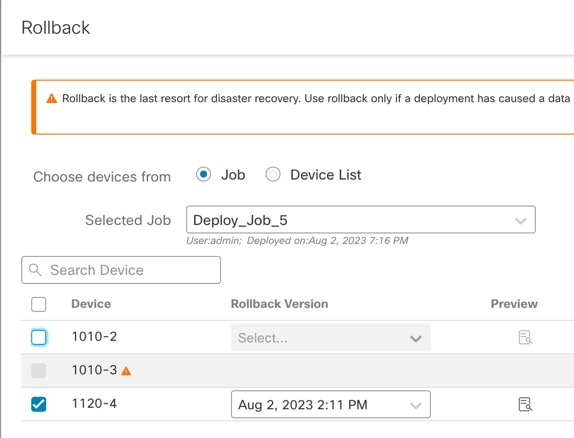
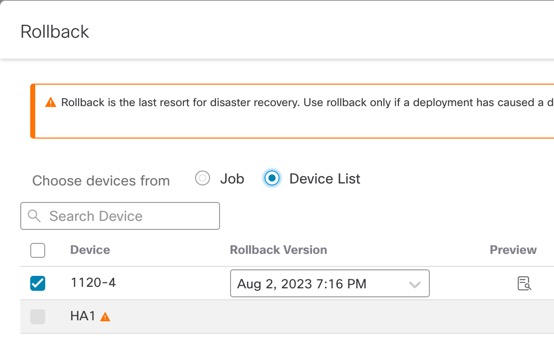
The management center displays the username as system for the following operations:
-
Rollback
-
Upgrade
-
Threat Defense backup and restore
-
SRU update
-
LSP update
-
VDB update
Auto-Enabling of Application Detectors
If you are performing application control but disable required detectors, the system automatically enables the appropriate system-provided detectors upon policy deploy. If none exist, the system enables the most recently modified user-defined detector for the application.
Asset Rediscovery with Network Discovery Policy Changes
When you deploy changes to a network discovery policy, the system deletes and then rediscovers MAC address, TTL, and hops information from the network map for the hosts in your monitored networks. Also, the affected managed devices discard any discovery data that has not yet been sent to the management center.
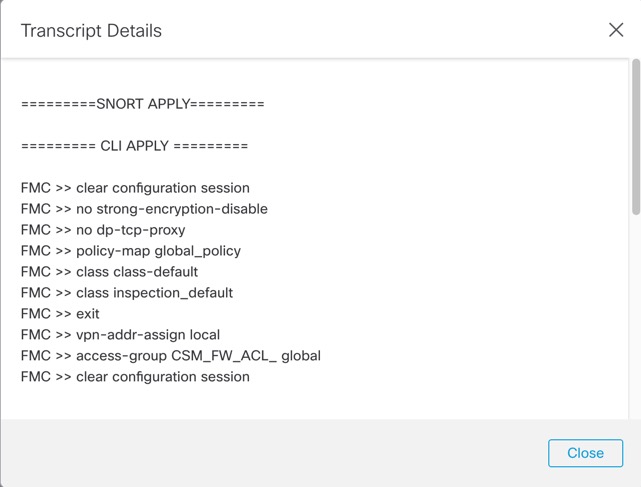
Snort Restart Scenarios
When the traffic inspection engine referred to as the Snort process on a managed device restarts, inspection is interrupted until the process resumes. Whether traffic drops during this interruption or passes without further inspection depends on how the target device handles traffic. See Snort Restart Traffic Behavior for more information. Additionally, resource demands may result in a small number of packets dropping without inspection when you deploy, regardless of whether the Snort process restarts.
Any of the scenarios in the following table cause the Snort process to restart.
|
Restart Scenario |
More Information |
|---|---|
|
Deploying a specific configuration that requires the Snort process to restart. |
Configurations that Restart the Snort Process When Deployed or Activated |
|
Modifying a configuration that immediately restarts the Snort process. |
|
|
Traffic-activation of the currently deployed Automatic Application Bypass (AAB) configuration. |
|
|
Enabling or disabling "Logging connection events to RAM disk" feature. |
See the section Log to Ramdisk in Troubleshoot Drain of FMC Unprocessed Events. |
Restart Warnings for Devices
When you deploy, the Inspect Interruption column in the deploy page specifies whether a deployed configuration restarts the Snort process on the threat defense device. When the traffic inspection engine referred to as the Snort process restarts, inspection is interrupted until the process resumes. Whether traffic is interrupted or passes without inspection during the interruption depends on how the device handles traffic. Note that you can proceed with the deployment, cancel the deployment and modify the configuration, or delay the deployment until a time when deploying would have the least impact on your network.
When the Inspect Interruption column indicates
Yes and you expand the device configuration listing, the
system indicates any specific configuration type that would restart the Snort process
with an Inspect
Interruption ( ). When you hover your mouse over the icon, a message informs you that deploying the
configuration may interrupt traffic.
). When you hover your mouse over the icon, a message informs you that deploying the
configuration may interrupt traffic.
The following table summarizes how the deploy page displays inspection interruption warnings.
|
Type |
Inspect Interruption |
Description |
|---|---|---|
|
Threat Defense |
Inspect
Interruption ( |
At least one configuration would interrupt inspection on the device if deployed, and might interrupt traffic depending on how the device handles traffic. You can expand the device configuration listing for more information. |
|
-- |
Deployed configurations will not interrupt traffic on the device. |
|
|
Undetermined |
The system cannot determine if a deployed configuration may interrupt traffic on the device. Undetermined status is displayed before the first deployment after a software upgrade, or in some cases during a Support call. |
|
|
Errors ( |
The system cannot determine the status due to an internal error. Cancel the operation and click Deploy again to allow the system to redetermine the Inspect Interruption status. If the problem persists, contact Support. |
|
|
sensor |
-- |
The device identified as sensor is not the threat defense device; the system does not determine if a deployed configuration may interrupt traffic on this device. |
 )
)For information on all configurations that restart the Snort process for all device types, see Configurations that Restart the Snort Process When Deployed or Activated.
Inspect Traffic During Policy Apply
Inspect traffic during policy apply is an advanced access control policy general setting that allows managed devices to inspect traffic while deploying configuration changes; this is the case unless a configuration that you deploy requires the Snort process to restart. You can configure this option as follows:
-
Enabled — Traffic is inspected during the deployment unless certain configurations require the Snort process to restart.
When the configurations you deploy do not require a Snort restart, the system initially uses the currently deployed access control policy to inspect traffic, and switches during deployment to the access control policy you are deploying.
-
Disabled — Traffic is not inspected during the deployment. The Snort process always restarts when you deploy.
The following graphic illustrates how Snort restarts can occur when you enable or disable Inspect traffic during policy apply.

 Caution |
When you deploy, resource demands may result in a small number of packets dropping without inspection. Additionally, deploying some configurations restarts the Snort process, which interrupts traffic inspection. Whether traffic drops during this interruption or passes without further inspection depends on how the target device handles traffic. See Snort Restart Traffic Behavior and Configurations that Restart the Snort Process When Deployed or Activated. |
Snort Restart Traffic Behavior
The following tables explain how different devices handle traffic when the Snort process restarts.
|
Interface Configuration |
Restart Traffic Behavior |
|---|---|
|
inline: Snort Fail Open: Down: disabled |
dropped |
|
inline: Snort Fail Open: Down: enabled |
passed without inspection Some packets can be delayed in buffer for several seconds before the system recognizes that Snort is down. This delay can vary depending upon the load distribution. However, the buffered packets are eventually passed. |
|
routed, transparent (including EtherChannel, redundant, subinterface): preserve-connection enabled (configure snort preserve-connection enable ; default) For more information, see Cisco Secure Firewall Threat Defense Command Reference. |
existing TCP/UDP flows: passed without inspection so long as at least one packet arrives while Snort is down new TCP/UDP flows and all non-TCP/UDP flows: dropped Note that the following traffic drops even when preserve-connection is enabled:
|
|
routed, transparent (including EtherChannel, redundant, subinterface): preserve-connection disabled (configure snort preserve-connection disable ) |
dropped |
|
inline: tap mode |
egress packet immediately, copy bypasses Snort |
|
passive |
uninterrupted, not inspected |
 Note |
In addition to traffic handling when the Snort process is down while it restarts, traffic can also pass without inspection or drop when the Snort process is busy, depending on the configuration of the Snort Fail Open Busy option (see Configure an Inline Set). A device supports either the Failsafe option or the Snort Fail Open option, but not both. |
Note |
When the Snort process is busy but not down during configuration deployment, some packets may drop on routed, switched, or transparent interfaces if the total CPU load exceeds 60 percent. |
 Warning |
Do not reboot the system while the Snort Rule Update is in progress. |
Snort-busy drops happen when snort is not able to process the packets fast enough. Lina does not know whether Snort is busy due to processing delay, or if is stuck or due to call blocking. When transmission queue is full, snort-busy drops occur. Based on Transmission queue utilization, Lina will try to access if the queue is being serviced smoothly.
Configurations that Restart the Snort Process When Deployed or Activated
Deploying any of the following configurations except AAB restarts the Snort process as described. Deploying AAB does not cause a restart, but excessive packet latency activates the currently deployed AAB configuration, causing a partial restart of the Snort process.
Access Control Policy Advanced Settings
-
Deploy when Inspect Traffic During Policy Apply is disabled.
-
Add or remove an SSL policy.
File Policy
Deploy the first or last of any one of the following configurations; note that while otherwise deploying these file policy configurations does not cause a restart, deploying non-file-policy configurations can cause restarts.
-
Take either of the following actions:
-
Enable or disable Inspect Archives when the deployed access control policy includes at least one file policy.
-
Add the first or remove the last file policy rule when Inspect Archives is enabled (note that at least one rule is required for Inspect Archives to be meaningful).
-
-
Enable or disable Store files in a Detect Files or Block Files rule.
-
Add the first or remove the last active file rule that combines the Malware Cloud Lookup or Block Malware rule action with an analysis option (Spero Analysis or MSEXE, Dynamic Analysis, or Local Malware Analysis) or a store files option (Malware, Unknown, Clean, or Custom).
Note that access control rules that deploy these file policy configurations to security zones or tunnel zones cause a restart only when your configuration meets the following conditions:
-
Source or destination security zones in your access control rule must match the security zones associated with interfaces on the target devices.
-
Unless the destination zone in you access control rule is any, a source tunnel zone in the rule must match a tunnel zone assigned to a tunnel rule in the prefilter policy.
Identity Policy
-
When SSL decryption is disabled (that is, when the access control policy does not include an SSL policy), add the first or remove the last active authentication rule.
An active authentication rule has either an Active Authentication rule action, or a Passive Authentication rule action with Use active authentication if passive or VPN identity cannot be established selected.
Network Discovery
-
Enable or disable non-authoritative, traffic-based user detection over the HTTP, FTP, or MDNS protocols, using the network discovery policy.
Device Management
-
MTU: Change the highest MTU value among all non-management interfaces on a device.
-
Automatic Application Bypass (AAB): The currently deployed AAB configuration activates when a malfunction of the Snort process or a device misconfiguration causes a single packet to use an excessive amount of processing time. The result is a partial restart of the Snort process to alleviate extremely high latency or prevent a complete traffic stall. This partial restart causes a few packets to pass without inspection, or drop, depending on how the device handles traffic.
Updates
-
System update: Deploy configurations the first time after a software update that includes a new version of the Snort binary or data acquisition library (DAQ).
-
VDB: For managed devices running Snort 2, deploying configurations the first time after installing a vulnerability database (VDB) update that includes changes applicable to managed devices will require a detection engine restart and may result in a temporary traffic interruption. For these, a message warns you when you select the management center to begin installing. The deploy dialog provides additional warnings for the threat defense devices when VDB changes are pending. VDB updates that apply only to the management center do not cause detection engine restarts, and you cannot deploy them.
For managed devices running Snort 3, deploying configurations the first time after installing a vulnerability database (VDB) update may temporarily interrupt application detection, but there will be no traffic interruptions.
Changes that Immediately Restart the Snort Process
The following changes immediately restart the Snort process without going through the deploy process. How the restart affects traffic depends on how the target device handles traffic. See Snort Restart Traffic Behavior for more information.
-
Take any of the following actions involving applications or application detectors:
-
Activate or deactivate a system or custom application detector.
-
Delete an activated custom detector.
-
Save and Reactivate an activated custom detector.
-
Create a user-defined application.
A message warns you that continuing restarts the Snort process, and allows you to cancel; the restart occurs on any managed device in the current domain or in any of its child domains.
-
-
Create or break a threat defense high availability pair.
A message warns you that continuing to create a high availability pair restarts the Snort process on the primary and secondary devices and allows you to cancel.


 )
)
 )
)


 )
) )
)


 )
)
 )
)
 )
) Feedback