Dashboard View of Devices
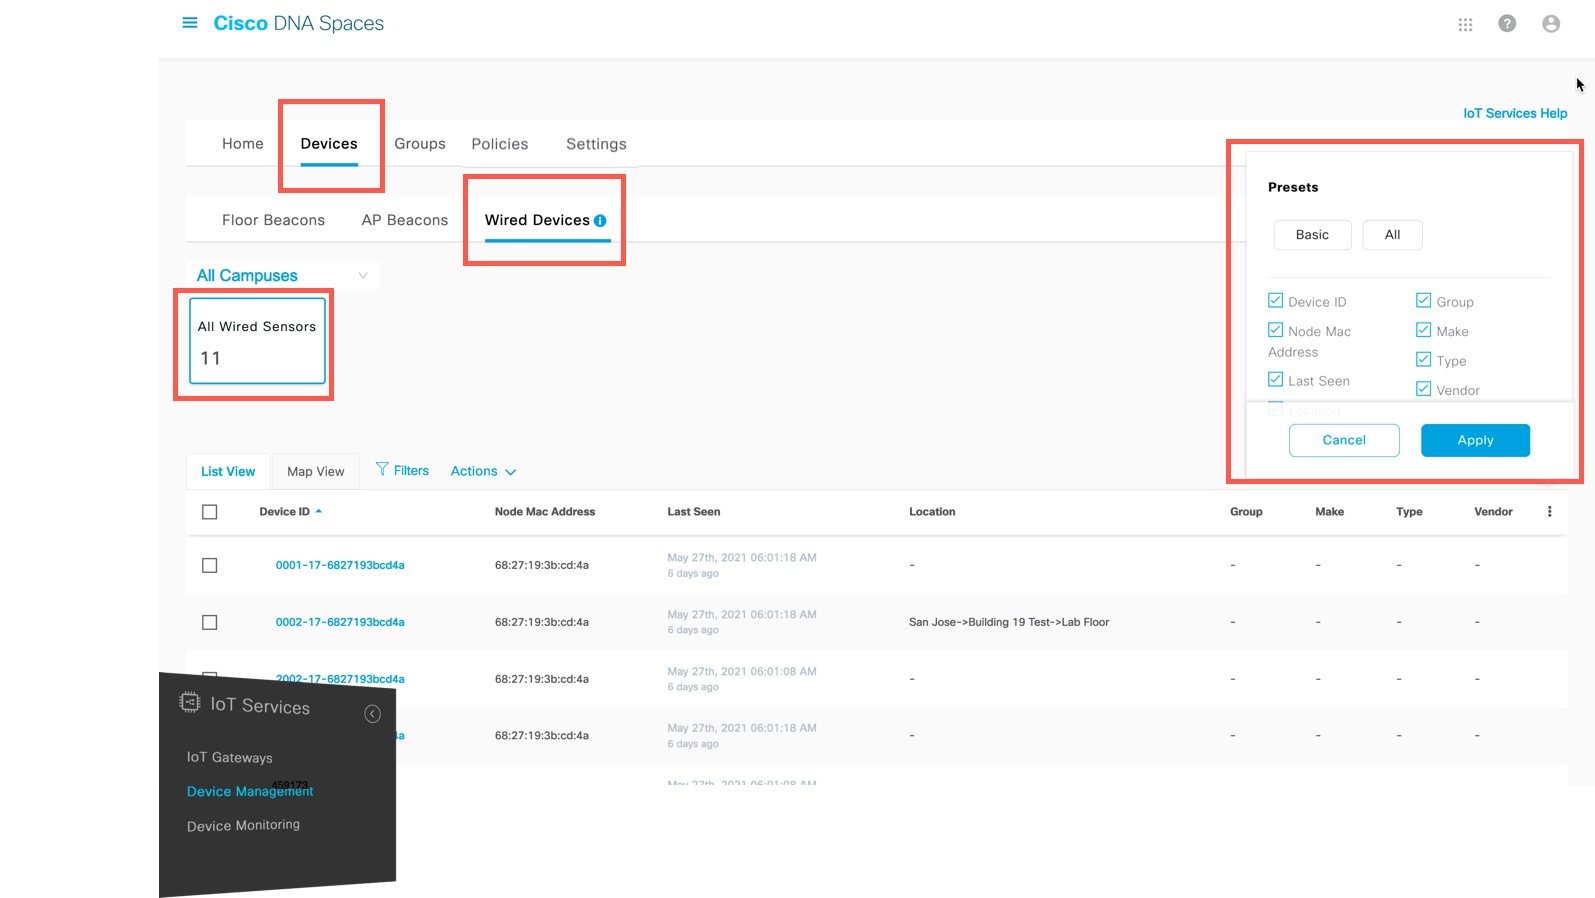
Choose IoT Service > Device Management > Devices and select a device type (Floor Beacons, AP Beacons, Wired Devices) to view an overview of that device.

The documentation set for this product strives to use bias-free language. For the purposes of this documentation set, bias-free is defined as language that does not imply discrimination based on age, disability, gender, racial identity, ethnic identity, sexual orientation, socioeconomic status, and intersectionality. Exceptions may be present in the documentation due to language that is hardcoded in the user interfaces of the product software, language used based on RFP documentation, or language that is used by a referenced third-party product. Learn more about how Cisco is using Inclusive Language.
Choose IoT Service > Device Management > Devices and select a device type (Floor Beacons, AP Beacons, Wired Devices) to view an overview of that device.

You can create groups and assign devices to them. This allows you to focus your attention on certain devices, and view only these devices by filtering them by the group.
|
Step 1 |
In the Cisco Spaces: IoT Service dashboard, choose Device Management > Groups. |
||
|
Step 2 |
Click Create a new group, enter a Group Name and Description, and click Next. |
||
|
Step 3 |
In the Add a group window that is displayed, select the devices you want to add to this group and click Create Group. |
||
|
Step 4 |
Click Close or Create another group. |
||
|
Step 5 |
To add one or more devices to the created group, click the Devices tab and then click one of the following:
|
||
|
Step 6 |
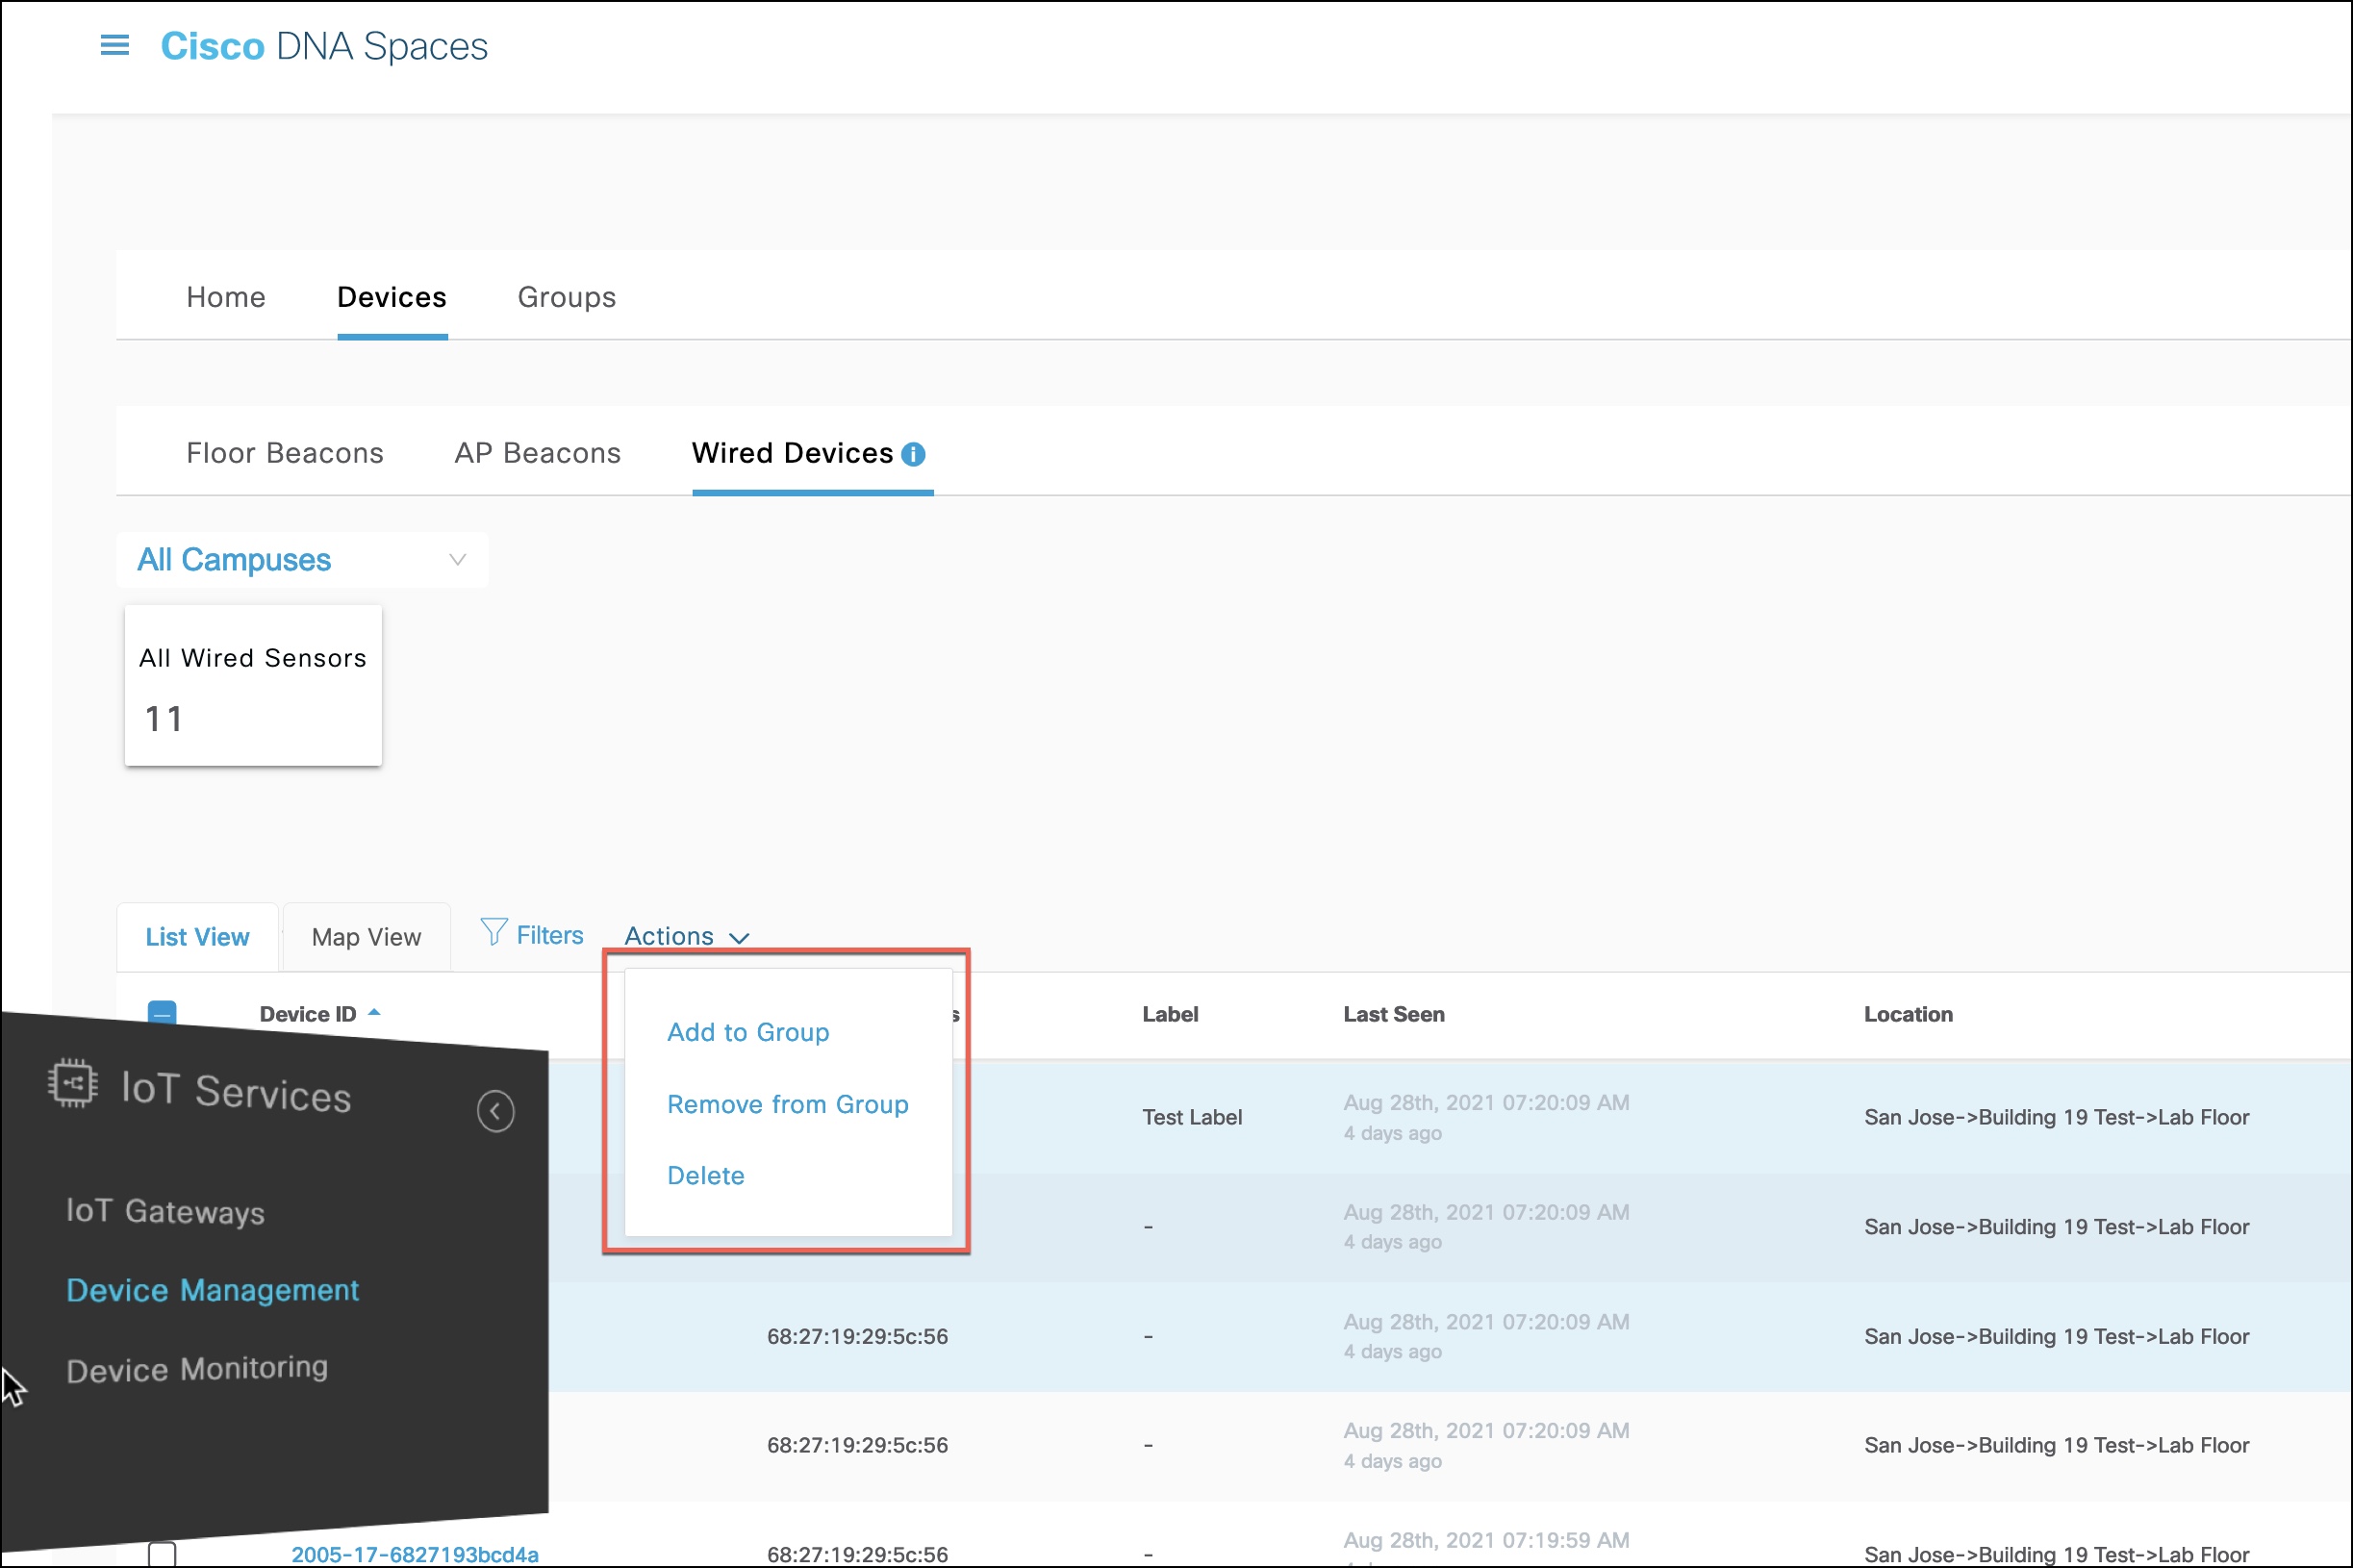
In the List View, check the check boxes of the devices to add. |
||
|
Step 7 |
Choose Actions > Add to Group. 

|
||
|
Step 8 |
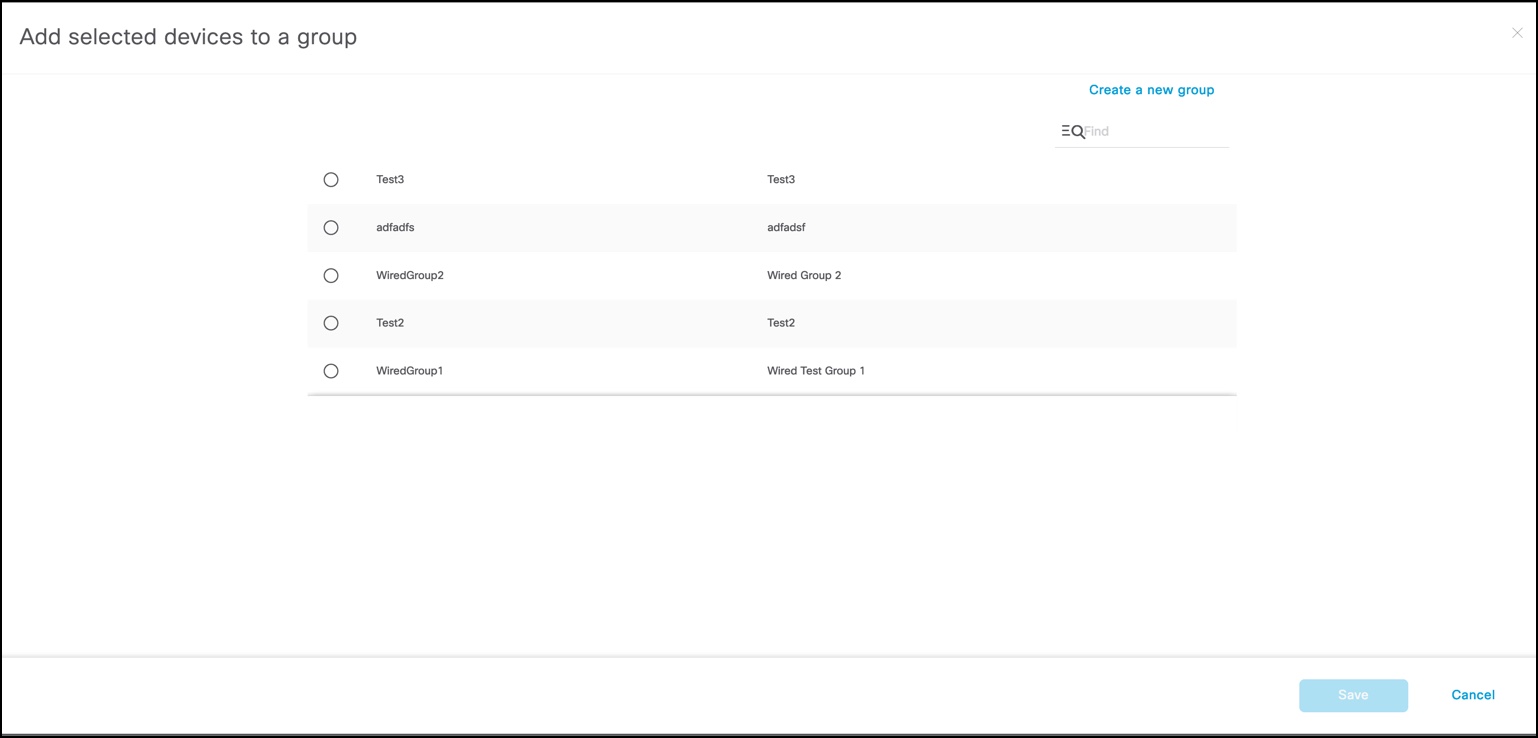
Click the group to which devices should be added. |
||
|
Step 9 |
(Optional) Click the Groups tab to see the group you created. Click the group name to see the devices in the group. You can also edit the group details from this window.
|