Configure Cisco Meraki Systems Manager
Cisco Meraki Systems Manager supports a variety of platforms, enabling the diverse device ecosystems that are commonplace today. Systems Manager offers centralized, cloud-based tools for endpoint management with far-reaching scalability for growing organizations. Integrate Cisco Meraki Systems Manager as an MDM server in Cisco ISE to leverage the endpoint information that is collected by Cisco Meraki Systems Manager for compliance checks and endpoint policy management.
For more information about Cisco Meraki Systems Manager, see the datasheet.
Cisco Meraki Systems Manager now supports MDM API version 3 and can provide Cisco ISE with a unique device identifier for connected endpoints. If you already have an active Cisco Meraki Systems Manager integration in your Cisco ISE, carry out Steps 8 to 15 for the Cisco ISE-related device profile in your Cisco Meraki Systems Manager.
Configure Cisco Meraki Systems Manager as an MDM/UEM Server
The images in this section display the Cisco Meraki Systems Manager GUI fields that you must work with during this task. The numbers in the images correspond to the step numbers in the task.
Before you begin
In Cisco ISE, create and export a System Certificate that is configured for Admin usage. You will use this certificate in Step 12 of the following task.
For instructions on how to create and export a system certificate, see the topic "System Certificates" in Chapter "Basic Setup" in the Cisco ISE Administrator Guide for your release.
Procedure
|
Step 1 |
Log in to your Cisco Meraki Systems Manager portal. |
|
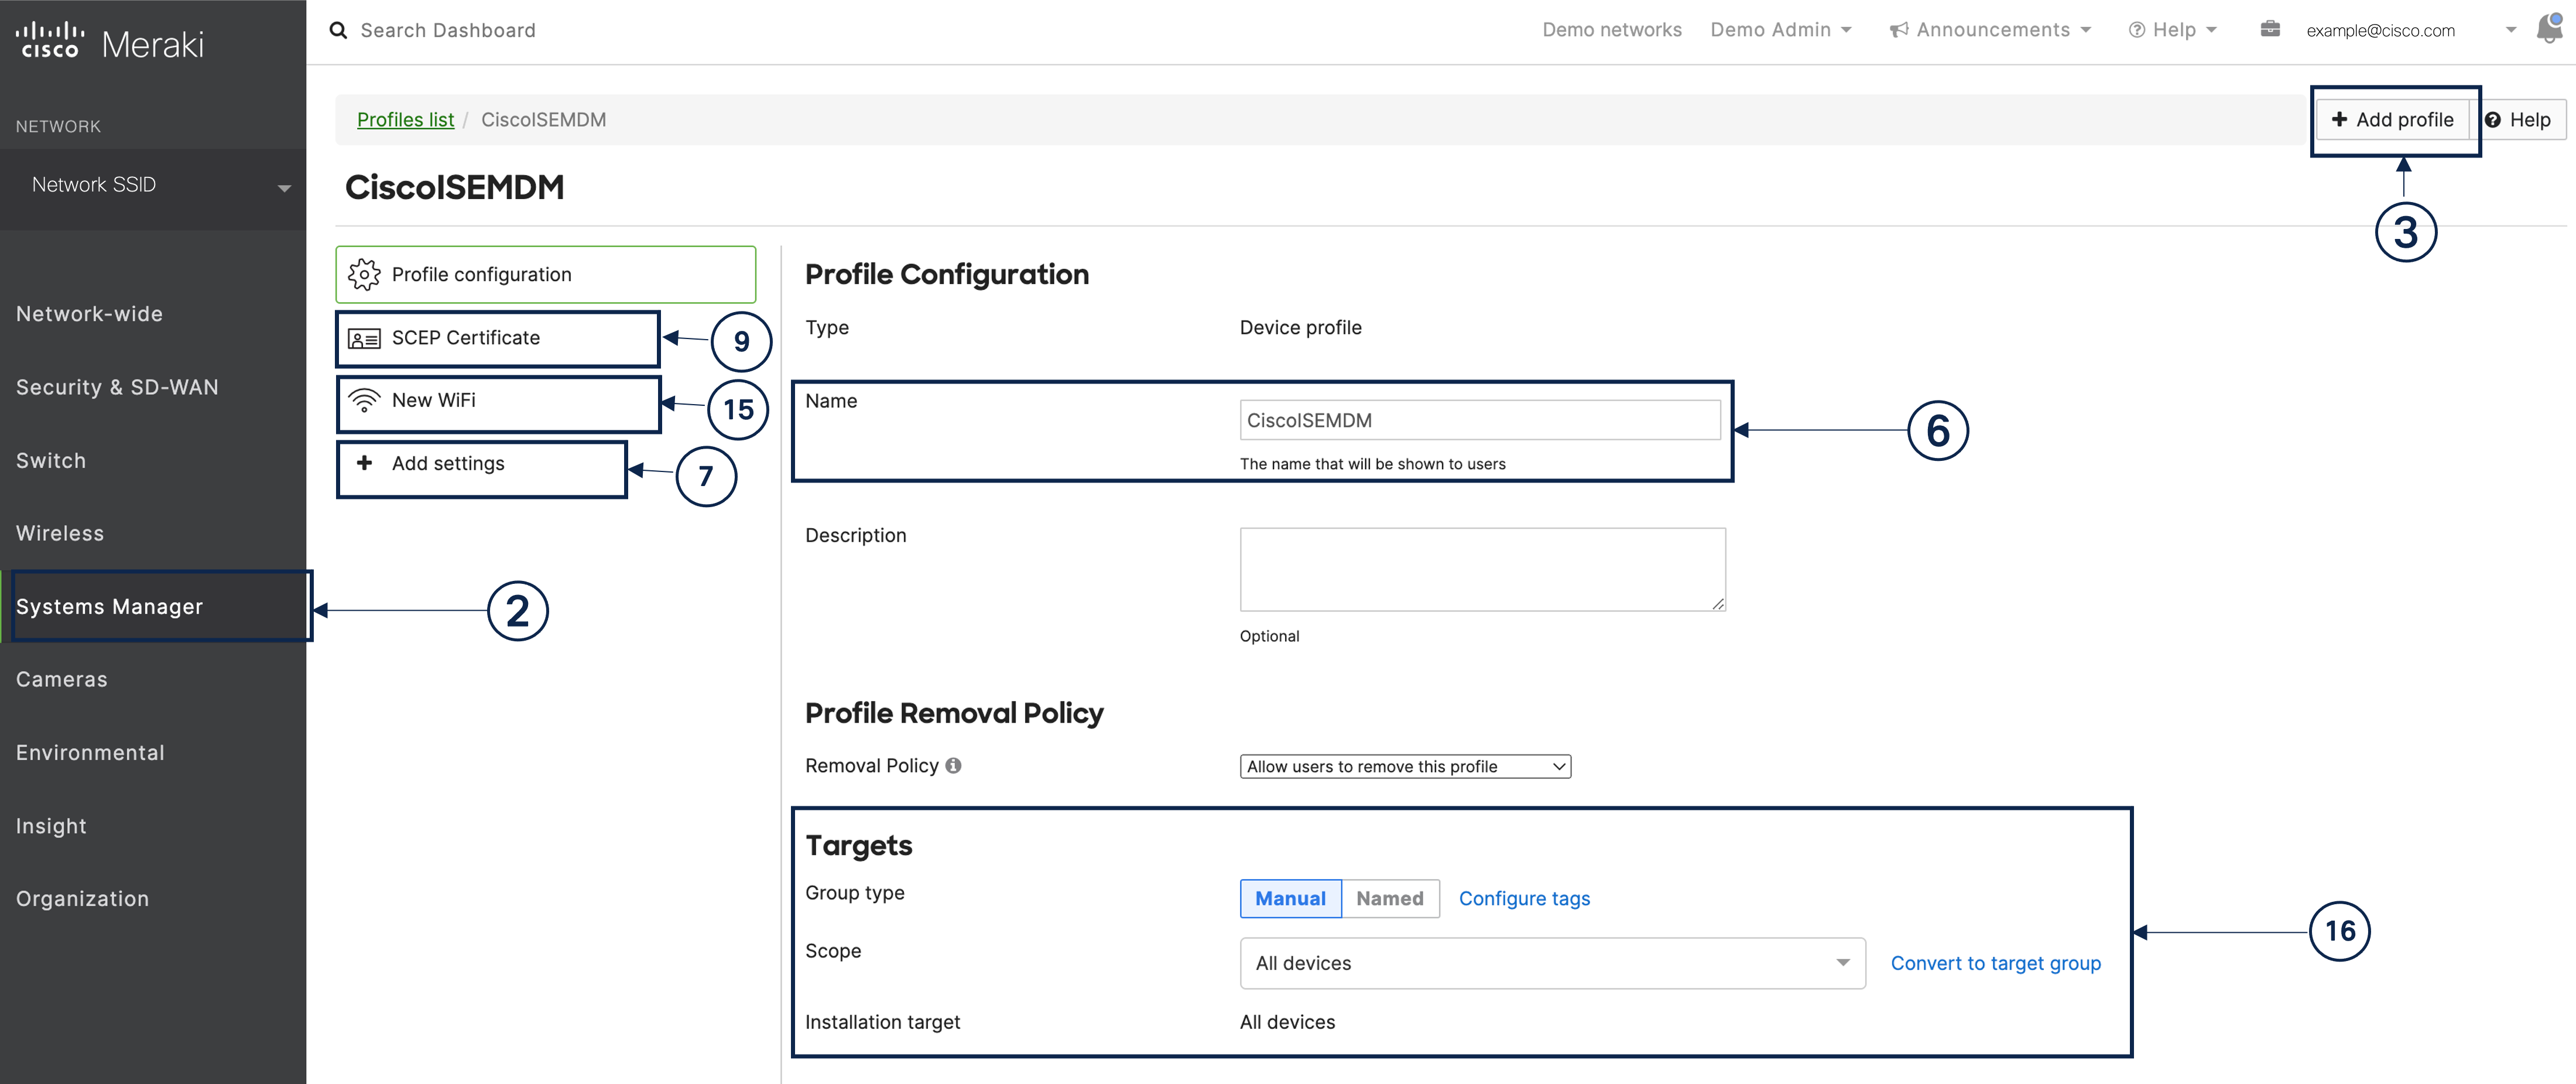
Step 2 |
From the main menu, go to . |
|
Step 3 |
Click + Add Profile. |
|
Step 4 |
In the Add New Profile dialog box that is displayed, click the Device profile (Default) radio button. |
|
Step 5 |
Click Continue. |
|
Step 6 |
In the Name and Description fields, enter the required values. |
|
Step 7 |
Click +Add settings. |
|
Step 8 |
In the Add New Settings Payload window that is displayed, click SCEP Certificate. |
|
Step 9 |
In the SCEP Certificate window that is displayed: 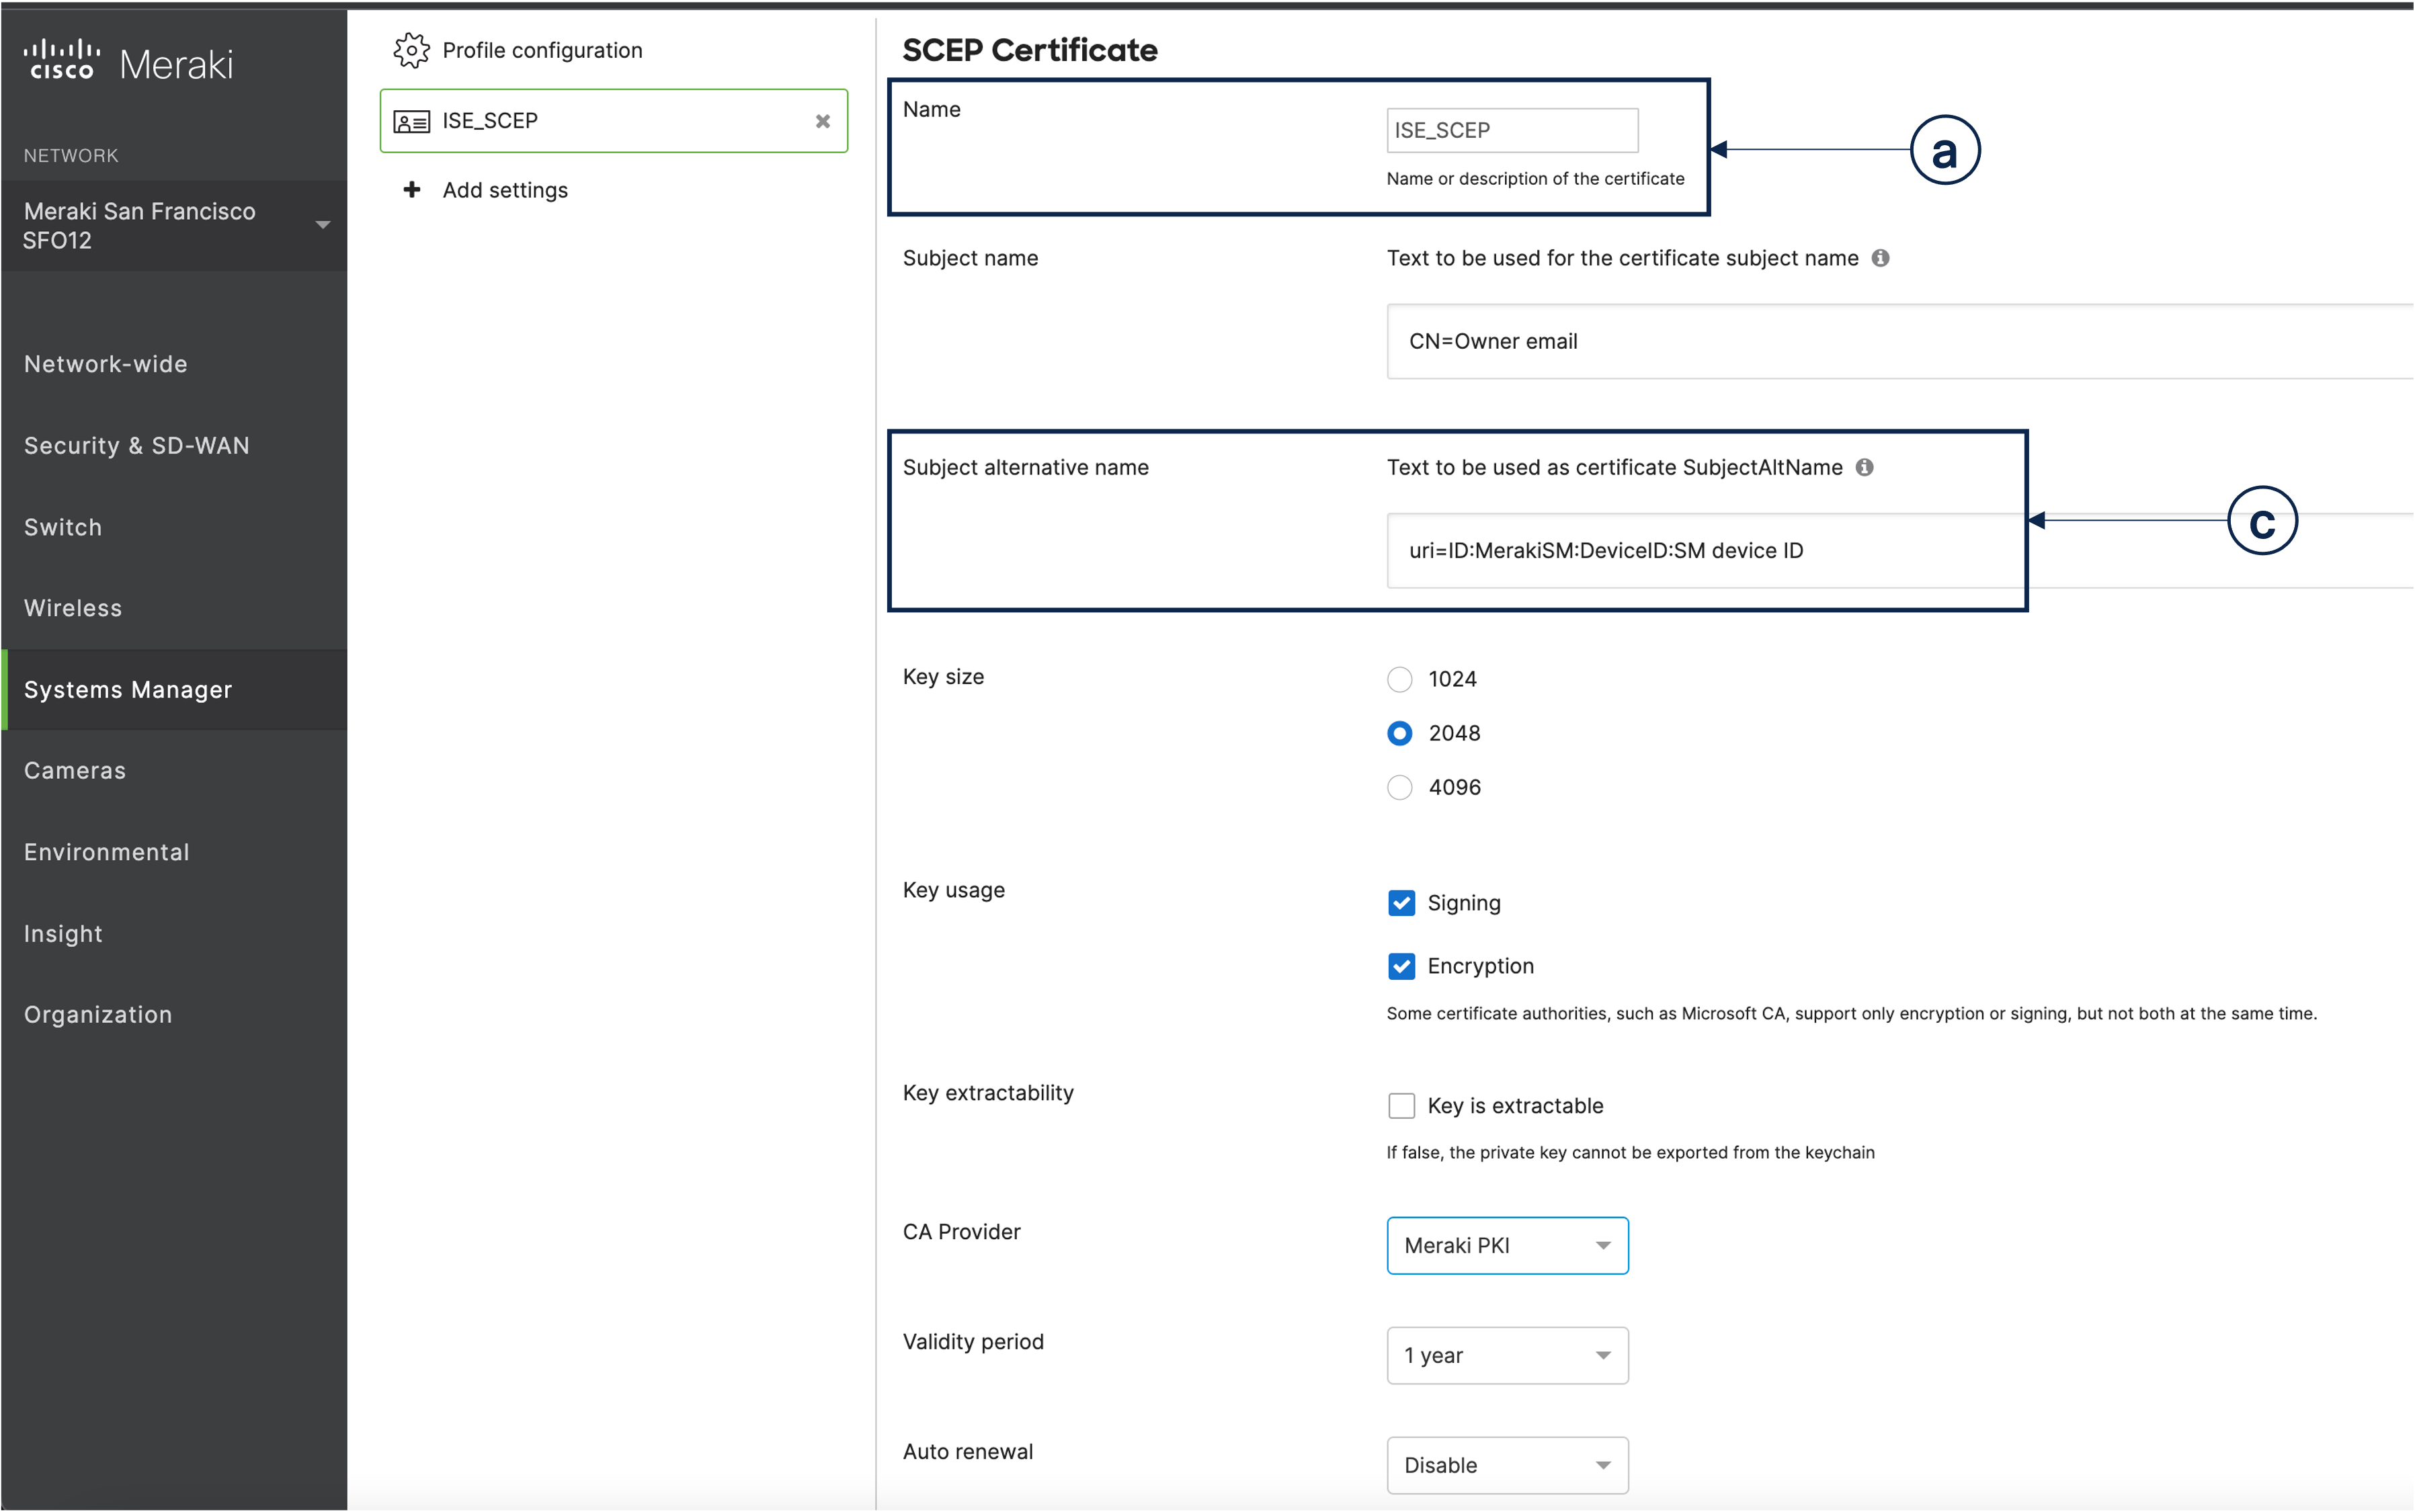
|
|
Step 10 |
Click +Add settings. |
|
Step 11 |
In the Add New Settings Payload window that is displayed, click Certificate |
|
Step 12 |
In the Certificate window that is displayed:
|
|
Step 13 |
Click +Add settings. |
|
Step 14 |
In the Add New Settings Payload window that is displayed, click WiFi Settings. |
|
Step 15 |
In the WiFi Settings window that is displayed: |
|
Step 16 |
In the Profile Configuration tab, in the Targets area, add a tag for the ISE use case. For information on how to create and manage tags in Meraki Systems Manager, see Manage Tags. The application of tags ensures that the ISE profile with its certificate and Wi-Fi settings is applied to the relevant devices. |
|
Step 17 |
In the You have unsaved changes dialog box, click Save. |
|
Step 18 |
From the left menu pane, choose Organization > Configure> MDM |
|
Step 19 |
From the ISE Settings area:
|
What to do next
Now, connect Cisco Meraki Systems manager as an MDM server in Cisco ISE. For information on how to carry out this task, see "Configure Mobile Device Management Servers in Cisco ISE" in the Chapter "Secure Access" in the Cisco ISE Administrator Guide for your release.
 Feedback