Adding Cisco DCNM Sites
This section describes how to add a DCNM site using the Nexus Dashboard GUI and then enable that site to be managed by Nexus Dashboard Orchestrator.
Before you begin
-
You must ensure that the site(s) you are adding are running Cisco DCNM, Release 11.5(1) or later.
Procedure
| Step 1 |
Log in to the Nexus Dashboard GUI |
| Step 2 |
Add a new site. 
|
| Step 3 |
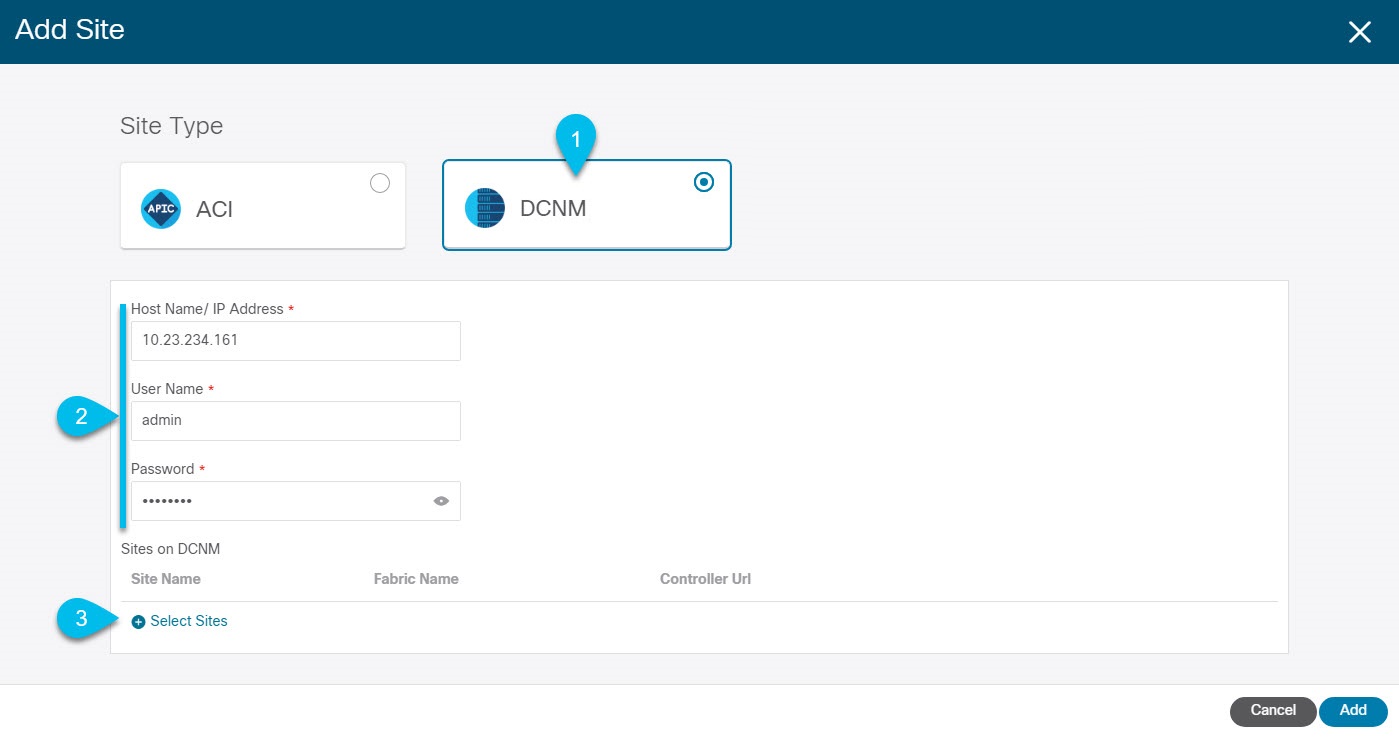
Provide site information.  |
| Step 4 |
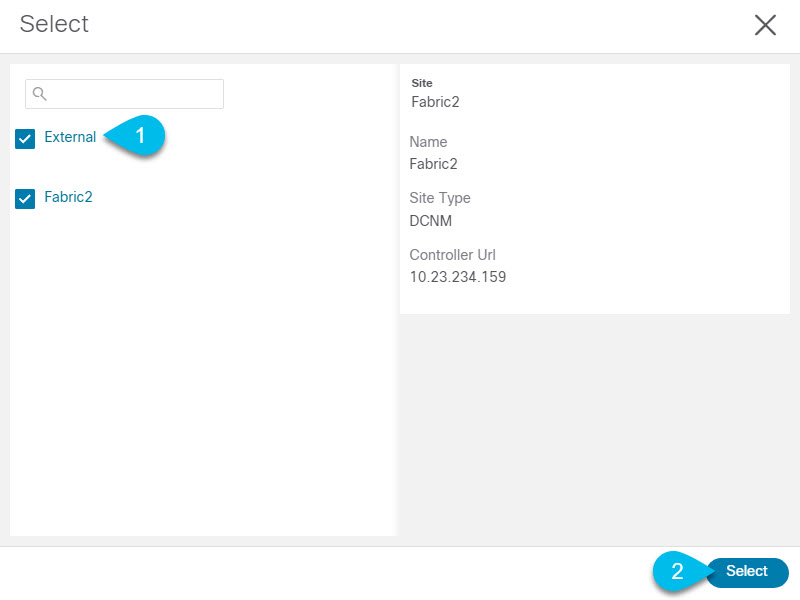
Select the fabrics you want to add to the Nexus Dashboard. 
|
| Step 5 |
In the Add Site window, click Add to finish adding the sites. At this time, the sites will be available in the Nexus Dashboard, but you still need to enable them for Nexus Dashboard Orchestrator management as described in the folowing steps. |
| Step 6 |
Repeat the previous steps for any additional DCNM controllers. |
| Step 7 |
From the Nexus Dashboard's Service Catalog, open the Nexus Dashboard Orchestrator service. You will be automatically logged in using the Nexus Dashboard user's credentials. |
| Step 8 |
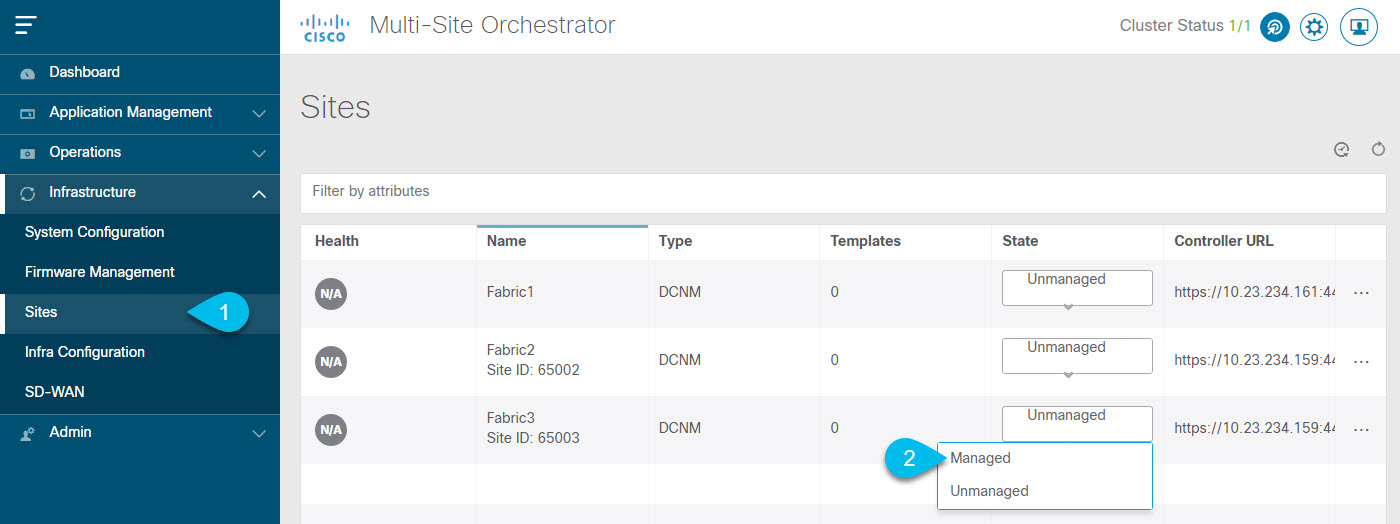
In the Nexus Dashboard Orchestrator GUI, manage the sites.  |
 Feedback