Onboarding Fabrics

Onboard Cisco ACI Fabrics

This section describes how to onboard one or more Cisco ACI fabrics to your Nexus Dashboard.

Before you begin

  • You must not on-board NDFC fabrics to the same cluster as ACI fabrics.

  • You can on-board standalone NX-OS switches in the same cluster as ACI fabrics but with a reduced scale and in physical clusters only.

    • For a 3-node cluster, you can have up to 25 standalone NX-OS switches (of the total 300 switches supported).

    • For a 6-node cluster, you can have up to 50 standalone NX-OS switches (of the total 1000 switches supported).

  • Fabric connectivity must be already configured as described in Fabric Connectivity.

  • EPG/L3Out for Nexus Dashboard data network IP connectivity must be already configured as described in Fabric Connectivity.

  • IP connectivity from Nexus Dashboard to Cisco Application Policy Infrastructure Controller (APIC) in-band IP over the data network must be already configured.

  • IP connectivity from Nexus Dashboard to the leaf nodes' and spine nodes' in-band IPs over the data network must be already configured.

Procedure


Step 1

Navigate to Manage > Fabrics.

Step 2

Click Add Fabric.

This starts the fabric onboarding workflow.

Step 3

Choose Manually Add, then choose Controller Based Fabric.

If you don't have the Insights service installed, this selection will not be visible and fabric onboarding defaults to this option.

Step 4

Provide fabric information.

  • Host Name/IP Address — provide the IP address used to communicate with the Cisco APIC.

    Note


    When providing the address, do not include the protocol (http:// or https://) as part of the URL string or fabric onboarding will fail.

  • User Name and Password — login credentials for a user with admin privileges on the fabric you are adding.

  • (Optional) Login Domain — if you leave this field empty, the fabric’s local login is used.

  • (Optional) Validate Peer Certificate — allows Nexus Dashboard to verify that the certificates of hosts to which it connects (such as fabric controllers) are valid and are signed by a trusted Certificate Authority (CA).

    Note


    You must have the certificate for this fabric already imported into your Nexus Dashboard before you can add a fabric using this option. If you have not yet added the certificates, cancel the onboarding workflow and follow the instructions described in the "Administrative Tasks" article in the Nexus Dashboard documentation library; then after you have imported the certificates, add the fabric as described here. If you enable the Verify Peer Certificate option but don’t import the valid certificate, fabric onboarding will fail.

  • (Optional) Enable the Use Proxy option if connectivity to this fabric's controller requires the proxy.

    The proxy must be already configured in the Nexus Dashboard's Admin Console.

Step 5

Provide additional fabric Details.

  • Name — a descriptive name for the fabric.

  • Location — fabric’s geographical location. This option is available only for on-premises fabrics.

Step 6

In the Summary page, verify the information and click Save to finish adding the fabric.


Onboard Cisco Multi-Site Inter-Fabric Network and Inter-Pod Network devices in a Cisco ACI fabric for Insights

You can onboard Cisco ACI Multi-Site Inter-Fabric Network and Inter-Pod Network devices in a Cisco Application Centric Infrastructure (ACI) fabric for use with Nexus Dashboard Insights. Doing so grants Nexus Dashboard Insights visibility into the network health of the Inter-Fabric Network and Inter-Pod Network devices.

Procedure


Step 1

Navigate to Manage > Fabrics.

Step 2

Click Add Fabric.

This starts the fabric onboarding workflow.

Step 3

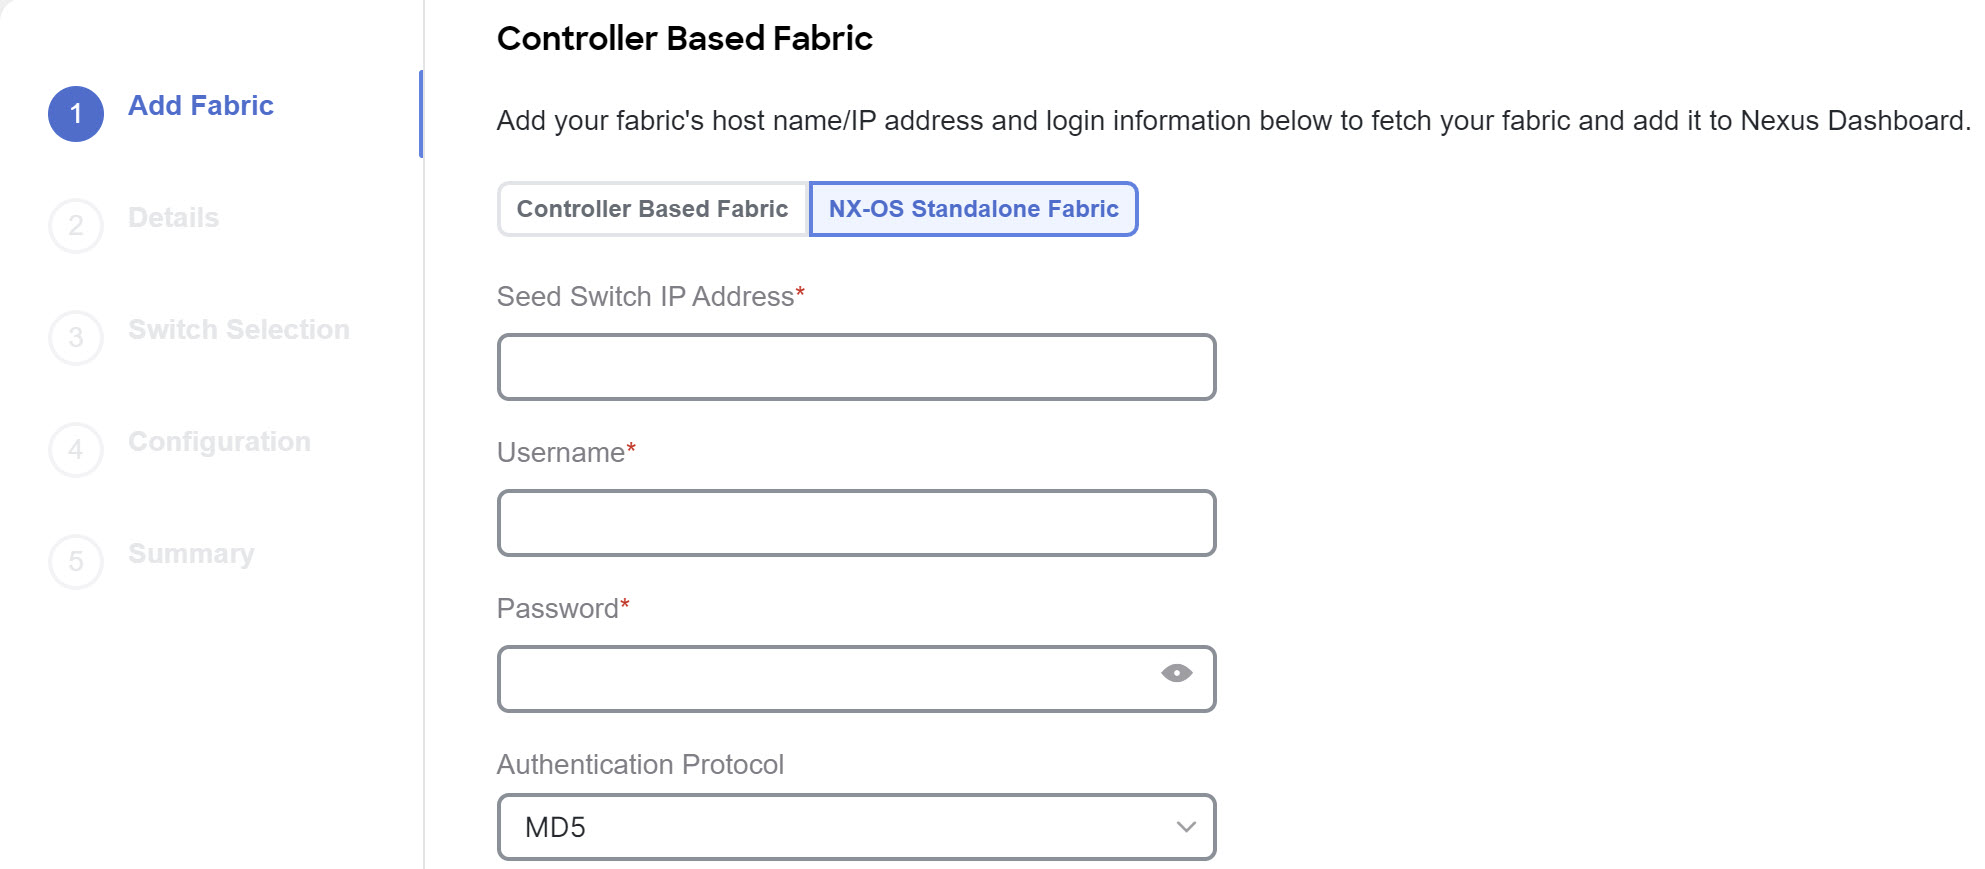
Choose Manually Add, then choose NX-OS Standalone Fabric.

Note


If this is the first time you are onboarding NX-OS switches without a controller, click Enable NXOS Discovery.

Step 4

Provide the fabric information.

  • Seed Switch IP Address—Provide the IP address of the seed switch used to discover other switches in the fabric.

  • Username and Password—Provide the login credentials on the seed switch.

Step 5

Provide additional fabric Details.

  • Name—A descriptive name for the fabric.

  • Location—Fabric’s geographical location. This option is available only for on-premises fabrics.

Step 6

In the Switch Selection page, select one or more Inter-Pod Network switches to add to the fabric.

By default, the switch discovery process will show switches that are 2 hops away from the seed switch. You can change the default setting using the Number of Hops drop-down and clicking Rediscover Switches.

After the switches are discovered, simply select all the switches you want to add to the fabric from the list on the left and click on the right arrow to move them to right-hand list.

The switches are added with the default Leaf role, but you can change it to other roles as required, then click Next to continue.

Step 7

In the Summary page, verify the information and click Save to finish adding the fabric.

Step 8

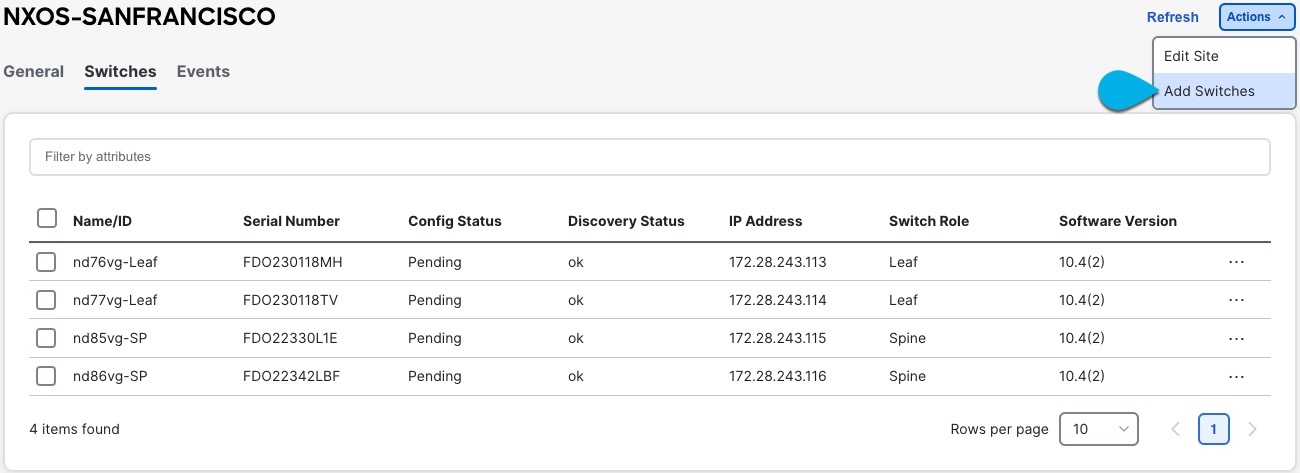
(Optional) Add switches to an existing standalone NX-OS fabric.

After you first add the fabric, you can Add Switches by selecting the fabric in the GUI:


Guidelines and limitations for Cisco Multi-Site Inter-Site Network and Inter-Pod Network devices in a Cisco ACI fabric for Insights

The following guidelines and limitations apply when you onboard Cisco ACI Multi-Site Inter-Site Network (ISN) and Inter-Pod Network (IPN) devices in a Cisco Application Centric Infrastructure (ACI) fabric:

  • If you want to onboard standalone NX-OS switches, you must use the Insights deployment mode for Nexus Dashboard. For information about the supported scale, see the Nexus Dashboard Capacity Planning tool.

  • The ISN and IPN devices are supported only on 3-node or 6-node physical Nexus Dashboard clusters.

    • A 3-node physical cluster supports up to 15 ISN and IPN devices.

    • A 6-node physical cluster supports up to 50 ISN and IPN devices.

Onboard NDFC fabrics

This section describes how to onboard one or more NDFC fabrics to your Nexus Dashboard.


Note


After the cluster is deployed, ensure that you configure the NDFC deployment persona by navigating to Fabric Controller > Admin > System Settings > Feature Management and selecting one of the supported modes.

When you create fabrics in your NDFC service, they are automatically added as fabrics to the Nexus Dashboard. The following steps are only required if you are on-boarding fabrics from a different Nexus Dashboard cluster for Fabric Controller and Insights co-location use case where each service is deployed in separate clusters.


Before you begin

  • You must not on-board ACI fabrics to the same cluster as NDFC fabrics.

  • You must not on-board standalone NX-OS switches to the same cluster as NDFC fabrics.

  • Fabric connectivity must be already configured as described in Fabric Connectivity.

  • Layer 3 connectivity to the fabric and switches must be already configured.

  • If your cluster is deployed in AWS or Azure, you must configure inbound rules on the data interface.

Procedure


Step 1

Navigate to Manage > Fabrics.

Step 2

Click Add Fabric.

This starts the fabric onboarding workflow.

Step 3

In the Add Fabric screen, choose Controller Based Fabric.

Step 4

Provide fabric information.

  • Host Name/IP Address — provide the IP address used to communicate with the Cisco NDFC.

    Note


    For NDFC fabrics, this must be the in-band IP address of NDFC.

    When providing the address, do not include the protocol (http:// or https://) as part of the URL string or fabric onboarding will fail.

  • User Name and Password — login credentials for a user with admin privileges on the fabric you are adding.

  • (Optional) Login Domain — if you leave this field empty, the fabric’s local login is used.

  • (Optional) Validate Peer Certificate — allows Nexus Dashboard to verify that the certificates of hosts to which it connects (such as fabric controllers) are valid and are signed by a trusted Certificate Authority (CA).

    Note


    You must have the certificate for this fabric already imported into your Nexus Dashboard before you can add a fabric using this option. If you have not yet added the certificates, cancel the onboarding workflow and follow the instructions described in the "Administrator" article in the Nexus Dashboard documentation library; then after you have imported the certificates, add the fabric as described here. If you enable the Verify Peer Certificate option but don’t import the valid certificate, fabric onboarding will fail.

Step 5

Provide additional fabric Details.

  • Name — a descriptive name for the fabric.

  • Location — fabric’s geographical location. This option is available only for on-premises fabrics.

Step 6

In the Summary page, verify the information and click Save to finish adding the fabric.


Onboard Cisco NX-OS switches

This section describes how to onboard one or more standalone Cisco NX-OS switches to your Nexus Dashboard.


Note


When onboarding standalone NX-OS switches without a controller (such as Cisco Application Policy Infrastructure Controller (APIC) or NDFC), the following restrictions apply:

  • You must not on-board standalone NX-OS switches to the same cluster as NDFC fabrics.

  • You can on-board standalone NX-OS switches in the same cluster as ACI fabrics but with a reduced scale and in physical clusters only.

    • For a 3-node cluster, you can have up to 25 standalone NX-OS switches (of the total 300 switches supported).

    • For a 6-node cluster, you can have up to 50 standalone NX-OS switches (of the total 1000 switches supported).

  • Only Nexus Dashboard Insights service supports standalone NX-OS switches. That is, you cannot co-host multiple services on the Nexus Dashboard cluster where you want to onboard standalone NX-OS switches.

  • Only physical Nexus Dashboard clusters support onboarding NX-OS switches.

  • You must not install the NDFC service in the same Nexus Dashboard cluster where you will onboard standalone NX-OS switches.

  • Before onboarding standalone NX-OS switches, you must enable "NX-OS switch discovery" in your cluster as mentioned in Step 3 below.

    • NX-OS switch discovery is not available when the Nexus Dashboard Insights service is cohosted with NDFC or NDO.

    • Enabling NX-OS switch discovery must be done by an Admin user.

  • You must also configure 10 persistent IPs (if using IPv4) and 8 IPs (if using IPv6) in the data network.

    Persistent IPs can be configured in the Nexus Dashboard > Admin Console > System Settings > External Service Pools > Data Service IPs page.

  • You must enable NX-OS switches auto-discovery Cisco Discovery Protocol (CDP) in all NX-OS switches.

    Transparent firewalls usually flood network Protocol Data Unit (PDUs) that can lead to undesired CDP neighbors. We recommend disabling CDP on interfaces connecting to the transparent firewall device to avoid discovery-related discrepancies.

  • You must configure Nexus Dashboard reachability to NX-OS switches' management network because NX-OS switches auto-discovery uses the switches' management interfaces.


Procedure


Step 1

Navigate to Manage > Fabrics.

Step 2

Click Add Fabric.

This starts the fabric onboarding workflow.

Step 3

Choose Manually Add, then choose NX-OS Standalone Fabric.

Note


If this is the first time you are onboarding NX-OS switches without a controller, click Enable NXOS Discovery.

Step 4

Provide fabric information.

  • Seed Switch IP Address — provide the IP address of the seed switch used to discover other switches in the fabric.

  • Username and Password — login credentials on the seed switch.

Step 5

Provide additional fabric Details.

  • Name — a descriptive name for the fabric.

  • Location — fabric’s geographical location. This option is available only for on-premises fabrics.

Step 6

In the Switch Selection page, select one or more switches to add to the fabric.

By default, the switch discovery process will show switches that are 2 hops away from the seed switch. You can change the default setting using the Number of Hops dropdown and clicking Rediscover Switches.

After the switches are discovered, simply select all the switches you want to add to the fabric from the list on the left and click on the right arrow to move them to right-hand list.

The switches are added with the default Leaf role, but you can change it to other roles as required, then click Next to continue.

Step 7

In the Summary page, verify the information and click Save to finish adding the fabric.

Step 8

(Optional) Add switches to an existing standalone NX-OS fabric.

After you first add the fabric, you can Add Switches by selecting the fabric in the GUI: