Prerequisites and Guidelines
Before you proceed with deploying the Nexus Dashboard cluster in Microsoft Azure, you must:
-
Ensure that the Azure form factor supports your scale and services requirements.
Scale and services support and co-hosting vary based on the cluster form factor. You can use the Nexus Dashboard Capacity Planning tool to verify that the cloud form factor satisfies your deployment requirements.
-
Review and complete the general prerequisites described in the Deployment Overview.
-
Review and complete any additional prerequisites described in the Release Notes for the services you plan to deploy.
-
Have appropriate access privileges for your Azure account and subscription.
-
Have created a resource group for your Nexus Dashboard cluster resources.

Note
The resource group must be empty and not contain any existing objects. Resource groups with existing objects cannot be used for Nexus Dashboard deployment.
To create a resource group:
-
In the Azure portal, navigate to .
-
Click +Add to create a new resource group.
-
In the Create a resource group screen, provide the name of the subscription you will use for your Nexus Dashboard cluster, the name for the resource group (for example,
nd-cluster), and the region.
-
-
Create an SSH key pair.
A key pair consists of a private key and a public key, you will be asked to provide the public key when creating the Nexus Dashboard nodes.

Note
You will need to use the same machine where you create the public key for a one-time login into each node to enable general SSH login during cluster deployment procedure.
Creating SSH keys is described in Generating an SSH Key Pair in Linux or MacOS and Generating an SSH Key Pair in Windows sections below.
Generating an SSH Key Pair in Linux or MacOS
These procedures describe how to generate an SSH public and private key pair in Linux or MacOS. For instructions on generate an SSH public and private key pair in Windows, see Generating an SSH Key Pair in Windows.
Procedure
|
Step 1 |
On your Linux virtual machine or Mac, create a public and private key pair using ssh-keygen, directing the output to a file. For example: Output similar to the following appears. Press the Enter key without entering any text when you are asked to enter a passphrase (leave the field empty so that there is no passphrase). |
||
|
Step 2 |
Locate the public and private key files that you saved. Two files should be displayed, where:
For example, if you directed the output to a file named azure_key, you should see the following output: In this case:
|
||
|
Step 3 |
Open the public key file and copy the public key information from that file, without the username@hostname information at the end.
|
Generating an SSH Key Pair in Windows
These procedures describe how to generate an SSH public and private key pair in Windows. For instructions on generate an SSH public and private key pair in Linux, see Generating an SSH Key Pair in Linux or MacOS.
Procedure
|
Step 1 |
Download and install the PuTTY Key Generator (puttygen): |
|
Step 2 |
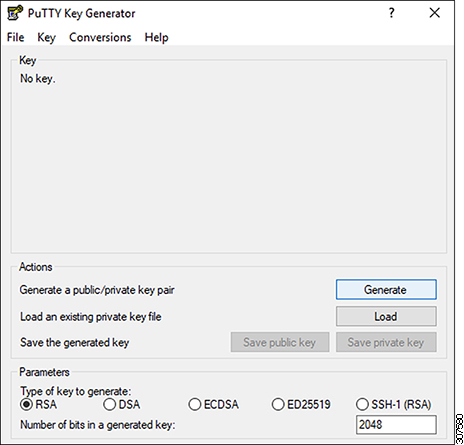
Run the PuTTY Key Generator by navigating to . You will see a window for the PuTTY Key Generator on your screen. 
|
|
Step 3 |
Click Generate. A screen appears, asking you to move the mouse over the blank area to generate a public key. |
|
Step 4 |
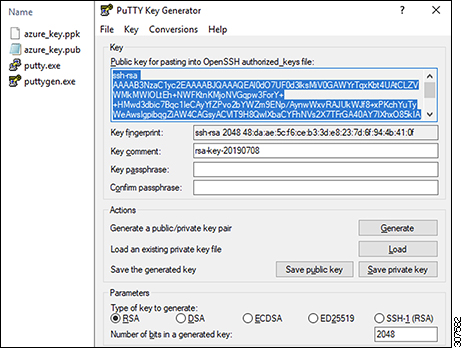
Move your cursor around the blank area to generate random characters for a public key. 
|
|
Step 5 |
Save the public key. |
|
Step 6 |
Save the private key. |


 Feedback