Upgrade CUCM/CUC/CUPS with Prime Collaboration Deployment
Available Languages
Contents
Introduction
This document describes how to upgrade Cisco Unified Communications Manager/Cisco Unity Connection/Cisco Unified Presence Server (CUCM/CUC/CUPS) with Prime Collaboration Deployment (PCD).
Prerequisites
Requirements
There are no specific requirements for this document.
Components Used
The information in this document is based on these software and hardware versions:
- CUCM Release 10.0
- PCD Release 10.5
The information in this document was created from the devices in a specific lab environment. All of the devices used in this document started with a cleared (default) configuration. If your network is live, make sure that you understand the potential impact.
Background Information
Cisco PCD is an application designed to assist in the management of Unified Communications applications. It allows the user to perform tasks such as migration of older software versions of clusters to new virtual machines, fresh installs, and upgrades on current clusters.In summary automates upgrade and migration task.
This document is focused on the upgrade task on PCD Release 10.5.
Supported Releases for the Upgrade Task on PCD Version 10.5
These include releases for the upgrade task on the Upgrade Application Server or Install COP files:
- Cisco Unified CM Releases Supported: 8.6(1-2), 9.0.(1), 9.1(1), 9.1(2), 10.x
- Cisco Unified Presence (CUP) Releases Supported: 8.6(3), 8.6(4), 8.6(5)
- Cisco Unified CM - IM and Presence Releases Supported: 9.0(1), 9.1(1), 10.x
- Cisco Unified Contact Center Express Releases Supported: 9.0(2), 10.x
- Cisco Unity Connection Releases Supported:
- From 8.6(x) to 8.6(x)
- From 8.6(x) to 9.x
- From 9.x to 9.x
- From 10.0(1) to 10.x
Configure
Complete these steps in order to configure your server:
- In order for the application servers in the cluster to be upgraded, ensure that the Platform Administrative Web Service (Release 9.x or later) or Platform Simple Object Access Protocol (SOAP) Services (Release 8.6) runs on that server.

- From a Linux shell, enter sftp adminsftp@<Cisco Prime Collaboration Deployment server> and then provide the password (this is the same in both the CLI and the GUI).
- Change the directory to the upgrade directory. For example, from a Linux shell, enter cd upgrade and press Return.
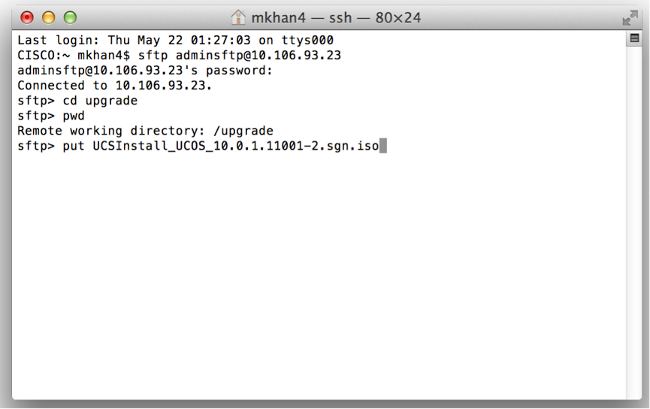
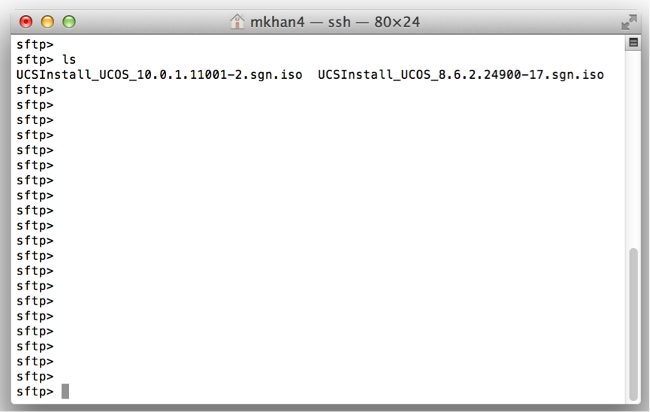
- Upload the ISO file or COP file. For example, enter put UCSInstall_UCOS_10.0.x.xxx.sgn.iso.
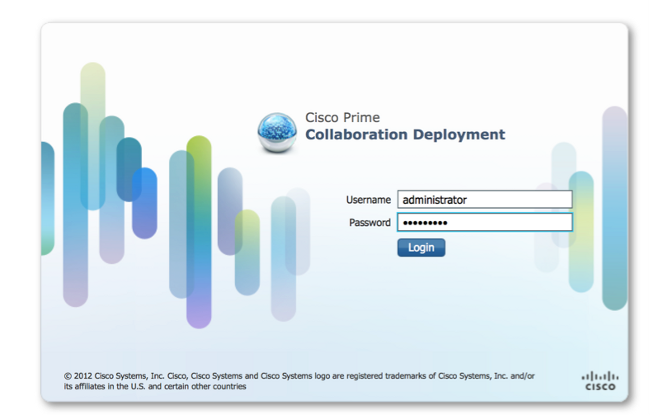
- Log into the PCD administration page.
- Choose Inventory > Clusters from the menu of the Cisco PCD application in order to access the Clusters page.

- Click Discover Cluster at the top of the Clusters page in order to discover current clusters.

The Discover Cluster wizard appears.
- Under Step 1 of the wizard, enter the required information and click Next.
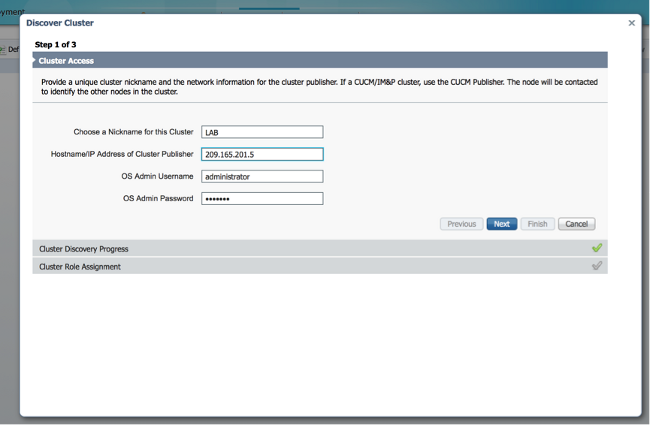
In the process of discovery, a COP file (ciscocm.ucmap_platformconfig.cop) is installed automatically on the active partition of all nodes in the cluster. This COP file is used strictly for the cluster discovery process and does not otherwise impact the call manager.
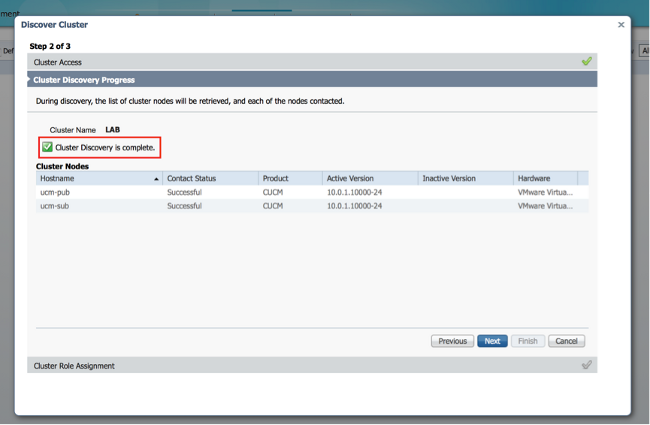
- Under Step 2 of the wizard, Cisco PCD generates a list of cluster nodes from the publisher's server inventory. This might take several minutes to complete. Once the list has been completely generated, the "Cluster Discovery Process is complete." message appears. Once complete, click Next to move on to Step 3 of this wizard.
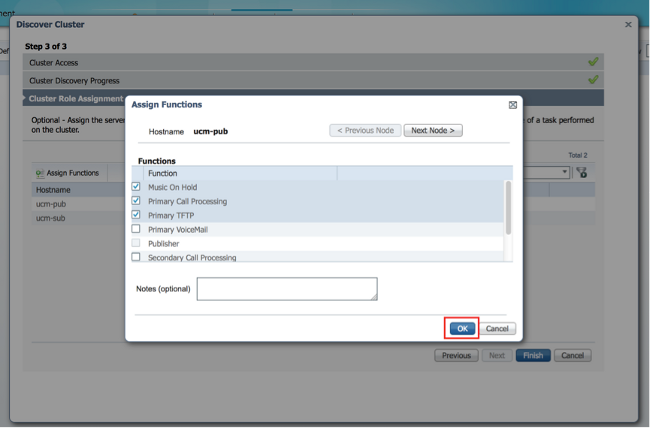
- Click the Assign Functions button in order to assign functions (optional) to each of the cluster nodes. The Assign Functions dialog box appears. Once you have assigned all the functions you wish to assign, click OK.
- Click Finish.
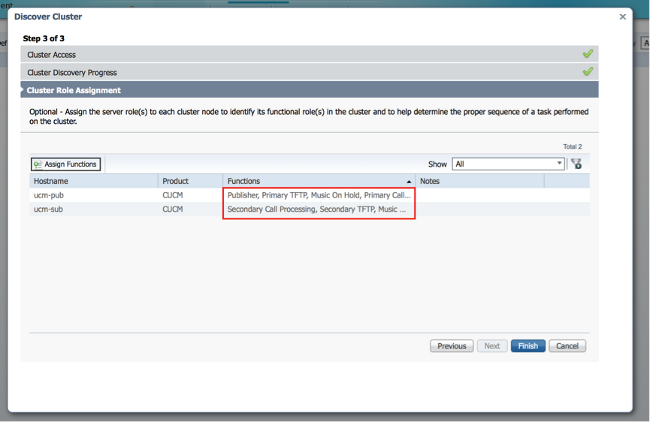
The cluster appears on the Clusters page, and shows the Cluster Name, Product and Version, and a Cluster Type of "Discovered". Discovery Status should list "Successful".

- Choose Tasks > Upgrade from the main menu.
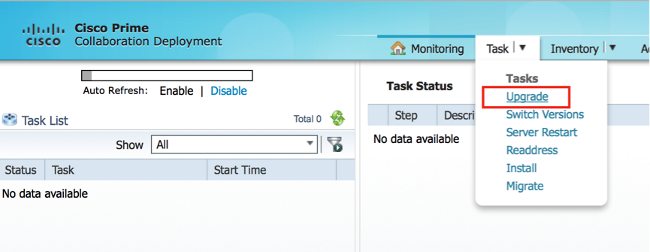
- Click Add Upgrade Task.
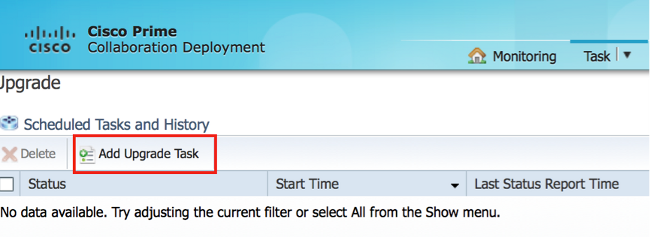
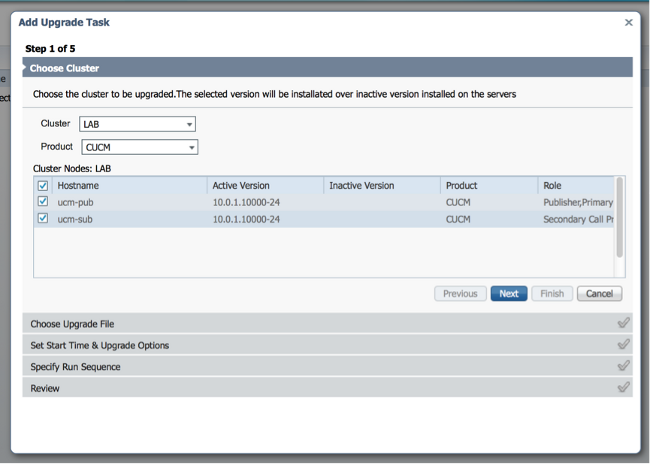
The Add Upgrade Task wizard displays.
- From the Cluster drop-down list and the Product drop-down list, choose the cluster and product on which the nodes are to be upgraded. Check the Cluster Nodes check boxes that are part of the upgrade from the list of nodes. Click Next.
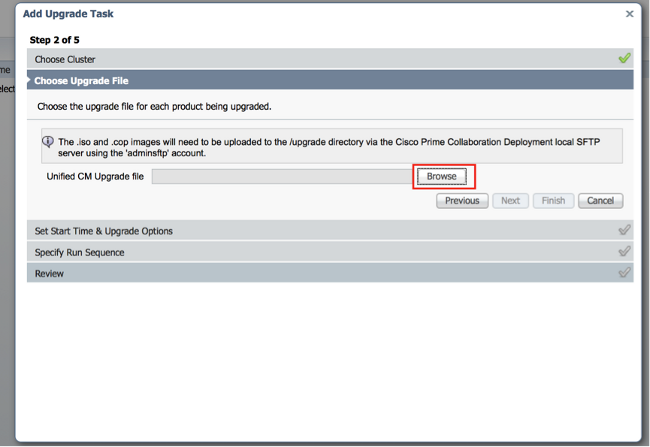
- Click Browse in order to select the upgrade files from the file server.
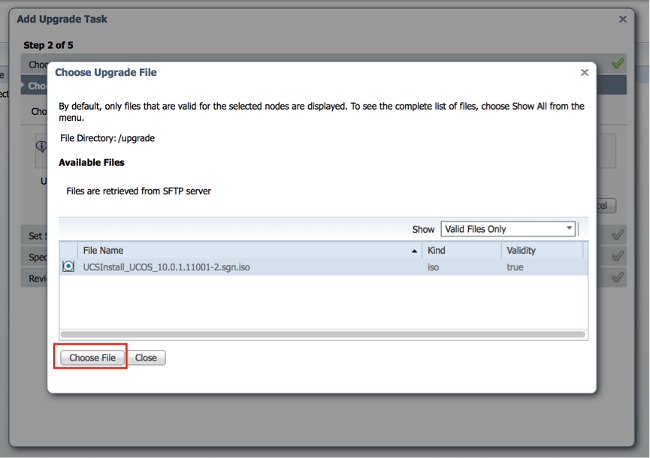
- Click Choose File and Click Next.
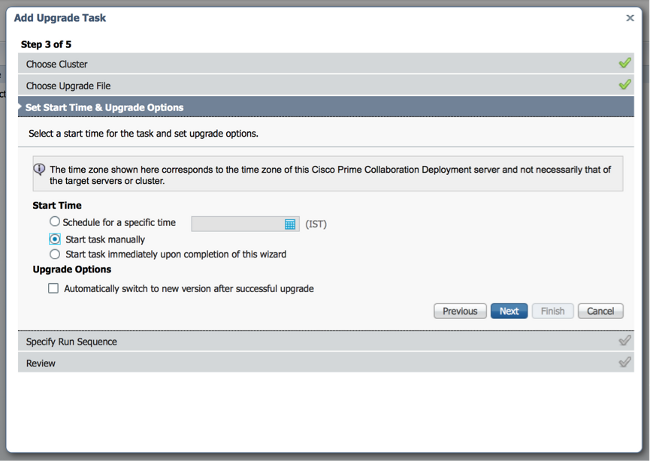
- You have several options to schedule upgrades. Click the radio button for the appropriate option. In this example, "Start task manually" was selected. Click Next.
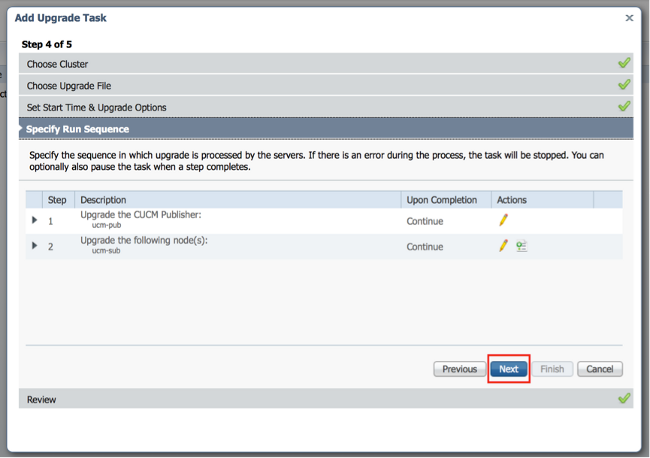
- [Optional] Specify the sequence of steps to complete the task. If this is not specified, it uses the default option.
- Click Next.
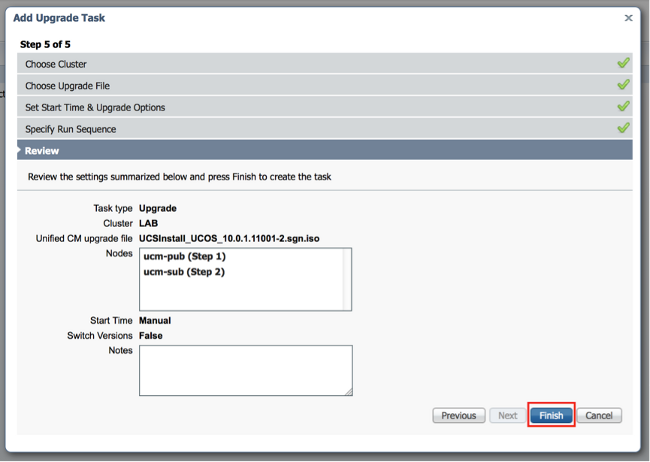
- Use the Review section in order to verify the details of the task you created. You can add notes for the task if required. The notes are saved with the task and are visible if the task is edited before completion. Click Finish in order to schedule the task.
- Click Start task manually in order to keep the task in a manual start.

Verify
Use this section in order to confirm that your configuration works properly.
- Click Monitoring on the main menu in order to view the Monitoring page.
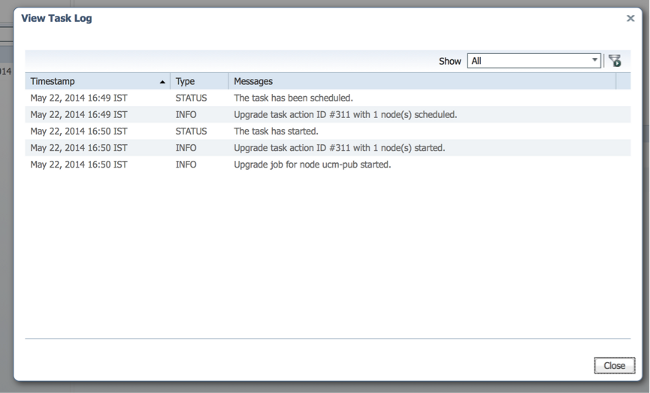
- Click View Log.

The View Task Log appears.
Troubleshoot
This section provides information you can use in order to troubleshoot your configuration.
The success or failure of each step in the upgrade task depends on the PCD server being able to receive a response from every server in the cluster in the upgrade process. In case the upgrade fails, verify the COP file installation status directly on the Unified Communications node. A further step ahead is to collect Install and upgrade logs and check the reason for failure.
The install logs can also be collected from the CLI with the file get install /* command.
Additionally, you can obtain PCD Main Application logs with the file get activelog tomcat/logs/ucmap/log4j/* command.
Contact Cisco
- Open a Support Case

- (Requires a Cisco Service Contract)


 Feedback