Configure User Accounts on the RV130 and RV130W Router
Available Languages
Objective
The objective of this article is to show you how to configure the administrator and guest users on the RV130 and RV130W Router.
The RV130 and RV130W Router provides user accounts in order to view and administer settings. Users can be from different groups or logical groups of Secure Sockets Layer (SSL) Virtual Private Networks (VPNs) that share the authentication domain, Local Area Network (LAN) and service access rules, and idle timeout settings. User management defines which type of users can utilize a certain type of facility and how that can be done.
Applicable Devices
- RV130
- RV130W
Software Version
- 1.0.3.22
Configure User Accounts
Account Activation
Step 1. Log in to the web-based utility of the router and choose Administration > Users.

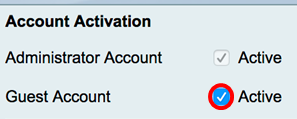
Step 2. (Optional) In the Account Activation area, check the Active Guest Account check box to enable read-only access to the router.
Note: The Administrator Account is enabled by default and cannot be unchecked. The Administrator account privileges are to read and write configurations and settings.
Administrator Account Settings
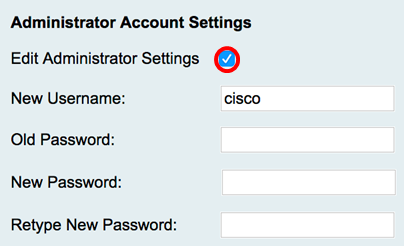
Step 1. Check the Edit Administrator Settings check box to enable the fields for configuration.
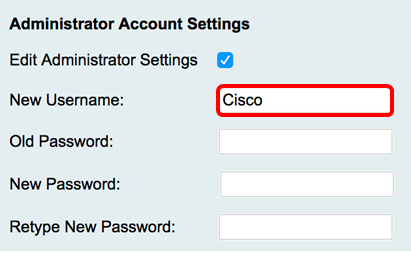
Step 2. In the New Username field, enter a new user name for the administrative privilege user. The default is cisco.
Note: For this example, Cisco is used.
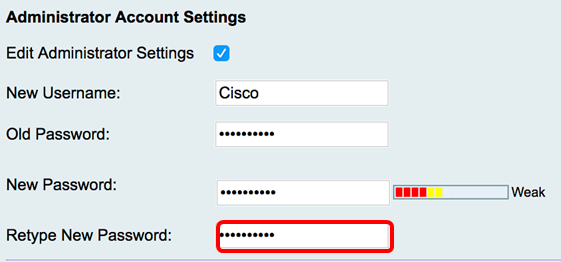
Step 3. In the Old Password field, enter the old password associated with the administrator privilege account.

Step 4. In the New Password field, enter a new password for the account. A password strength meter will appear on the right side of the field and determine the strength of the password based on the length and characters used.

Step 5. In the Retype New Password field, retype the password entered.
Step 6. Click  .
.
You should now have successfully configured the Administrator Account Settings.
Guest Settings
Step 1. Check the Edit Guest Settings check box to enable the fields for configuration.
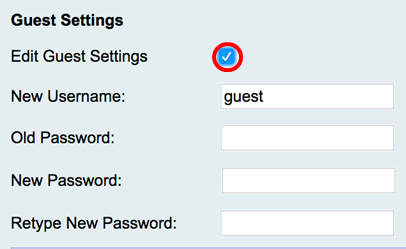
Step 2. In the New Username field, enter a new user name for the guest privilege user. The default is guest.
Note: For this example, Disco is used.
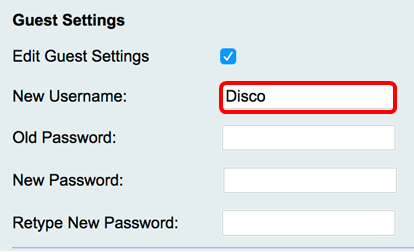
Step 3. In the Old Password field, enter the old password associated with the guest privilege account.

Step 4. In the New Password field, enter a new password for the account. A password strength meter will appear on the right side of the field and determine the strength of the password based on the length and characters used.

Step 5. In the Retype New Password field, retype the password entered.

Step 6. Click  .
.
You should now have successfully configured the Guest Account Settings.
Import Local Users
Step 1. In the Import User Name & Password area, click Browse... and choose the appropriate file. This must be a Comma-separated values (CSV) file. To download the template, skip to Step 2.
Note: For this example, User_Import_Templete (2).csv is used.

Step 2. (Optional) To download the template, click Download.

Step 3. Click Import.

A message will appear in the top portion of the page that the configuration settings have been saved successfully.

Step 4. Click Save to save the settings.

You should now have successfully imported a list of local users on the RV130 or RV130W.
Revision History
| Revision | Publish Date | Comments |
|---|---|---|
1.0 |
13-Dec-2018 |
Initial Release |
 Feedback