Introduction
This article describes the process of removing a product instance via Cloud Connect. You need to remove a product instance when the device no longer consumes any licenses or when you are replacing hardware and removing it from the network.
Prerequisites
Requirements
Before you start, ensure that you:
Components Used
The information in this document was created from Catalyst 9300 with IOS version 16.12.05b in a specific lab environment. If your network is live, ensure that you understand the potential impact of any command.
Removing a Product Instance (Cloud Connect)
Step 1:
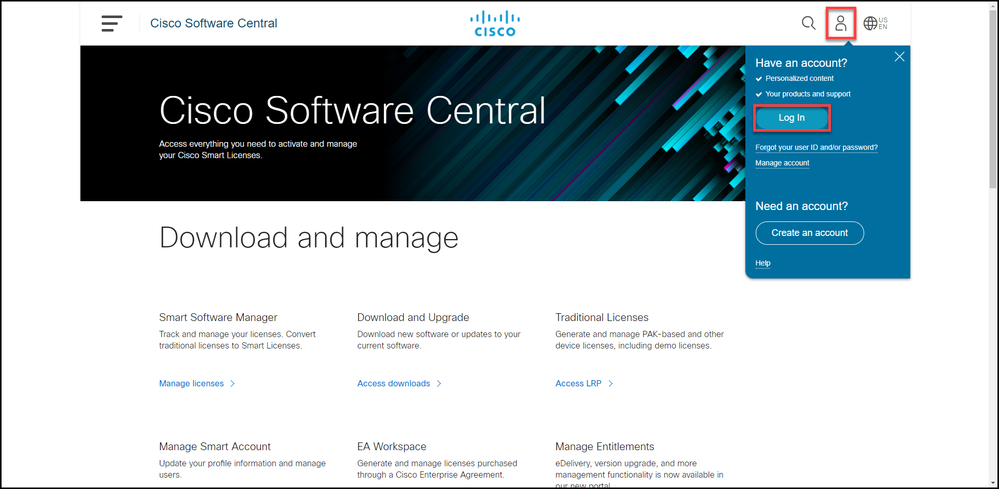
Go to Cisco Software Central and log in with your Cisco.com account.
Step 2:
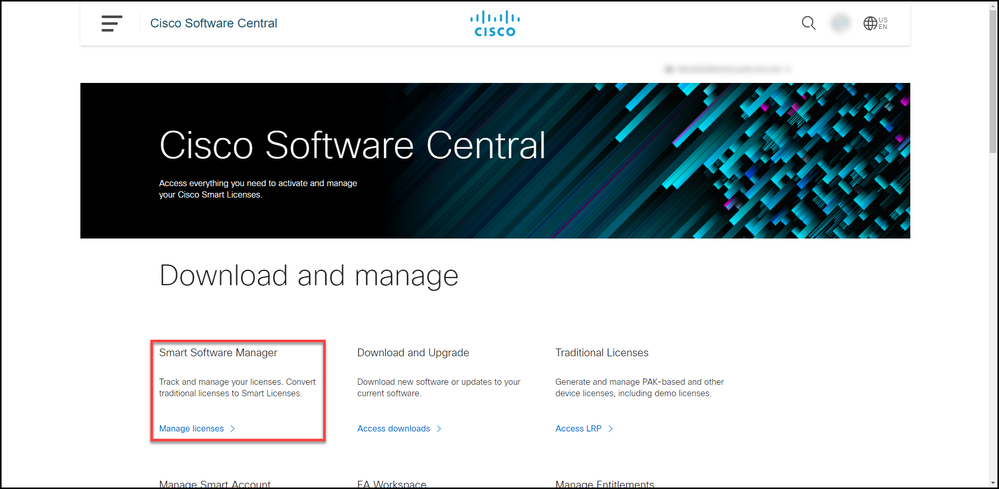
In theSmart Software Managersection, clickManage licenses.
Step 3:
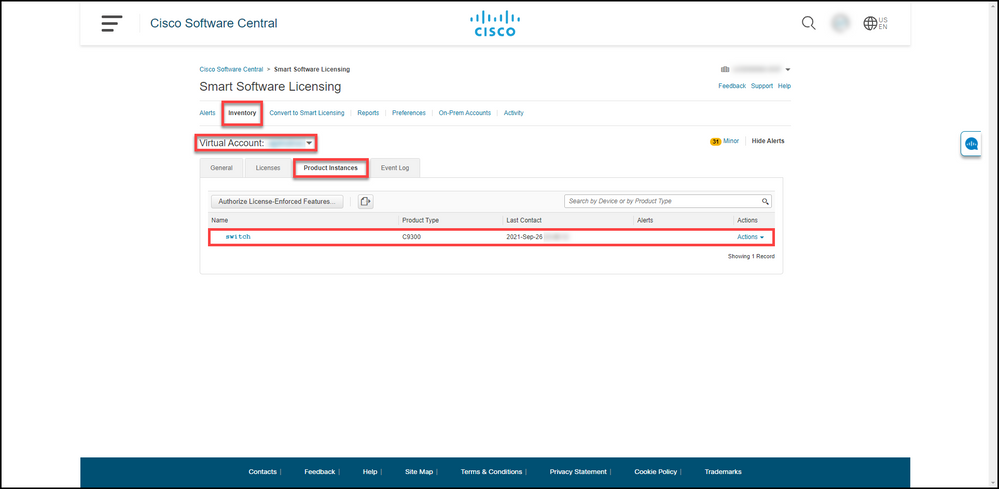
On the Inventory tab, select your Virtual account, clickProduct Instances, search by device or product type, and then press Enterto find your device.
Step result: The system displays the product instance of your device.
Step 4:
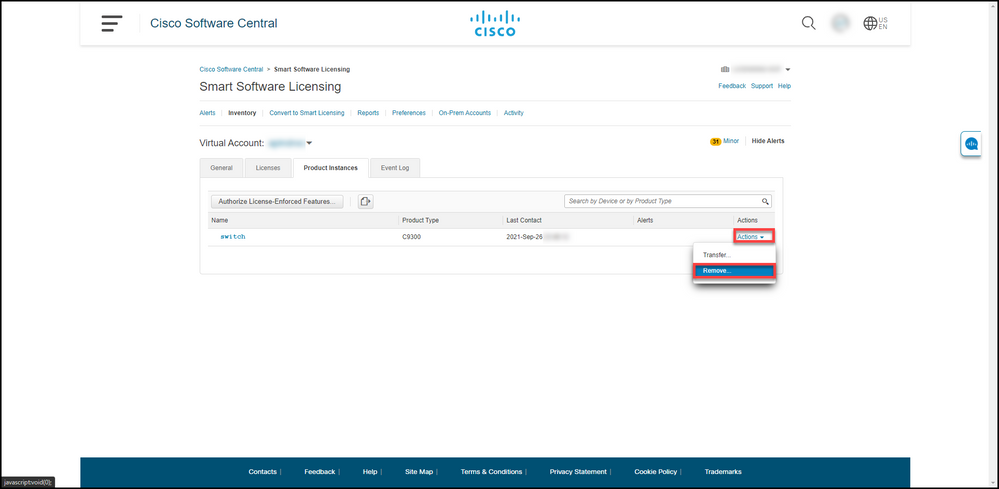
In theActionscolumn, click theActionsdrop-down, and then selectRemove.
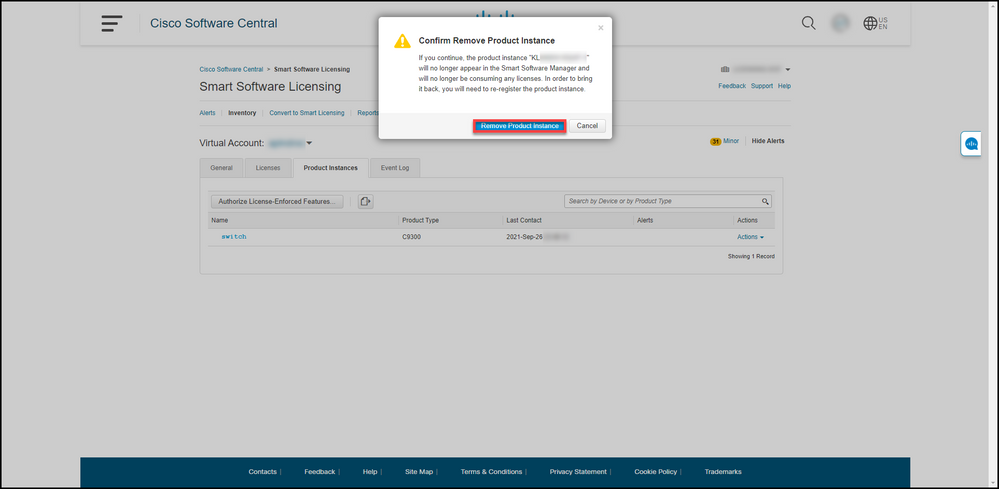
Step result: The system displays theConfirmRemove Product Instancewarning message.
Step 5:
In theConfirmRemove Product Instancewarning message, click the Remove Product Instance button.
Step result: The system removes the product instance from the Product Instance table in Cisco Smart Software Manager (CSSM) and the product instance no longer consumes any licenses. If you only remove the product instance from CSSM, then the product instance of your device gets re-populated in CSSM when the next synchronization occurs. To stop the synchronization, you need to also deregister the device on one of the clients or console. Refer to Step 6.
Step 6:
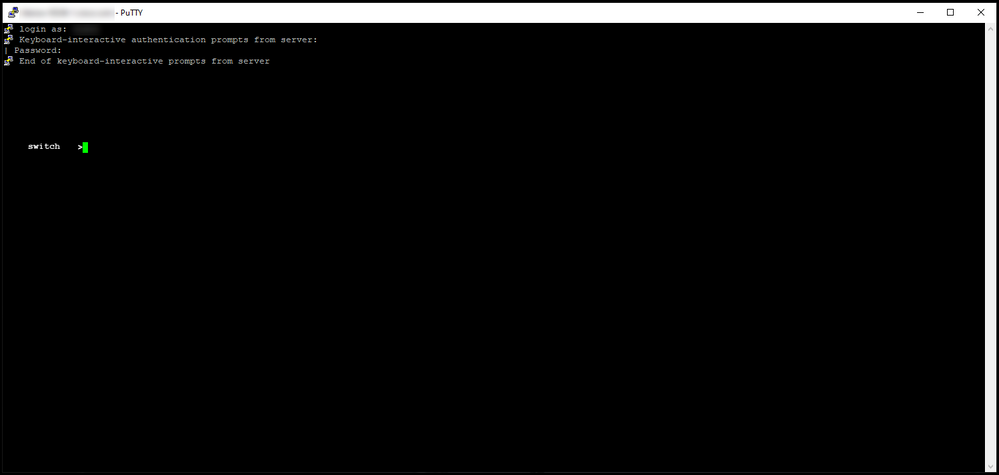
Log in to the internetwork operating system (IOS) of the device with the login and password by using one of the clients or console.
Step result: You enter the user EXEC mode of the IOS.
Step 7:
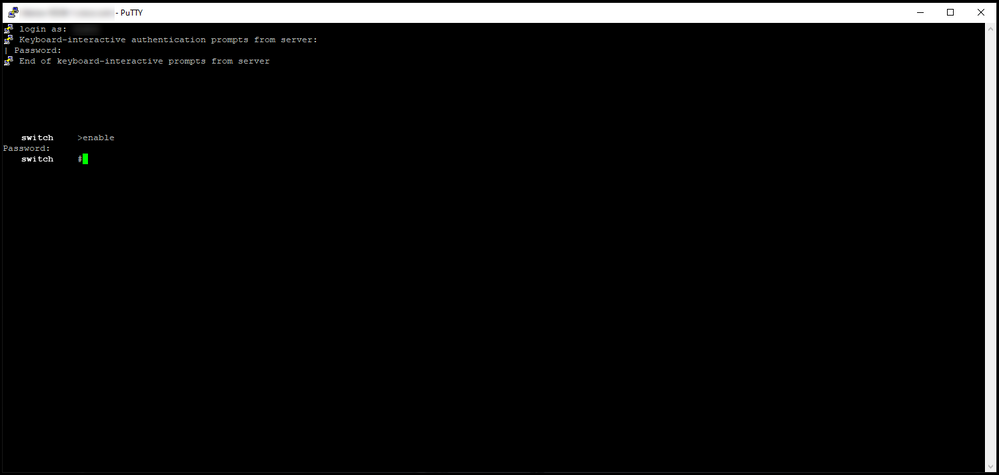
In the user EXEC mode, enter theenablecommand, and then type the password to access the privileged EXEC mode.
Step result: You enter the privileged EXEC mode.
Step 8:
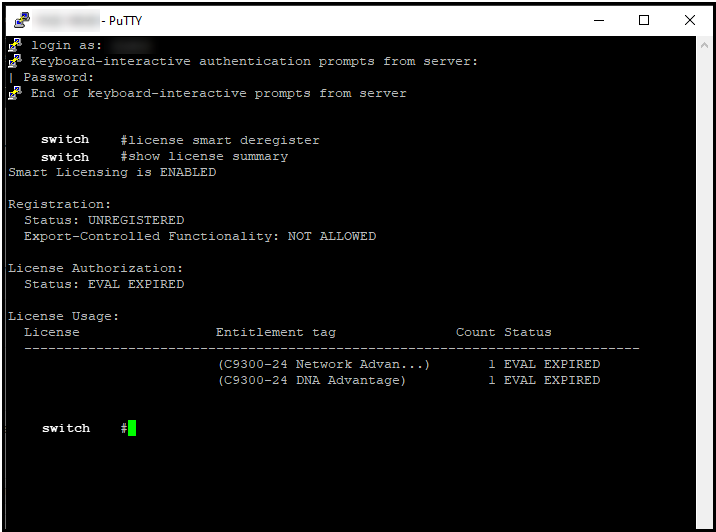
In the privileged EXEC mode, enter thelicense smart deregistercommand.
Note: To verify that the system successfully executed the command, you can enter the show license summary command. If the deregistration was successful, the system displays the registration status as unregistered.
Step result: The system deregisters the device.
Verify
Use this section to confirm that you successfully removed your product instance.
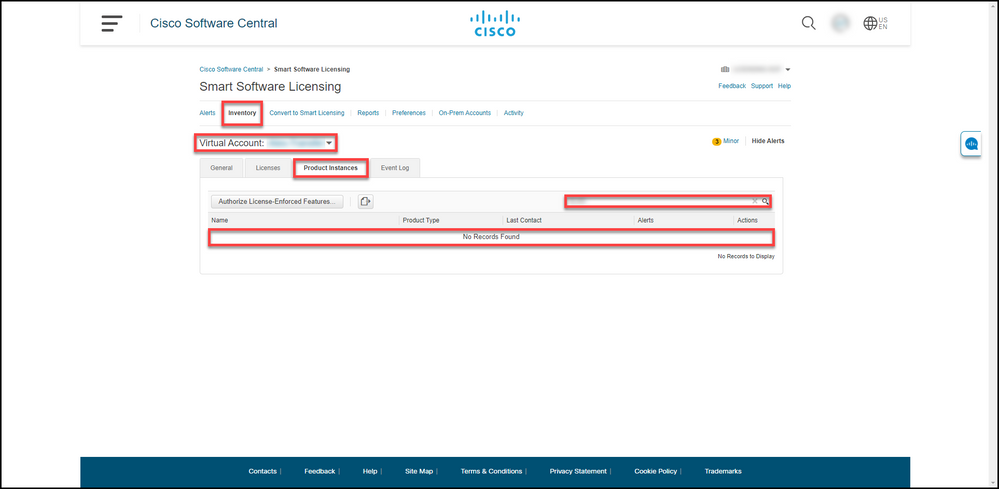
Verification Step:On theInventorytab, select your Virtual account, clickProduct Instances, search by device or product type, and then pressEnter.
Step result: The system no longer displays the product instance that you removed.
Troubleshooting
If you experience an issue during the process of removing a product instance from a Smart account, open a case inSupport Case Manager (SCM).
Related Information
How to Register a Device with a Smart Account (Cloud Connect)


 Feedback