Introduction
This document will guide network administrators through the installation of Cisco CMX 10.5 image on Cisco 3375 MSE appliance. This process also includes the instructions on how to set up Cisco Integrated Management Controller (CIMC) that is required for the installation.
It is not possible to upgrade from CMX 10.2, 10.3 or 10.4 to 10.5. A fresh new installation is required. If you try to upgrade directly, the following error message will pop up:
"MD5 did not match, looks like the cmx file is corrupt. Please download fresh and try again."
Upgrade from 10.5 version to a newer version (e.g. from 10.5.0-206 to 10.5.1-26) can be done in the CMX web interface under System->Settings->Upgrade
In order to avoid hitting the CSCvn64747 when installing the 10.5.1-26, it is recommended to first install the 10.5.0 and then upgrade to 10.5.1-26
Prerequisites
Requirements
Cisco 3375 MSE appliance
Cisco CMX 10.5 ISO file (downloaded from https://software.cisco.com)
Components Used
Components used in this guide:
- Cisco 3375 with CIMC version 4.0(1a)
- Cisco Connected Mobile Experiences version10.5.1-27
- MacBook running MacOS Mojave and Google Chrome as Web Browser
Installation
CIMC configuration and KVM launch
Step 1 Plug in monitor into the VGA port and keyboard into the USB port at the back of the appliance. Power on the machine. Press F8 during the boot screen to enter CIMC configuration utility:

Figure 1. Boot screen
Step 2 Configure the CIMC parameters, press F10 to save and wait 45 seconds for changes to be applied. Press F5 to refresh and verify the settings have been applied. Click ESC to exit.

Figure 2. Cisco IMC Configuration Utility
To get access to CIMC from your network, connect the MSE 3375 to the switch via management port located on the back side of the device:

Figure 3. Management port
Step 3 In the Chrome Web Browser, go to http://<cimc_ip_address>. When logging in for the first time, the default username will be admin. The default password is password.If you are running CIMC version 4.0(1a), the login screen will look like this:

Figure 4. CIMC login screen
Step 4 Once you log in, press Launch KVM Console in the top right corner. CIMC v4 supports both HTML and Java based KVM. Java version 1.6.0_14 or later is required to run Java based KVM. This tutorial will be using an HTML one.

Figure 5. Launching KVM console
If pop-ups in your browser are blocked, make sure to press on a link to get forwarded:

Figure 6. Pop-up being blocked
Step 5 Once the KVM has launched, press on Virtual Media and Activate Virtual Devices. After virtual devices are activated, the dropdown menu will expand and additional options will show up. Press MAP CD/DVD in order to map the CMX 10.5 ISO file:
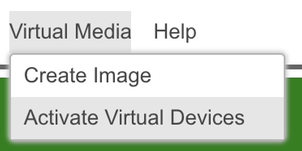
Figure 7. Activate Virtual Devices

Figure 8. Map CD/DVD
Step 6 Navigate to and select the downloaded CMX image and press Map Drive. Once pressed, the Virtual Media menu will expand again to show what image is mapped:

Figure 9. Mapping the drive
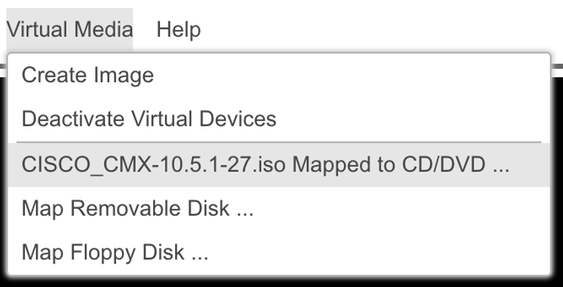
Figure 10. Mapped CMX image
Step 7 After checking the image is properly attached, go to Power tab and select Reset System (warm boot) to reset the appliance. During the boot process press F7 to start the installation of the mapped image:

Figure 11. Restarting the appliance

Figure 12. CIMC boot selection menu
CMX image installation
Step 1 Select Install CMX using current console to continue the installation. Once selected, the installation scripts will start loading:
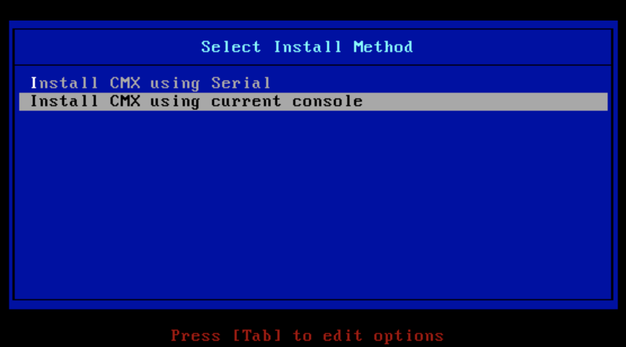
Figure 13. Continue installation in the current KVM
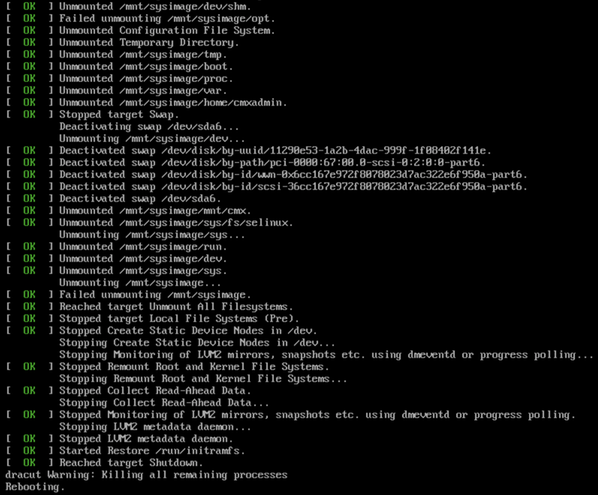
Figure 14. CentOS installation script trace
Step 2 Once the installer starts, it will ask for a confirmation. Type in yes and then press Enterto proceed with the installation. "Yes" might appear in the left upper corner:

Figure 15. Prompt to continue the installation might not be aligned
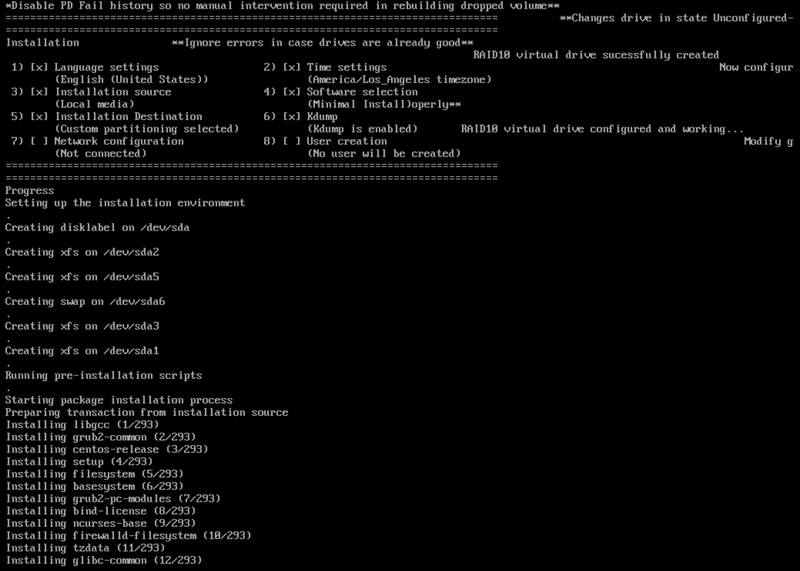
Figure 16. Once Enter is pressed, the installation will start
Step 3 The CMX installation process should take around 20-30 minutes:

Figure 17. Installation takes 20-30 minutes
CMX initial setup
Step 1 Once the installation is complete, the machine is going to automatically reboot. This time, do not press any key while booting.
Step 2 Log into CMX using the default credentials (cmxadmin/cisco) as displayed on top:

Figure 18. Logging in for the first time
Step 3 You will be prompted to change password for root and cmxadmin users. Password specifications must be met:

Figure 19. Changing root and cmxadmin passwords
Step 4 Configure the network parameters. Gateway and DNS need to be reachable for network settings to be applied. In case they are not, you will be prompted to configure network parameters again. If they are reachable, keepalive services will be restarted. During this process, DO NOT press Enter!
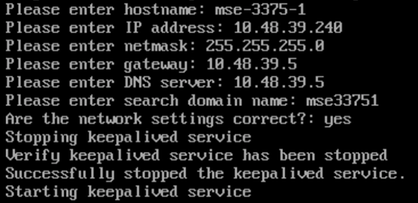
Figure 20. Network parameters setup
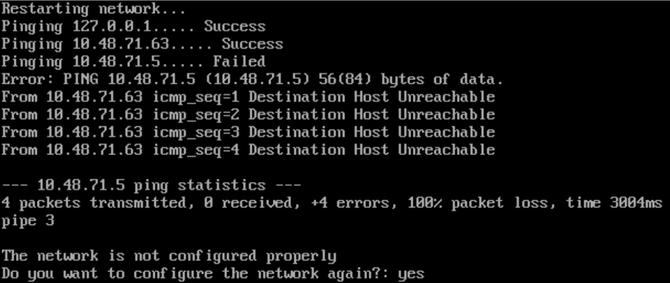
Figure 21. If gateway is unreachable, network configuration prompt will come up
Step 5 After keepalive services are restarted, the installation will prompt to enter NTP server IP address, region and country. In case the NTP is not used, the prompt will skip to time zone and time/date configuration:

Figure 22. NTP configuration
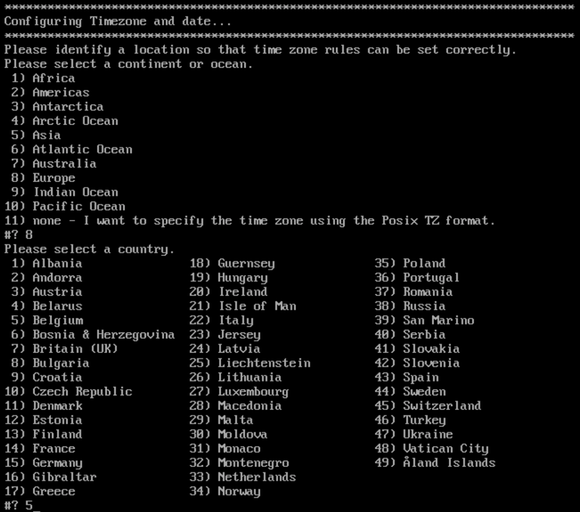
Figure 23. Timezone and date configuration
Step 6You will be prompted to confirm entered information. If you select No, you will be taken back to the NTP configuration prompt:

Figure 24. NTP configuration
Step 6 Next prompt will ask you to select if you want disk encryption. KVM setup ends here and the remaining configuration will be done through CMX web interface (GUI):
Disk encryption is one of the requirements for GDPR compliance. Full information about CMX GDPR compliance can be found on this link.

Figure 25. Disk encryption prompt
Once encrypted, the drive cannot be unencrypted.
CMX node installation
Step 1 Access the CMX GUI trough https://<cmx_ip_address>:1984. Port 1984 is only used during the initial setup or upgrade. Log in using cmxadminuser and the password that was previously configured:

Figure 26. CMX GUI node installation login
Step 2 Select the CMX node type (Location or Presence). Note that this cannot be changed afterwards. After selecting, wait for the configuration and startup to finish:

Figure 27. CMX node type selection

Figure 28. Startup process
Step 3 Press Please click to continue setup:

Figure 29. Click to continue setup
Step 4 Installation process is now done. You will be redirected to the setup assistant to finish the node's specific configuration (maps import, pairing with wireless controller and mail server setup):
Once the setup is complete, make sure to clear browser cookies and cache. Not doing this might result in some CMX web pages being blank.
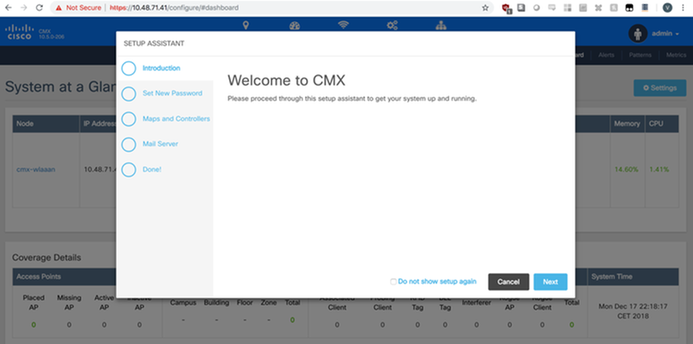
Figure 29.CMX setup assistant
