Use Microsoft Outlook with Cisco Unified CallManager Express
Available Languages
Contents
Introduction
This document describes the procedure to use Microsoft Outlook with Cisco Unified CallManager Express. It demonstrates the phone configuration in Cisco CallManager Express, the installation of Cisco CallManager Express Telephone Service Provider and the CiscoIOSTspLite driver on a personal computer (PC), and the dialing of a called party by Microsoft Outlook in representation of a phone controlled by Cisco CallManager Express.
Prerequisites
Requirements
Ensure that you meet these requirements before you attempt this configuration:
-
Cisco Unified CallManager Express
-
Microsoft Office Outlook
Components Used
The information in this document is based on these software and hardware versions:
-
Cisco Unified CallManager Express version 4.x
-
Microsoft Office Outlook 2003
The information in this document was created from the devices in a specific lab environment. All of the devices used in this document started with a cleared (default) configuration. If your network is live, make sure that you understand the potential impact of any command.
Network Diagram
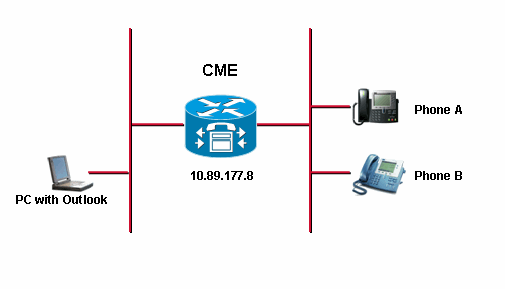
This document uses this network setup, see Figure 1:
-
Cisco Unified CallManager Express that runs on Cisco 3845
-
Two IP Phones controlled by the Cisco CallManager Express
-
One Personal Computer that runs Microsoft Windows XP and Microsoft Office Outlook
Conventions
Refer to the Cisco Technical Tips Conventions for more information on document conventions.
Background
The purpose of this document is to complete these tasks:
-
Install the Cisco Unified CallManager Express Telephony Service Provider on a PC that runs Window XP Professional.
-
Install the CiscoIOSTspLite driver on a PC that runs Window XP Professional.
-
Use Microsoft Outlook in order to control one IP phone registered to Cisco Unified CallManager Express and dial another phone through Microsoft Outlook.
Installation and Configuration
Example Configuration
Before you start the configuration, it is assumed that Cisco Unified CallManager Express is fully tested and works properly. These two phones are controlled by this Cisco Unified CallManager Express. These are the configurations of these two phones:
-
Phone A
!--- Line 1 for Phone A

 ephone-dn  2
 number 1000
 label 1000
 preference 1
 call-forward busy 9999
 call-forward noan 9999 timeout 10
 no huntstop

!--- Line 2 for Phone A

 ephone-dn  4
 number A3005
 label A3005
 name Intecom from Rob
 intercom A3006

!--- Line 3 for Phone A

 ephone-dn  6 2000 label "Paging System"
 number 61720
 pickup-group 5001
 label 61720
 description 5137426172
 call-forward all 7000'
 call-forward busy 7000
 call-forward noan 7000 timeout 10
 night-service bell

!--- Phone A Configuration

 ephone  3
 description 1000
 username "ksaxon" password test
 mac-address 000A.8A67.5313
 type 7960
 keep-conference endcall
 button  1:2 2:4 3:6
-
Phone B
!--- Line 1 for Phone B

 ephone-dn  8
 number 7970
 label  7970
 call-forward busy 9999
 call-forward noan 9999 timeout 10

!--- Line 2 for Phone B

 ephone-dn  10
 number 8970
 label 8970

!--- Line 3 for Phone B

 ephone-dn  12
 number 9970
 label 9970

!--- Line 4 for Phone B

 ephone-dn  14
 number A3006
 label A3006
 name Intercom from Rob
 intercom A300510.C6E2.8F2D

!--- Phone B Configuration

 ephone  7
 description 7971
 mac-address 0011.92BA.1B12
 type 7971
 button  1:8 2:10 3:12 4:6
Step-by-Step Instructions
Complete these steps:
-
Install the Cisco Unified CallManager Express Telephony Service Provider:
-
Run CiscoUnifiedCMETSPSetup201.exe. The Cisco Unified CallManager Express TSP 2.0 Setup Wizard appears. See Figure 2.
Figure 2: Cisco Unified CME TSP 2.0 Setup Wizard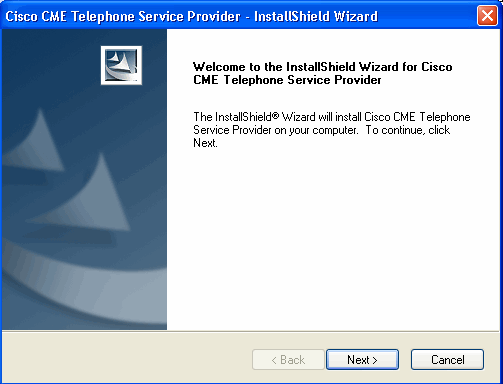
-
Click Next. The License Agreement window appears. See Figure 3.
Figure 3: License Agreement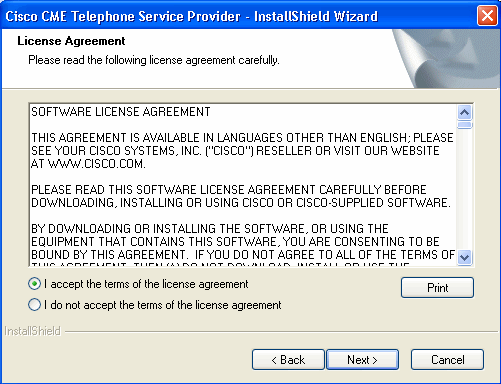
-
Click the I accept the terms of the license agreement radio button, and click Next. The Customer Information window appears. See Figure 4.
Figure 4: Customer Information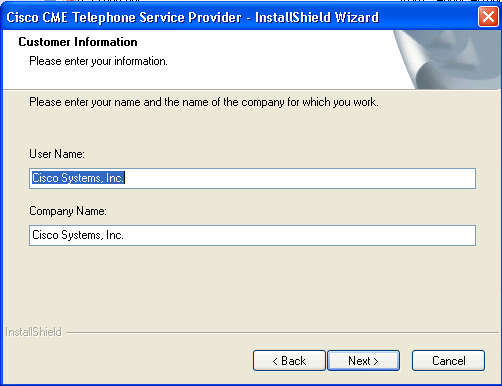
-
Fill the User Name and Company Name fields.
-
Click Next, and the Setup Type window appears. See Figure 5.
Figure 5: Setup Type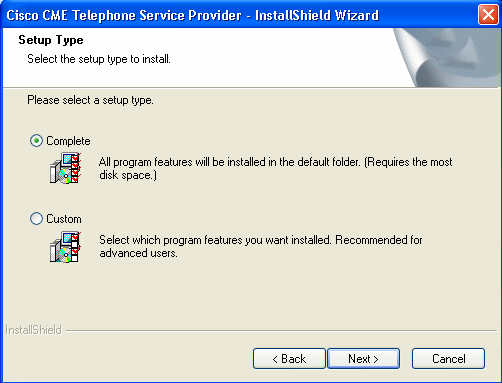
-
Click the Complete radio button, and click Next. The Ready to Install the Program window appears. See Figure 6.
Figure 6: Ready to Install the Program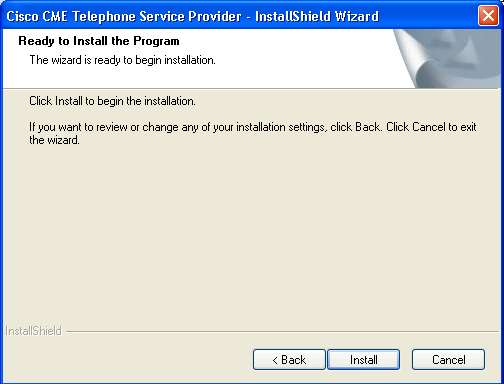
-
Click Install. The Welcome to Cisco CME TSP Setup Wizard window appears. See Figure 7.
Figure 7: Welcome to Cisco CME TSP Setup Wizard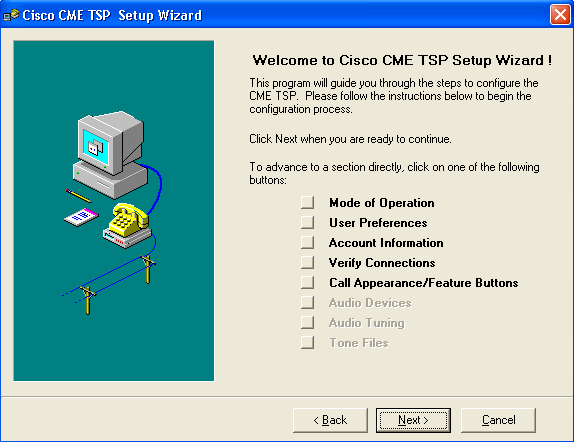
-
Click Next. The Mode of Operation window appears. See Figure 8.
Figure 8: Mode of Operation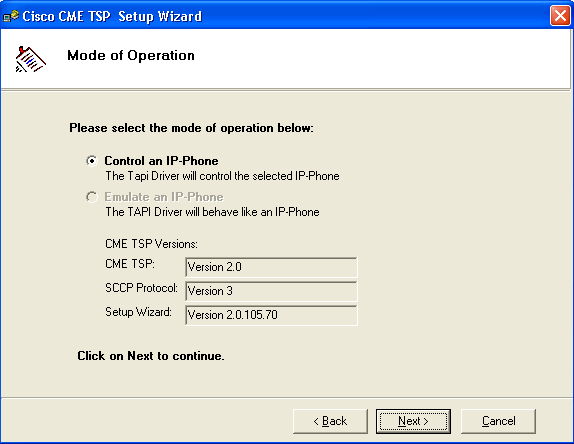
-
Click Control an IP-Phone, and click Next. The User Preferences window appears. See Figure 9.
Figure 9: User Preferences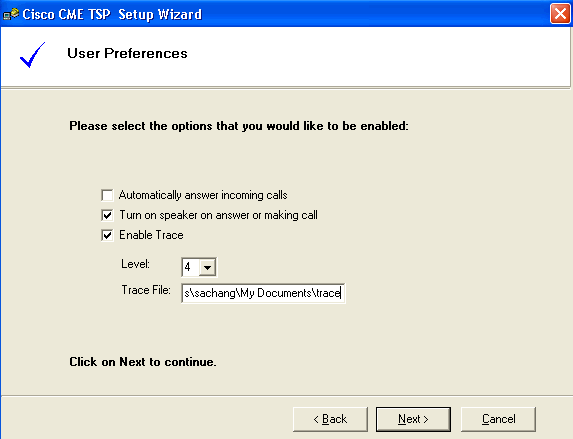
-
Check Turn on speak on answer or making call and Enable Trace. Choose the trace level and enter the trace file path.
-
Click Next. The Account Information window appears. See Figure 10.
Figure 10: Account Information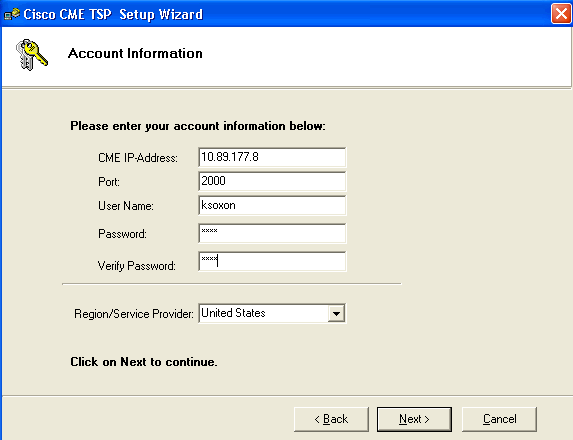
-
Enter the CME IP-Address, Port, User Name, Password and Verify Password.
-
Click Next. The Connections to CME window appears. See Figure 11.
Figure 11: Connections to CME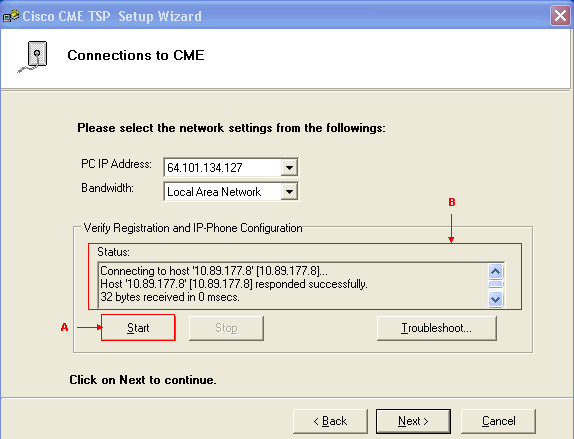
-
Choose the PC IP address and Bandwidth from their respective drop-down lists.
-
Click Start. See arrow A in Figure 11. Review all messages in the Status list box in order to verify if the PC successfully contacts the Cisco Unified CallManager Express. See arrow B in Figure 11. This represents a successful connection between the PC and the Cisco Unified CallManager Express. Based on the messages, the PC can successfully control one phone with three lines defined under the Cisco CallManager Express control.
Connecting to host '10.89.177.8' [10.89.177.8]...
Host '10.89.177.8' [10.89.177.8] responded successfully.
32 bytes received in 0 msecs.
Found Router : 10.89.177.8
Success : Registered user with 10.89.177.8
Found line : lineInst 1 dirNumber 1000 displayName 1000
Found line : lineInst 2 dirNumber A3005 displayName A3005
Found line : lineInst 3 dirNumber 6172 displayName 6172
Found line : lineInst 4 dirNumber
Found line : lineInst 5 dirNumber
Found line : lineInst 6 dirNumber
-
Click Next. The Call Appearance/Feature Buttons window appears. See Figure 12. It represents a specific phone with three lines configured which matches messages in the status list box in step 15.
Figure 12: Call Appearance/Feature Buttons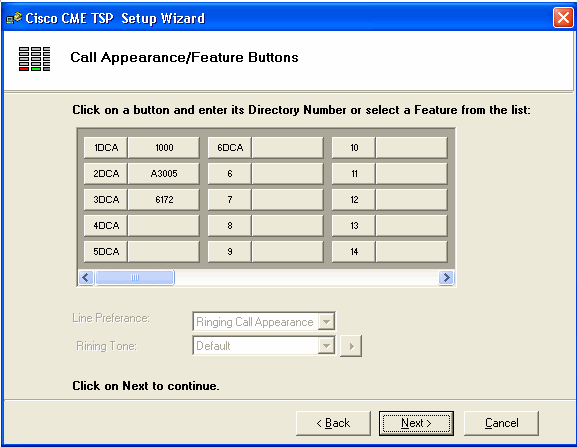
-
Click Next. The Saving Configuration Changes window appears. See Figure 13.
Figure 13: Saving Configuration Changes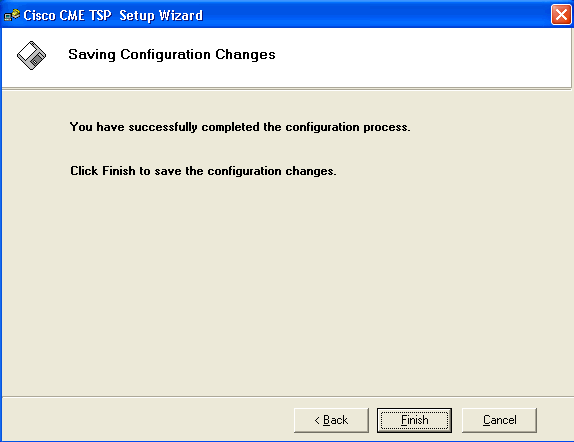
-
Click Finish.
-
Restart the PC.
-
-
Complete these steps in order to install the CiscoIOSTspLite driver
-
Run the the CiscoIOSTspLit1.3.exe. The Welcome to the InstallShield Wizard for CiscoIOSTspLite1.3 window appears. See Figure 14.
Figure 14: InstallShield Wizard for CiscoIOSTspLite1.3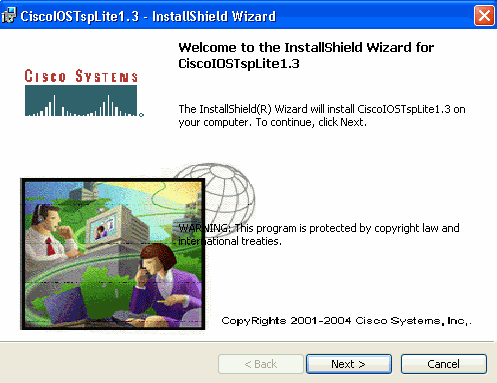
-
Click Next. The License Agreement window appears. See Figure 15.
Figure 15: License Agreement (CiscoIOSTspLite1.3)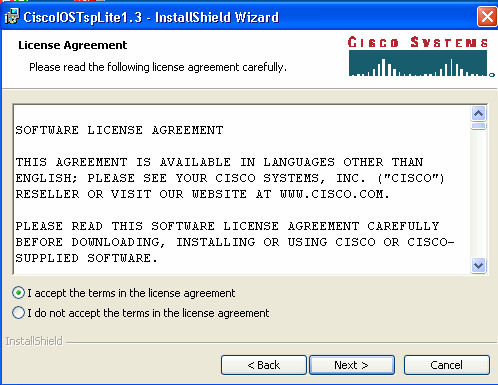
-
Click I accept the terms in the license agreement and, click Next. The Customer Information window appears. See Figure 16.
Figure 16: Customer Information (CiscoIOSTspLite1.3)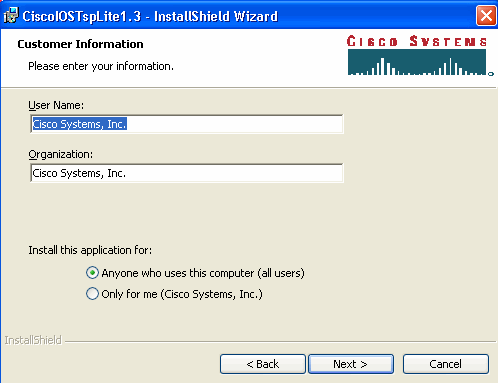
-
Fill the User Name and Organization fields. Click Next. The Ready to Install the Program window appears. See Figure 17.
Figure 17: Ready to Install the Program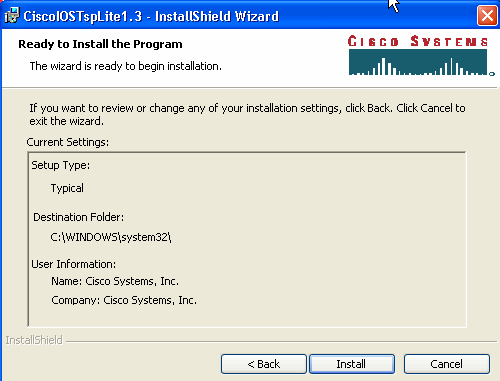
-
Click Install. The Cisco IOS Telephony Service Provider window appears. See Figure 18. The User Name and Password must match the User Name and Password, as shown in Figure 10.
Figure 18: Cisco IOS Telephony Service Provider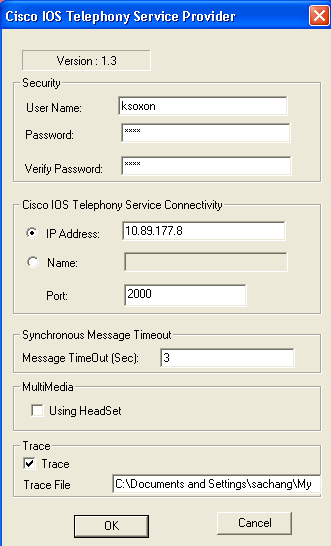
-
Click OK. The InstallShield Wizard Completed window appears.
Figure 19: InstallShield Wizard Completed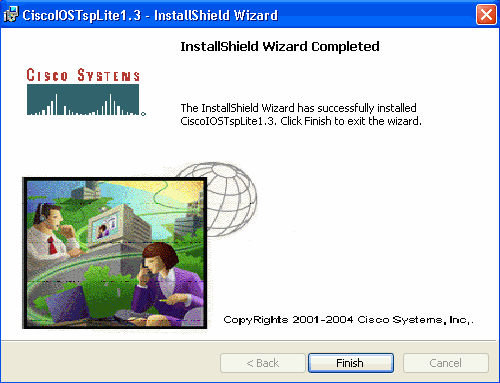
-
Click Finish. The Reboot window appears. See Figure 20.
Figure 20: Reboot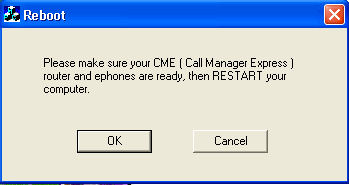
-
Click OK in order to reboot the PC.
-
Verify
You can log into Cisco Unified CallManager Express and issue the show ephone command. Figure 21 is an extraction of show ephone. It represents that the PC with an IP address of 64.101.134.165 controls ephone-3. The username is ksaxon and the status is registered .See arrow A in Figure 21.
Figure 21: Show Ephone 
The next step is to dial the contact with Microsoft Outlook in representation of the phone controlled by Cisco Unified CallManager Express:
-
Open Microsoft Outlook, and open the Contacts folder. See Figure 22.
-
Select a contact to call.
Figure 22: Contacts List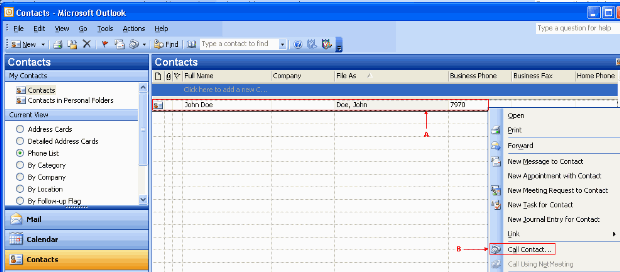
-
Right-click the selected contact. See arrow A in Figure 22. Then, choose Call Contacts from the drop-down list. See arrow B in Figure 22. The New Call window appears. See Figure 23. The End Call button is grayed out. See arrow B in Figure 23.
Figure 23: New Call - Start Call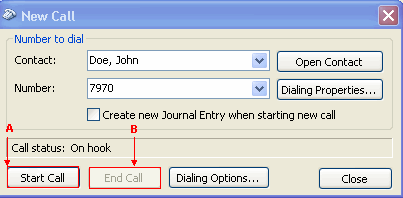
-
Click Start Call. See arrow A in Figure 23.
-
If the call succeeds, the Start Call button is grayed out. See arrow A in Figure 24.
Figure 24: New Call - End Call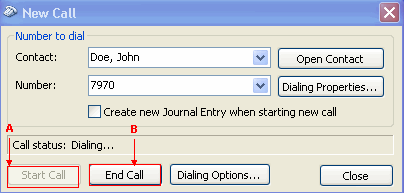
-
You can talk with the called party with the audio devices, such as speakers and headphones, on the PC.
-
Click End Call in order to terminate the call. See arrow B in Figure 24.
Troubleshoot
There is currently no specific troubleshooting information available for this configuration.
Related Information
Revision History
| Revision | Publish Date | Comments |
|---|---|---|
1.0 |
02-Jul-2007 |
Initial Release |
Contact Cisco
- Open a Support Case

- (Requires a Cisco Service Contract)


 Feedback