Introduction
This document describes the procedure to configure the speed dial button for a Cisco IP phone with Cisco CallManager.
Prerequisites
Requirements
Cisco recommends that you know how to create users and associate devices to the users.
Before you configure the speed dial buttons on a phone, you need to make sure your Phone Button Template is configured to support speed dial buttons. Cisco 7970/7960/7940/7910 IP phones allow the configuration of speed dials by default.
Refer to Creating Users, Phones and Associations in Cisco CallManager for more information.
Components Used
The information in this document is based on these software and hardware versions:
- Cisco CallManager 10.5,11.x
- Cisco IP Phone 7962
Note: This document can also be used for other versions of Cisco CallManager and other models of IP phones.
The information in this document was created from the devices in a specific lab environment. All of the devices used in this document started with a cleared (default) configuration. If your network is live, make sure that you understand the potential impact of any command.
Background Information
Cisco IP phones have buttons that you can program to dial a number when they are pressed. For example, the default template for the Cisco 7962 IP phone has four speed dial buttons. These buttons can be configured by a user that has been associated with an IP phone or by the CallManager server administrator.
Configure
As a Cisco CallManager Server Administrator
The Cisco CallManager server administrator can change the speed dial buttons for any user with these steps:
Note: The maximum number of speed dials that can be configured are four for a 7962 and one for a 7940. This is the supported feature of these phones. You cannot have more than these configured.
-
Log in to your CallManager through Cisco Unified CM Administration.

-
Choose Device > Phone.

-
Enter the search string for the phone you wish to configure (optional) and click Find.

-
Click the phone Device Name.

-
Click Add a new SD on the left panel of the phone.
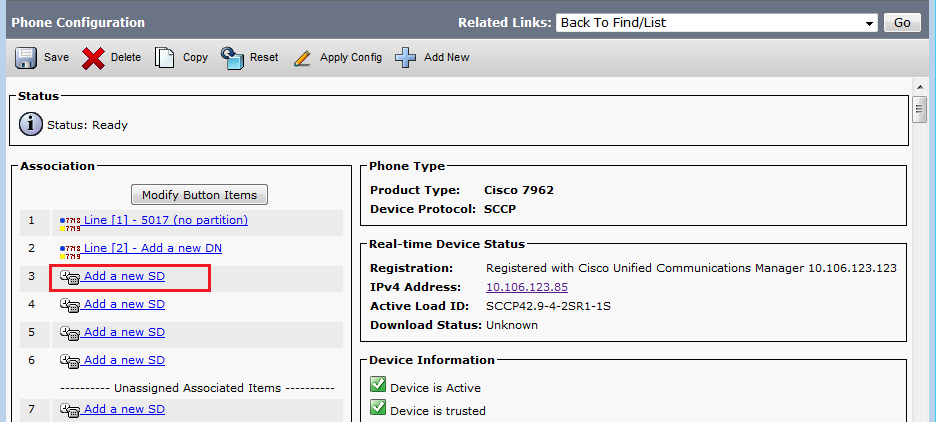
Note: If you have already configured Speed Dial it will show the number. In order to edit that, click the number.

-
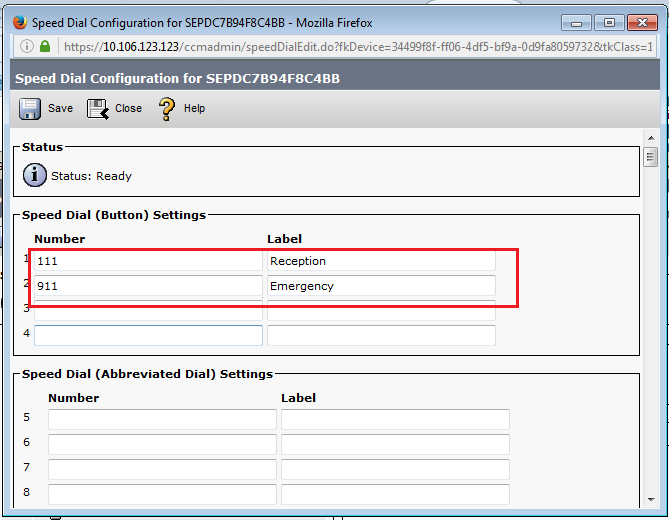
Configure the Speed Dial Number and the Display Text on the pop-up window.
-
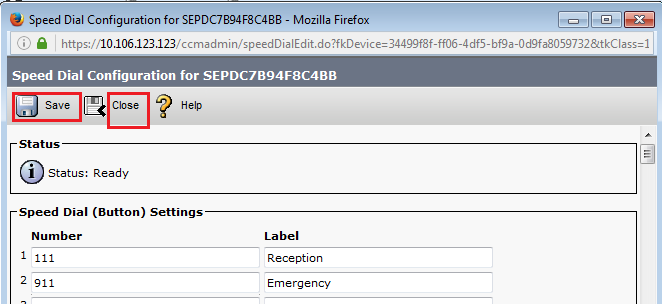
Click Save and Close.
-
This resets the phone. Now you can see the Speed Dial display name on the phone screen.
Speed Dials through Extension Mobility
Note: Cisco CallManager Extension Mobility configuration is not covered in this document. Refer to the Configuration Checklist for Cisco CallManager Extension Mobility in the Cisco CallManager Extension Mobility feature note for more information on this feature.
Complete these steps in order to configure speed dials with Cisco CallManager Extension Mobility:
-
Log in to your CallManager with CM administration credentials.
-
Choose Device > Device Setting > Device Profile.

-
Enter the search string for the profile (optional) and click Find.

-
Click the profile Name.

-
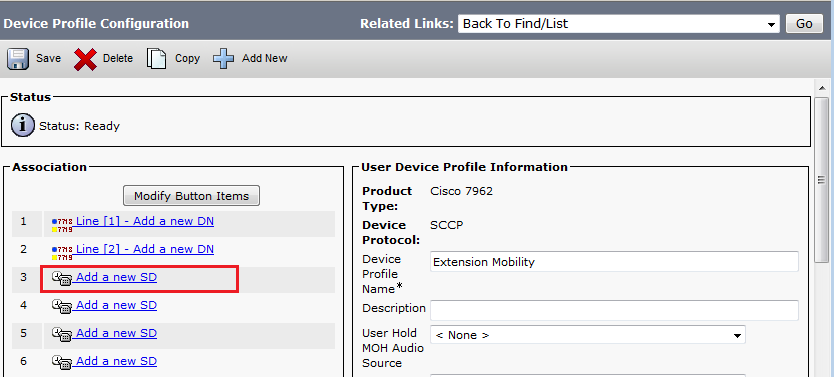
Click Add a new SD on the left panel of the profile.
-
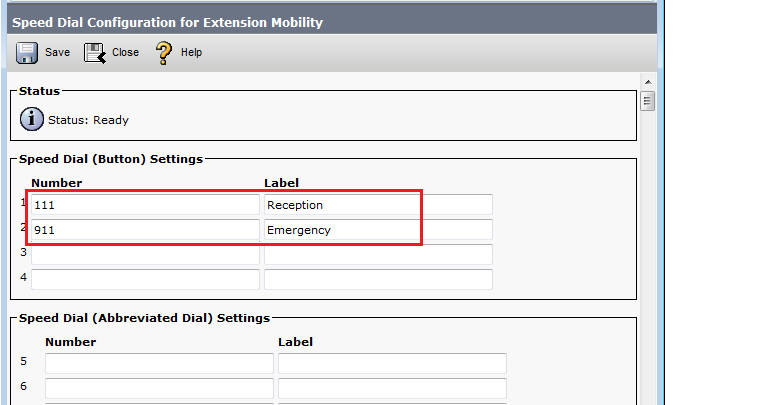
Configure the Speed Dial Number and the Display Text on the pop-up window.
-
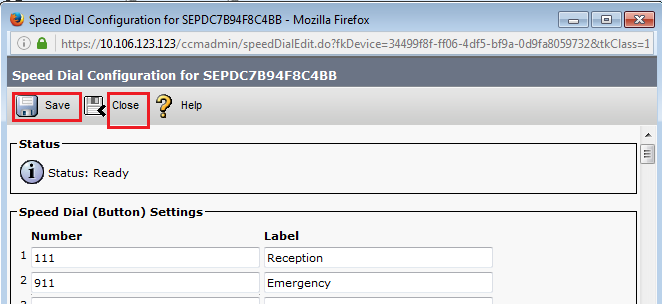
Click Save and Close.
-
You must log out and log in again in order to see the speed dials on your phone.
Troubleshoot
There is currently no specific troubleshooting information available for this configuration.
Verify
There is currently no verification procedure available for this configuration.
Related Information
