Introduction
This document describes how to upgrade or install a license on the Cisco Unified Communications Manager (CallManager) (CUCM) with the Cisco Enterprise License Manager (ELM). This document focuses on (CUCM licensing specifically for version 9.x or later. Cisco Unity Connection licensing is different
Prerequisites
Requirements
Cisco recommends that you:
Components Used
The information in this document is based on these software and hardware versions:
- Cisco Unified Communications Manager (CallManager) (CUCM) version 9.x and later
- CiscoEnterprise License Manager on CUCM version 9.x and later
The information in this document was created from the devices in a specific lab environment. All of the devices used in this document started with a cleared (default) configuration. If your network is live, make sure that you understand the potential impact of any command.
Conventions
Refer to Cisco Technical Tips Conventions for information on document conventions.
Upgrade and Install
- Log in to the Cisco Unified Communications Enterprise License Manager.
- On the splash screen, click the License Manager link.

- Expand Inventory and click Product Instances.
- Point the License Manager at the CUCM server/cluster you want to use the licenses on. It is best to use the IP address for the Hostname/IP Address section of the CUCM Publisher only. You do not need to point anything at any of the subscribers.
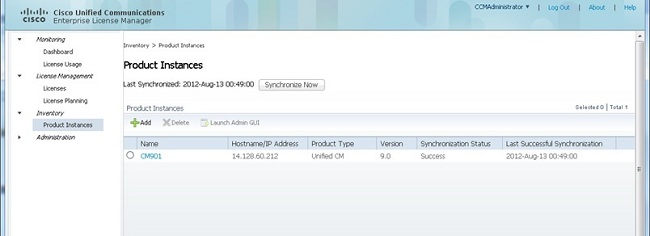
- Point the License Manager at the CUCM server you want to use the licenses on. It is best to use the IP address for the Hostname/IP Address section of the CUCM Publisher only.
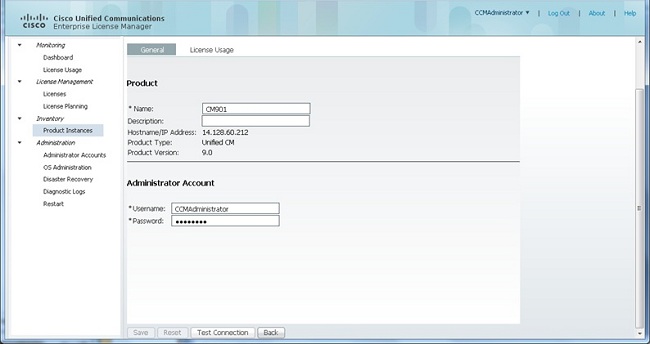
- Click Test Connection and ensure it is successful.
- Click Synchronize Now.
- If the cluster has been upgraded from an earlier version of CUCM and all the data is put in to the CUCM, take these steps. Expand License Management and click License Planning.
- Click Upgrade Licenses.

- Select Unified CM from the Product Type drop-down list, then click Next.

- The Unified CM product type is listed; move the server from the left list to the right list.


- Click Next to view the selection of license types.
- Select the type of licenses; Cisco recommends that you select the types that you plan to buy in the future. For example, if you currently buy a Cisco Unified Workspace License (CUWL), select CUWL.
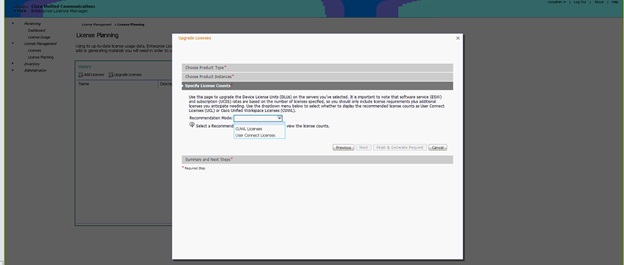
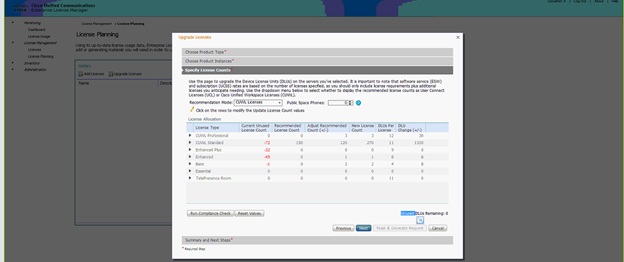
- In the lower right corner of the screen, the count of Unused DLUs Remaining needs to equal 0. (DLU is the acronym for Device License Unit.) Modify the parameters in the Adjust Recommended Count column so that you get 0 Unused DLUs Remaining. Cisco recommends that you select the highest value of license type that is most used in the cluster and that you consider a few higher if possible. Remember, you can borrow licenses automatically with the licensing tool in CUCM. In this example, select a number of CUWL Standard and CUWL Professional licenses and include a few Basic or Enhanced licenses.
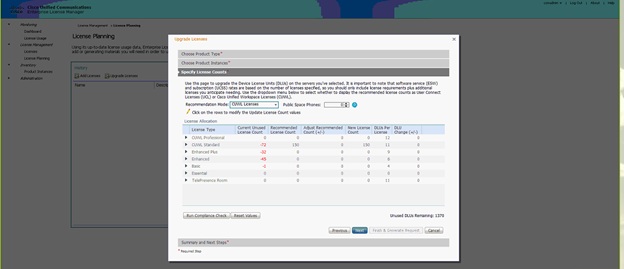
Review the Unused DLUs Remaining in order to see how the count changes based on input values.

Notice the Adjust Recommended Count column multiplied by the DLUs Per License column number is the number that is subtracted from the Unused DLUs Remaining.

Notice the count now equals 0 in the Unused DLUs Remaining. Click Next.
- Click Finish & Generate Request. Do not change the file name.

- Click the Save File to your computer link and save the file locally.
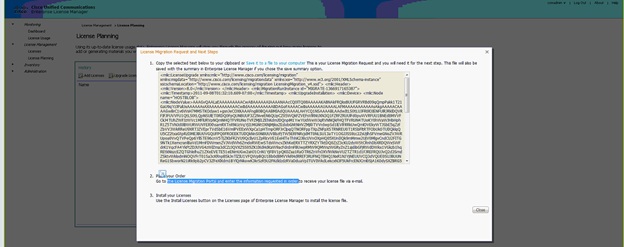
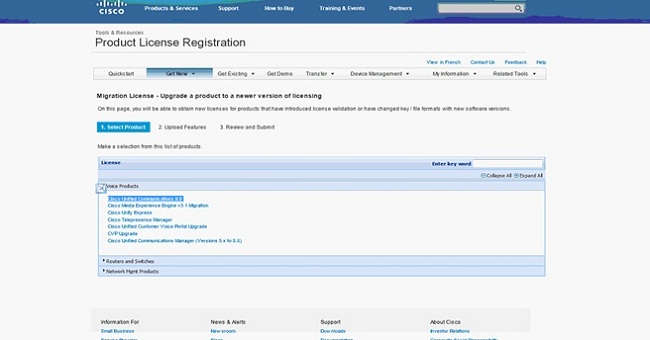
- Click the link in Step 2 on the screen, and login with your CCO ID. The remainder of this procedure assumes your account information is correct.
- Select Cisco Unified Communications 9.0 and continue.
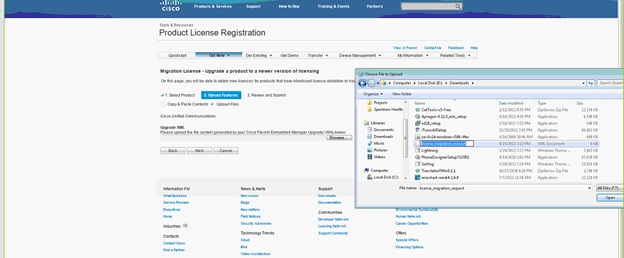
- Select Upload File.

- Browse to the location of the file you saved earlier and select Next.
- Review the information in order to ensure accuracy, then click the checkbox in order to accept the license file. Click Get License, then choose whether to download or email the file. Email is based on the account information.
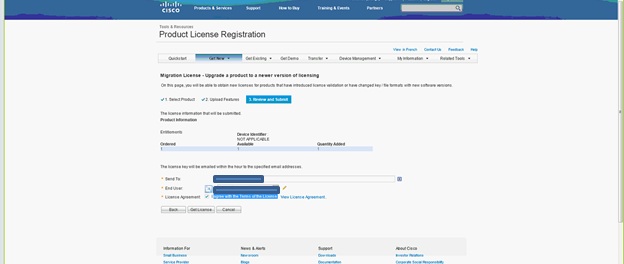
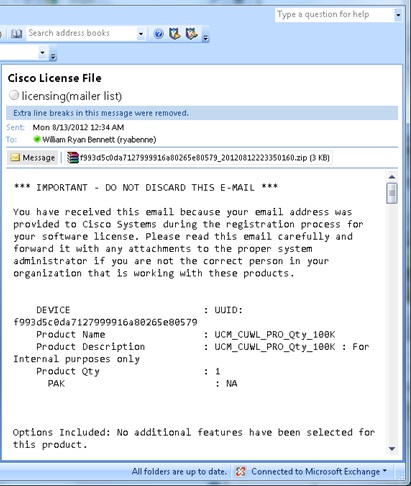
The license tool generates a license file quickly so you do not have to wait more than a few minutes in order to receive the license file by email.
- Save the ZIP file and extract the file within it.
- Navigate to the ELM, expand License Management, and click Licenses in order to install the license. Based upon the ELM version, select an appropriate method to upload the license; there are different upload options in different versions. In this example, there is a drop-down list where the Generate License Request is shown.

Verify
Use this section to confirm that your configuration works properly.
Once the license file is installed, you should not see Demo Mode when you click the About icon in the upper right corner of the ELM tool.
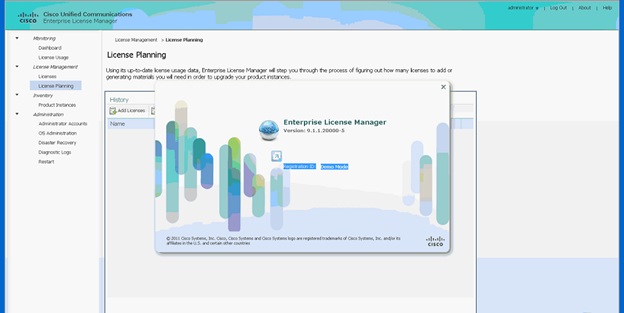
When you check your license usage, you see appropriate details.

Tip: Be sure to click the Synchronize Now button.
Troubleshoot
This section provides information you can use to troubleshoot your configuration.
Security Error in Synchronization Status
A Security Error is most often a certificate-based issue caused by changes to the ELMs or the Hostname/IPs.
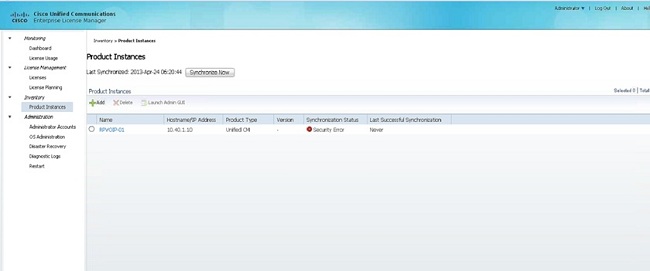
Check the NTP stratum, as noted in Prerequisites, then enter this command on the CLI:
admin:license client reset registration
Delete and re-add the CUCM and it should successfully synchronize. If the sychronization fails, open a Technical Assistance Center (TAC) case with the CUCM team for further investigation.
License Request Status
If you get a License Request Status error on the licensing tool, open a TAC case with the licensing team in order to regenerate your license. On the ELM page, expand License Management, click Licenses, and run the License Generate Request. The TAC case should be resolved within 48 hours.

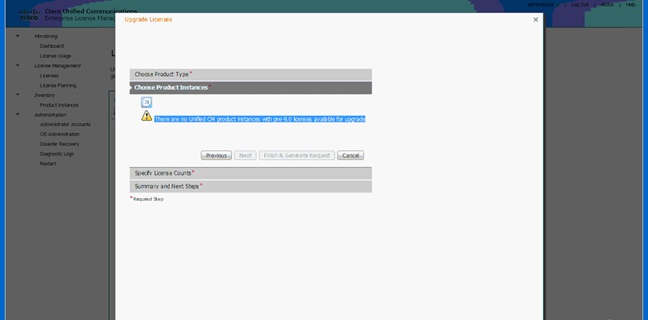
No Unified CM Product Instances
If you get a No Unified CM Product Instances error, contact the licensing team in order to escalate the case to the licensing business unit (BU) in order to regenerate your license. This generally takes 24-48 hours.
Product Instance Registration Failed
If your product instance registration failed, find the ELM instance that has control of the cluster.

Related Information
