Introduction
This document describes the configuration of Cisco Unity Connection Release 12.5(1) Service Update 3 and later with Microsoft Office 365 in order to enable SpeechView voicemail transcription in a Cisco Unity Connection notification. While the screenshots are sourced from specific versions of Unity Connection and Microsoft Office 365, the concepts should apply to any earlier or later version of either product.
Prerequisites
Requirements
There are no specific requirements for this document.
Components Used
The information in this document is based on these software and hardware versions:
- Unity Connection Release 12.5SU3 and later
- Microsoft Office 365
The information in this document was created from the devices in a specific lab environment. All of the devices used in this document started with a cleared (default) configuration. If your network is live, make sure that you understand the potential impact of any command.
SpeechView Operation
- Unity Connection sends the voicemail message to Nuance via the Smart Host. This message includes the admin-defined return SMTP address that Nuance uses for the reply.
- Nuance transcribes the message and sends the transcription to Microsoft Office 365.
- Microsoft Office 365 receives the response message and forwards it via Smart Host to contact with the email address of stt-service@<unity connection domain>.Unity Connection expects all SpeechView transcriptions to be sent to the alias "stt-service" at the Cisco Unity Connection SMTP domain, which in this example is "stt-service@<unity connection domain>."
- When Unity Connection receives the response, it processes it accordingly. If it is a response to a registration request, it completes the registration, or if it is a transcription, it takes the transcription and sends it to whatever notification device(s) are defined for the user who received the voicemail.
Deployment Diagram

Configure
Step 1. Unity Connection Configuration
For Unity Connection configuration, refer to https://www.cisco.com/c/en/us/support/docs/voice-unified-communications/speechview/116126-config-speechview-00.html#anc7.
Step 2. Microsoft Office 365 Configuration
1. Login on Microsoft Office 365 as admin user. Click All Admin centres.
2. Open Exchange Admin Center and click on mail flow.
3. Navigate to the Connectors tab and configure new Connector to Unity Connection.
3.1. Click + sign in order to add a connector as shown in the image.

3.2. Enter connection details of the connector.

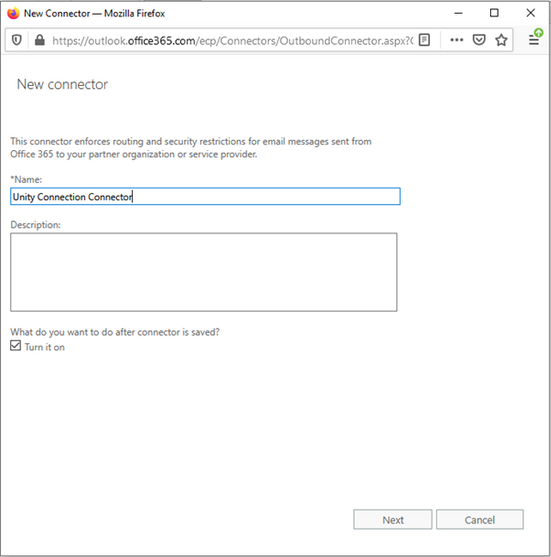
3.3. Click Next and enter name.

3.4. Connector will be used along with Transport Rule. Select the first option as shown here.

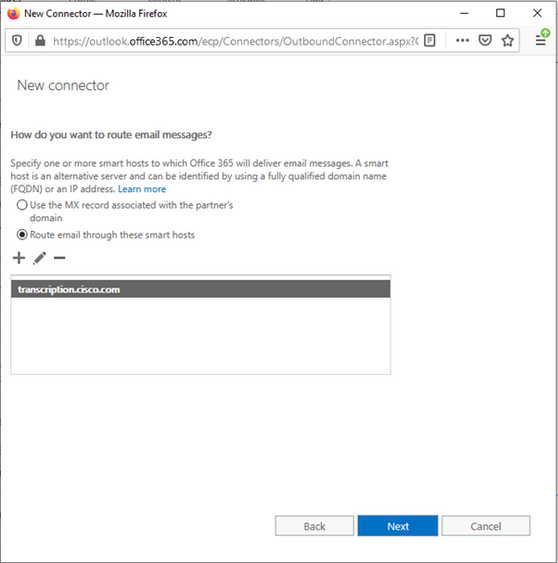
3.5. Click Next and select the Routing Pattern. Since Smart Host is used to communicate with Microsoft Office 365 server to Unity Connection, select the second option Route email through these smart hosts. Add the details of Smart Host with the use of the + option.

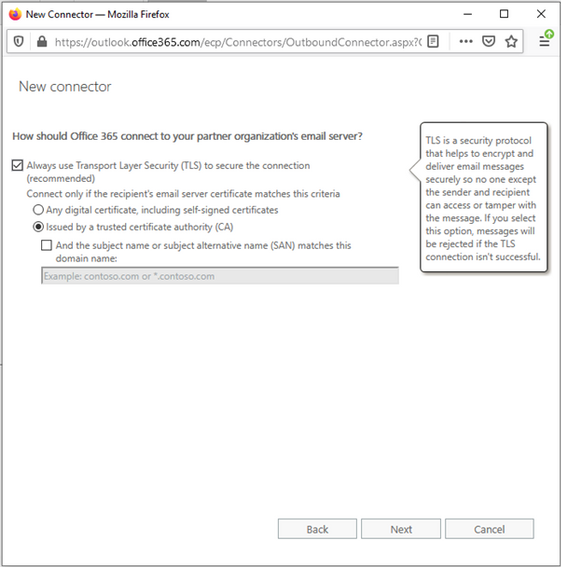
3.6. Enter required security restrictions.

3.7. Confirm your settings and click Next.
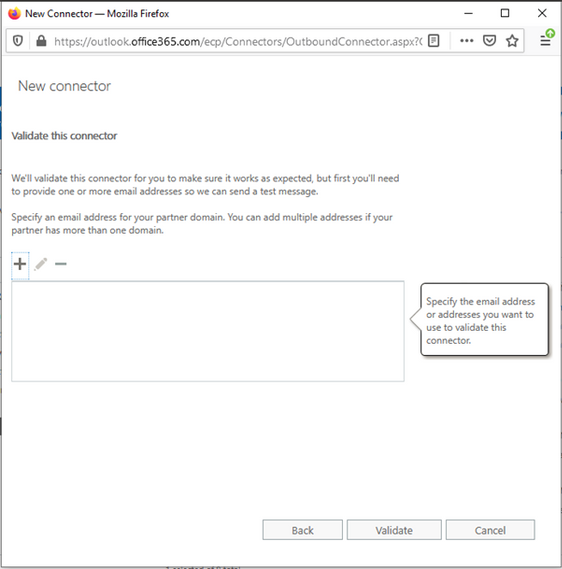
3.8. Specify the email address in case you want to validate the email address.

4. Navigate to the Rules tab. Create one Rule.

Rule describes the scenario in which whenever mail arrives on “oAuth2@ciscomessagingaplha.onmicrosoft.com” mailbox, message will be redirected to “stt-service@<unity connection domain>” with the use of “Unity Connection Connector”.
Verify
There is currently no verification procedure available for this configuration.
Troubleshoot
There is currently no specific troubleshooting information available for this configuration.
