Introduction
This document describes how the bulk migration of Unified Messaging (UM) accounts from exchange to Office 365 happens in Cisco Unity Connection (CUC).
How do you Bulk Migrate UM Account of Users from Exchange to Office 365 in CUC?
When you have multiple UM accounts on unity connection and would like to migrate the UM account of users from one to another. Bulk edit tool does not help as you cannot directly migrate UM accounts through Bulk Edit tool.
This procedure describes how to bulk migrate the Exchange UM account of users to Office 365. The same procedure can be used to migrate between any two UM accounts.
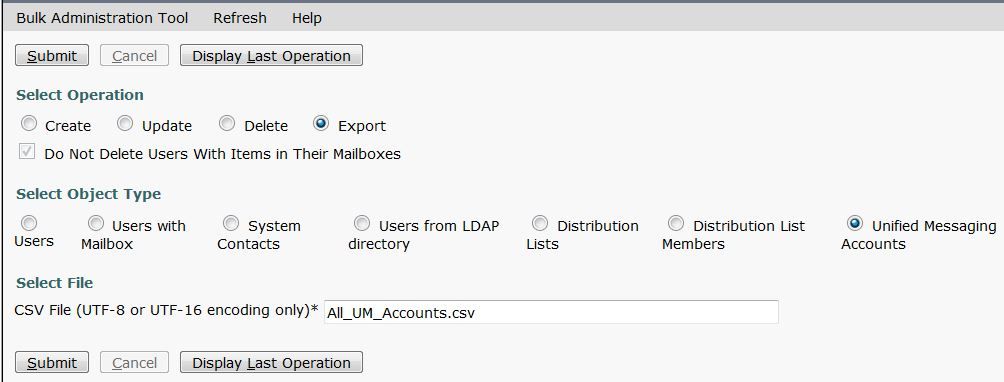
Step 1. In order to export a list of all users having a UM account in a csv file, navigate to Tools > Bulk Administration Tool and then under Select Operation check Export, and under Select Object Type check Unified Messaging Accounts, as shown in the image.

Exported csv file is shown in the image:

Step 2. From the above csv file, ensure that it contains only those users whose UM account needs to be migrated from exchange to Office 365. For example, from exported CSV file, the first user test is already using Office 365, therefore remove this from the csv file.

Step 3. Use above csv file to delete the existing UM account of users Exchange-2010 by Bulk Administration tool.
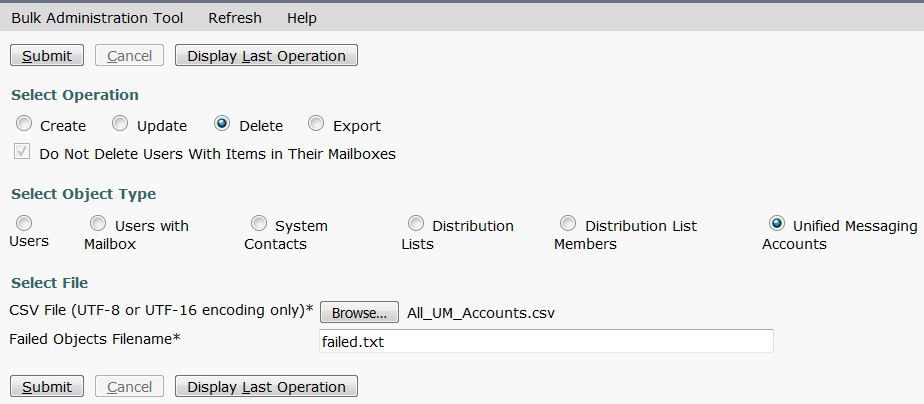
Navigate to Tools > Bulk Administration Tool and under Select Operation check Delete, and then under Select Object Type check Unified Messaging Accounts. After this, browse the above csv file (which contains only those users, whose UM account need to be deleted) and click on Submit, as shown in the image:

If UM accounts of all the users are deleted successfully, you should get a notification:
"Bulk Administration Tool completed. Number of successes: 4, Number of failures: 0"
Step 4. Now you need to create the UM accounts for office 365. Open the above CSV file and make these changes:
- Rename the 2nd column ServiceDisplayName with UM service account name created for office 365.
- Leave the 3rd column OptionalServiceAccountID blank.

Step 5. Create the office 365 UM account of users using above csv file.
Navigate to Tools > Bulk Administration Tool and check Create under Select Operation, and then select Unified Messaging Accounts under Select Object Type, as shown in the image. Now browse the above csv file.

If UM accounts of all the users are created successfully, you should get a notification like this:
"Bulk Administration Tool completed. Number of successes: 4, Number of failures: 0"
Step 6. Verify if UM account of users are created successfully.

