Introduction
This document describes how to perform a migration between two Cisco Unified Communications Manager (CUCM) cluster with Prime Collaboration Deployment (PCD).
Prerequisites
Requirements
There are no specific requirements for this document.
Components Used
The information in this document is based on these software versions:
- CUCM Release 10.0 and 10.5
- PCD Release 10.5
The information in this document was created from the devices in a specific lab environment. All of the devices used in this document started with a cleared (default) configuration. If your network is live, make sure that you understand the potential impact of any command.
Background Information
Cisco PCD is a migration/upgrade application for Unified Communications applications. Using PCD, you can upgrade the version of existing Unified Communications applications or you can migrate the complete cluster to a new cluster of same or different version. This document describes the migration procedures to CUCM 10.5 from version 10.0 where both the old and new cluster were on Unified Computing System (UCS) platform.
For details on supported versions, compatibility, licensing and other pre-migration checklist, refer to the link: Migration to Cisco Unified Communications Manager Release 10.5(1) Using Prime Collaboration Deployment
Configure
Build the destination cluster
Build the destination cluster using the correct Open Virtualization Archive (OVA) template for the specific version of the CUCM. The OVA file could be downloaded from cisco.com
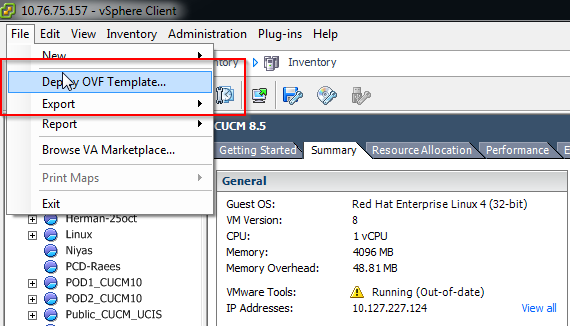
1. Deploy the OVA from the Vsphere client as shown in this image.

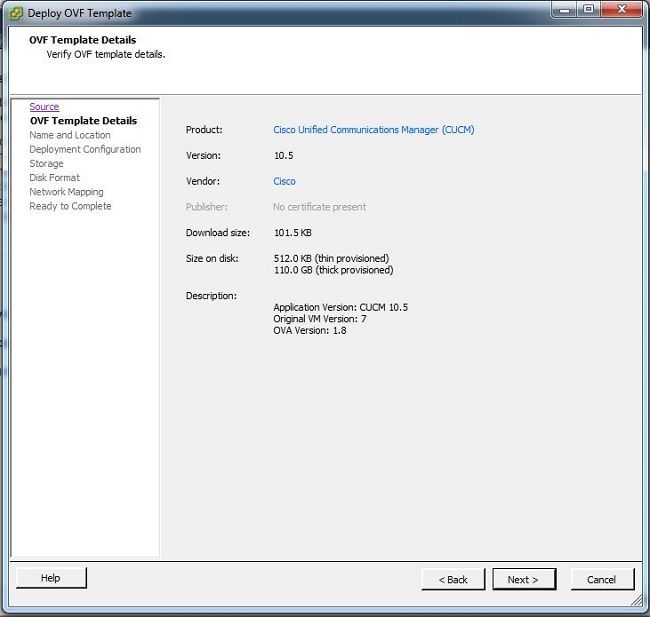
2. Specify a name for the destination cluster virtual machine.

3. Select the appropriate datastore for the storage media.

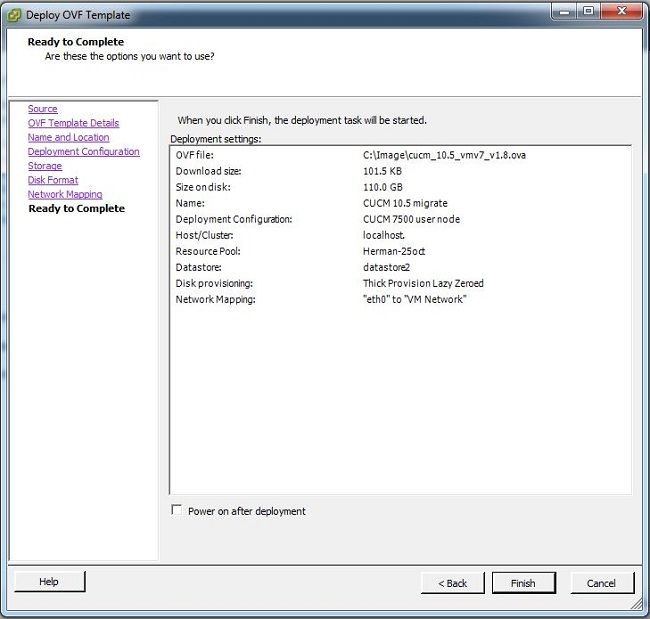
4. Verify the OVA details and click the Finish button.

Discover the cluster
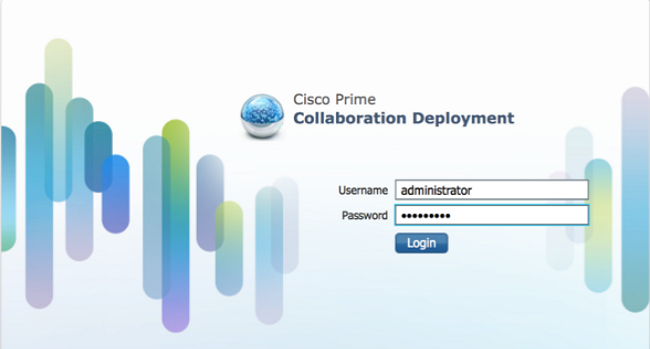
1. Log in to the GUI of the PCD tool.
2. Once you are logged in, navigate to Inventory > Clusters and then click Discover cluster.

3. Provide existing cluster's details and click the Next button.

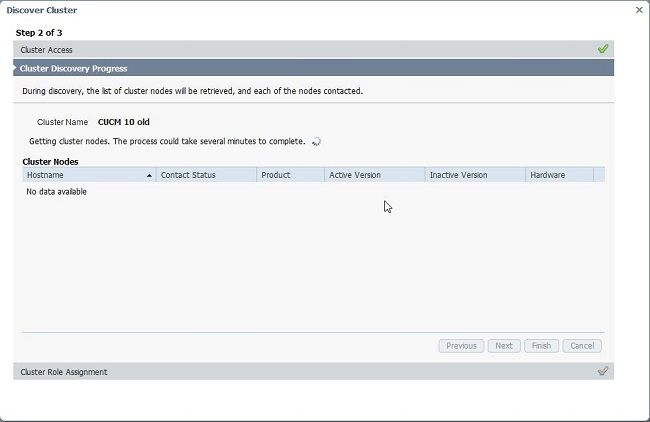
The discovery might take a few minutes to complete and this image is seen during that phase.
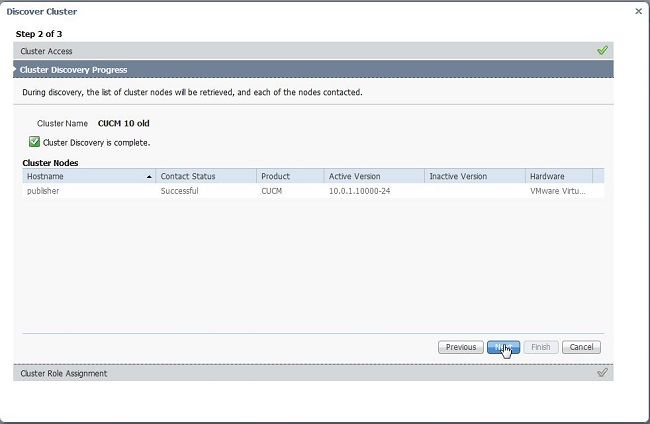
4. The Contact status would show as successful once the existing cluster is discovered and the same would be displayed under cluster nodes. Click the Next button in order to navigate to the Cluster Role Assignment page.
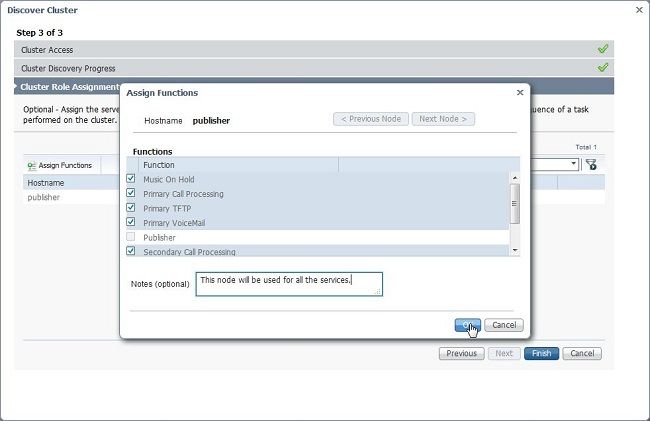
5. Navigate to Assign Functions page and select the appropriate functions for the host cluster.
Define the migration cluster
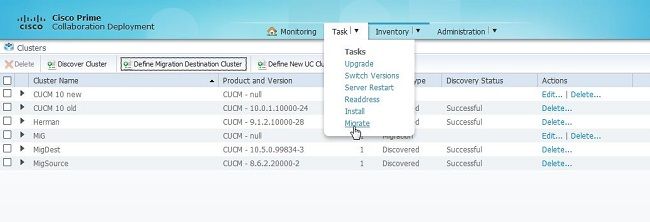
1. Once the cluster is discovered successfully, click the Define Migration Destination Cluster button for specifying destination cluster.
2. Enter the details of the old and new cluster.
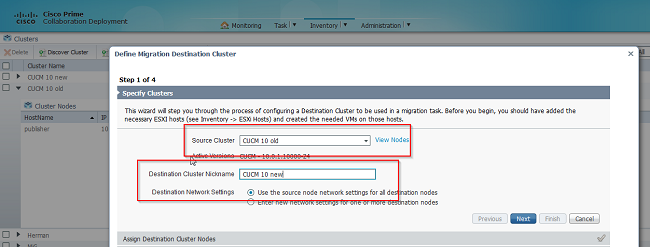
A message in red is seen, as shown in the image, when the destination nodes are not specified.
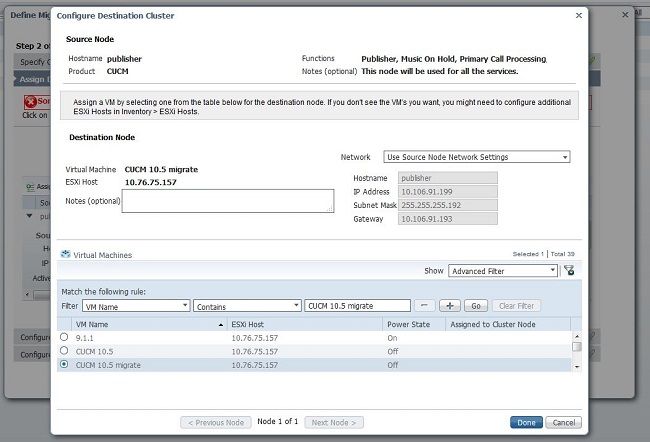
3. Click the Assign Destination Cluster Node button to proceed with the destination node assignment as shown in this image .

4. Select the Use Source Node Network Settings option under Network drop down menu to keep the existing network settings and select the destination virtual machine where the new cluster is deployed.
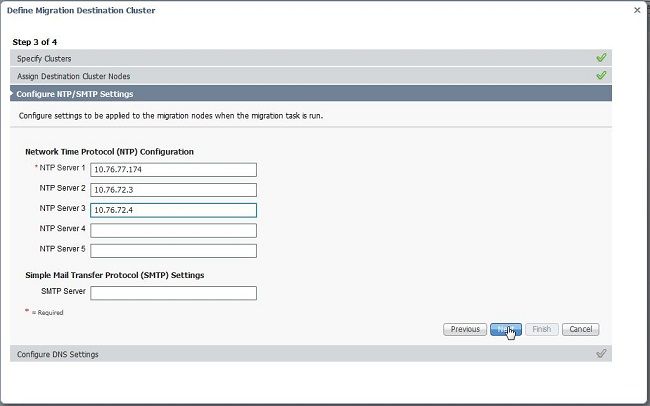
5. Define appropriate Network Time Protocol (NTP) server details here as shown in this image.
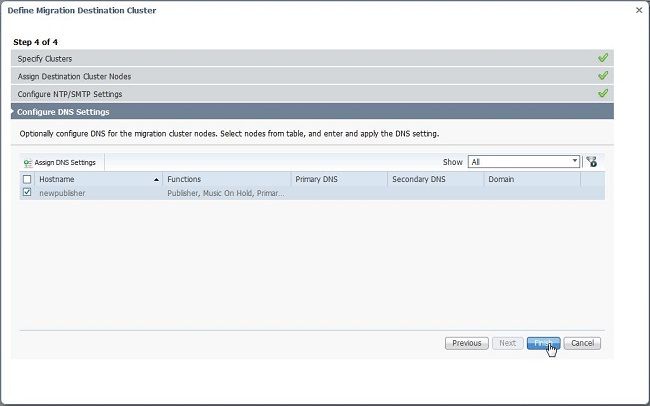
6. Configure the Domain Name Server (DNS) settings here as shown in this image.
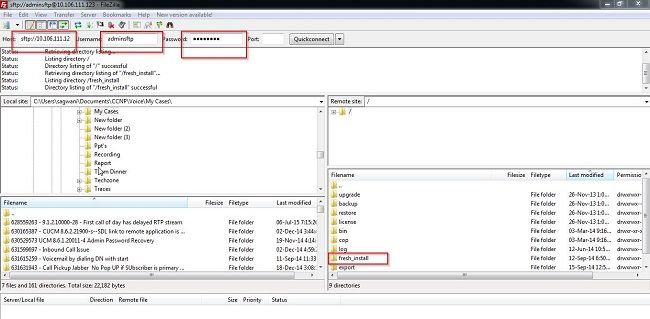
7. Upload the bootable ISO image to the Secure FTP (SFTP) server. Access the PCD server through a SFTP client using its ip address and default credentials adminsftp/[your default administrator password].
Once logged in, navigate to the Fresh_install directory to upload the iso image.

Initiate Migration
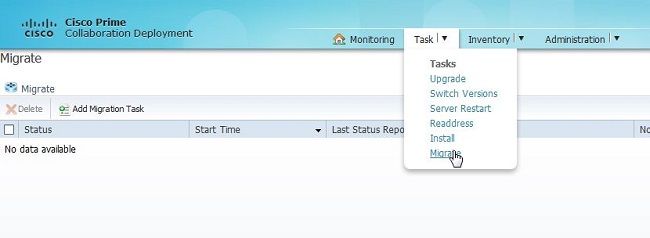
1. To initiate the migration task, navigate to Task > Migrate and click the Add migration task button .
2. Specify the Source and Destination Cluster details.

3. Choose the bootable media uploaded to the /fresh_install folder of the SFTP server.

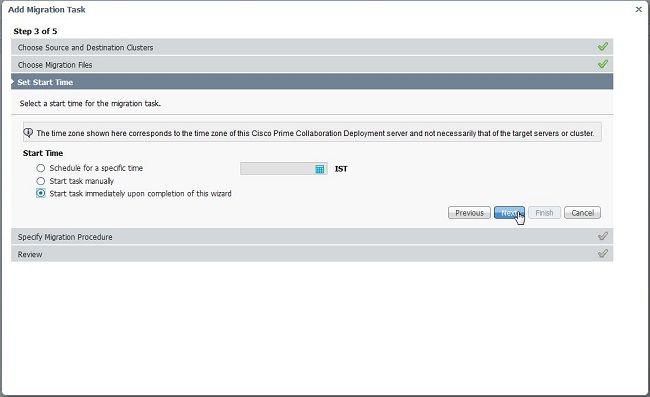
4. Select the start time for the migration .
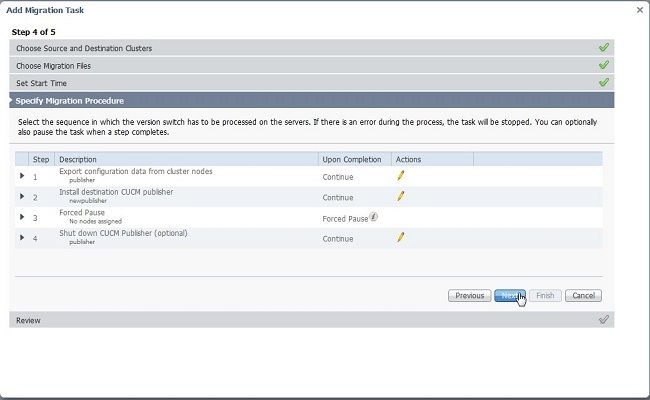
Here you have the option to modify the action specified in the default task list.
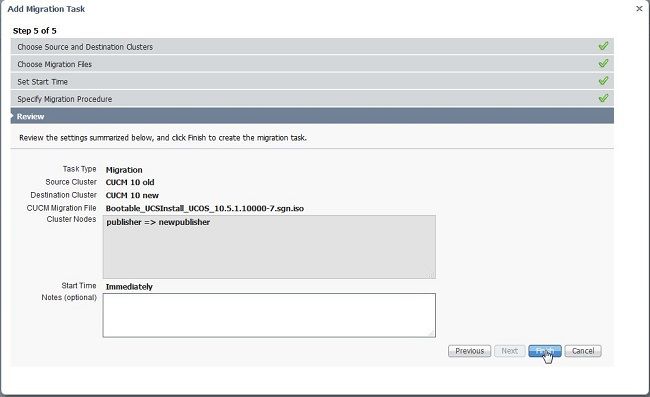
5. Review the migration settings and click the Finish button.

Verify
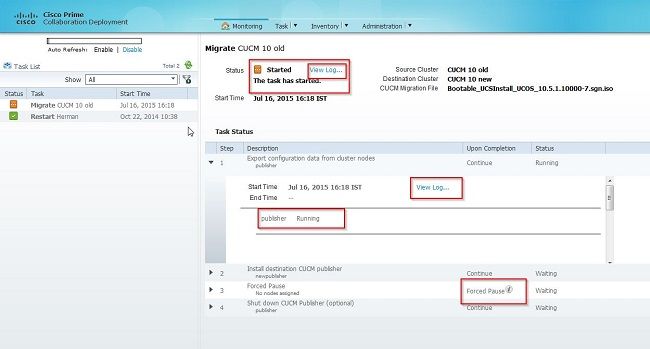
Here you can check the status and details of migration.
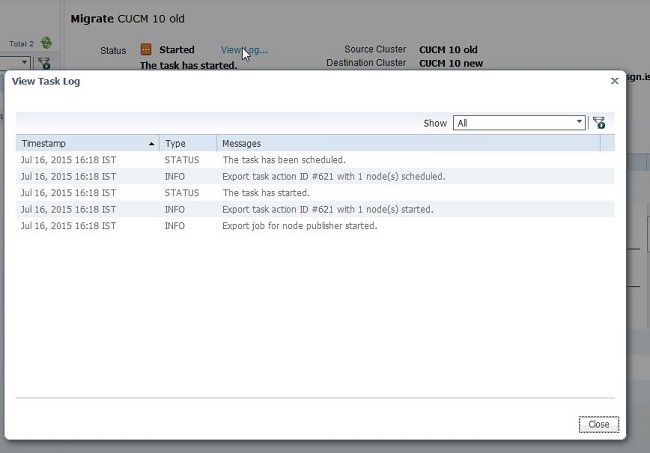
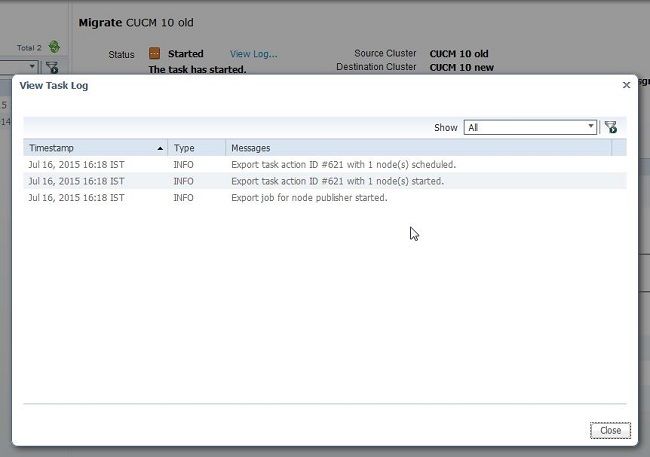
1. Click on view log to get further details on migration status.
Troubleshoot
There is currently no specific troubleshooting information available for this configuration.


 Feedback