Introduction
This document describes how to install, configure and troubleshoot INNP.
Cisco Unified Communications Manager (CUCM) provides a default North American Numbering Plan (NANP). For countries with different dial plan requirements, you can install a Cisco International Dial Plan and use it to create a unique numbering plan that is specific to your requirements.
Prerequisites
Requirements
Cisco recommends that you have knowledge of these topics:
- Call Routing
- Route Filter
Components Used
The information in this document is based on Cisco Unified CallManager 11.5.
The information in this document was created from the devices in a specific lab environment. All of the devices used in this document started with a cleared (default) configuration. If your network is live, make sure that you understand the potential impact of any command.
Backgroung Information
If you are installing a national numbering plan for countries outside of North America, download the Cisco Option Package (COP) file that contains the international dial plans for the current release.
The COP file uses the naming convention and is available from the Cisco website:
https://software.cisco.com/download/release.html?mdfid=278719042&softwareid=282074292&os=Linux&release=3.1.33-GB&relind=AVAILABLE&rellifecycle=&reltype=latest
Configure
This is the procedure to install the INNP cop file.
Step 1. Login to OS Admin.

Step 2. Navigate to Software Upgrade > Install/Upgrade, as shown in the image:

Select the Source: Here we are using the SFTP server to perform the install/upgrade.
Source: Remote Filesystem
Directory: /
Server: Here you have to keep the SFTP application running laptop/desktop IP address.
User Name: SFTP user name.
User Password: Password of the SFTP user.
Transfer Protocol: SFTP
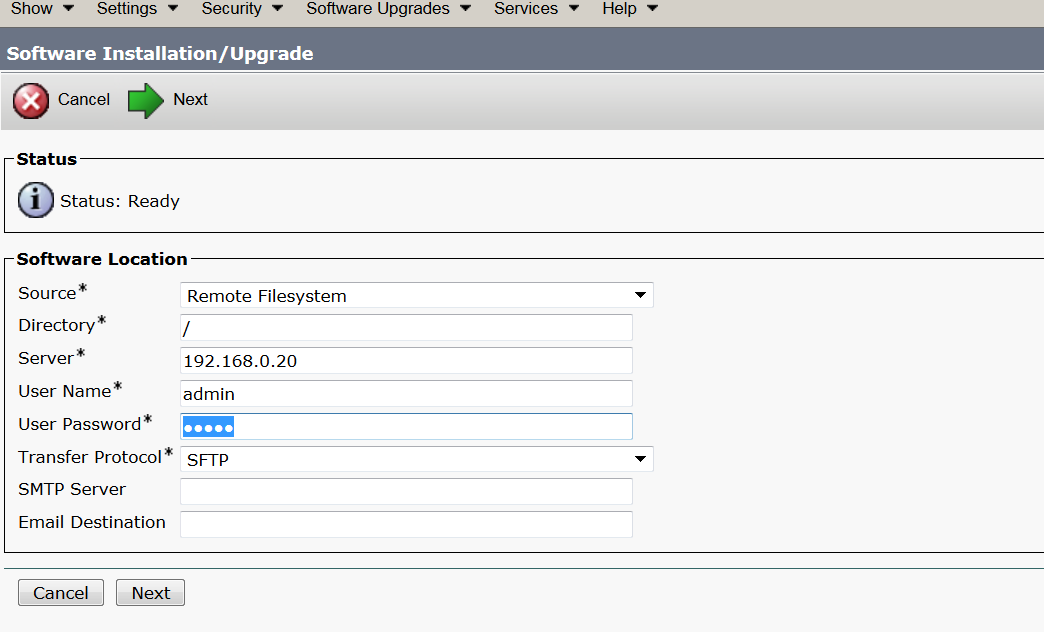
Step 3. Select Next and then the screen as shown in the image appears.
You have to select the correct cop file for INNP and then Select Next.

You get screen as shown in the image. Select Next.

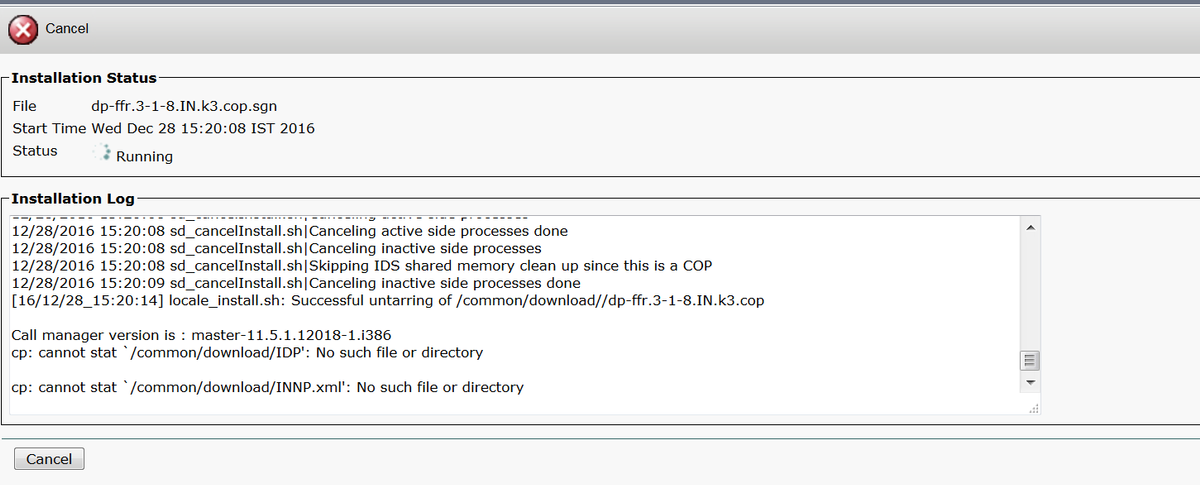
Step 4. Installation is in progress:
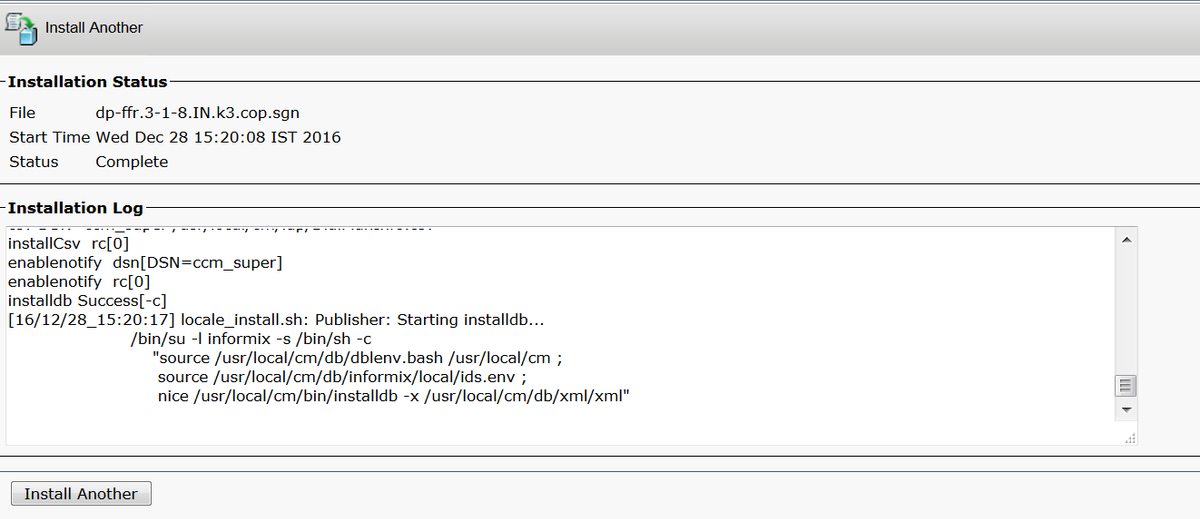
Step 5. Installation Complete.
Perform the same operation for all the nodes in the cluster.
Setup of INNP
Step 1. Under Cisco Unified CM Administration, navigate to Call Routing > Dial Plan Installer.


Step 2. Click on Find and Select INNP, as shown in the image:

Step 3. As shown in the image, click on Install.

Once the cop file installation done, restart the CM service on all the nodes.
Clauses in INNP
First understand the clauses in the INNP:
# P: Digit pattern -- PATTERN TAG
# T: Type of Number -- I(nternational) or N(ational)
# W:  Network Specific Facilities -- OP or OPXXXX(alternate carriers)
# U: Urgent pattern? (Call extended immediately on match)

# [2-6]XXXXX
P: [2-6]XXXXX                    LOCAL-6-DIGIT

# [2-6]XXXXXX
P: [2-6]XXXXXX                   LOCAL-7-DIGIT

# [2-6]XXXXXXX
P: [2-6]XXXXXXX                  LOCAL-8-DIGIT


# Long Distance Calls

# 0+11+[2-6]XXXXXXX
P: 0                             NATIONAL-ACCESS
P: 11                            AREA-CODE
P: [2-6]XXXXXXX                  LOCAL-8-DIGIT
T: N

# 0+2[02]+[2-6]XXXXXXX
P: 0                             NATIONAL-ACCESS
P: 2[02]                         AREA-CODE
P: [2-6]XXXXXXX                  LOCAL-8-DIGIT
T: N

# 0+33+[2-6]XXXXXXX
P: 0                             NATIONAL-ACCESS
P: 33                            AREA-CODE
P: [2-6]XXXXXXX                  LOCAL-8-DIGIT
T: N


# Services, Mobile & Non Geographic Calls

# 100
P: 100                           SERVICE
U: Y

# 101
P: 101                           SERVICE
U: Y

# 80[01589]X+XXX+XXX
P: 80[01589]X                    LOCAL-PREFIX-8-MOBILE
P: XXX                           MOBILE-ACCESS
P: XXX                           MOBILE-SUBSCRIBER
T: N

# 81XX+XXX+XXX
P: 81XX                          LOCAL-PREFIX-8-MOBILE
P: XXX                           MOBILE-ACCESS
P: XXX                           MOBILE-SUBSCRIBER
T: N

# 8128+XXX+XXX
P: 8128                          LOCAL-PREFIX-8-MOBILE
P: XXX                           MOBILE-ACCESS
P: XXX                           MOBILE-SUBSCRIBER
T: N

# 8149+XXX+XXX
P: 8149                          LOCAL-PREFIX-8-MOBILE
P: XXX                           MOBILE-ACCESS
P: XXX                           MOBILE-SUBSCRIBER
T: N
For more details please refer below link for INNP clauses:
http://www.cisco.com/web/software/282074292/122537/INNP.txt
On the basis of above information we will create the route filter.
Example:
Your requirement is to create Local calling filter which only allows local calling.
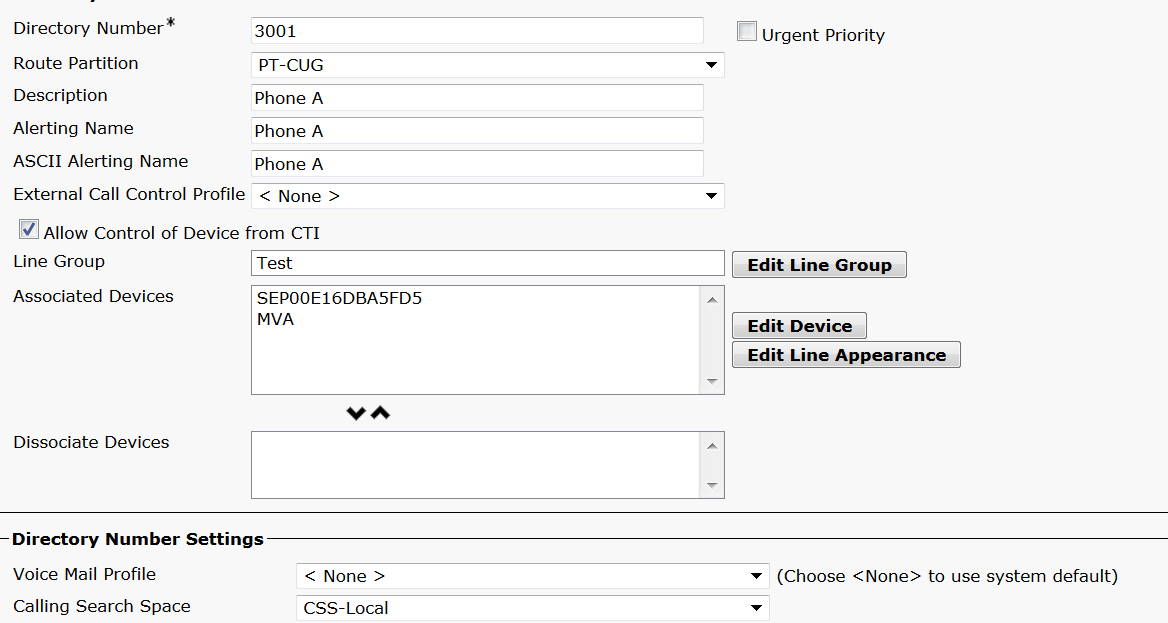
Scenario: Extension 3001 has to call to Local mobile number starting with 7,8 and 9.
Extension 3001 has to call local landline number (8 digit).
Extension 3001 has to block the STD and national call dialling.
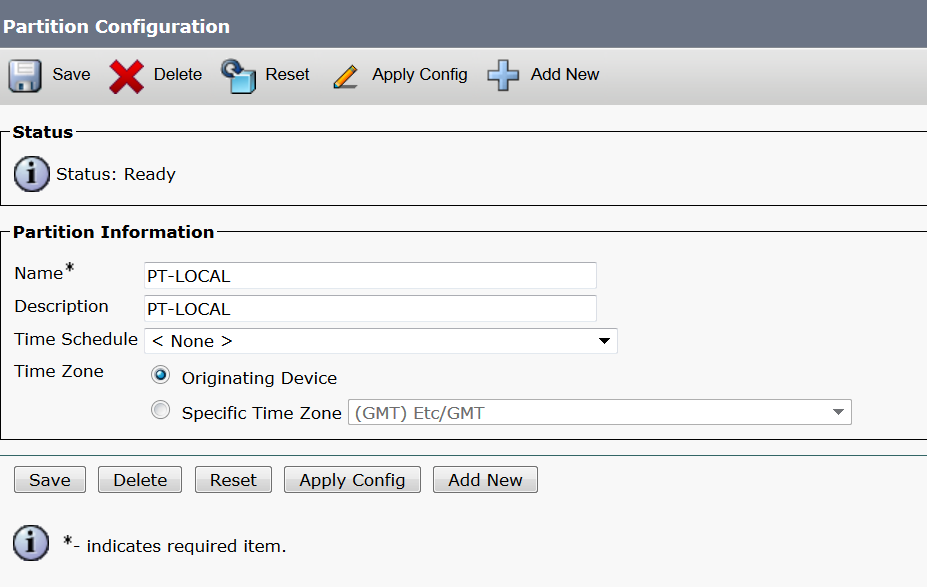
Step 1. Create New Partition – PT-LOCAL
Navigate to Call Routing > Class of Control >Partition.
Step 2. Create New CSS – CSS-Local
Navigate to Call Routing > Class of Control > Calling Search Space.
In this CSS, you keep PT-LOCAL partition.
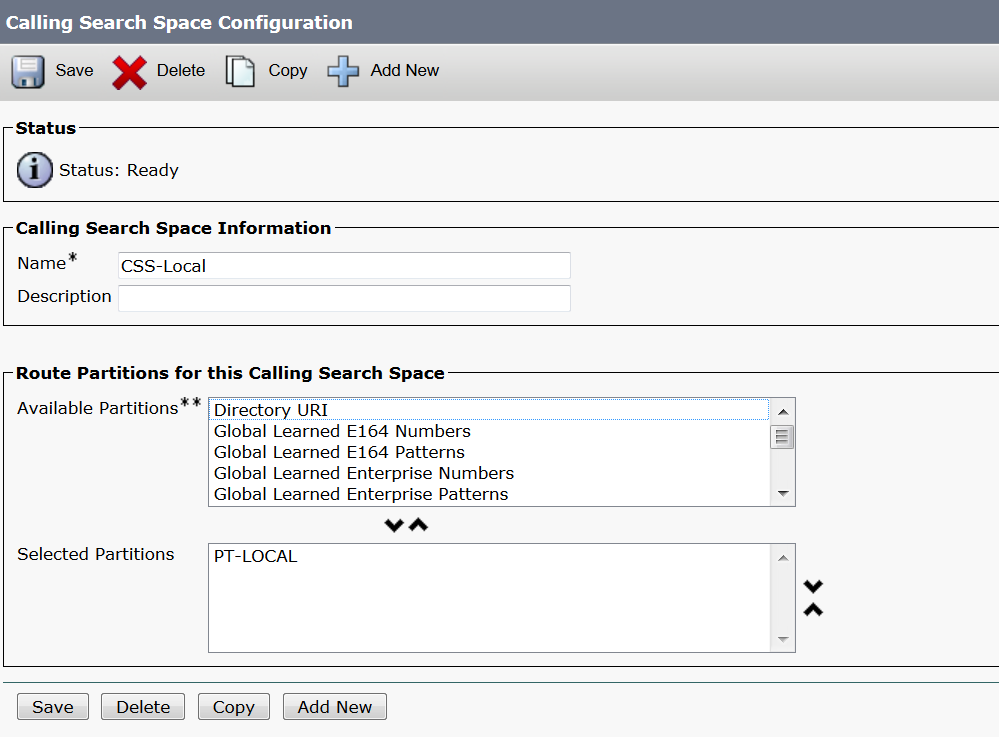
Step 3. Create router filter.
Navigate to Call Routing > Route Filter.
Click on Add New, as shown in the image:

As shown in the image, Select the Numbering Plan.

These filters are created as per the requirement.
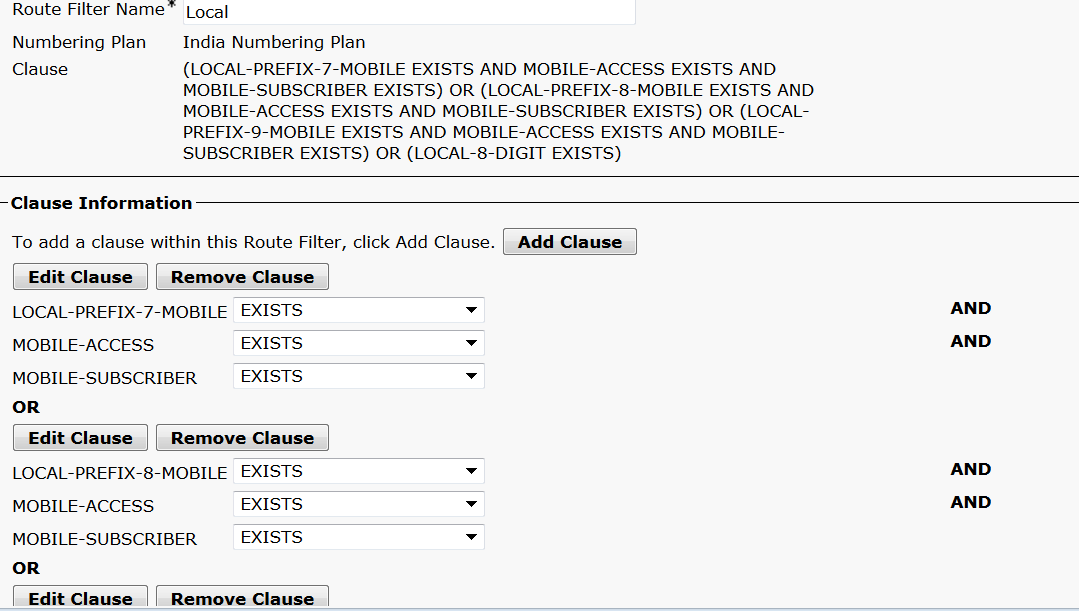
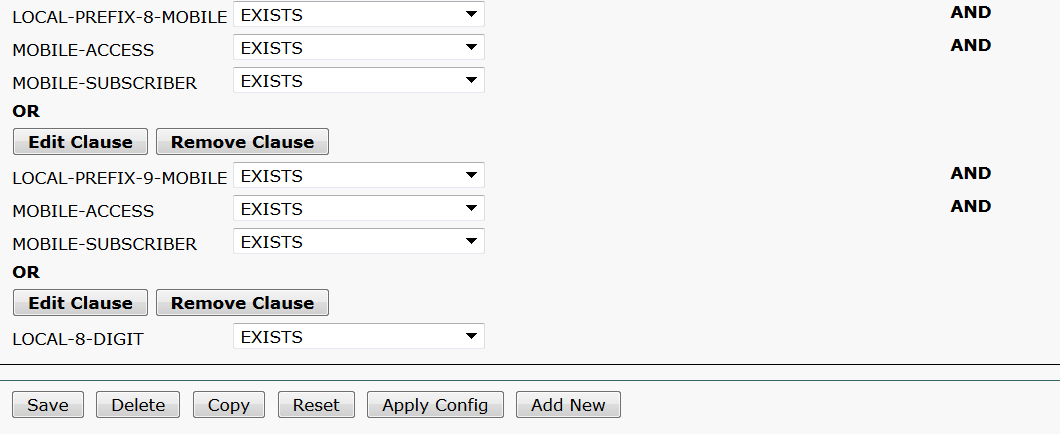
Step 4. Create Route pattern.
Navigate to Call Routing > Route/Hunt > Route Pattern.
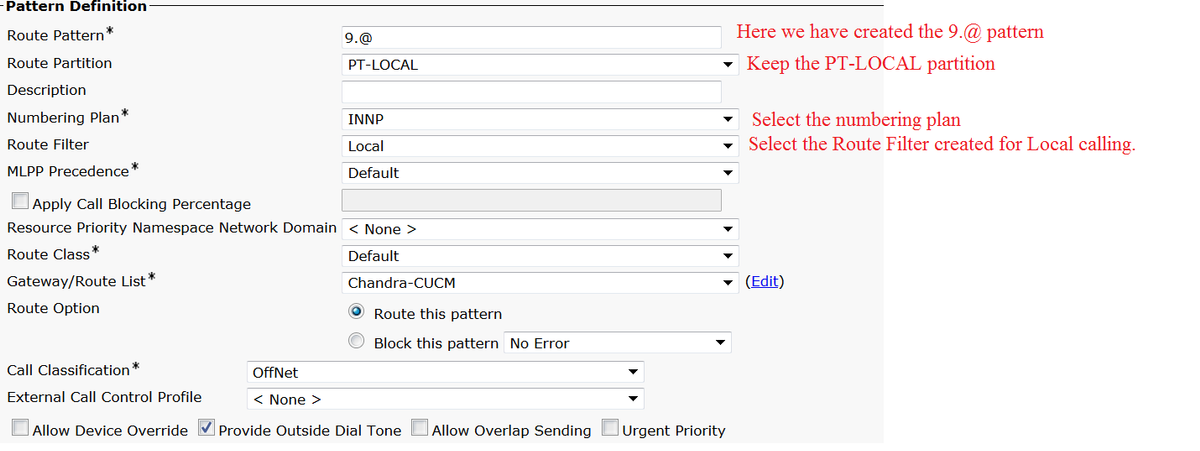
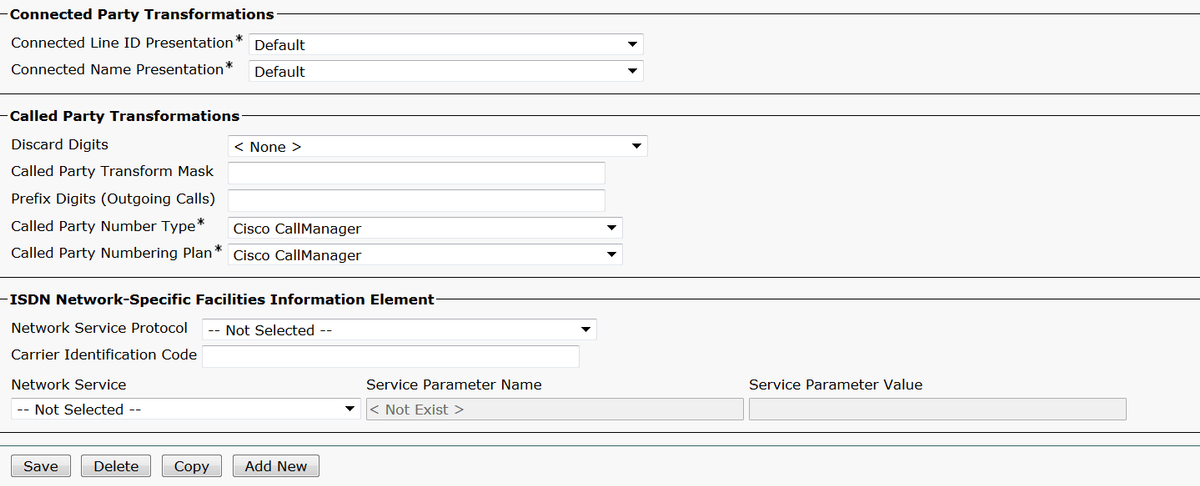
Please ensure that the testing extension has correct CSS (CSS-Local).
Verify
Verification of the configuration:
Step 1. Under Dial Number Analyzer, navigate to Analysis > Phones.

Enter the extension 3001 and click on Find.


Step 2. As you click on Do Analysis, a page appears with all the details and correct filter, as shown in the image:

Troubleshoot
The configured route filter works fine but it has one issue. If you dialled the STD number with two digit area code the call go though.
Example: If you dial number 080 26252728, it routes the call with local filter.
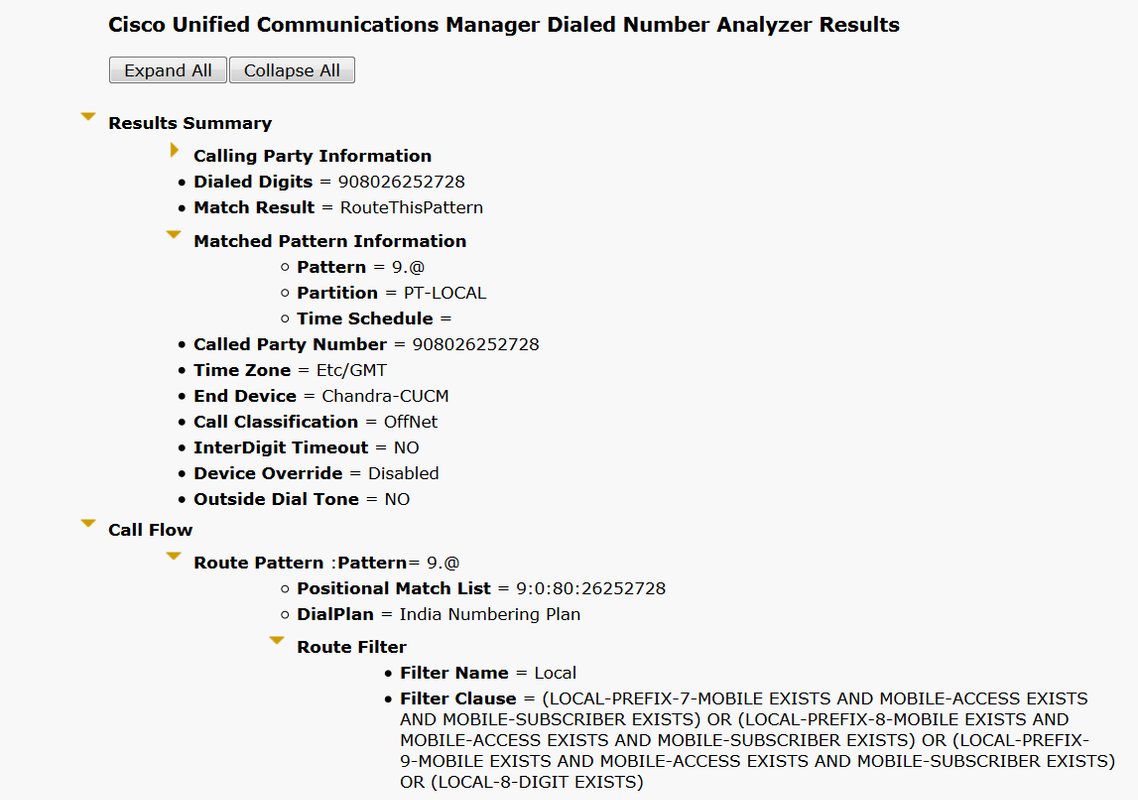
The reason behind it is that the calling for Local-8-digit number is allowed and it matches the 8 digit excluding the area code.
So here you have to explicitly define in the filter to block the area code in local filter.
Step 1. Navigate to Router filter and Edit Clause for Local 8 Digit.

Step 2. Select the AREA-CODE DOES-NOT-EXIST and Save the filter, as shown in the image:

The filter looks like below:

Step 3. Perform the DNA for STD number with two digit Area code.

Note: You have to explicitly block the pattern which is not required.
