Introduction
This document describes how to upload an IP phone firmware on multiple nodes of Cisco Unified Communications Manager (CUCM) cluster through Prime Collaboration Deployment (PCD).
Prerequisites
Requirements
There are no specific requirements for this document.
Components Used
The information in this document is based on these software versions:
- CUCM Release 10.5.2.11900-3
- PCD Release 11.0.1.20000-2
- IP Phone Firmware 78xx.11-5-1-18
The information in this document was created from the devices in a specific lab environment. All of the devices used in this document started with a cleared (default) configuration. If your network is live, make sure that you understand the potential impact of any command.
Background Information
Cisco PCD is a migration/upgrade application for Unified Communications applications. Through PCD you can upgrade the version of Unified Communications applications which exists or you can also migrate the complete cluster to a new cluster of same or different version. Apart from this, you can also install device pack, Cisco Options Package (COP) files, phone firmware file to the call manager.
Cisco PCD is quite useful if you upload IP phone Firmware on callmanager, especially in a multi-node cluster, as it reduces the number of steps required to be performed and also removes the dependencies on third party Simple Filw Transfer Protocol (SFTP) servers . It also allows the users to schedule the firmware file upload as per their maintenance window.
Configure
Discover Cluster
In order to discover the cluster to which the Phone Firmware File has to be uploaded, navigate to Inventory > Clusters > Discover Cluster, as shown in the image:

Specify the Hostname/IP address and OS admin credetials for the cluster to be discovered.
Nickname for this cluster need not be same as the hostname.
Once done, click on Next, as shown in the image:

Cluster discovery could take several minutes. It depends upon the size and the location of the cluster .
Once the Cluster is successfully discovered, click on Next, as shown in the image:

Assign server roles here if required as you click on Edit Settings. Once done click on Finish, as shown in the image:

Upload Firmware File to PCD
Before the upgrade file is specified, upload the Phone firmware file to the PCD.
The file should be a Cisco Options Package (COP) file .
In order to upload, SFTP to the IP address of the PCD server with username adminsftp and PCD login password. Change the directory to upgrade and upload the file there.
This is the sample file upload:
SANKALJA-M-H02V:sankalja sankalja$ sftp adminsftp@10.127.227.100
adminsftp@10.127.227.100's password:
Connected to 10.127.227.100.
sftp>

sftp> cd upgrade
sftp> put /sankalja/cmterm-78xx.11-5-1-18.k3.cop.sgn
Uploading /sankalja/cmterm-78xx.11-5-1-18.k3.cop.sgn to /upgrade/cmterm-78xx.11-5-1-18.k3.cop.sgn
/sankalja/cmterm-78xx.11-5-1-18.k3.cop.sgn

100%   68MB  11.4MB/s   00:06
Add Upgrade Task
After the Cluster is discovered successfully and the Phone firmware file is uploaded to the upgrade directory of PCD, add the upgrade task.
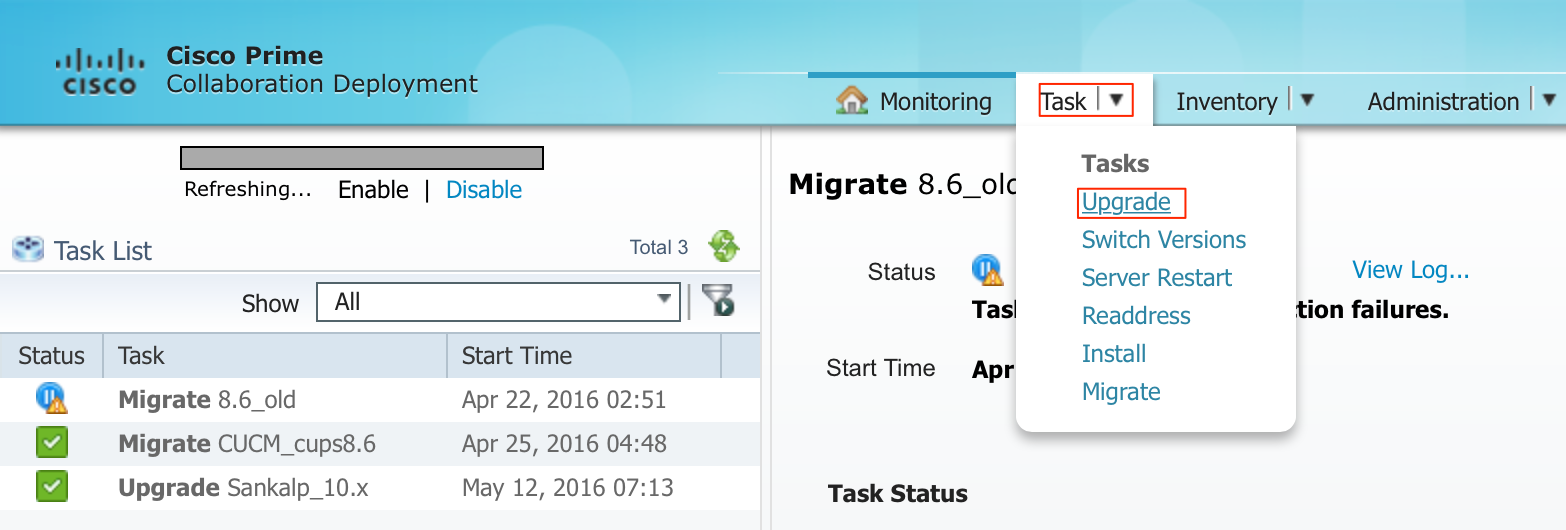
Navigate to Task > Upgrade > Add Upgrade Task as shown in the image:

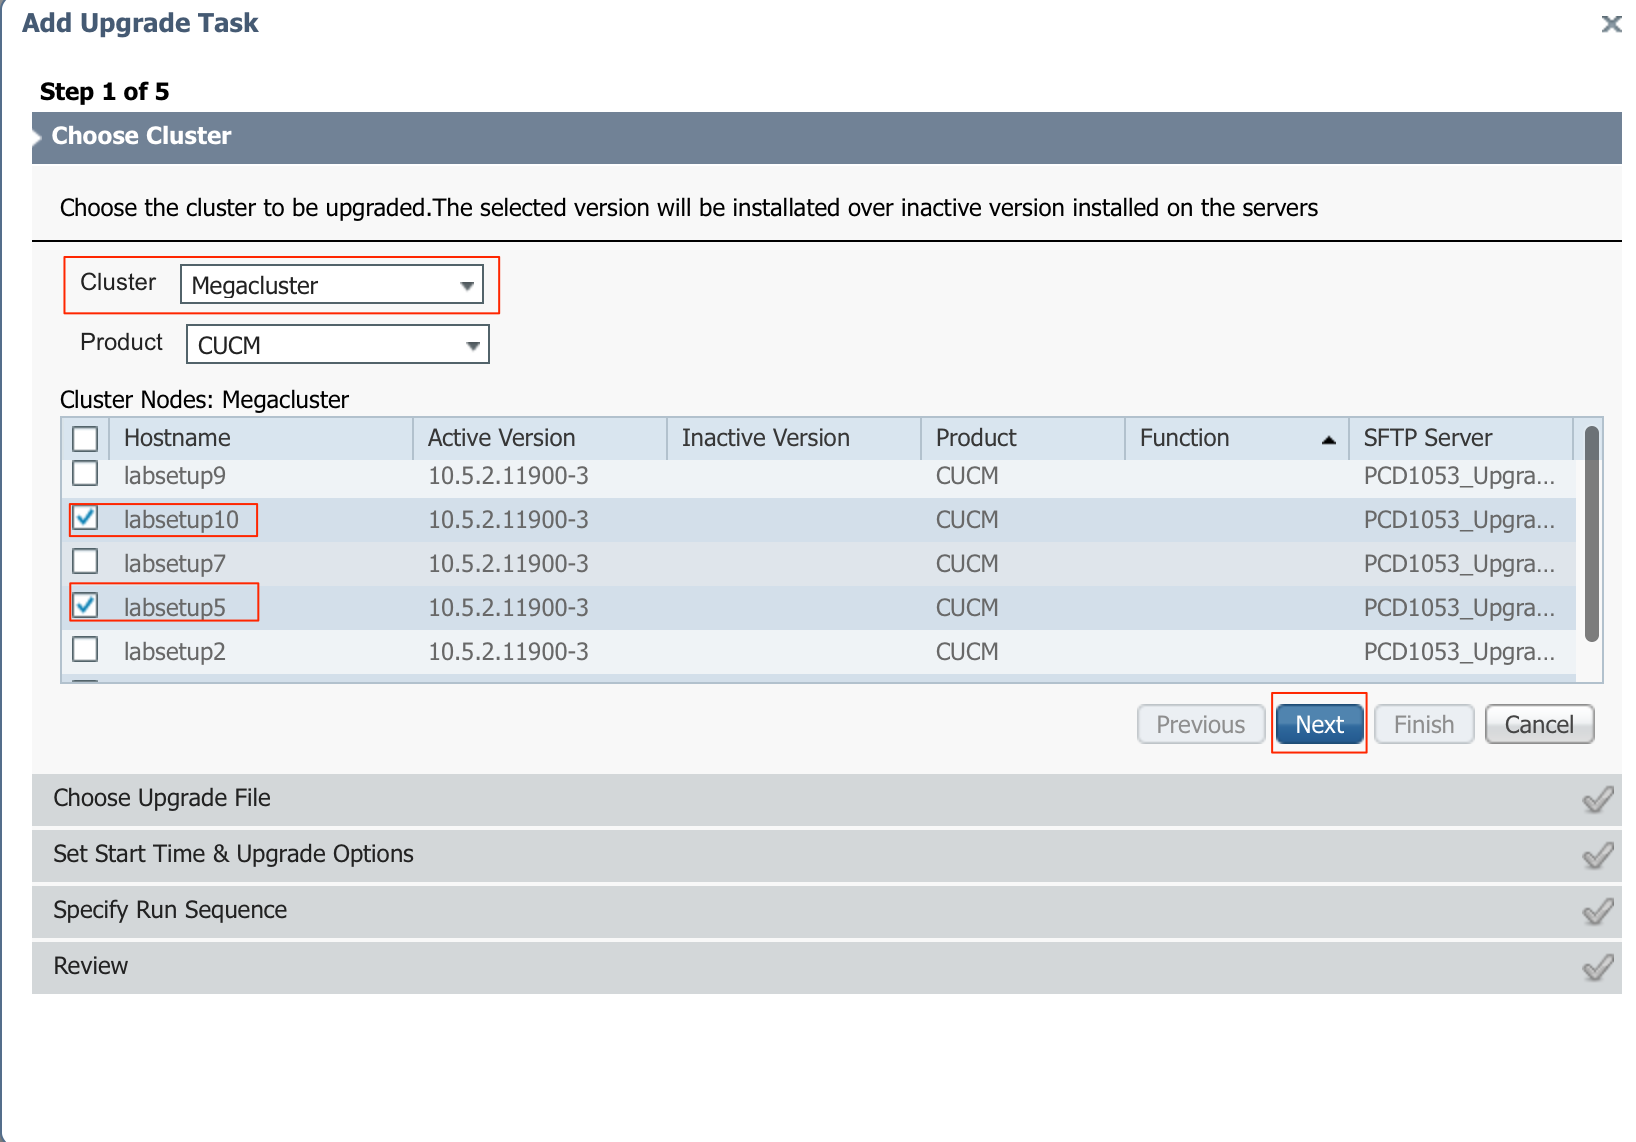
Choose the Destination cluster, where the Phone firmware file needs to be uploaded .
Then select the node in which you want to upload the phone firmware file.
After it is completed, click on Next, as shown in the image:
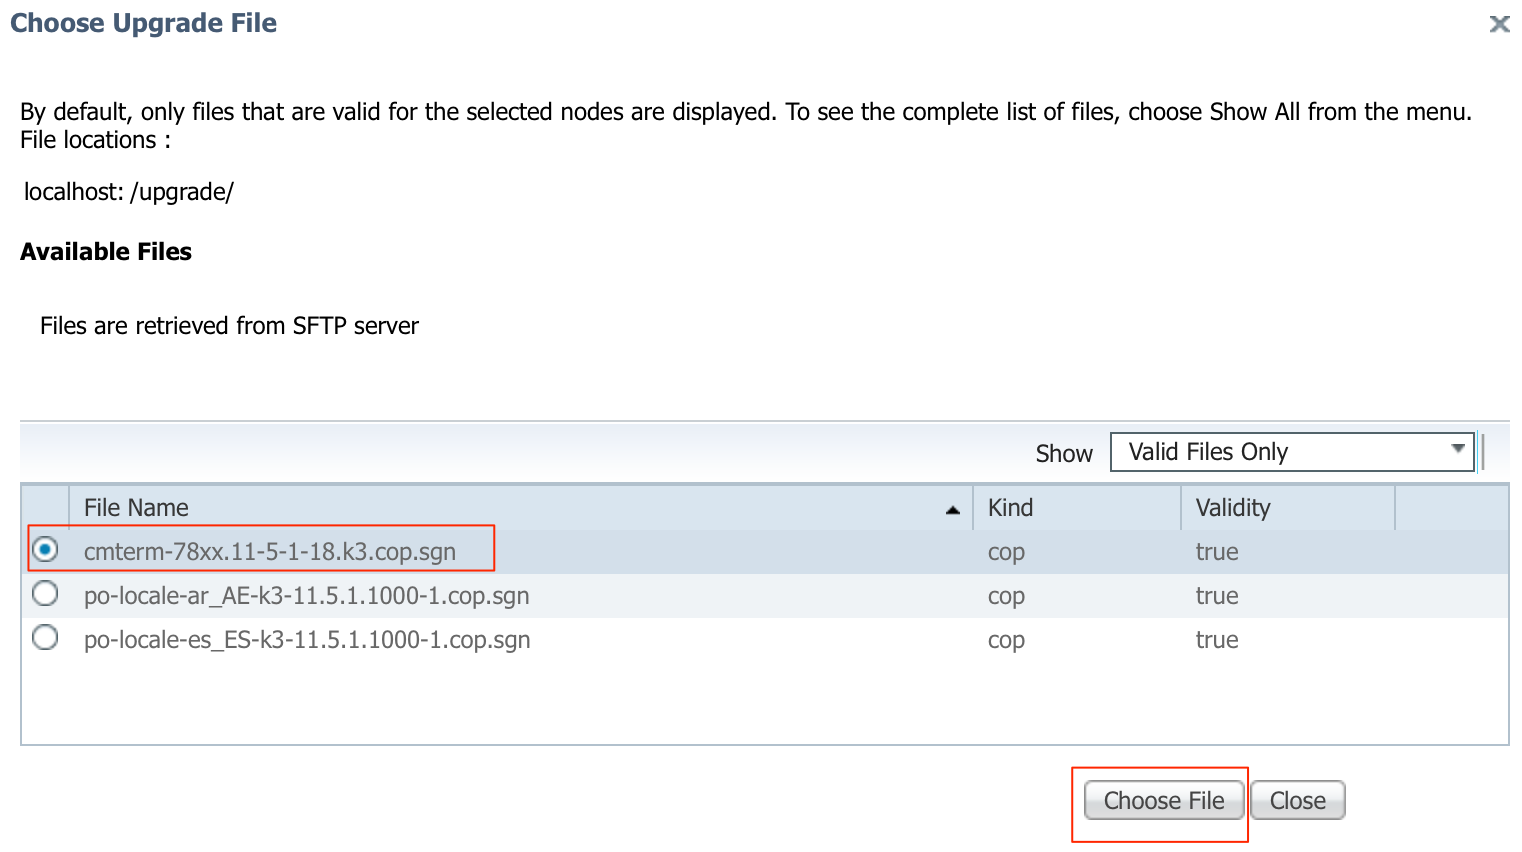
Click Browse to choose the Phone Firmware file, as shown in the image:
The required file should be present in the upgrade directory of PCD.

The required file should be present in the upgrade directory of PCD.
Select your required file and click on Choose File, as shown in the image:
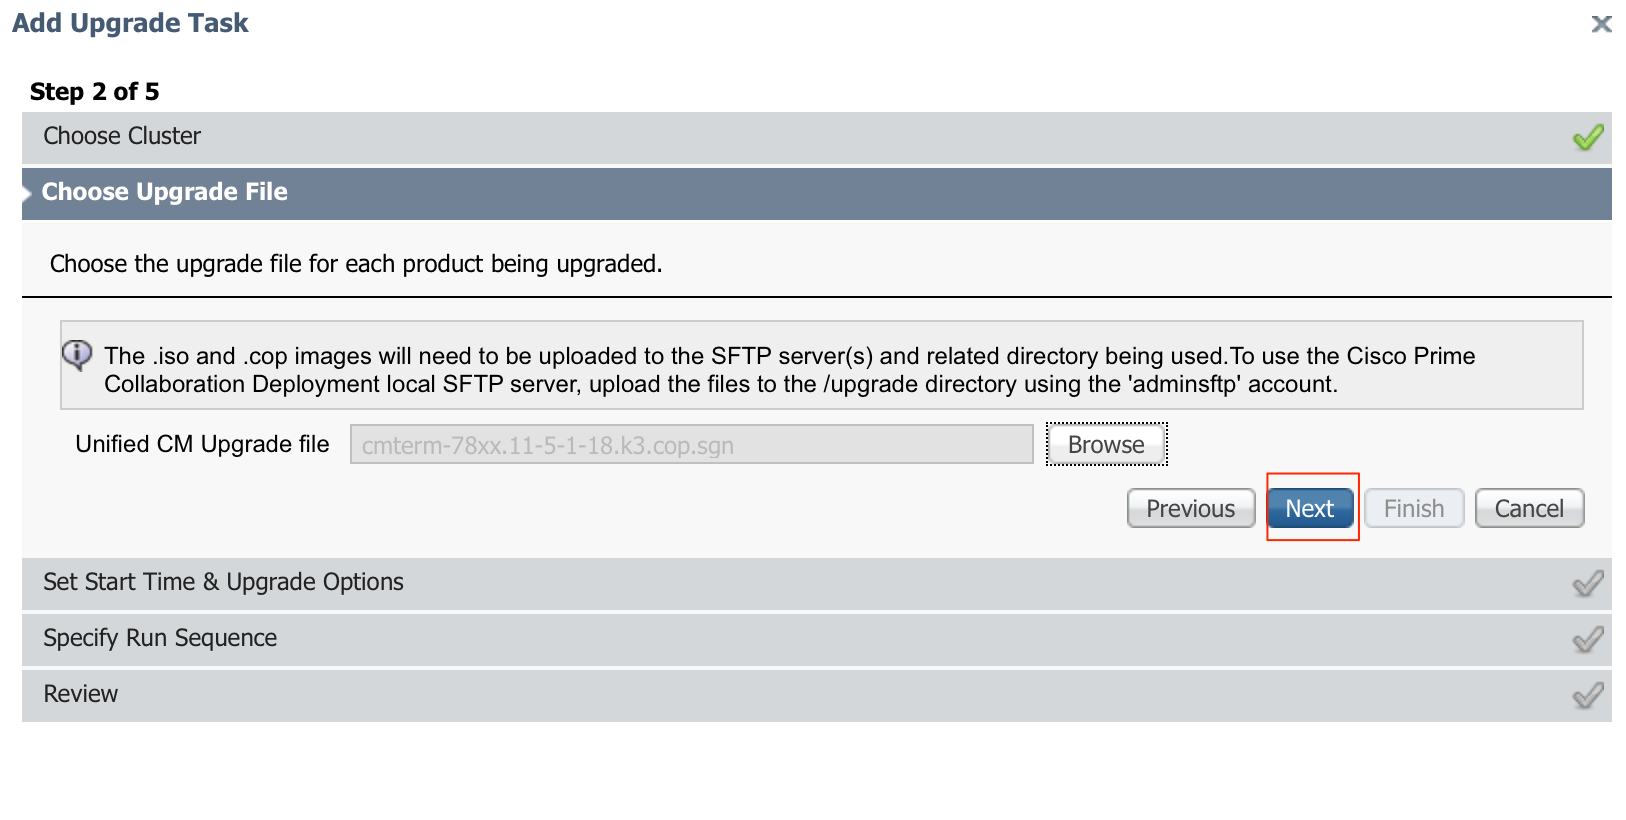
Click Next, as shown in the image:
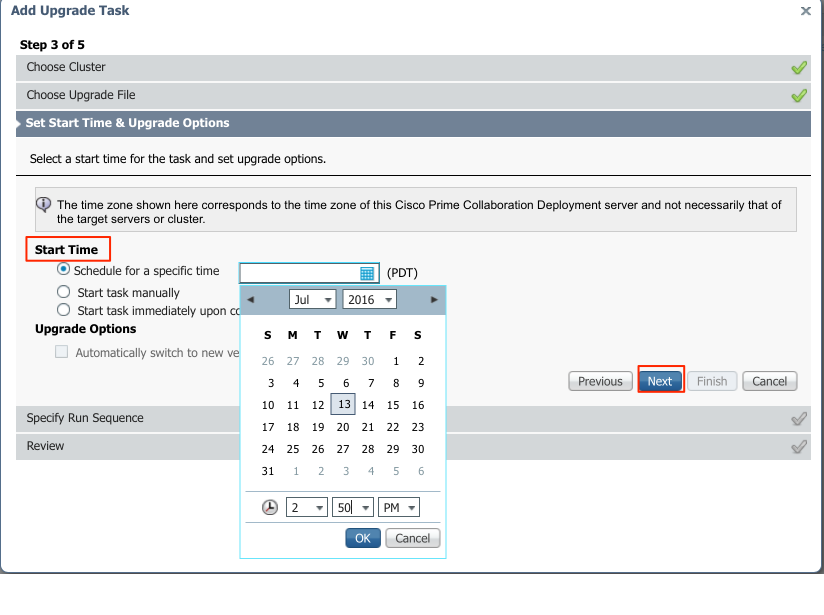
Specify the start time as per requirement. You can choose the start the task immidiately after completion of wizard or manually or schedule the file installation, for a later time.
Once the Start Time is specified, click Next, as shown in the image:
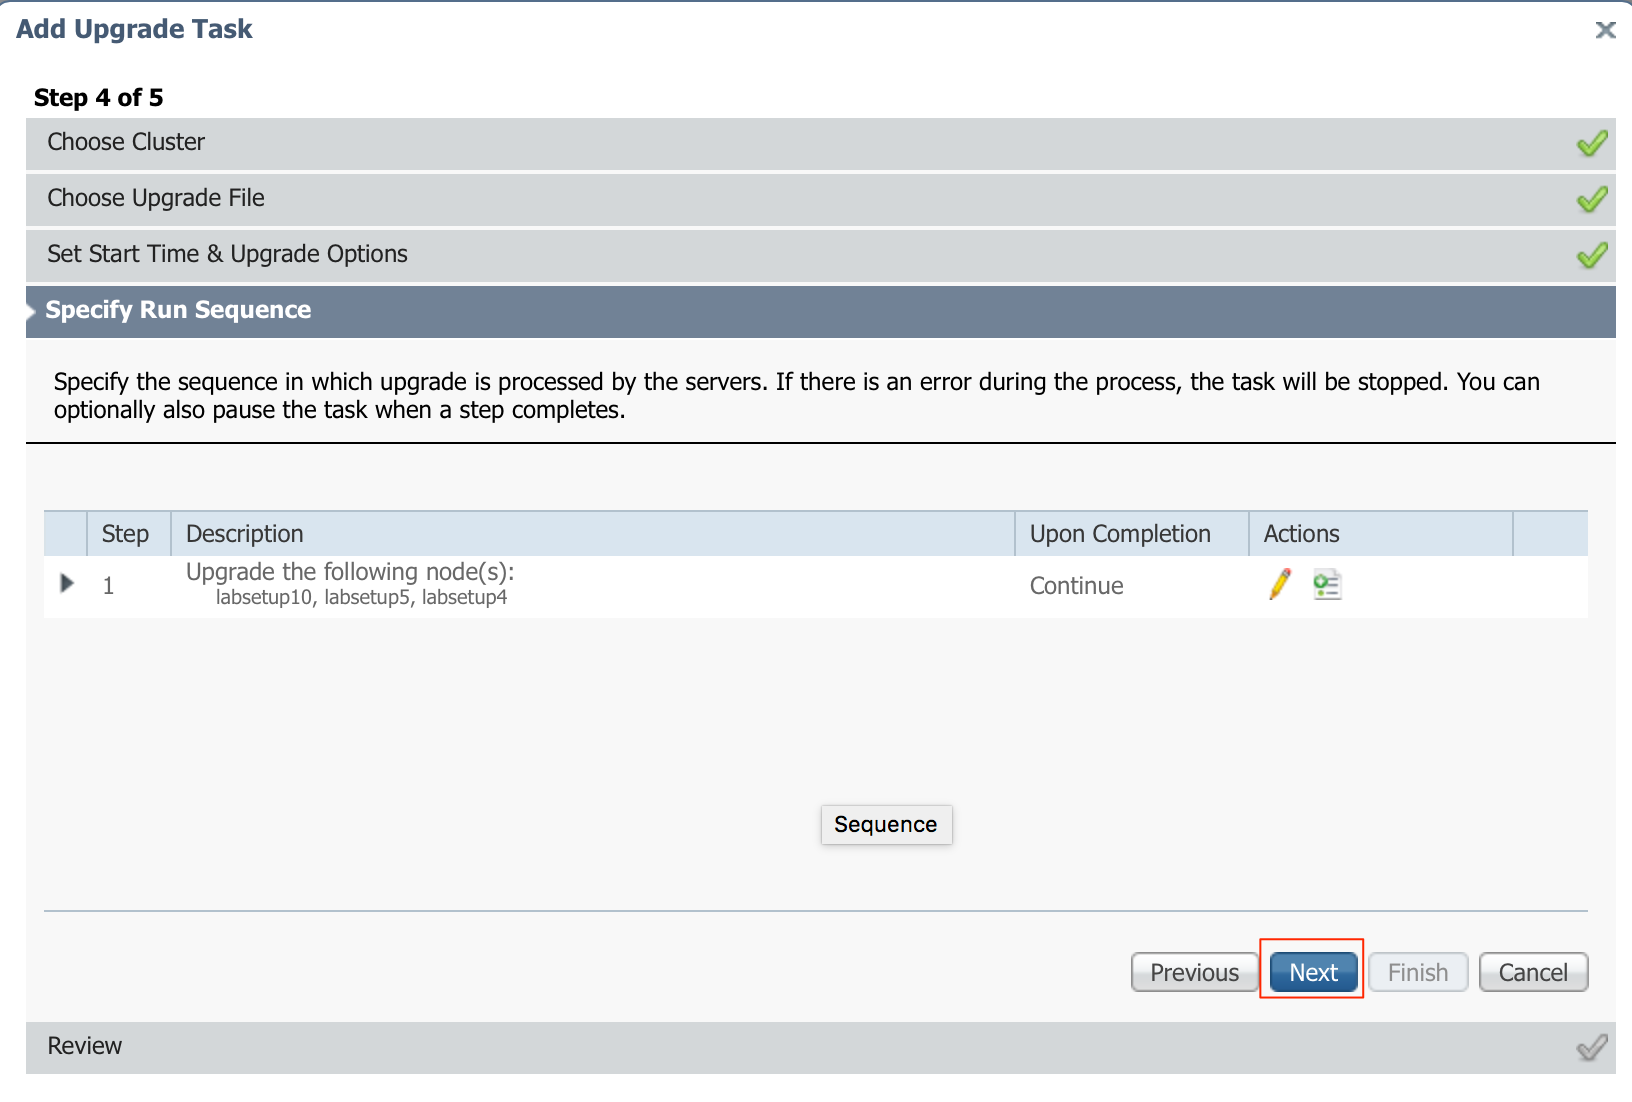
Specify the sequence in which the upgrade is processed by the server.
Review the upgrade task before it is initiated and after the process is completed click Finish, as shown in the image:
Review the upgrade task before it is initiated.and after the process is completed click Finish, as shown in the image:

These notifications appear at the right hand bottom of the screen .

Verify
Use this section in order to confirm that your configuration works properly.
In order to Verify the status of the Firmware file Installation, navigate to Task > Upgrade > Scheduled Tasks and History > View Details.
In case it is requied to Edit the setting, click Edit to make the necessary changes, as shown in the image:

Based on above configuration the Firmware file installation begins as per the scheduled time .
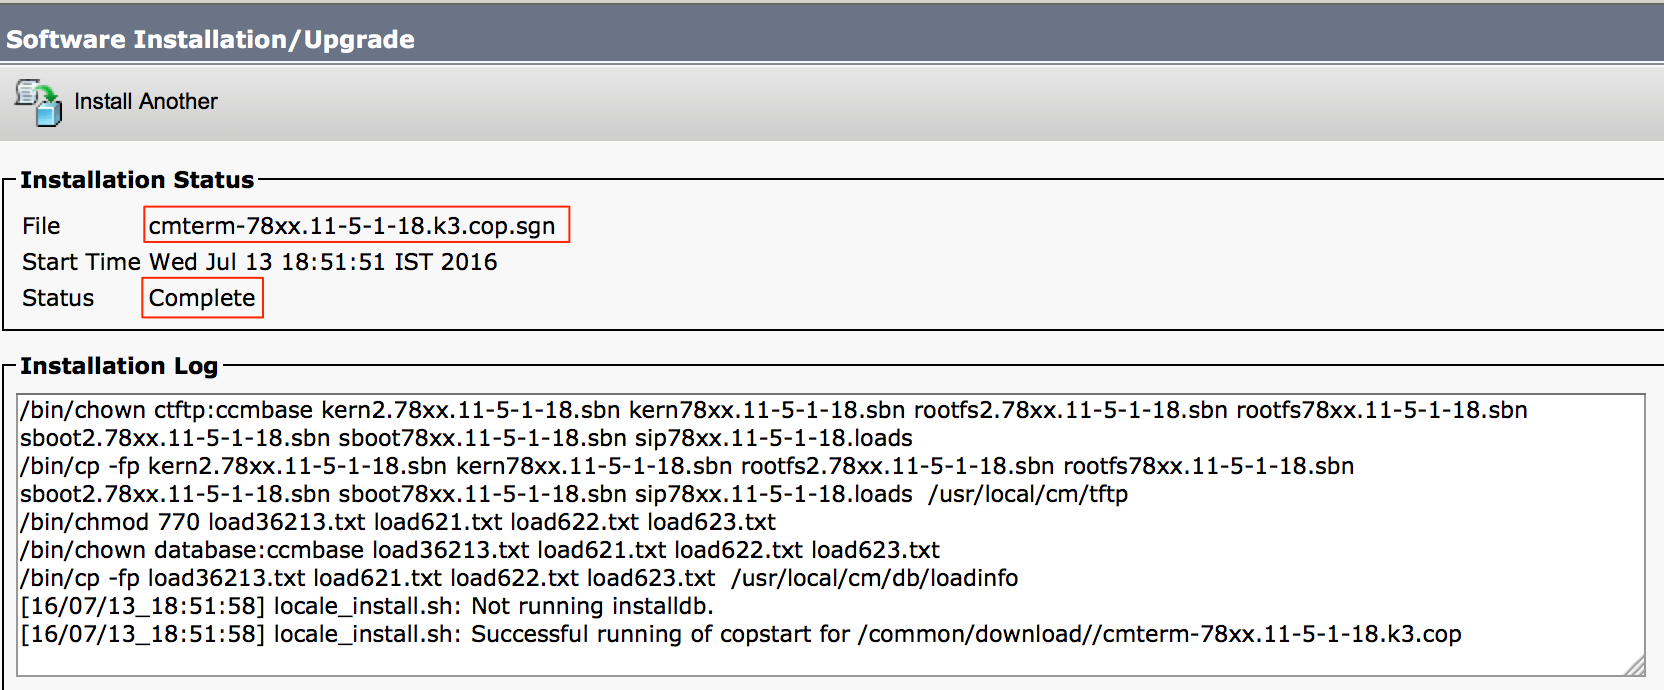
When the firmware installation starts you can see it as below on the call manager .
Navigate to OS Administration > Software Upgrade > Software Installation / Upgrade > Assume Control, as shown in the image:

As shown in the image, the status is reflected as Complete on call manager, after the installation is complete.
Post installation, in order to find files, navigate to OS Administration > Software Upgrade > TFTP File Management.

As shown in the image, on PCD after the installation is complete, the status is reflect as Successful, as shown in the image:

After the Firmware files are uploaded to call manager, the TFTP service should be restarted on the respective servers for the new firmware to reflect under CM Administration > Device > Device Settings > Device Defaults .
The phones need to be Reset, for them to download the firmware file.
Troubleshoot
There is currently no specific troubleshooting information available for this configuration.
