Introduction
This document describes how to upgrade ESXi for a Cisco Business Edition (BE6K/7K) via Cisco Integrated Management Controller (CIMC) vKVM interface.
Prerequisites
Requirements
Cisco recommends that you have knowledge of these topics:
- Cisco Business Edition Server Models
- ESXi vSphere
Components Used
The information in this document is based on these software and hardware versions:
- Business Edition Server BE6H-M5-K9
- ESXi 6.7 version
The information in this document was created from the devices in a specific lab environment. All of the devices used in this document started with a cleared (default) configuration. If your network is live, ensure that you understand the potential impact of any command.
ESXi Upgrade
Pre-Upgrade Tasks
Validate the Correct ESXi Version to Upgrade
Determine the correct ESXi version to upgrade your BE server. You must validate the compatibility with two applications:
- Compatibility with UC applications: To validate the supported versions of the UC application running on the server, refer to UC Applications Virtualization Guide.
For example, if you are hosting a CUCM14 virtual machine, the supported versions of VMware vSphere ESXi are 6.7, 7.0U1 and 8.0U1. In the virtualization table the minimum base version is listed, this means that CUCM14 compatibility is not supported for version 7.0, but it is supported for 7.0U1, 7.0U2, or 7.0U3.
- Compatibility with CIMC:
Go to UCS Hardware and Software Compatibility Tool to validate the supported CIMC versions for your ESXi version:
- Server Type: Cisco Standalone Servers C-series
- Server model: refer to the table and select the correct UCS model according to your BE model.
|
BE Model
|
UCS model
|
|
BE6M-M4-(K9/XU)
|
UCSC-C220-M4S
|
|
BE6H-M4-(K9/XU)
|
UCSC-C220-M4S
|
|
BE6M-M5-(K9/XU)
|
UCSC-C220-M5SX
|
|
BE6H-M5-(K9/XU)
|
UCSC-C220-M5SX
|
|
BE6K-M6-(K9/XU)
|
UCSC-C220-M6S
|
|
BE7M-M4-(K9/XU)
|
UCSC-C240-M4S2
|
|
BE7H-M4-(K9/XU)
|
UCSC-C240-M4SX
|
|
BE7M-M5-(K9/XU)
|
UCSC-C240-M5SX
|
|
BE7H-M5-(K9/XU)
|
UCSC-C240-M5SX
|
|
BE7M-M6-(K9/XU)
|
UCSC-C240-M6SX
|
|
BE7H-M6-(K9/XU)
|
UCSC-C240-M6SX
|
- Processor Version: Select the latest
- Operating System: VMware
- Operating System Version: the ESXi destination version.
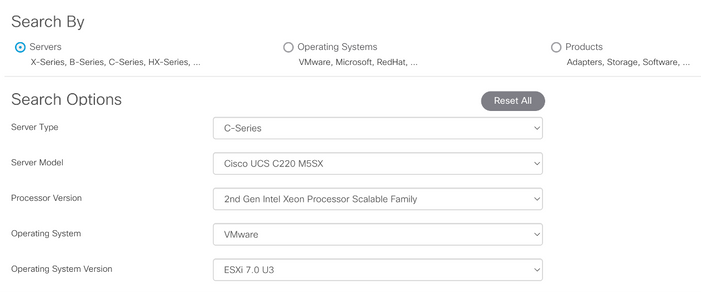 Compatibility tool example
If your current CIMC version is listed as compatible, there is no need to upgrade your CIMC. Otherwise, upgrade your CIMC with the Firmware Bundle link specified in the Details Column and refer to Install & Upgrade Guides in the Documents Column.
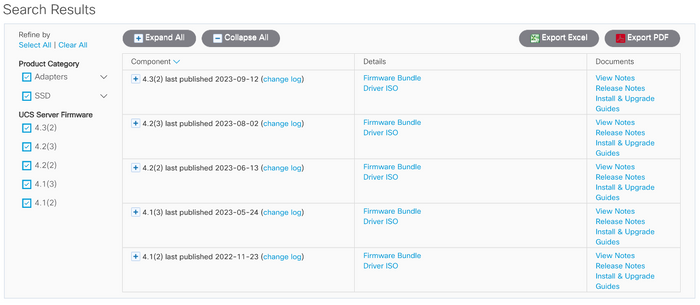 Compatibility tool results
Validate the Virtual Drive the ESXi is Booting Up
Log in to your CIMC portal, navigate to Storage > Cisco Raid Controller > Virtual Drive Info and identify the Virtual Drive Name that has Boot Drive as true.
 CIMC boot up virtual drive
Download ISO File From VMware Portal
In order to get the correct ISO file for the upgrade, navigate to VMWare Portal > Select Version > Custom ISO > find Cisco Custom Image for ESXi > click on Go To Downloads.
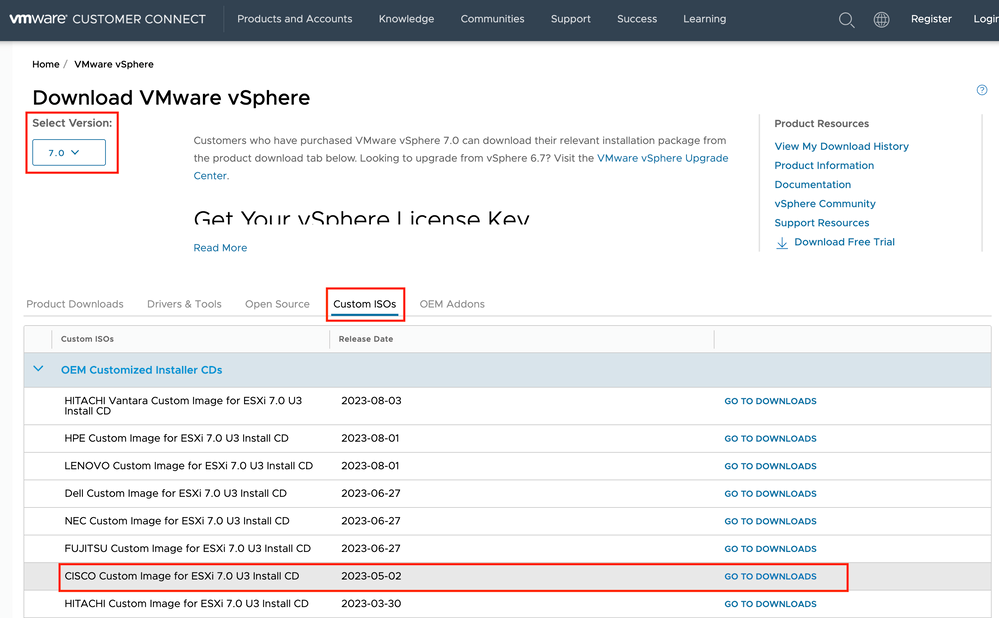 VMware portal ISO download page
Select the latest ESXi version and click on Download Now for the file type: ISO
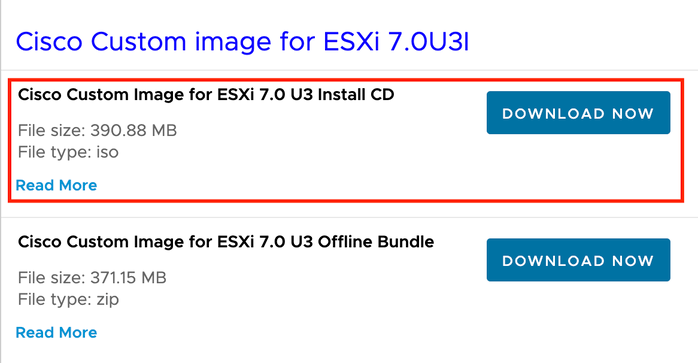 ESXi ISO download selection
Upgrade Tasks

Warning: You must power off your Virtual Machines gracefully. For UC appliances the correct process is to log in via SSH and type utils system shutdown command.
- Set ESXi in maintenance mode. Navigate to ESXi GUI interface > right-click on Host > Maintenance Mode > Enter Maintenance Mode.
- Open CIMC interface and click Launch vKVM from the toolbar.

Tip: The browser must allow pop-up windows as vKVM console opens in a different window.

- In the vKVM console, click Virtual Media. If it is not enabled, click Activate Virtual Devices.
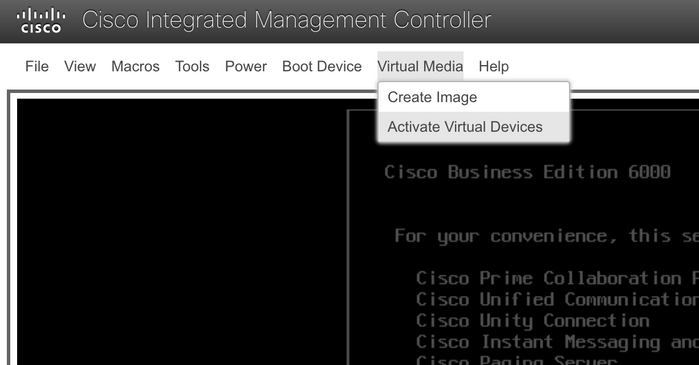 Activate virtual devices menu
- Then click on Map CD/DVD.
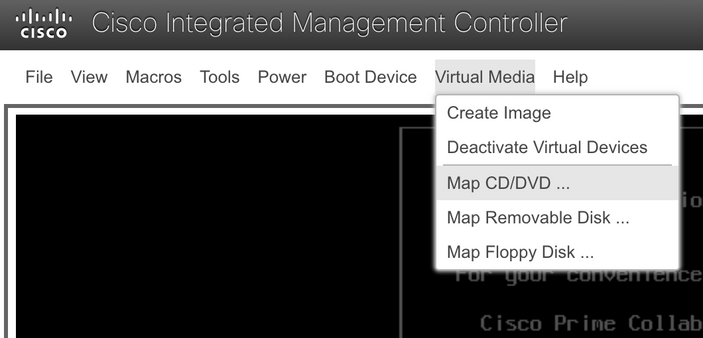 Map CD/DVD menu
- Select the ISO file to upload and then click Map Drive.
 Map image file window
- Navigate to Virtual Drive Menu and validate that your Image file is mapped.
 Validate virtual drive menu
- In order to restart your server navigate to Power > Reset System (warm boot).
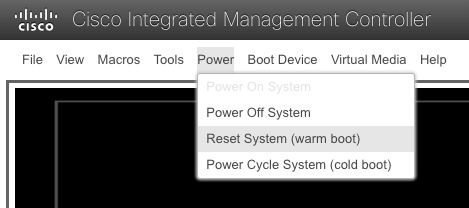 Reset system menu
- The server starts booting.
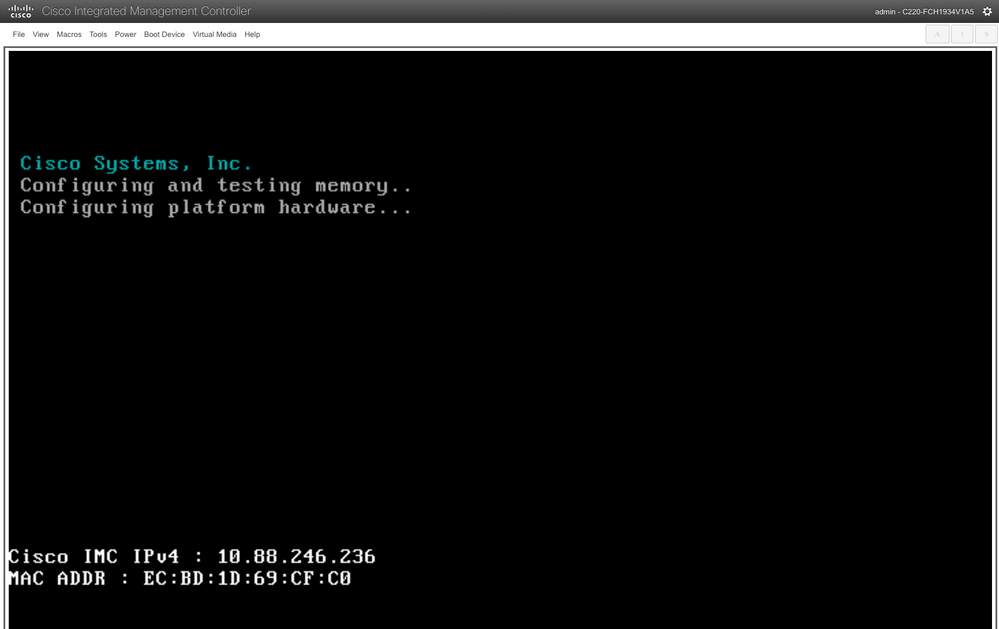 Server booting up window
- Once the Cisco Logo appears, type F6 to select the Boot Menu, message Entering Boot selection menu appears.
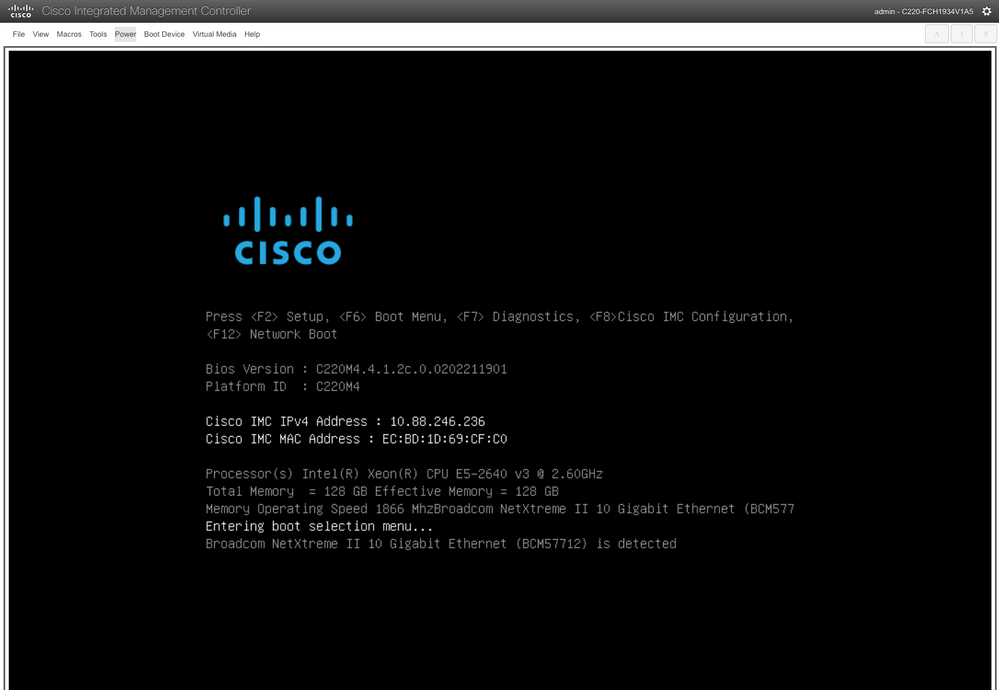 Server boot menu selection window
- Boot menu is displayed, select Cisco vKVM-Mapped vDVD option.
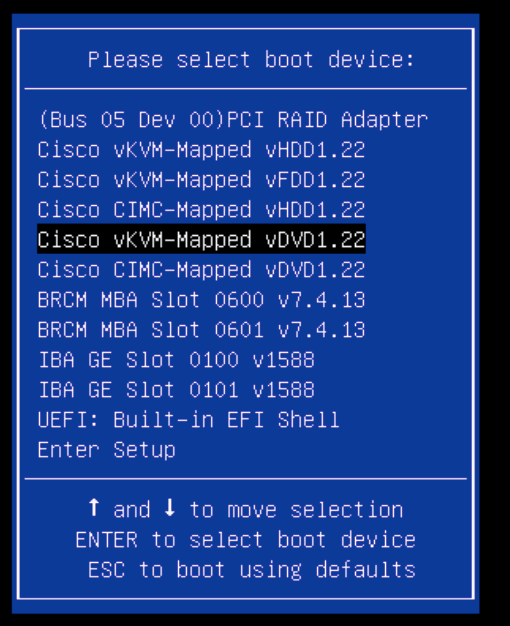 Boot menu window
- Select ESXi Installer before the automatic boot is triggered.
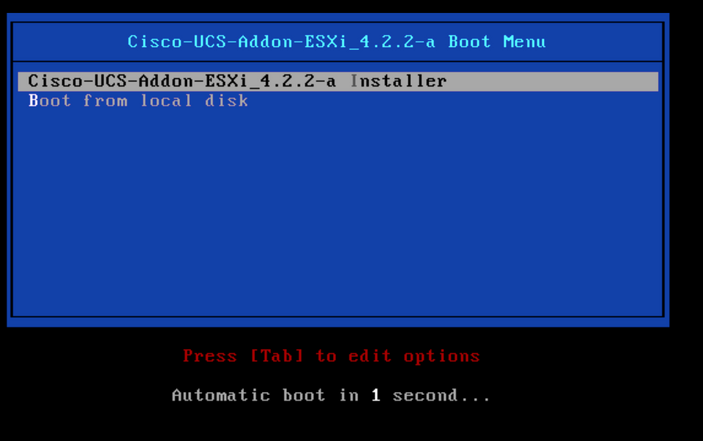 ESXi installer selection window
- UCS starts loading the ESXi installer.

Caution: Make sure that your session stays active, if your browser connection is disconnected, the booting process from vDVD is going to fail.

Tip: Perform the upgrade from a local machine in the same UCS network to reduce the time it takes to load the ISO file.
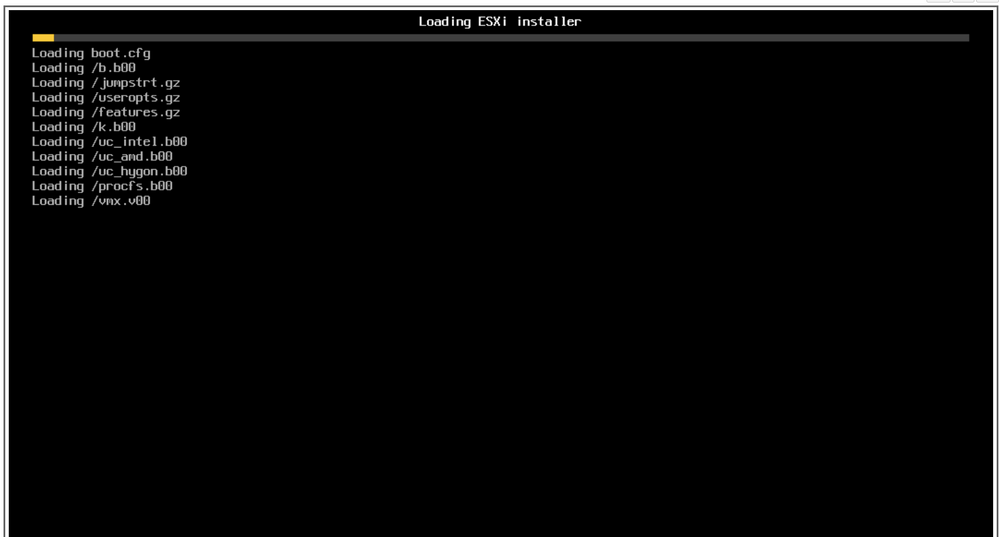 Loading ESXi installer screen
- The Welcome Installation Wizard is displayed, press Enter to continue.
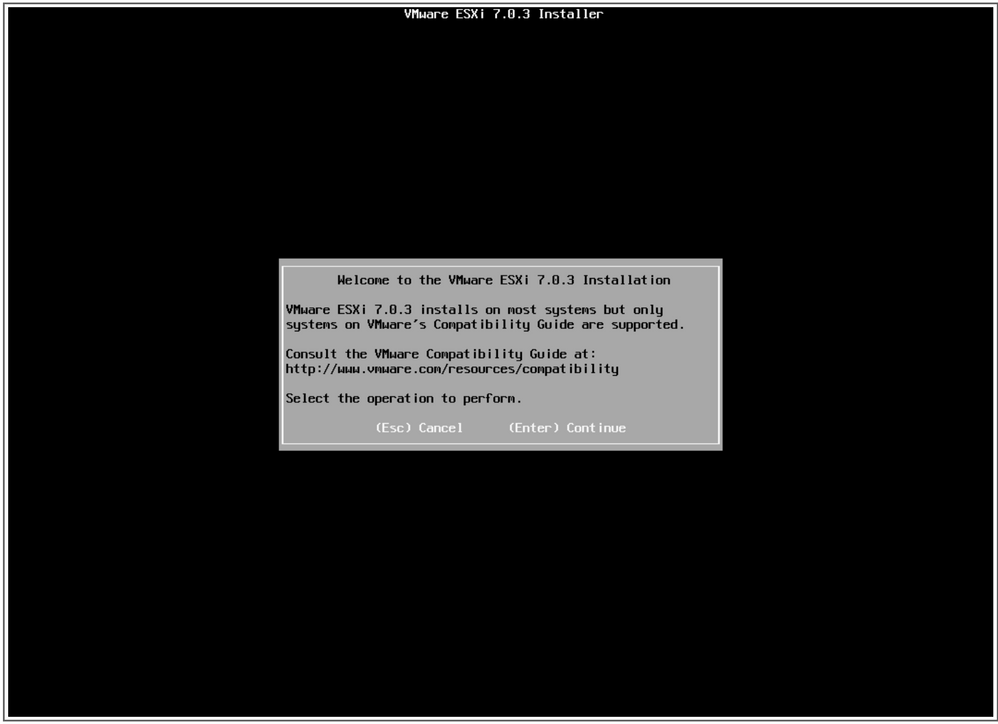 Welcome ESXi installation screen
- End User License Agreement (EULA) appears, press F11 to Accept and Continue.

Tip: If the F11 key is not recognized you can use Macros Custom keys, navigate to Macros > Manage > New > Select F11 Key. The new key appears under Macro > User Defined Macros.
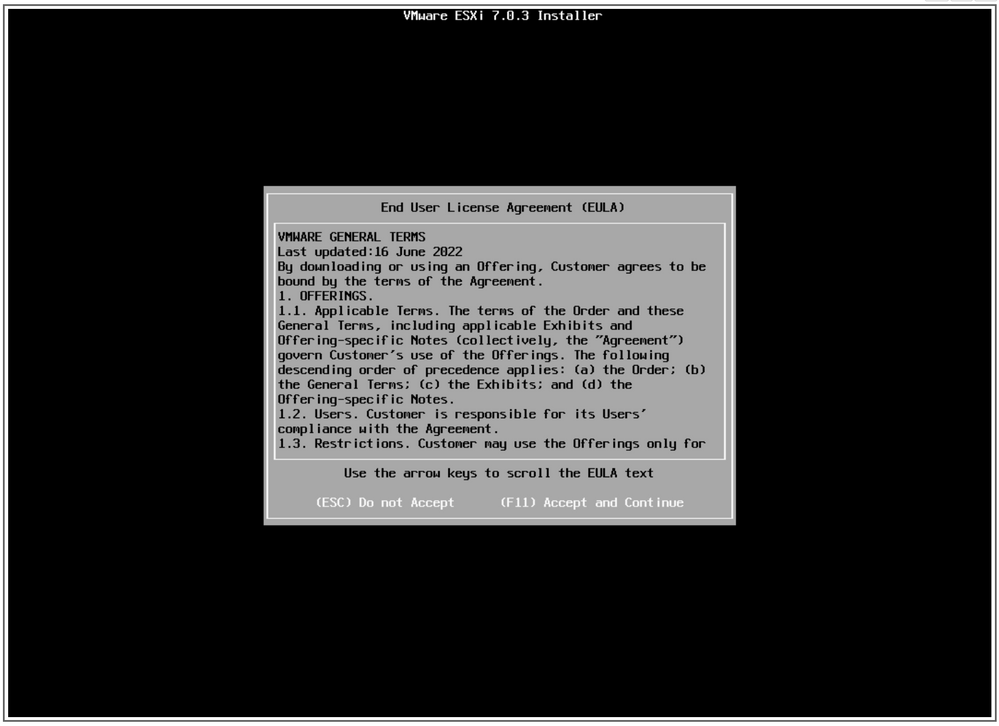 EULA screen
- The Installer scans your UCS storage.
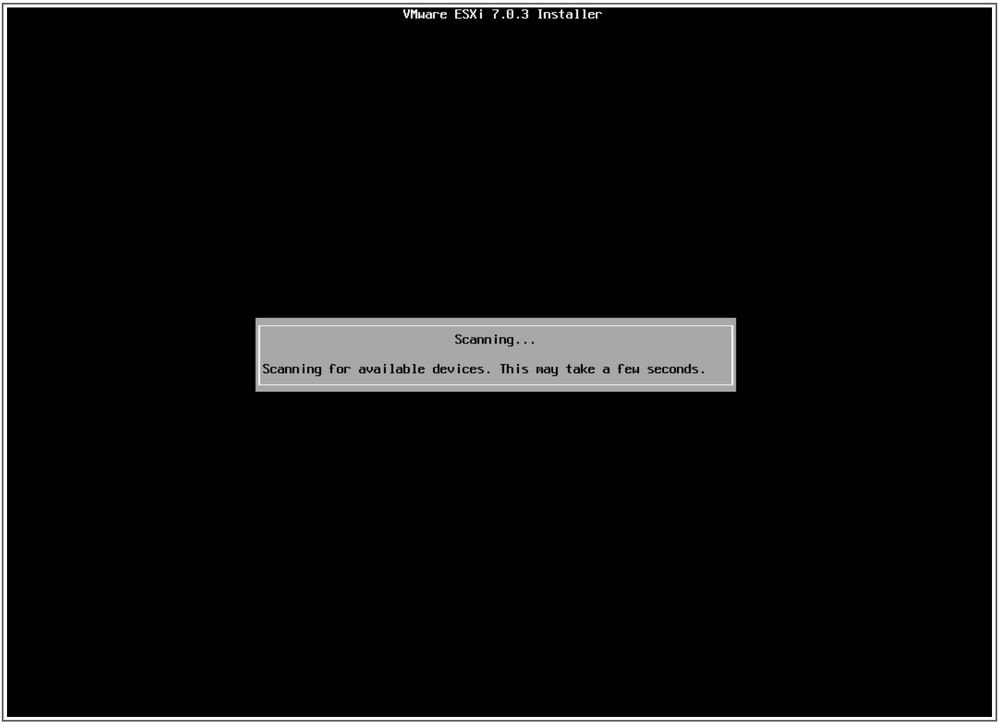 ESXi installer scanning screen
- Select the Virtual Drive that has the ESXi installed, it is the one identified as Boot Virtual Drive in Pre-upgrade Tasks.
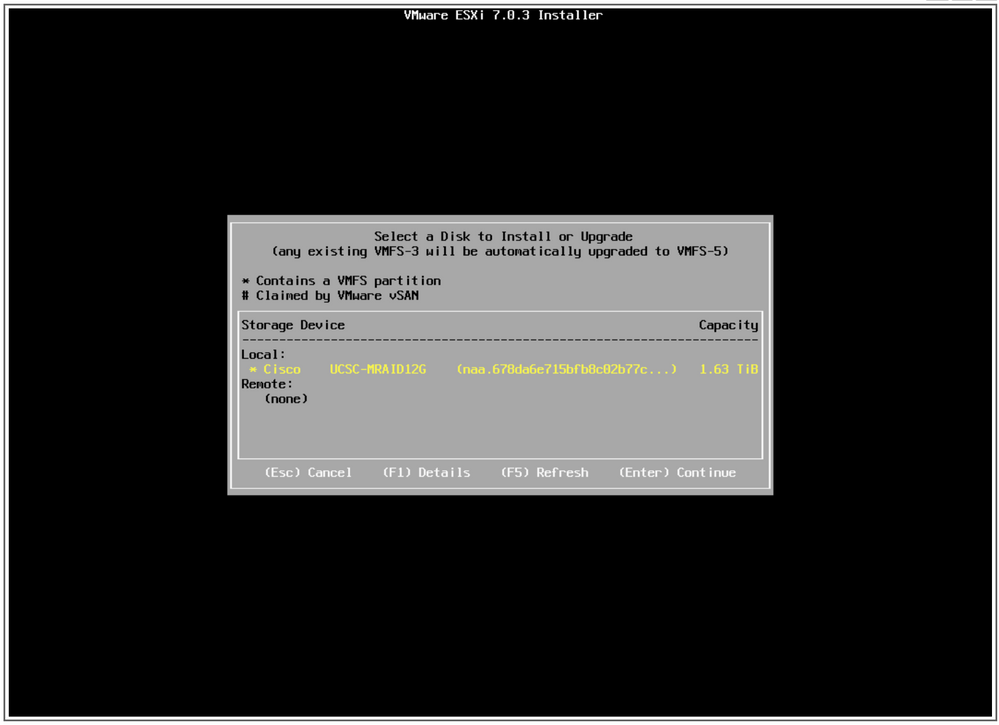 Select disk screen
- Select Upgrade ESXi, preserve VMFS datastore.

Note: This is the same process for ESXi fresh install, in case no previous ESXi is detected or the incorrect Virtual Drive is selected, only the Install options are displayed.
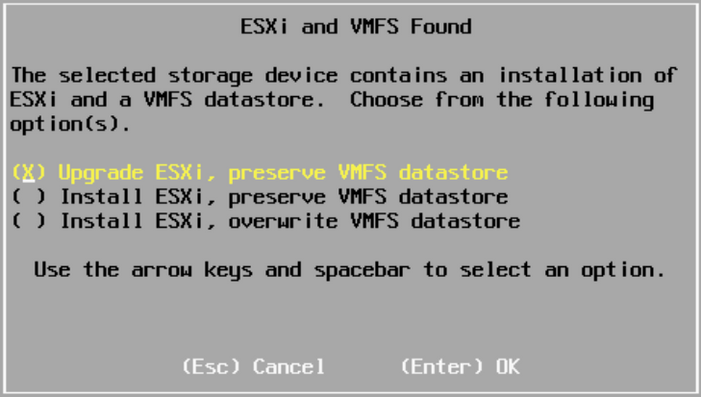 Upgrade selection screen
- Validate the source and destination ESXi versions and confirm upgrade with F11.
 Confirm upgrade screen
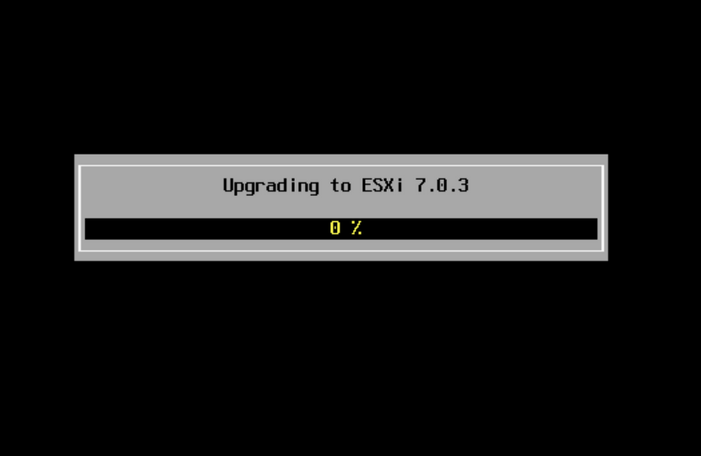 Upgrade in progress screen
- Once the upgrade is complete, remove the ESXi ISO file from vDVD and press Enter.
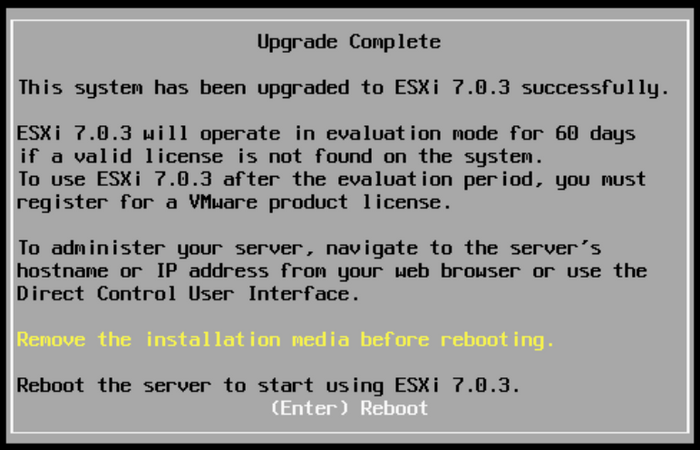 Upgrade complete screen
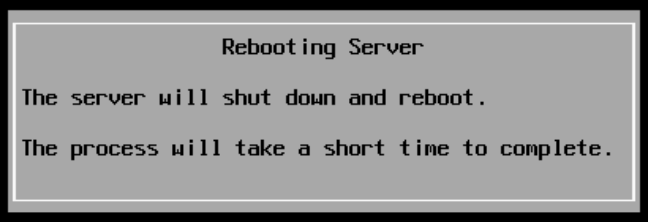 Rebooting server screen
- UCS starts the normal booting process, once it finishes the new ESXi version is displayed in the top right corner.
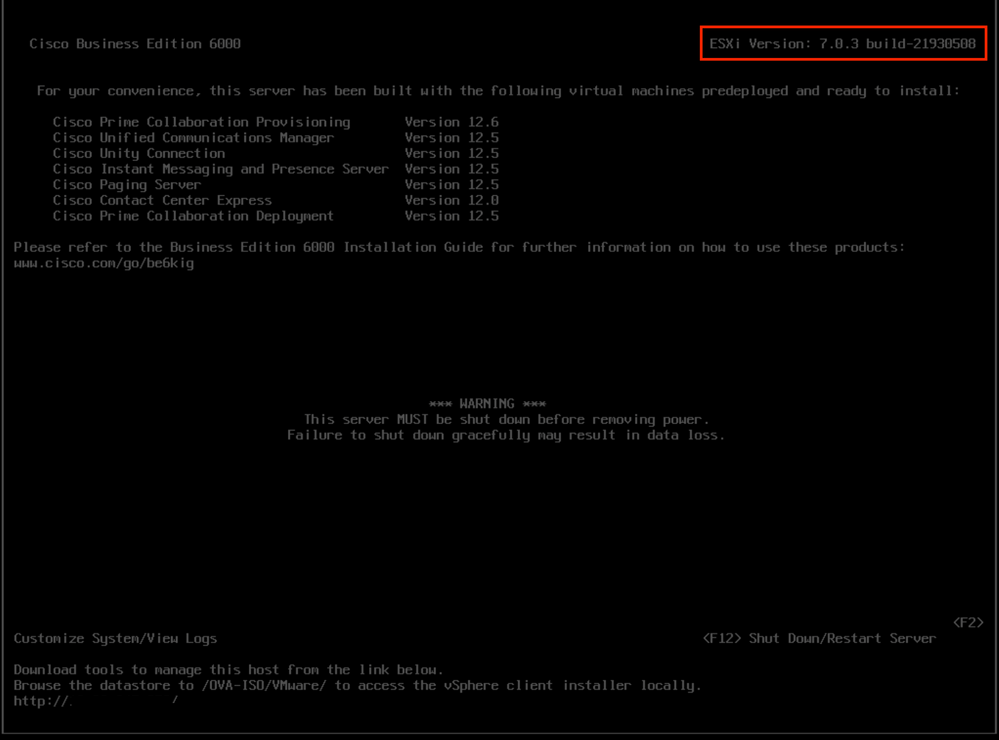 Upgrade successful screen
- Navigate to ESXi GUI interface > right-click on Host > Maintenance Mode > Exit Maintenance Mode.
Post-Upgrade Tasks
Upgrade ESXi License
In case the ESXi upgrade is from a different major version (from 6.x to 7.x) you must upgrade your ESXi license too. There are different options to upgrade the ESXi license according to the type and the way it was purchased.
There are 3 types of ESXi licenses you can acquire with a BE6K/7K server:
1. VMware License
2. Cisco Re-sell License with ISV1 contract
3. Embedded License with SWSS contract
If the license was purchased directly with VMware, refer to VMWare License key requirements article or contact VMware.
If the license was purchased with Cisco, either Cisco re-sell with ISV1 or Embedded license, then upgrade your license through MCE tool, refer to MCE Version Upgrade Guide.
Related Information


 Feedback