Increase Customer Engagement by Configuring Purple on WAP 571/571E Devices
Available Languages
Introduction/Objective
As of software version 1.1.0.3 Cisco devices WAP571/571E now support external captive portals. This article provides directions for configuring the Purple platform on Cisco WAPs. (Link to Purple website) Where appropriate this article will link to Purple's site where there is the option for deeper understanding or customization.
Requirements
- WAP571/571E - Firmware image 1.1.0.3 (WAP571/E firmware Link )
- MAC addresses of the devices you intend to use with Purple
What is Purple?
In their own words, Purple describes itself as follows:
“Purple gives businesses a means to capture and understand their offline world by offering a cloud-based platform that sits on top of their existing WiFi infrastructure.” – Purple About Us page
Purple acts as an authentication service that enables potential network users the ability to log into the WiFi via accounts they already have. This includes the usual social media stalwarts – Twitter, Facebook, Instagram, etc. – or by filling out a brief form. The users gain access to the network, exchanging data about themselves. Underscoring this service is the idea that data holds business value. Whether the data is: profile of likes, geo location, or other demographics - each data type can contribute to a targeted understanding of your customers.
What is the use case? Or “Why would I use Purple?”
Offering users easy access to the internet via WiFi, users grant your business insight into who they are. By understanding more about who your customer is, the more you are able to tailor your subsequent messaging to them. Otherwise known as engagement, with careful curation of the data to provide insights, you can take steps to re-engage with your customers while in store or after they have left. This is not simply a branding exercise; performing actions based on insights gained can increase your sales and customer satisfaction.
When used in conjunction with a marketing strategy, the health of your business can see dramatic improvement. Leveraging data acts as a catalyst for this process.
What else should I know?
Networks with one to five wireless access points are able to leverage Purple free of charge. Above five WAPs, you must opt into the Enterprise service tier. (More information on pricing here)
How is Purple different from what Cisco offers?
Cisco devices have the ability to offer social media logins, using their favorite site’s credentials to gain access to your wireless network. While WAP devices gather the status and statistics of users connecting, Cisco does not offer the ability to turn this data into actionable business insight without significant legwork. The distinction lies in statistics versus analytics, from design forward, analytics are a part of a pipeline. Using this “pipeline” enables you to understand how a customer goes from just visiting to a repeat customer. Without direction, the pipeline is more of a firehose.
Let’s kick this off, setup your Purple Account
Step 1. Create an account on Purple (link to account creation page).
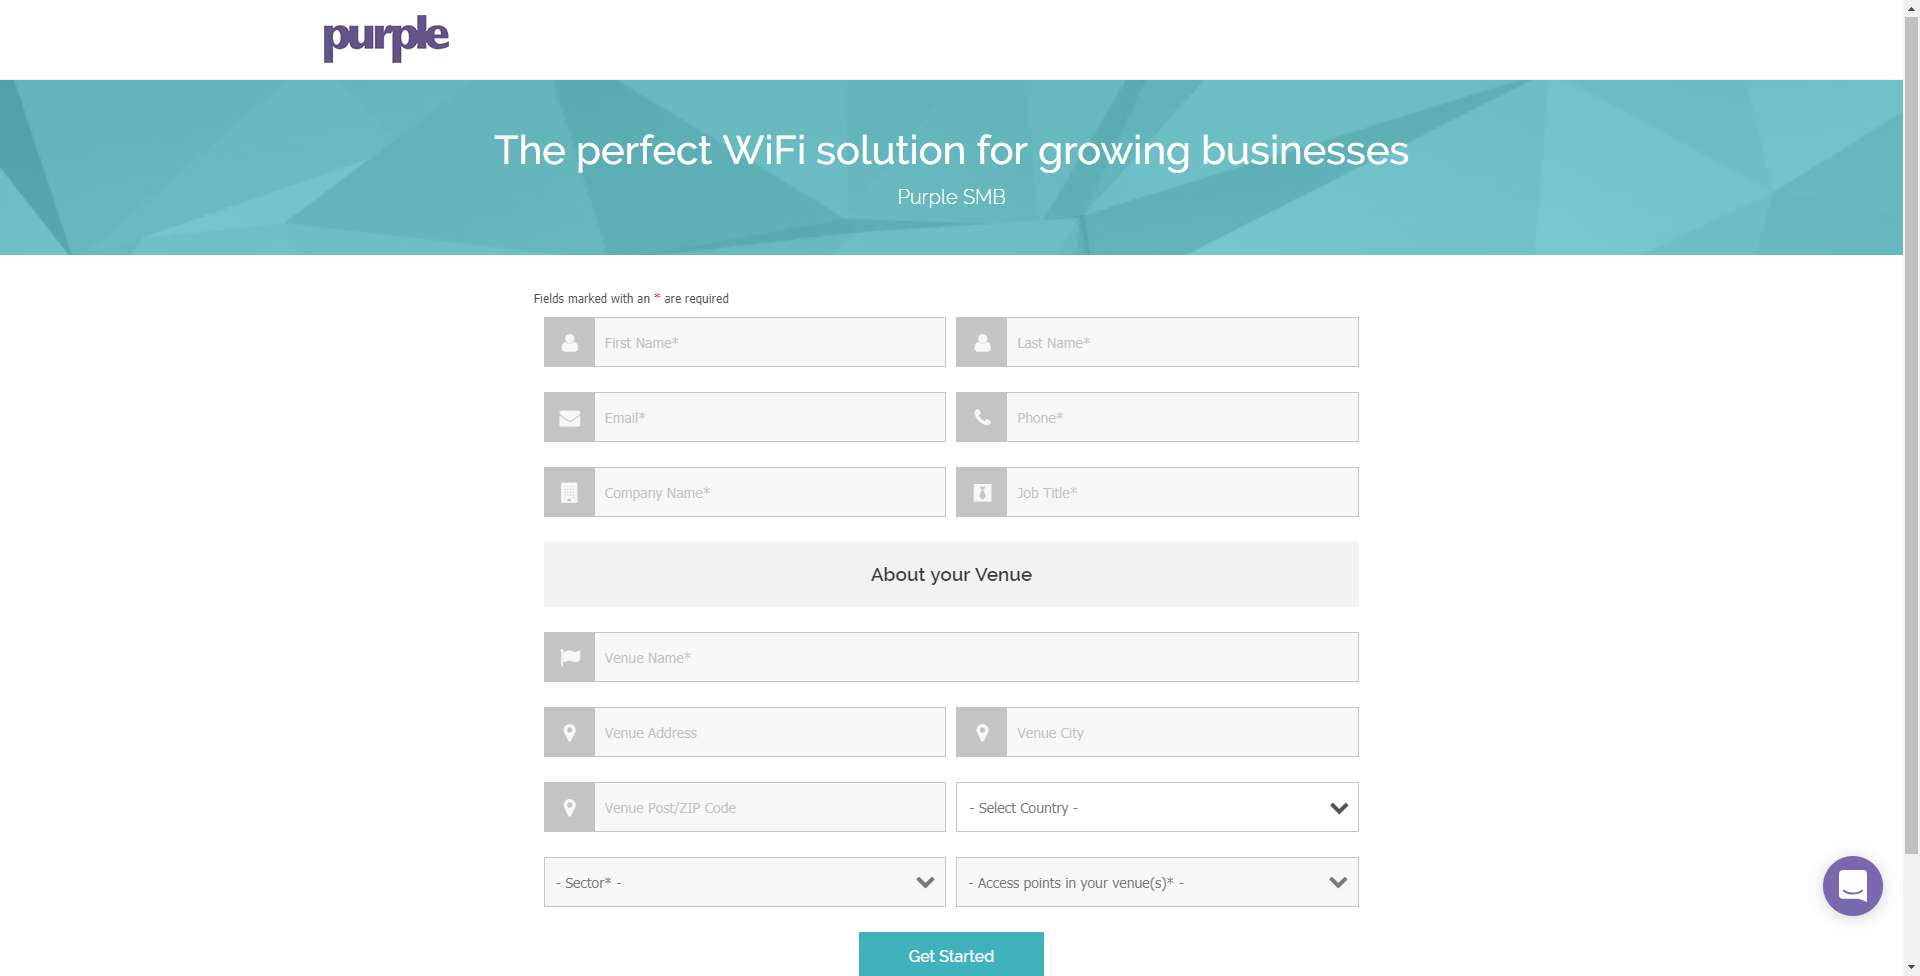
Note: Geographic location is a requirement to use Purple.
Step 2. After entering these initial details, Purple will guide you through a 3-part wizard to gain further detail about your business. Link the social media accounts by clicking the profiles associated with your business use.
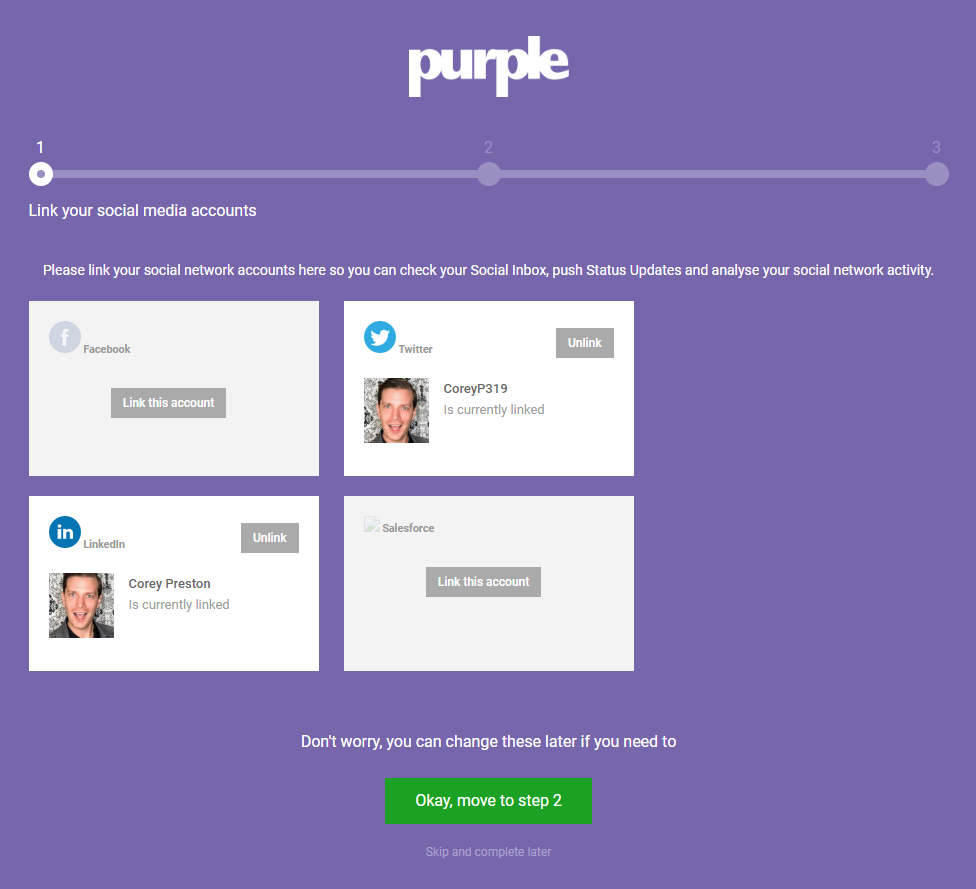
Note: You do have the option to skip this step, but our recommendation is to include it sooner than later.
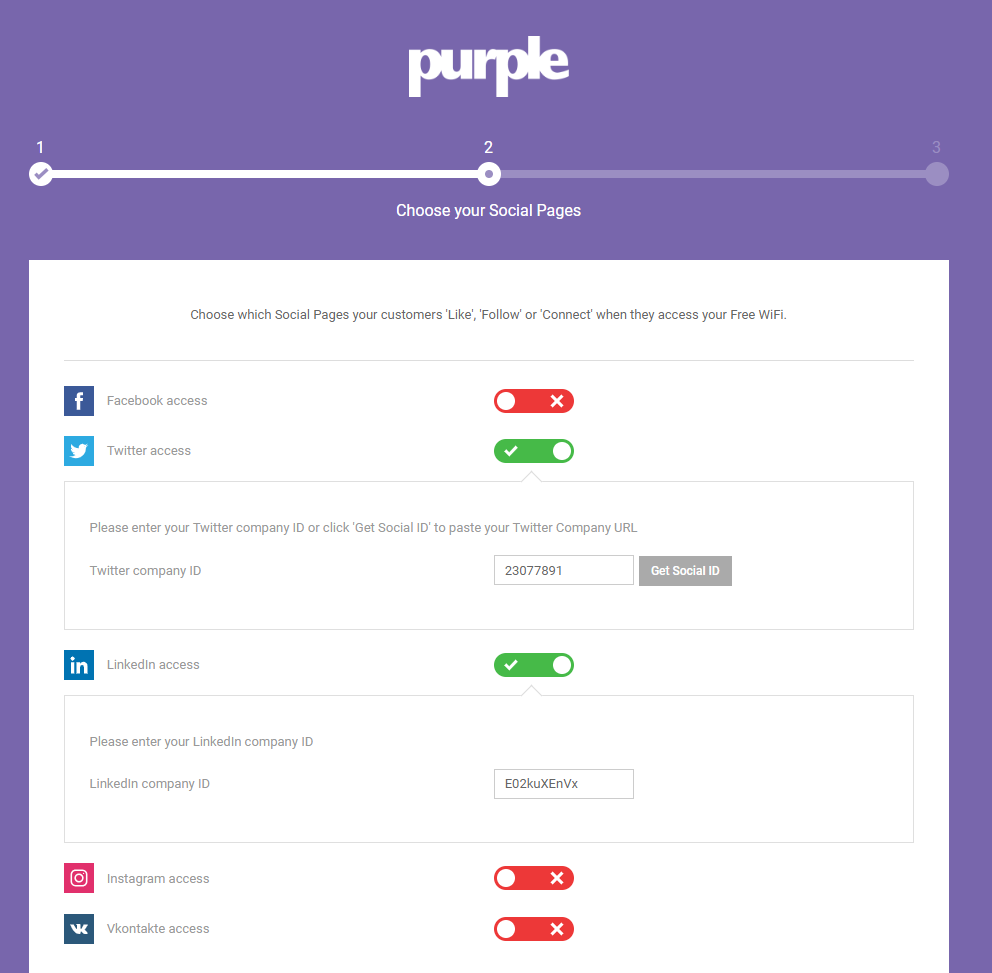
Step 3. Now you will be able to configure which social media pages users will be able to Like or Follow. Select the profiles by clicking the toggles.
Step 4. The last page of the wizard will have you register your first WAP device. Begin by clicking the Router Type drop-down box, scrolling down to the Cisco section and selecting AP (Mobility Express) .
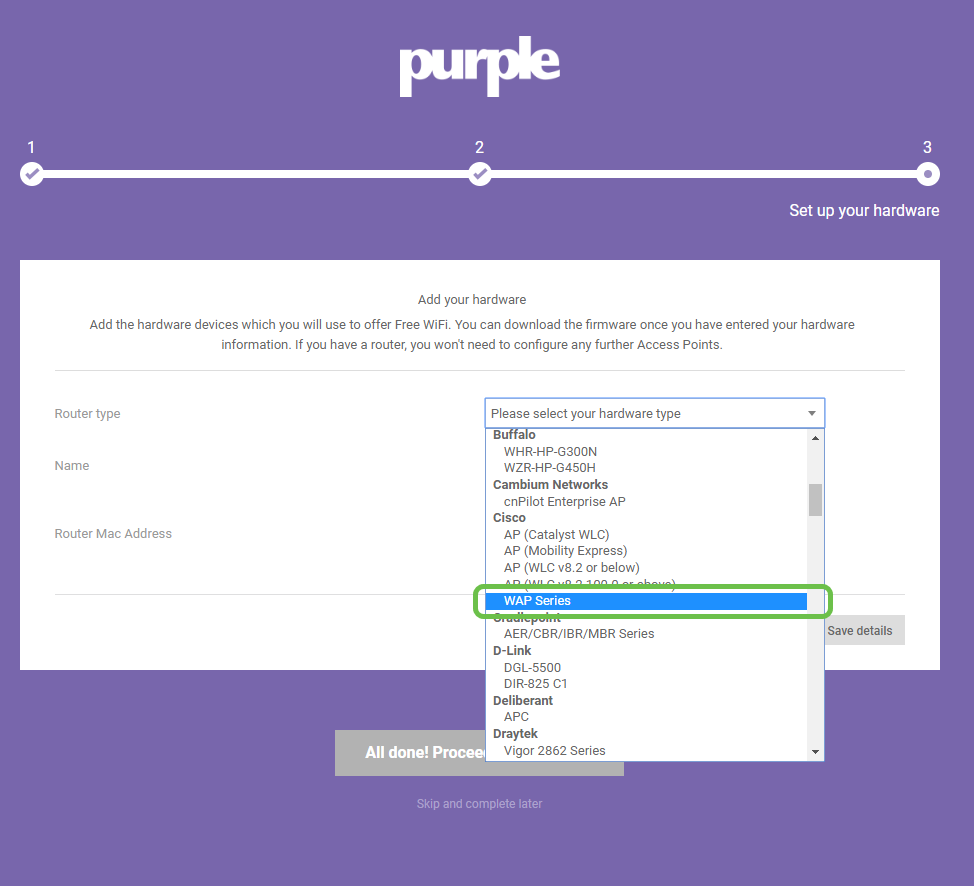
Note: After selecting your Router Type, two additional buttons will appear, View Manual Online and Download Manual. This document, in two forms provides additional steps you will need to perform on the WAP devices.
Step 5. Now name the access point, be descriptive so you can later easily associate the device with a location, this is especially important for analytics reporting.
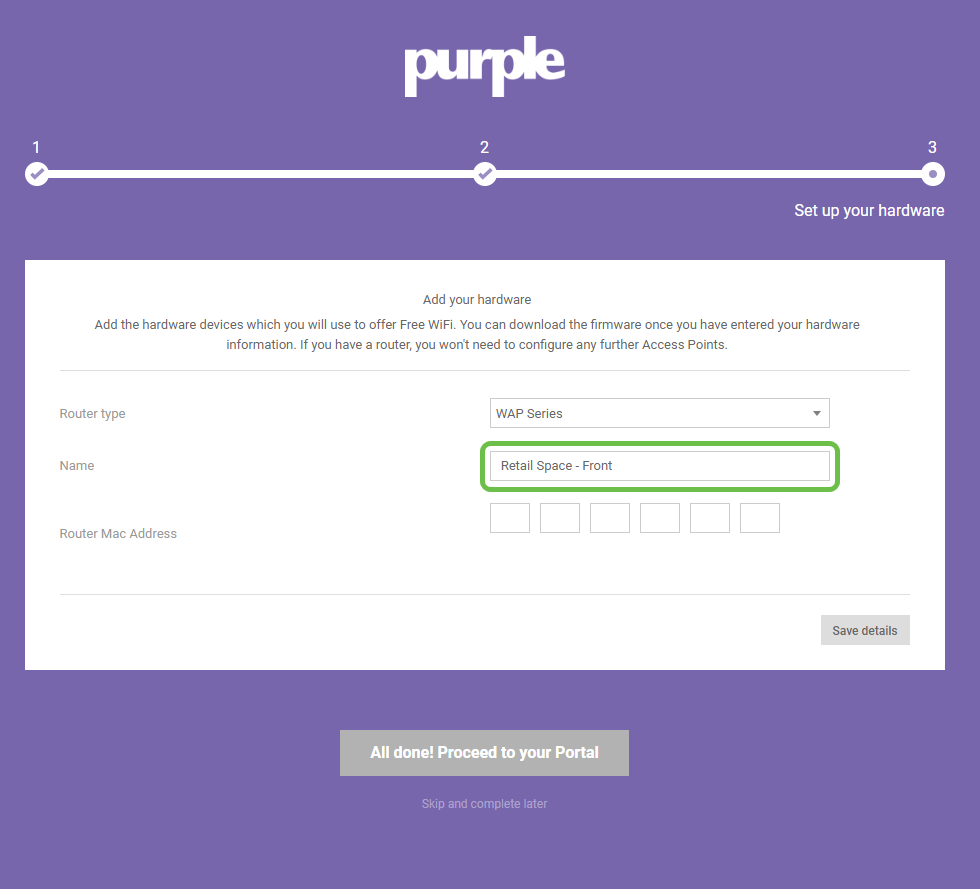
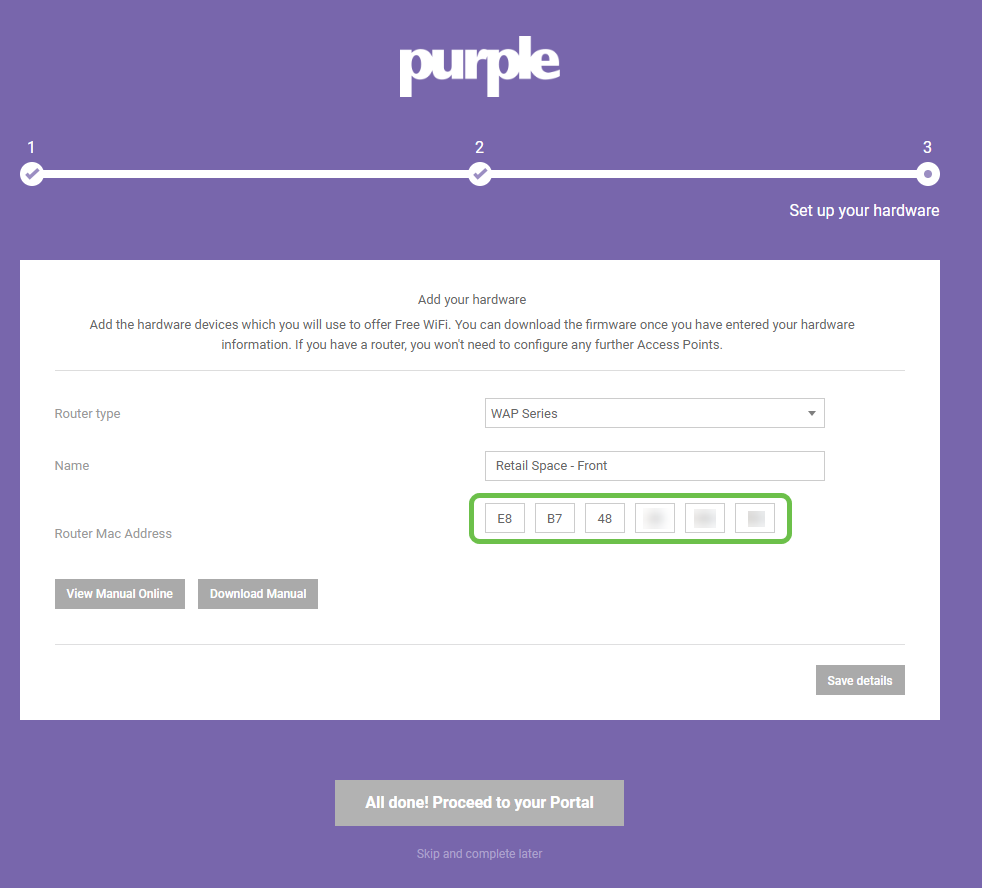
Step 6. Enter the MAC address associated with the name you assigned in the previous step.
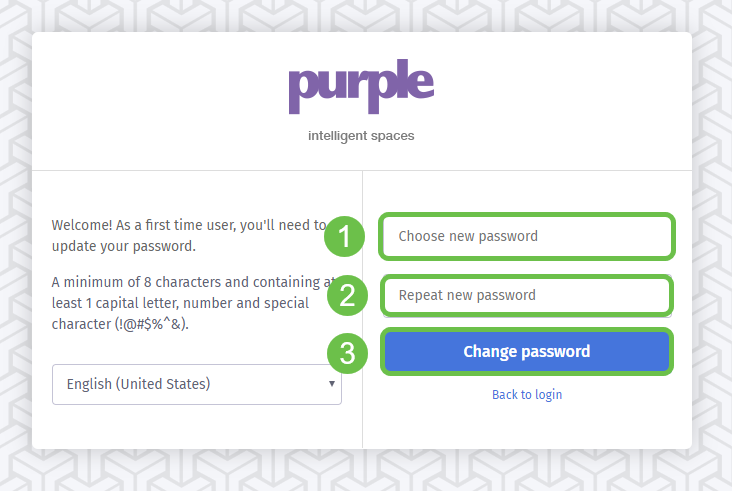
Step 7. Upon your first login, a prompt appears to create a new password. Enter and re-enter your password, then click the Change password button.
Corralling the rest of your WAP devices
Now that you have created your account, you will need to add the rest of the hardware. Purple categorizes hardware by Venues or Groups, logically this makes sense as you’ll want to provide different experiences and messaging based on the location a user is joining the network.
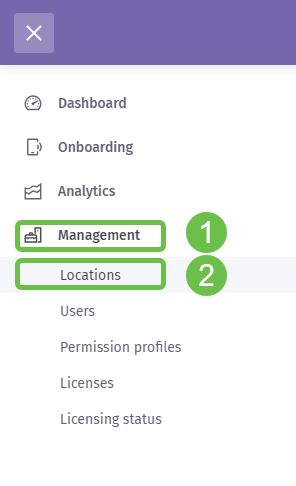
Step 1. From your dashboard screen click the menu icon in the upper left-hand corner.

Step 2. With the menu open, click Management > Locations.
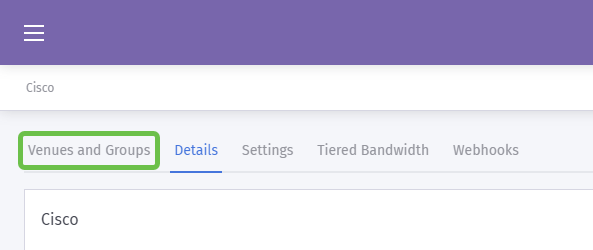
Step 3. The locations page loads with a series of 5 tabs acting as sub-navigation options. It will default to loading the Details page, click the Venues and Groups tab.
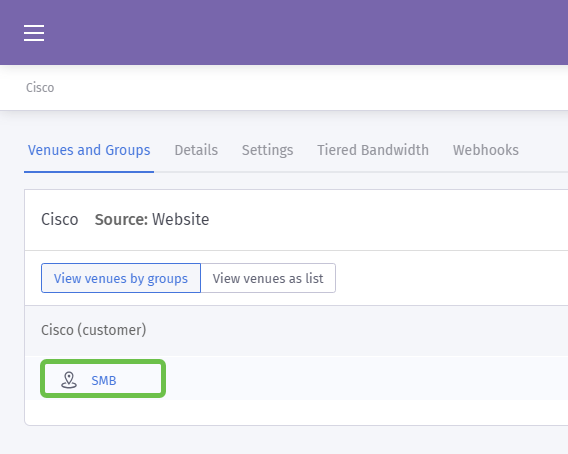
Step 4. Now click the Venue you created in Step 1 of the account creation process. In our case we named the venue SMB.
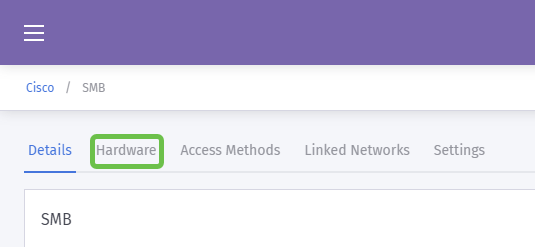
Step 5. When the SMB page loads, a new series of sub-navigation menu items loads defaulting to the Details tab. Click the Hardware tab.
Step 6. Now click the Add hardware button in the right side of the screen.

Step 7. Now you will be prompted to enter the details of your hardware. Begin by naming the device, we’ve named our device “Reception-WAP”.

Step 8. Next click the drop-down box for Hardware type, scroll to the Cisco section and select AP (Mobility Express).
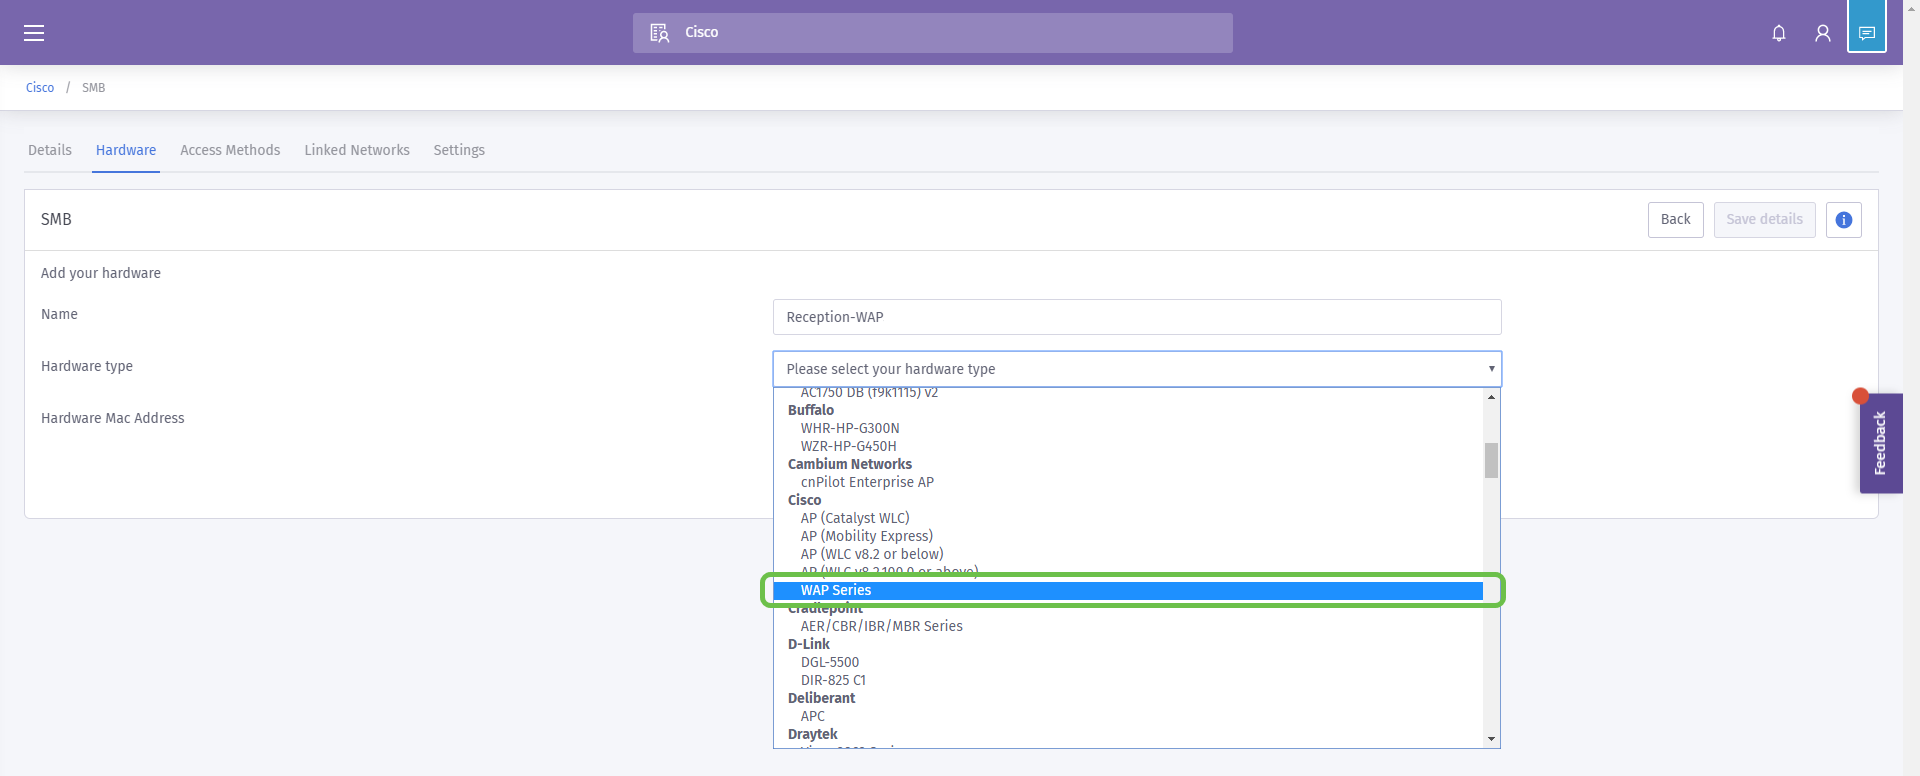
Step 9. Now enter the Mac address of the device you are adding.

As noted above, but repeated here to emphasize its importance. After selecting your Router Type, two additional buttons will appear, View Manual Online and Download Manual. This document, in two forms provides additional steps you will need to perform on the WAP devices.
Kicking your Splash page template into gear
Now that your account is created, you will need to perform the following milestones:
- Create and Customize your Purple Splash page
- Create your user’s access journey
- Add any remaining devices
The splash page acts as the “face” users will see as they begin to connect to your WiFi network. Contained in this page will be options for customizing a user agreement for joining or additional marketing touchpoints that enable further engagement.
Step 1. After logging into your account, click on the menu hamburger icon in the upper-left hand corner.

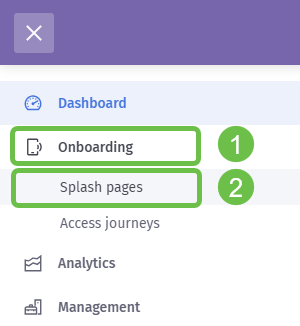
Step 2. When the menu opens, click Onboarding > Splash pages.
Step 3. In the upper right-hand corner, click the Create new template button.
Note: The i icon to the right of Create new template is on most pages and can be clicked for a tour of the features on the page the i icon is clicked.
Step 4. Purple will generate a modal window that requests several inputs. Start by naming your template, we have named ours Cisco-Splash.
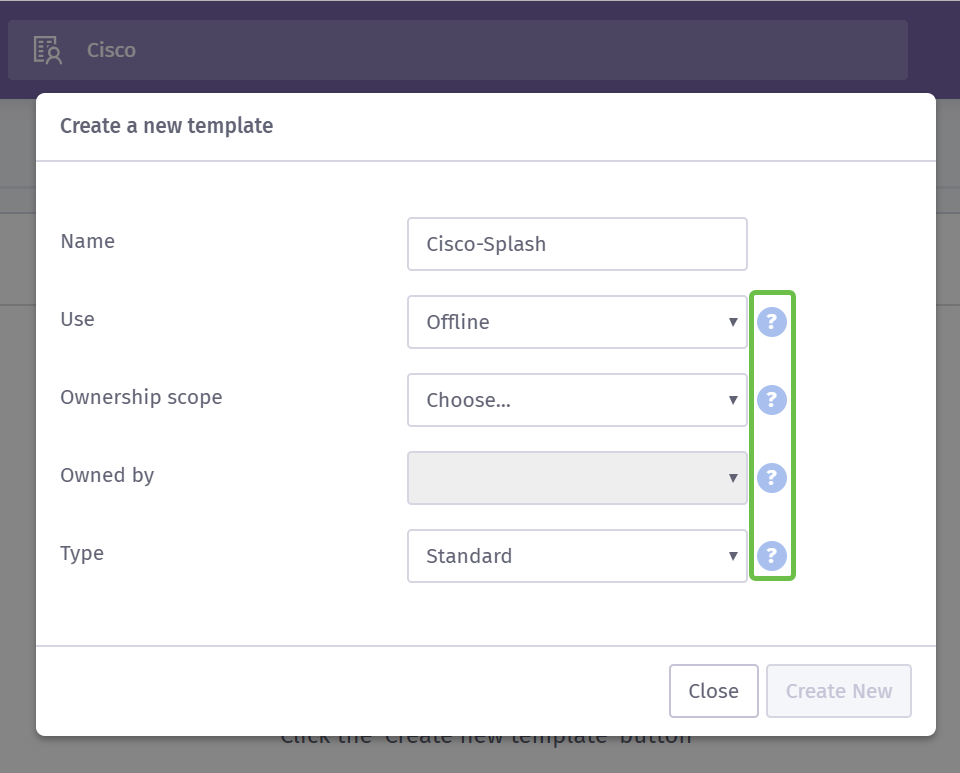
Note: Make use of the Tool-tips on the right side of the screen to understand their purpose in more detail.
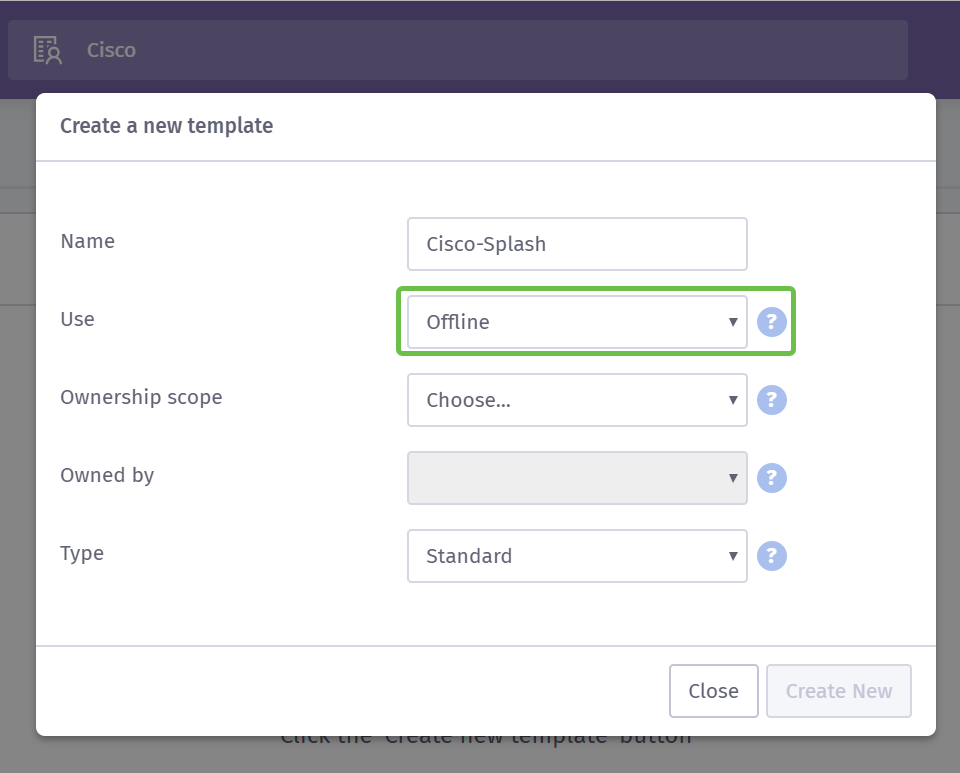
Step 5. Next select the Use for your template, in our case we have left it at the default Offline, meaning the template will display prior to connecting.
Step 6. Now select the Ownership scope, we have selected Location.
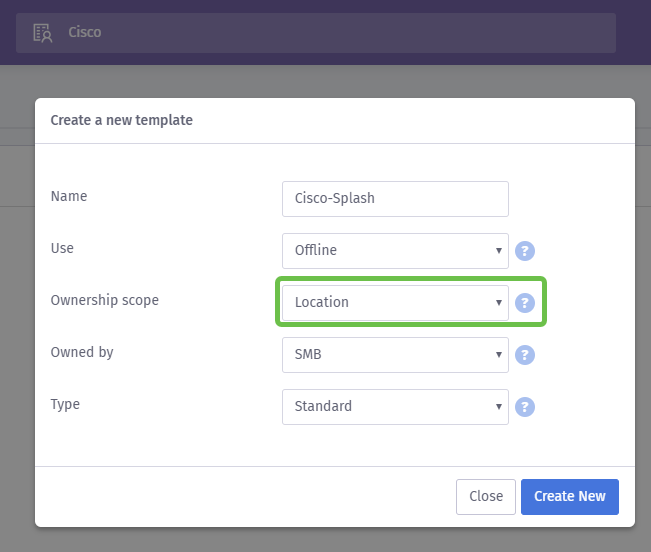
Step 7. Continue configuration of the template by selecting the owner of the template, in this case it is SMB.
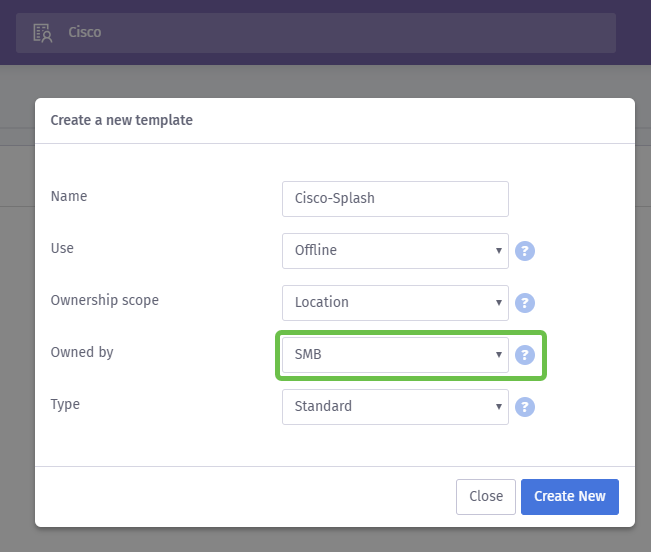
Step 8 Then select the type of template, either Standard or Custom HTML. The custom HTML selection is for advanced users who know exactly what they are looking for in a template. We have chosen standard.
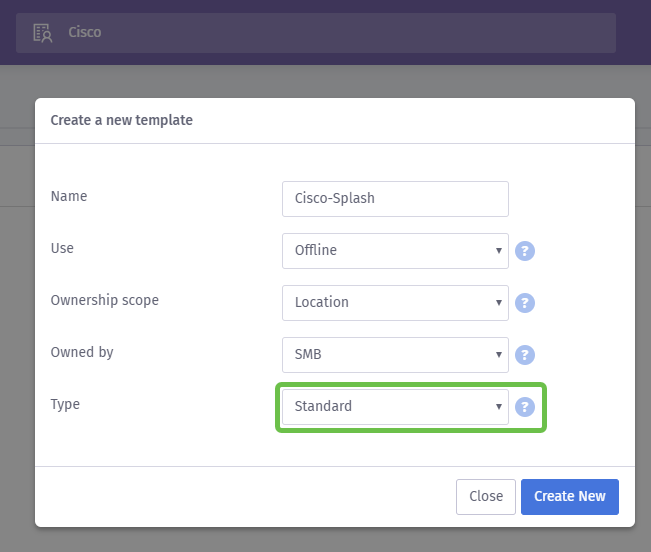
Step 9. Wrap up this section by clicking on the Create New button.
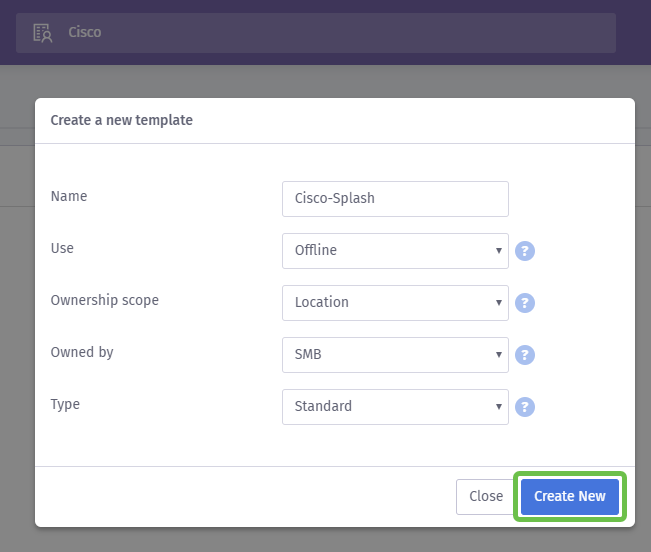
At this point, Purple will open a template editor screen. The page will provide you a tour of the important details, if this does not begin automatically click the i icon in the upper right hand corner. Remember to save often while editing your splash page.
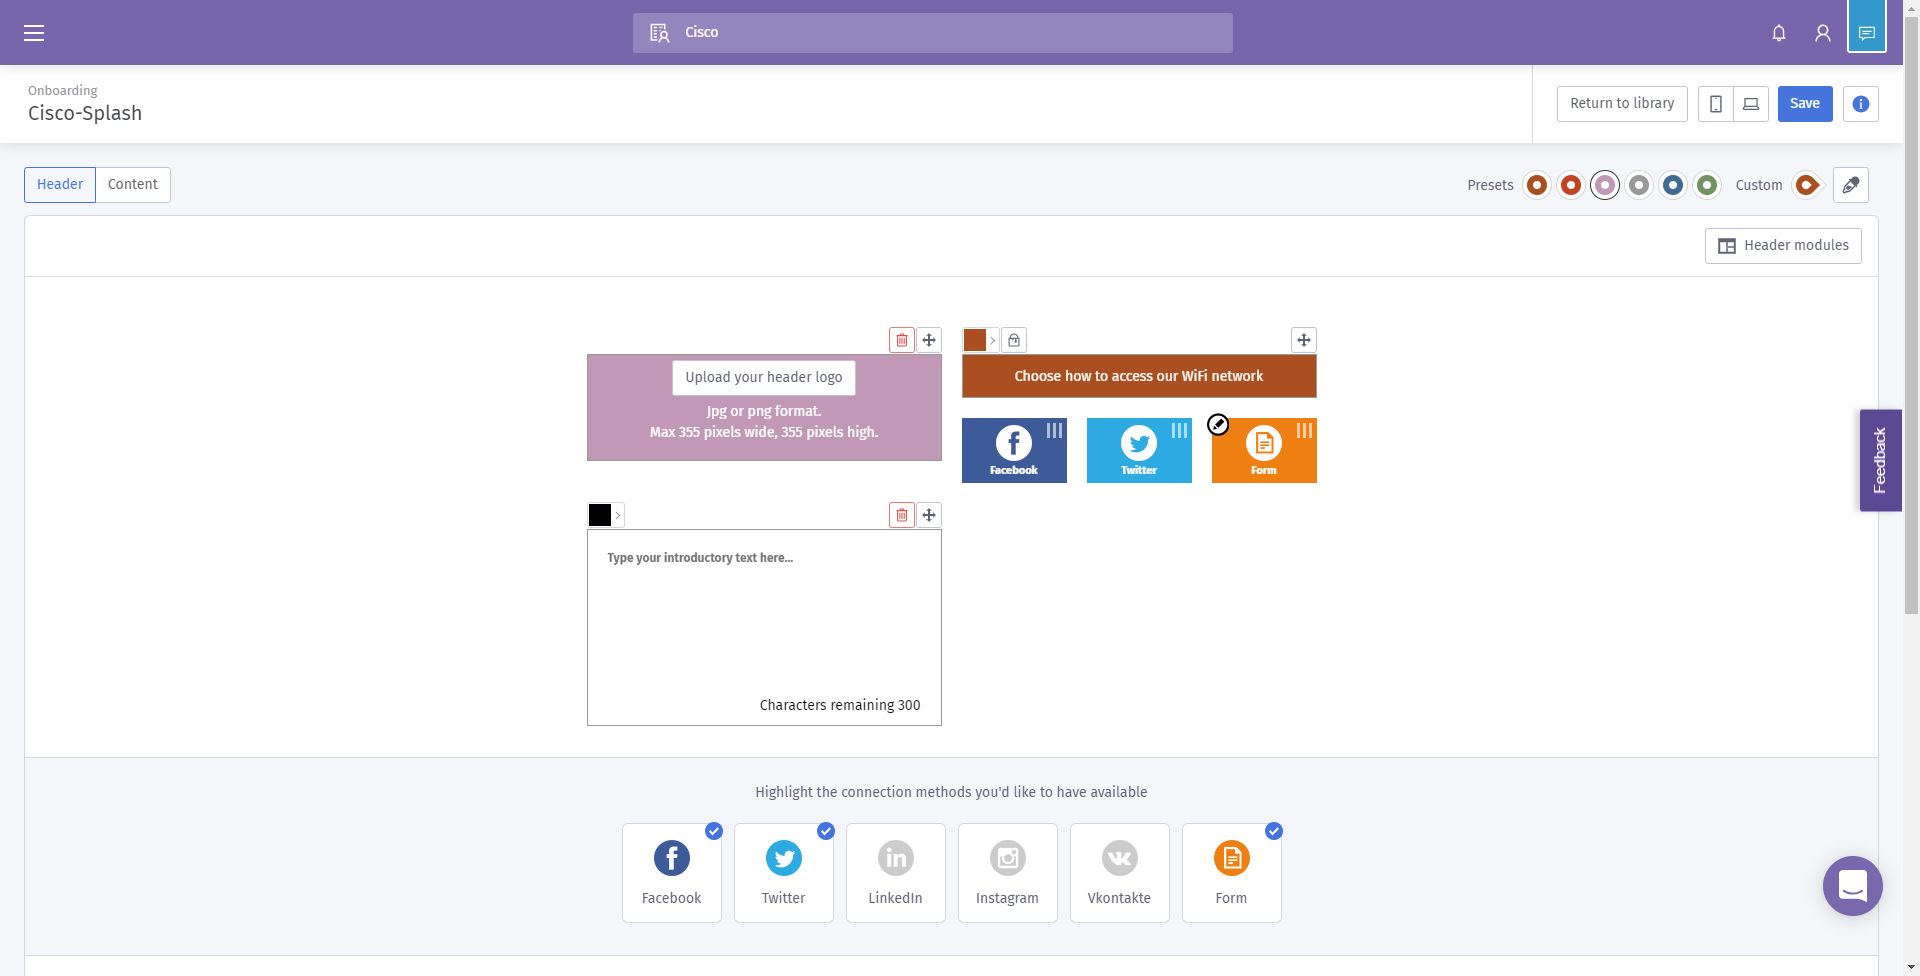
Note: The Form option contains many data types you may ask the user to provide.
Welcome back! This page contains a wealth of options in customizing the template to your needs. We will not review each of those here- we will leave that to Purple, but below are some important items to consider as you progress.
Four Quick Tips on creating an effective Splash page:
- Carefully consider the contents of your Splash page; it is your opportunity to impress your customers with a cohesive introduction to your online brand. This includes considerations like if you running a promotion include those details to make users aware. The default settings are quick, but customization can have more potential for impact.
- When selecting colors of the template, ensure the colors compliment the color scheme of your brand and logo. For more information on color matching, see this link.
- Use logos that have a transparent background PNG format, or bonus points for using a scalable vector graphic (SVG) logo. For more information on the SVG format, see this link.
- Make use of custom URLs when adding links to your splash page. For example, a link to your website https://My-Super-Cool.com can include additional parameters like source of the referral, in this case Purple refers the user. Therefore, when you compile reports on website activity, you are able to have visibility into how many website users are arriving from the Purple portal people. Other avenues include special offers for the user. If you would like to get started, customizing a URL you can use this tool from Google.
The above tips are only scratching the surface of what tools are available to build a marketing strategy. Complexity and effectiveness of this strategy rises with the technical marketing savvy of your strategy. For further direction about creating a Splash page template, see the videos on Purple’s support site here.
Crafting your user’s access journey
Now that you have created a splash page, Purple requires the creation of an access journey. An access journey, as its name implies defines ancillary factors your users will encounter during their connection process. Again, there is ample room for customization and consideration of your potential users can enable a better experience.
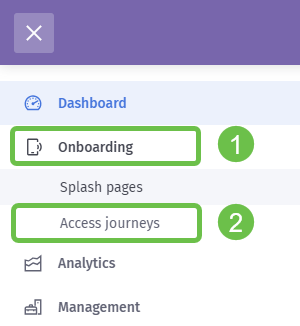
Step 1. Click the menu icon in the upper left-hand corner.

Step 2. When the menu opens, click Onboarding > Access journey.
Step 3. Next click the choose… drop-down box and select the Splash page you previously created.
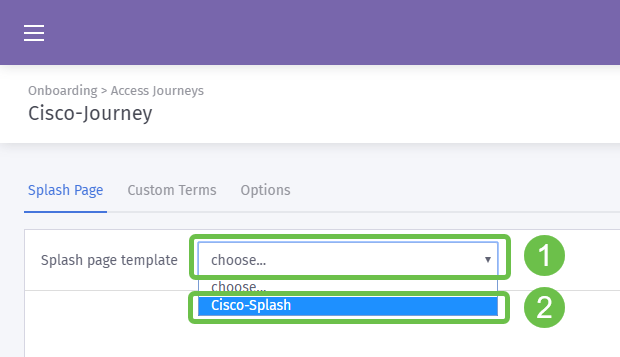
Step 4. This will load a preview of your Splash page, yet you are not required to edit from here. To proceed, select Custom Terms.
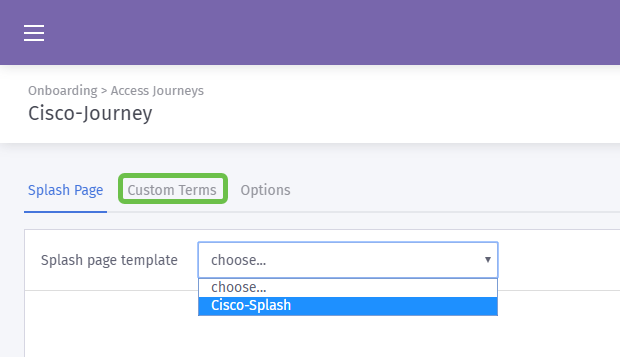
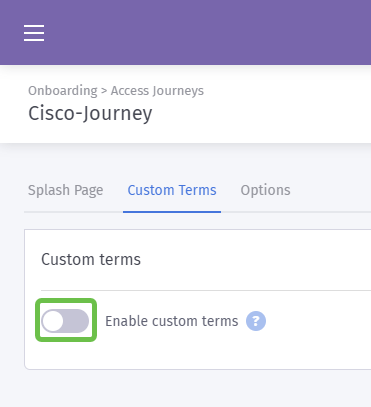
Step 5. (Optional) If you would like to write a custom terms and conditions, do so by clicking the Enable custom terms toggle button
Step 6. (Optional) Enter the Name, the hyperlink or Link text to show users, the version number and the contents of your custom terms and conditions.
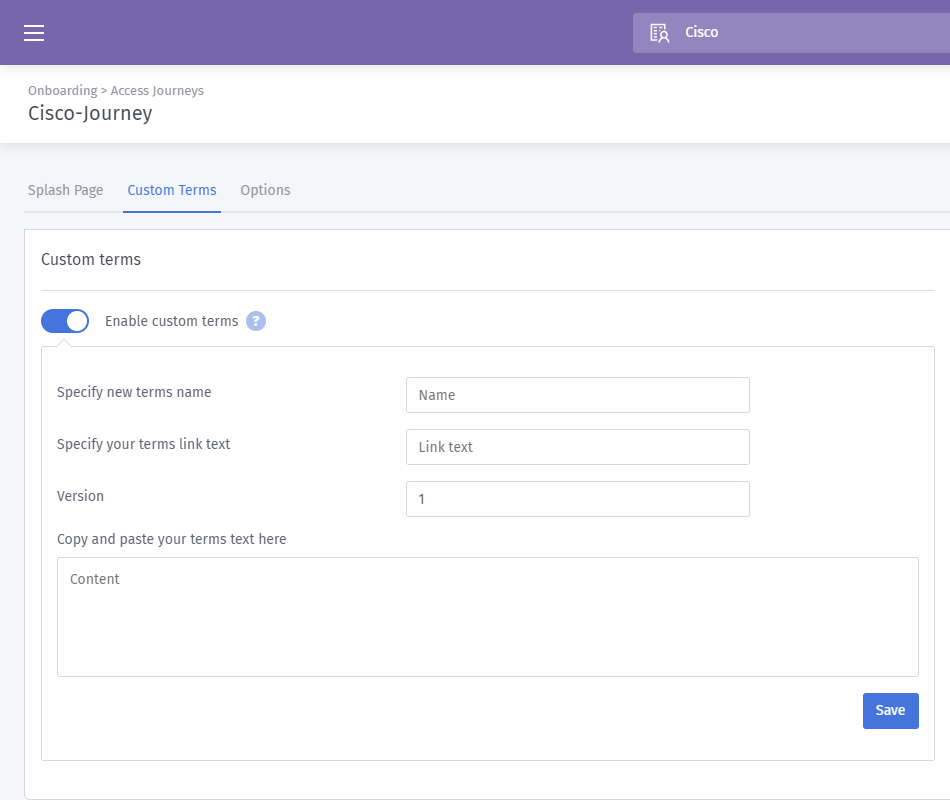
Best Practice: As a part of the copy, you write for these custom terms, inform users they will be exchanging details about themselves for internet access. Informed consent allows users to be aware of the value exchange and prevents PR issues.
Step 7. Otherwise, click on the Options tab.
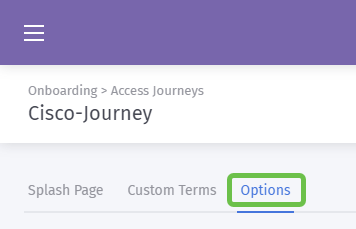
Step 8. By default, some options are pre-selected, again consider the needs and strategy of your business when selecting among these options.

Note: Make use of the tooltips marked with a ? to learn more detail about these options.
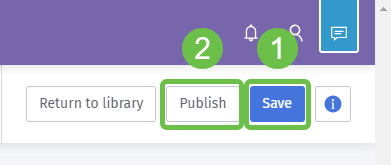
Step 9. When satisfied click Save and then Publish.
Step 10. After you click Publish, a modal window will appear asking where to apply the splash page and access journey. Click the Select an option drop-down box and then select A Venue.
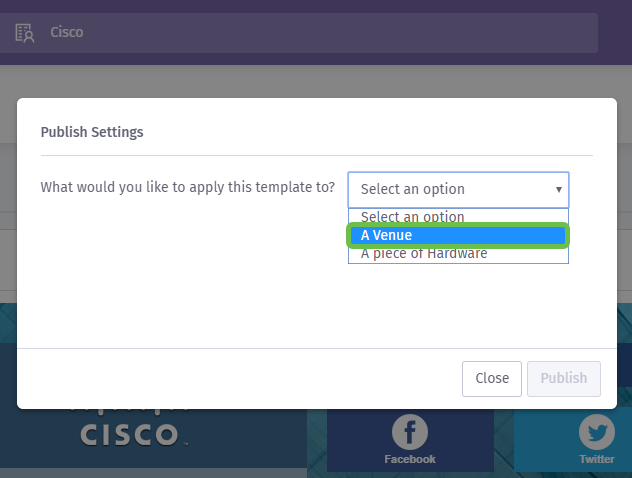
Note: You do have the option of applying the splash page and access journey to a specific piece of hardware.
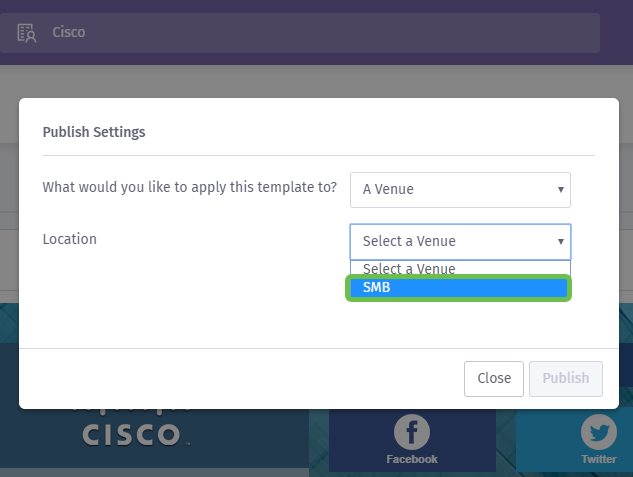
Step 11. An additional field will appear asking you to select the location; we have chosen the SMB location.
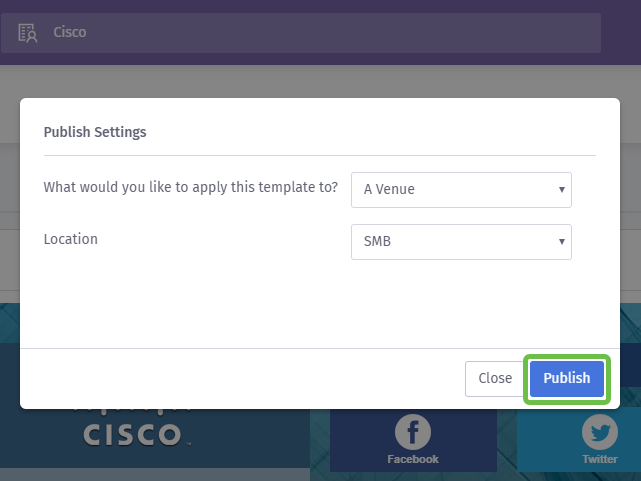
Step 12. Complete the setup by clicking the Publish button.
Configuring the Wireless Access Point
Now the “face” of your network is ready for its close-up, we will setup the WAP device.
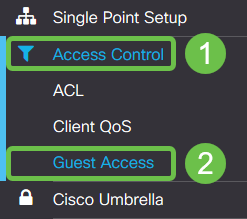
Step 1. After logging into your device, click Access Control > Guest Access.
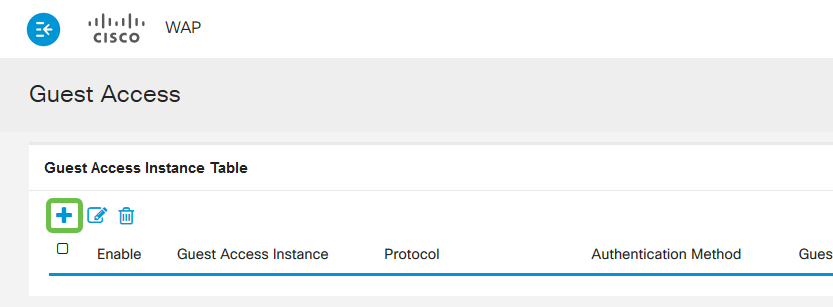
Step 2. Click the plus icon.

Step 3. Name the Guest Access Instance table, we have named ours PurpleTest.

Step 4. Click the protocol drop-down box and select HTTPs.

Step 5. Next click the Authentication Method drop-down box and select External Captive Portal.

Step 6. Now we will edit the details of the external captive portal, do this by clicking the eye icon, which will spawn a modal window.
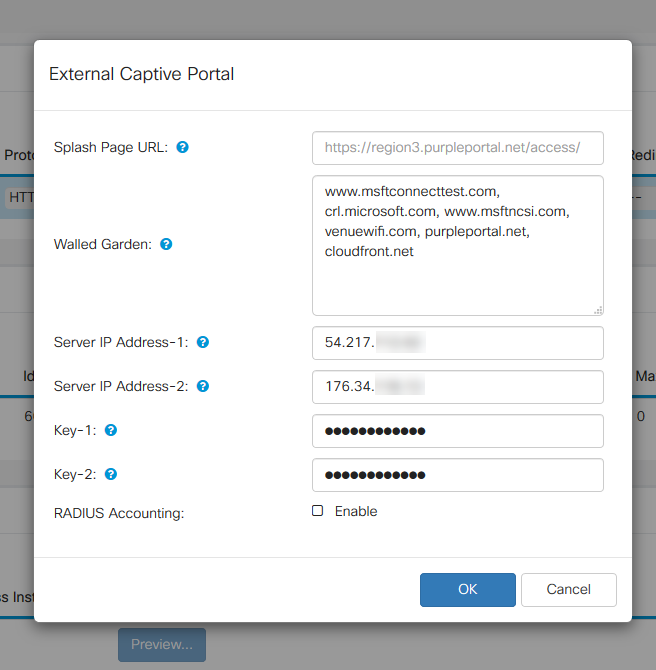
Step 7. Some of the fields are pre-populated by the WAP device depending on your running configuration. However, you will need to add the URL of your Splash page from Purple.
Note: There are three regions servicing the Purple service as of publishing this article. One is for the Americas, two is Europe and region 3 is for Asia-Pacific.
Step 8. In order for the social logins to redirect the authentication requests, the WAP needs your guidance on which URLs to expect. Enter the URLs, separated by commas. More on which URLS below.
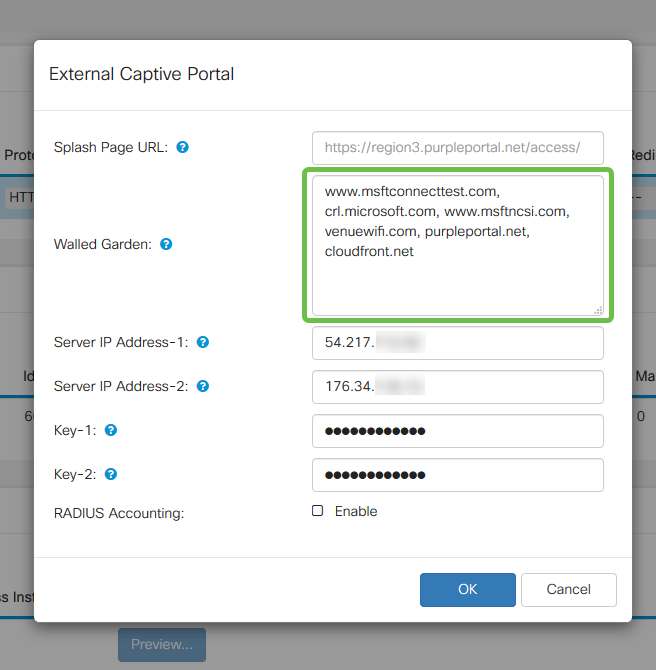
Note: The last URL listed in the Walled Garden field does not require a comma.
| Social Media Site | Walled Garden URLs |
|---|---|
| linkedin.com, licdn.com | |
| twitter.com, twimg.com | |
| facebook.com, fbcdn.net, akamaihd.net, connect.facebook.net | |
| instagram.com | |
| vkontakte | vk.me, vk.com |
| weibo.com, sina.com.cn |
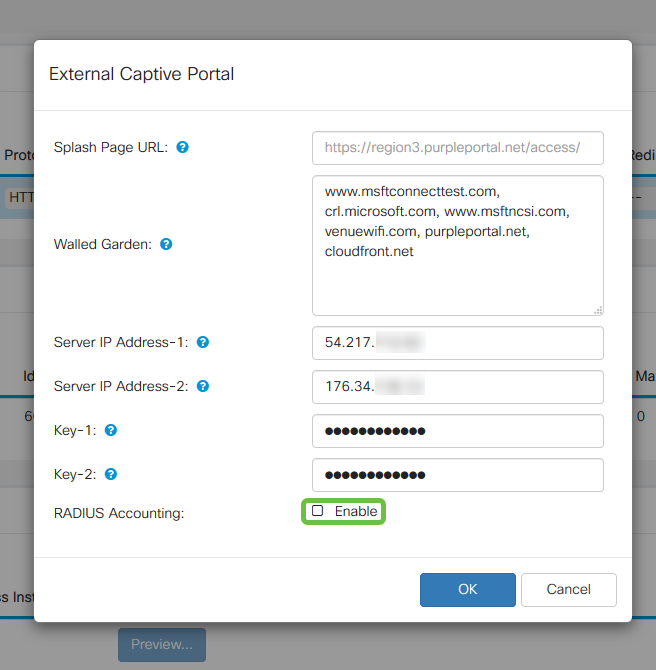
Step 10. (Optional) If you would like to keep detailed RADIUS authentication data, check off the Enable checkbox.
Step 11. When complete click the Save button in the upper right-hand corner.
Rounding out the process by attaching Purple to your WAP
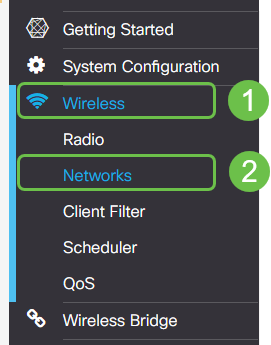
Step 1. Click Wireless > Networks > Create Virtual Access Points
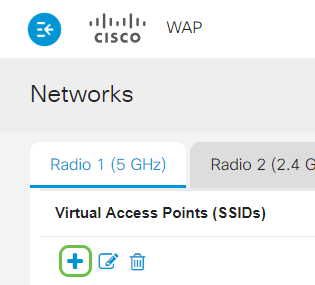
Step 2. Click the plus icon to create a new Virtual Access Point. This will create logical versions of your WAP.
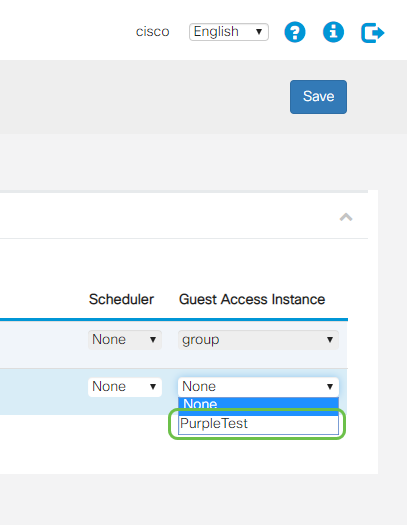
Step 3. Click the Guest Access Instance Drop-down box and select external captive portal instance created previously.
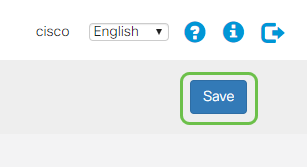
Step 4. Complete the configuration for this VAP by clicking the Save button in the upper-right hand corner.
Repeat these steps for the 5 GHz radio as well, begin by clicking the 5GHz tab, and repeating steps 1 – 3.
Conclusion
At this point, you are prepared to launch to your live environment. Leverage all the utility Purple has to offer by visiting their support section for more information and guidance. Links below:
- Video – Analytics
- Video – Customer engagement
- Video – Customer Relations Management
Note: As a part of a service relaunch there is a legacy and beta iteration, you and this guide have been setting up the beta version.
 Feedback