Upgrade the Firmware on the WAP125
Available Languages
Objective
New firmware releases are improvements from previous firmware versions. Network device performance can be enhanced when an upgrade is made. Firmware files can be downloaded through:
- Trivial File Transfer Protocol (TFTP) — A User Datagram Protocol (UDP) file transfer protocol typically used to distribute software upgrades and configuration files. When using the TFTP client, the file will be downloaded from a TFTP server.
- Hypertext Transfer Protocol/with Secure Sockets (HTTP/HTTPS) — A protocol that uses your web browser to transfer the file.
This document explains how to swap and upgrade the firmware on the WAP125 through an HTTP/HTTPS client or TFTP server.
Tip: When you are upgrading firmware, it is recommended to use a wired connection on your computer to avoid interruption during the upgrade process.
Applicable Devices
- WAP125
Software Version
- 1.0.0.4
Upgrade the Firmware
Note: Before starting the upgrade process, make sure you have downloaded the latest firmware of your device from the Cisco website. To check for the latest updates, click here.
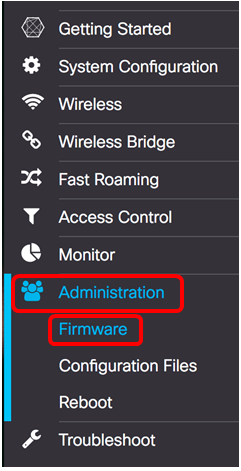
Step 1. Log in to the web-based utility of the WAP and choose Administration > Firmware.
The Firmware area is described as follows:
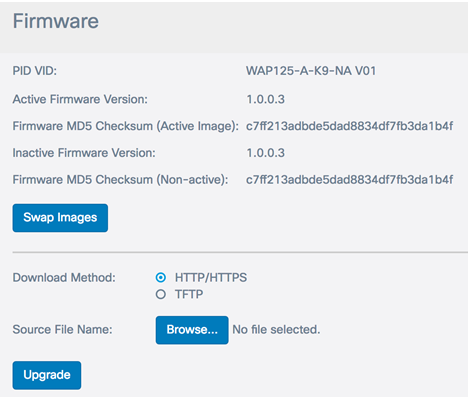
- PID VID — Displays the product ID and vendor ID of the access point.
- Active Firmware Version — Displays the current firmware version.
- Firmware MD5 Checksum (Active Image) — A 32-character hexadecimal number or a 128-bit encryption method. The MD5 algorithm uses a public cryptosystem to encrypt data.
- Inactive Firmware Version — When the firmware is upgraded, the previous version is saved as an Inactive Firmware Version.
- Firmware MD5 Checksum (Non-active) — Secondary 32-character hexadecimal number or a 128-bit encryption method. The MD5 algorithm uses a public cryptosystem to encrypt data.
Step 2. In the Download Method area, choose a radio button to determine the method at which the download will be obtained. The options are:
- HTTP/HTTPS — If this is chosen, proceed to the Upgrade through HTTP/HTTPS.
- TFTP — If this is chosen, proceed to the Upgrade through TFTP Server.
Note: In this example, HTTP/HTTPS is chosen.

Upgrade through HTTP/HTTPS
Step 3. Click Browse… to obtain the file for upgrading. The firmware upgrade file supplied must be a .tar file. Do not attempt to use .bin or other file formats for the upgrade as these types of files do not work. The file name cannot contain spaces, and special characters.
Note: In this example, WAP125_1.0.0.4.tar is chosen.

Step 4. Click Upgrade to apply the new firmware.
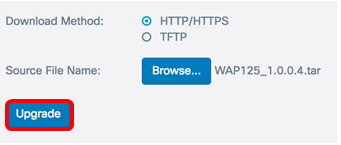
A progress bar will appear above the Upgrade button together with a note informing you that uploading the new firmware may take several minutes.

Once the firmware has been uploaded to the WAP, the page changes and displays a series of instructions as the device reboots.

Step 5. Once the WAP has rebooted, log back in to the web-based utility and choose Administration > Firmware to verify the new firmware version.
The Active Firmware Version should now show the latest firmware version.
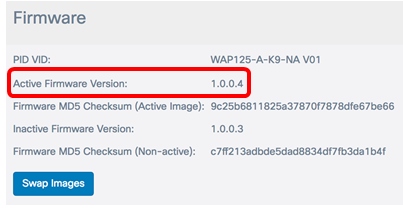
You should now have successfully upgraded the WAP125 through HTTP/HTTPS.
Upgrade through TFTP Server
Step 3. In the Source File Name field, enter the name of the source file to be uploaded to the WAP. The firmware upgrade file supplied must be a .tar file. Do not attempt to use .bin or other file formats for the upgrade as these types of files do not work. The file name cannot contain spaces, and special characters.
Note: In this example, WAP125_1.0.0.4.tar is used.
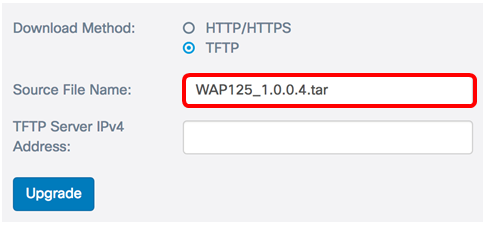
Step 4. In the TFTP Server IPv4 Address field, enter the IP address of the TFTP Server where the firmware is located.
Note: In this example, 192.168.100.145 is used.

Step 5. Click Upgrade.

A progress bar will appear above the Upgrade button together with a note informing you that uploading the new firmware may take several minutes.

Step 6. Once the firmware has been uploaded to the WAP, the page changes and displays a series of instructions as the device reboots.
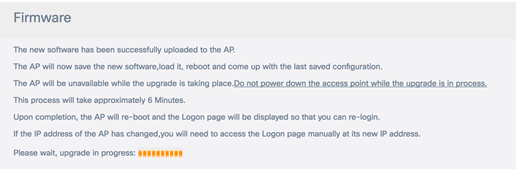
Step 7. Once the WAP has rebooted, log back in to the web-based utility and choose Administration > Firmwareto verify the new firmware version.
The Active Firmware Version should now show the latest version.
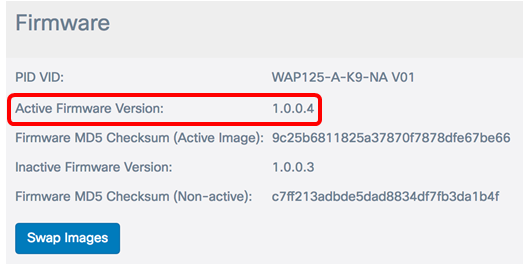
You should now have successfully upgraded the WAP125 through a TFTP Server.
Swap the Firmware
WAPs typically have two firmware images or files. This is so that if one firmware file fails for any reason, the other, a backup or non-active one can be used. You can also choose to use one over the other.
Step 1. In the Firmware area, click the Swap Images button.
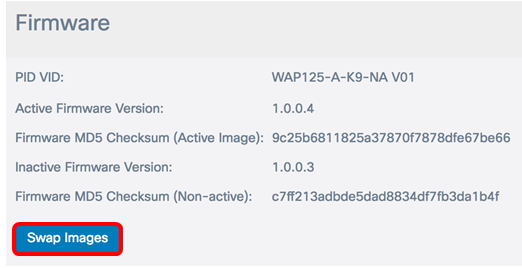
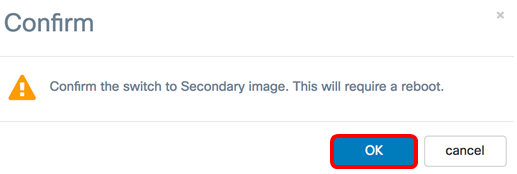
Step 2. A pop-up window will prompt you to confirm the switch to the secondary image. Click OK to continue.
A progress bar will appear as the reboot is in progress.

Step 3. Log back in to the web-based utility of the WAP and choose Administration > Firmware.

You should now have successfully swapped the Inactive Firmware to the Active Firmware.
 Feedback