Configure Guest Web Portal Locale Table on the WAP125 or WAP581
Available Languages
Objective
The Guest Web Portal Locale of the WAP125 and WAP581 access points allow you to manipulate the settings of the Captive Portal. This is where the appearance of the Captive Portal window is configured. Configuring the Guest Web Portal is typically done when guest access is first deployed. The Guest Web Portal Table provides the administrators of the network the ability to customize the Guest Web Portal to better suit the requirements of the company.
This article aims to show you how to configure the Guest Web Portal Locale on the WAP125 or WAP581 access point.
Applicable Devices | Firmware Version
- WAP125 | 1.0.0.5 (Download latest)
- WAP581 | 1.0.0.4 (Download latest)
Configure Guest Web Portal Locale
Step 1. Log in to the web-based utility by entering your Username and Password in the fields provided and then click Login.

Note: The default username and password is cisco/cisco.
Step 2. Choose Access Control > Guest Access.
Note: The images on this article are taken from the WAP125. Menu options may vary depending on the model of your device.

Step 3. Check the check box for the Web Portal Locale Name to be configured.
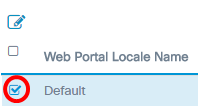
Note: In this example, Default is chosen.
Step 4. Click the Edit button.

Step 5. Enter the name of the portal in the Web Portal Locale Name field. This can be up to 32 characters long.
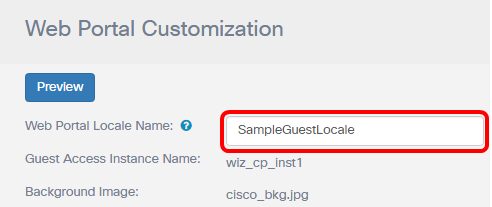
Note: In this example, SampleGuestLocale is entered.
Choose a Background Image
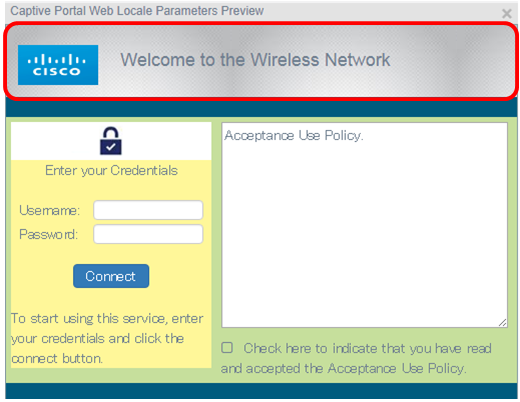
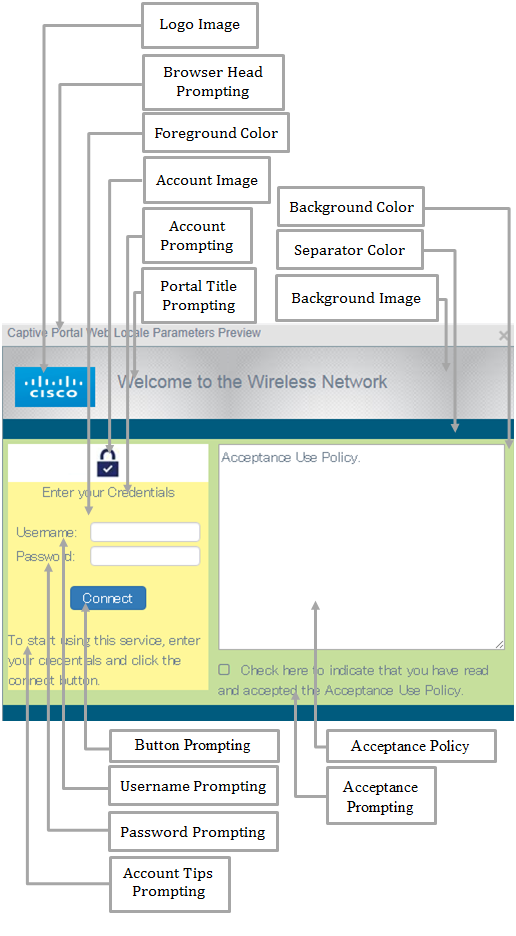
Note: The background image appears at the back of the logo image, and the portal title prompt. The background image size must be 64k or less and must have a file name without spaces up to 32 characters long. Supported image file types are GIF, JPG, and PNG. In this example, background_image3.png is chosen.
Step 6. On the Web Portal Customization page, click the Background Image Browse button.

Step 7. Click the image that you need to use as the background for the portal.

Step 8. Click Open.

Step 9. Click Upload.

Choose a Logo Image
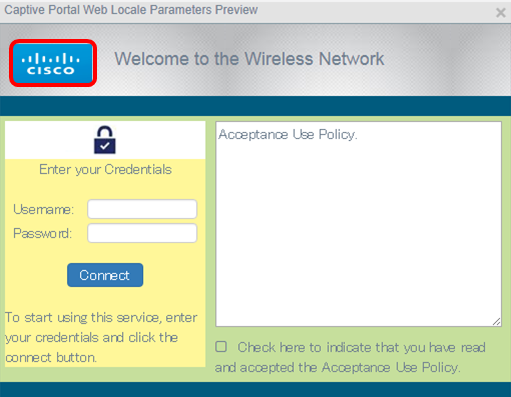
Note: The logo image appears at the top-left corner of the portal prompt. The logo image size must be 64k or less, and must have a file name without spaces up to 32 characters long. In this example, cisco_logo.png is chosen.
Step 10. Click the Logo Image Browse button.

Step 11. Click the image that you need to use as the logo for the portal.

Note: In this example, cisco_logo is chosen.
Step 12. Click Open.

Step 13. Click Upload.

Choose a Foreground Color

Note: The foreground color is the background color of the Connect button, Account Tips prompt, Username and Password prompt. The default value is #FFFFFF. In this example, the foreground color is #fff799.
Step 14. On the Web Portal Customization page, click the Foreground Color Select button.

Step 15. Choose the color that you need to use for the foreground of your portal.
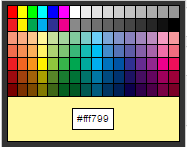
Note: In this example, #fff799 is chosen.
Choose a Background Color

Note: The background color is the color that is immediately surrounding the Acceptance Policy, and the foreground. It is where the Acceptance Prompting message is displayed.
Step 16. In the Web Portal Customization page, click the Background Color Select button.

Step 17. Choose the color that you need to use for the background of your portal.

Note: The default value is #FFFFFF. In this example, #c6df9c is chosen.
Choose a Separator Color

Note: The separator color is found right below the Portal Title Prompting area. Below the separator color are the Acceptance Policy and the Account Image.
Step 18. On the Web Portal Customization page, click the Separator Color Select button.

Step 19. Choose the color that you need to use the separator color of your portal.

Note: The default value is #FFFFFF. In this example, #005b7e is chosen.
Choose an Image for the Account

Note: The account image must be 5k in size, and must have a file name without spaces up to 32 characters long. Supported image file types are GIF, JPG, and PNG.
Step 20. On the Web Portal Customization page, click the Account Image Browse button.

Step 21. Click the image that you need to use as the image for the account.

Note: In this example, login_key.jpg is chosen.
Step 22. Click Open.

Step 23. Click Upload.

Step 24. Choose a font for the portal from the Fonts drop-down list.

Note: The default value is Arial. In this example, Cisco Sans is chosen.
Step 25. Enter a prompt to start using the account in the Account Prompting field.
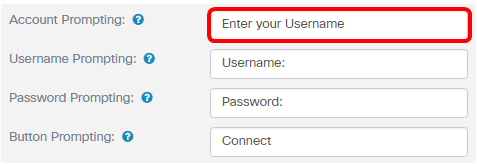
Note: In this example, Enter your Username is entered.
Step 26. Enter a prompt for the username in the Username Prompting field.

Note: In this example, Username: is entered.
Step 27. Enter a prompt for the password in the Password Prompting field.

Note: In this example, Password: is entered.
Step 28. Enter a label for the connect button in the Button Prompting field.

Note: In this example, Connect is entered.
Step 29. Enter the header name of the portal in the Browser Head Prompting field.

Note: In this example, Cisco Captive Portal is entered.
Step 30. Enter the title of the portal in the Portal Title Prompting field.

Note: In this example, Welcome to the Wireless Network is entered.
Step 31. Enter a prompt to start using the portal in the Account Tips Prompting field.

Note: In this example, To start using this service, enter your credentials and click the Connect button is entered.
Step 32. Enter the terms and conditions of usage in the Acceptance Policy field.

Note: In this example, Acceptance Use Policy is entered.
Step 33. Define the prompt for accepting the usage policy in the Acceptance Prompting field.

Note: In this example, Check here to indicate that you have read and accepted the Acceptance Use Policy is entered.
Step 34. Define the prompt when the usage policy is not accepted in the No Acceptance Warning field.
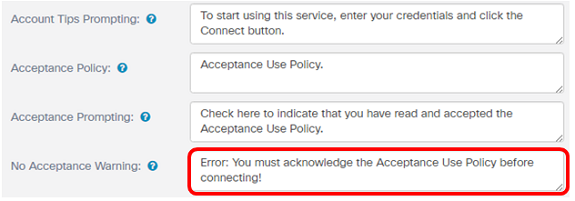
Note: In this example, Error: You must acknowledge the Acceptance Use Policy before connecting! is entered.
Step 35. Define the activity in progress prompt in the Work In Progress Prompting field.
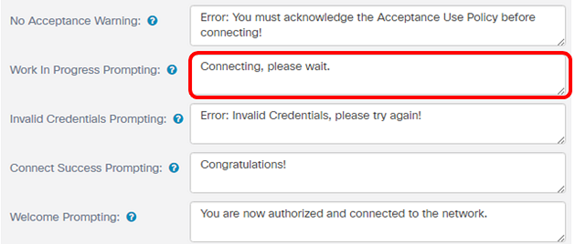
Note: In this example, Connecting, please wait. is entered.
Step 36. Define the prompt for invalid credentials in the Invalid Credentials Prompting field.

Note: In this example, Error: Invalid Credentials, please try again! is entered.
Step 37. Enter the prompt for connecting successfully to the Connect Success Prompting field.

Note: In this example, Congratulations! is entered.
Step 38. Enter the welcome prompt in the Welcome Prompting field.
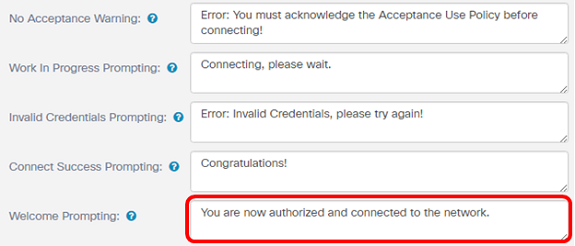
Note: In this example, You are now authorized and connected to the network is entered.
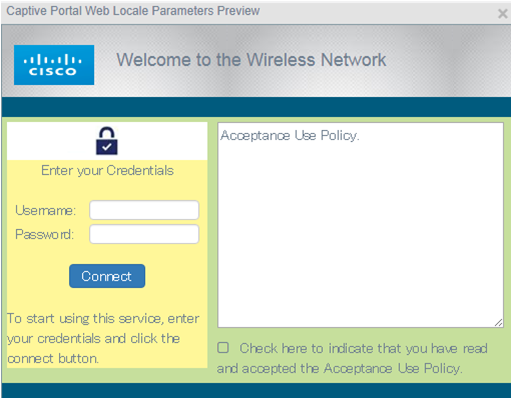
Step 39. Click Preview to view the captive portal before saving the settings.

This is how it looks like after the configuration.
Step 40. Click Save.
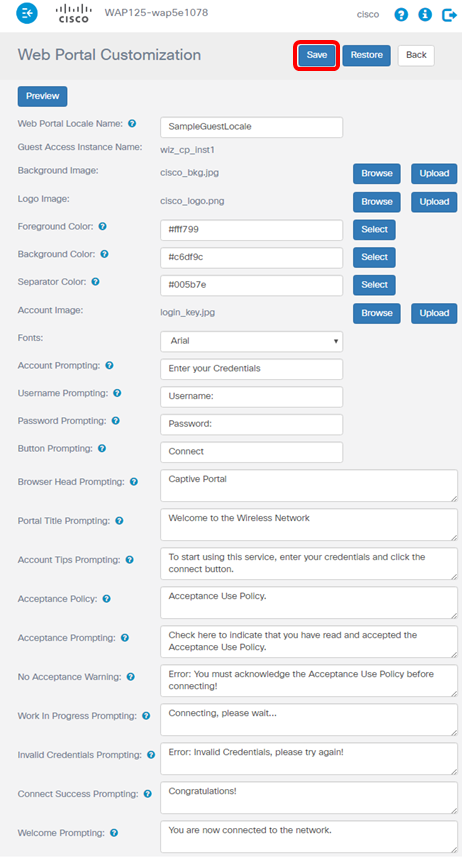
You should now have configured the Guest Web Portal Locale of the WAP125 or WAP581 access point.
Revision History
| Revision | Publish Date | Comments |
|---|---|---|
1.0 |
12-Dec-2018 |
Initial Release |
 Feedback