Backup and Restore the Primary AP Configuration on Cisco Business Wireless
Available Languages
Objective
The objective of this article is to show the necessary steps to back up and restore the configuration of the Primary Access Point (AP) when using Cisco Business Wireless (CBW) APs.
Applicable Devices | Software Version
-
140AC (Data Sheet) | 10.3.1.0 (Download latest)
-
145AC (Data Sheet) | 10.3.1.0 (Download latest)
-
240AC (Data Sheet) | 10.3.1.0 (Download latest)
Introduction
CBW has a new feature available on version 10.3.1.0 and above, that allows you to export and import the Primary AP configuration on the Web User Interface (UI).
This configuration file contains all the information about the Primary AP including radio, mesh, and location settings. Configuration files are created in XML format.
This is useful to have when you have to perform a factory reset. If you have the configuration file you can upload it instead of having to reconfigure the Primary AP from scratch. Another instance that a configuration file would be useful is if you want the same configurations set on a new Primary AP.
If you do not have the latest version of software for your AP, you will need to do this before you begin. You cannot perform these steps without the update. If you need assistance, check out Update Software of a Cisco Business Wireless Access Point.
If you are unfamiliar with terms in this document, click on Cisco Business: Glossary of New Terms.
Log into the Primary AP
Step 1
Using a computer on your network, log into the Web UI of your Primary AP by entering https://[IP address of your Primary AP] in the search bar. Be sure to use https:// as a prefix or you will not have access. In this example, https://192.168.1.124 was used but yours will vary. If you are having problems with access, you can try another web browser.

Step 2 (Optional)
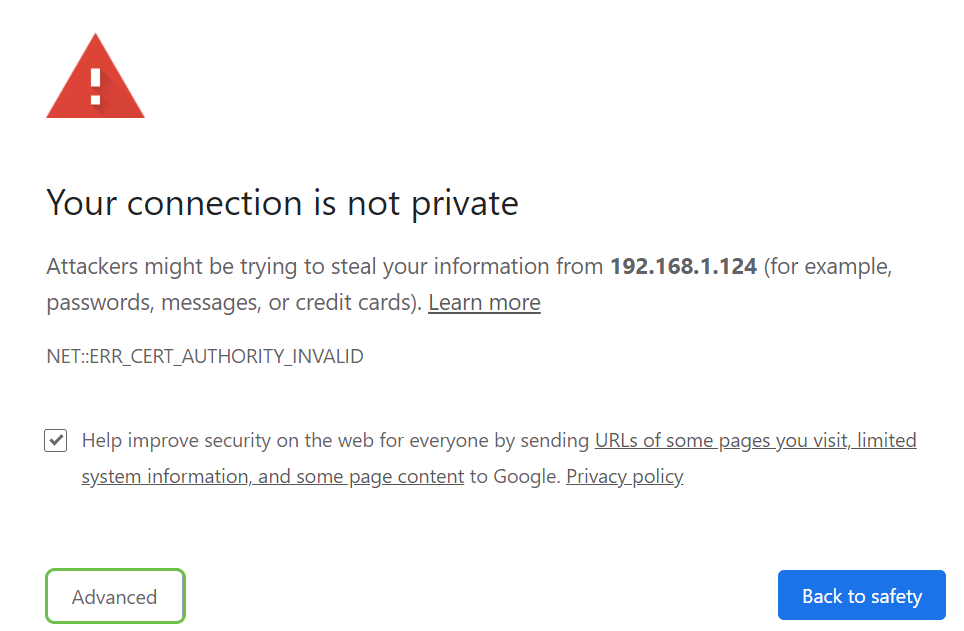
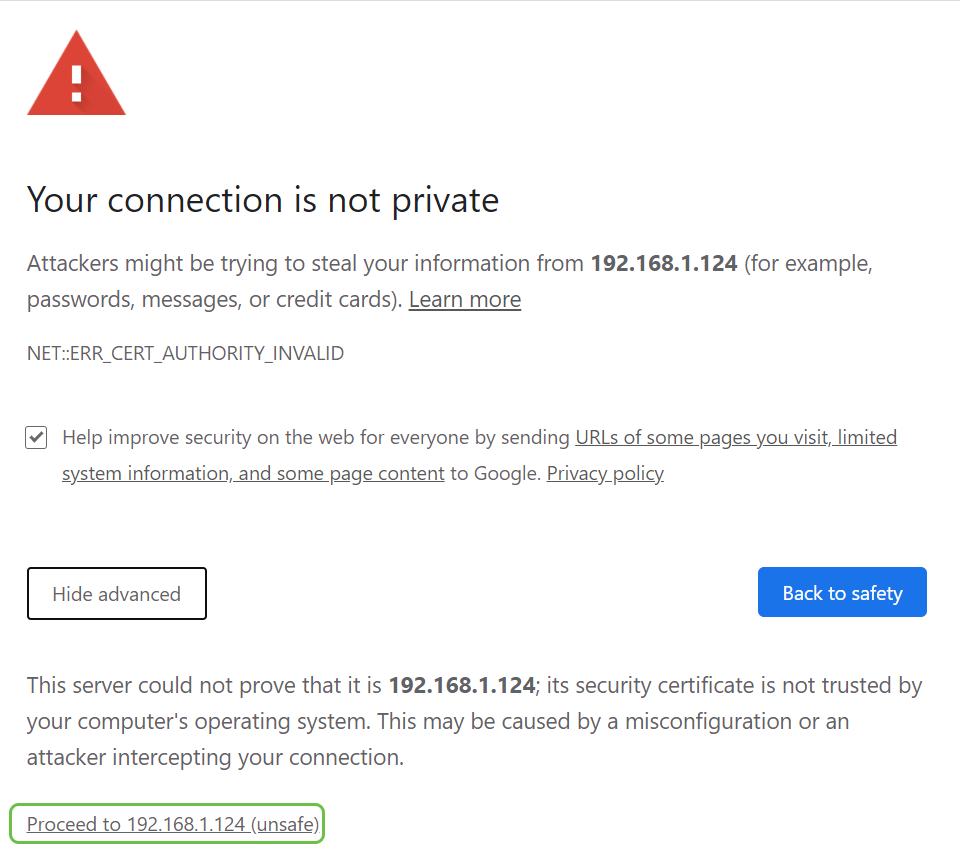
If you don’t have a security certificate, you may see a pop-up with a warning. This warning may look different depending on your web browser. Click to advance and proceed.
There may be a second pop-up to click to proceed.
Step 3
Click Login.

Step 4
Enter your Username and Password. Click OK.

Download the Configuration File
Step 1
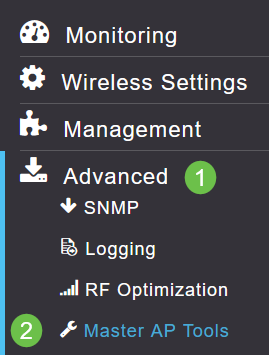
Click Advanced > Primary AP Tools.
Step 2
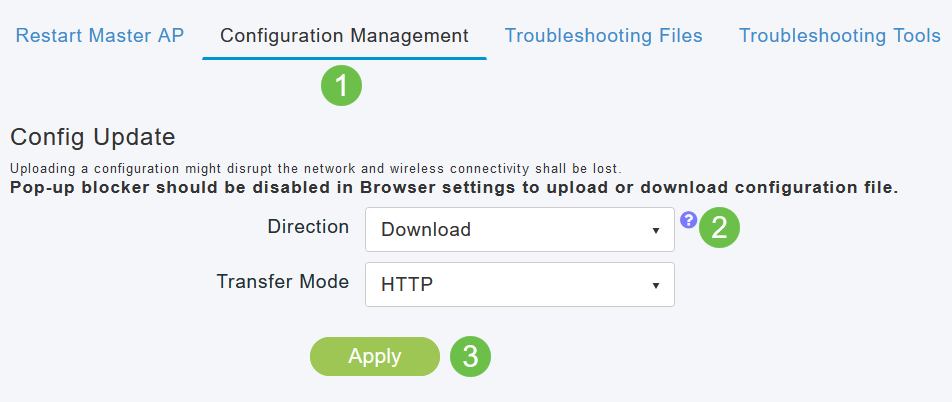
Click on the Configuration Management tab. Click the Direction drop-down menu to select Download. Leave the Transfer Mode at HTTP. Click Apply.
Step 3
You will see a pop-up asking for a confirmation that you want to download the file. Click Yes.

Step 4
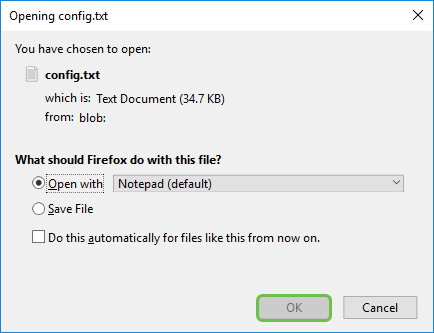
A pop-up window shows some options. In this example, we chose Open with Notepad (default). Click OK. If you don’t want to view before saving, you can select Save File and move on to the Upload the Configuration section of this article.
Step 5
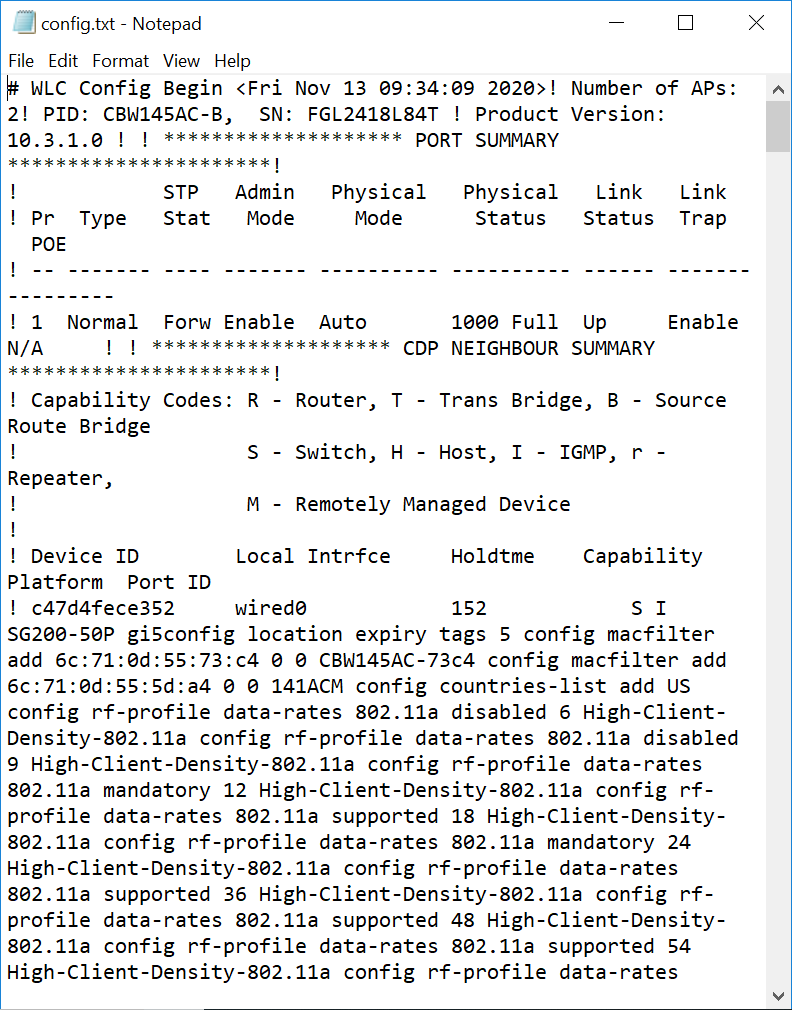
This is an example of one section of a configuration file.
Step 6
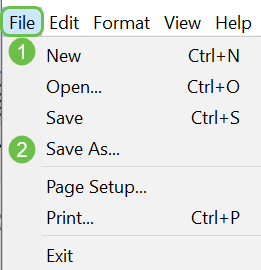
Click File and then from the drop-down menu select Save As....
Step 7
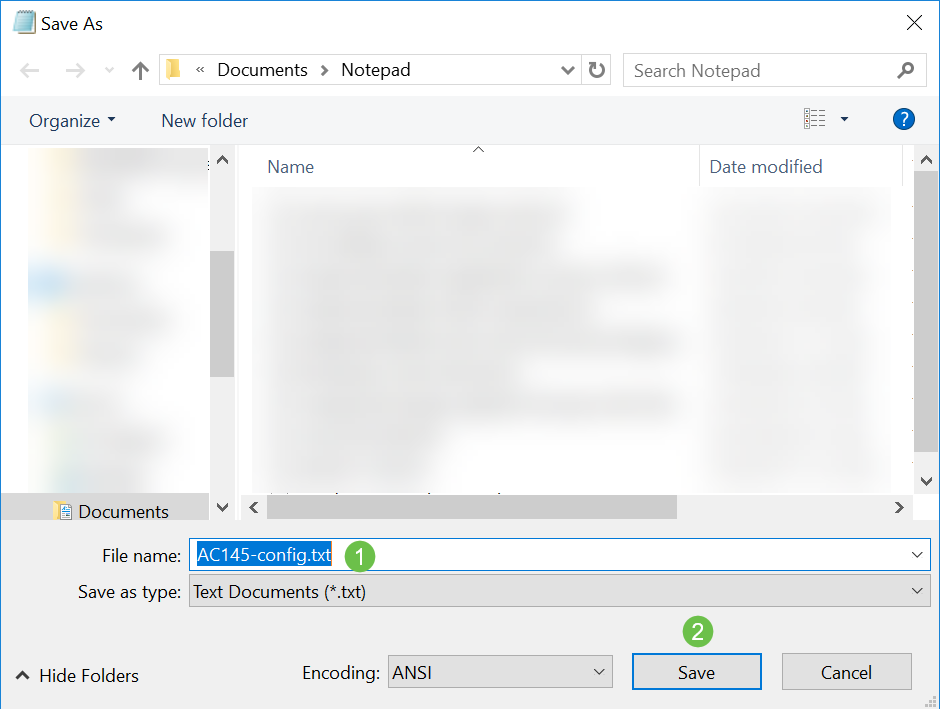
Enter a name for the configuration file. Click Save. Take note of the location of the file for upload.
Upload the Configuration File
Step 1
Click Advanced > Primary AP Tools.

Step 2
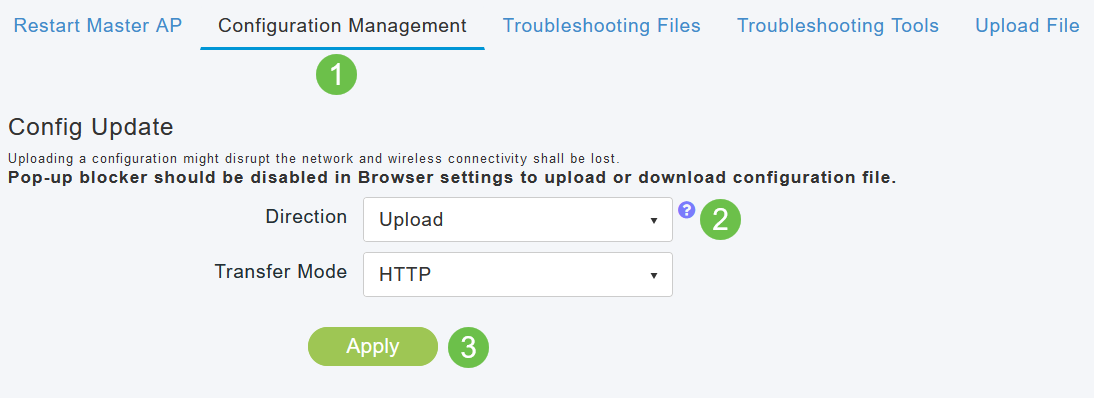
Click on the Configuration Management tab. Click the Direction drop-down menu to select Upload. Leave the Transfer Mode at HTTP. Click Apply.
Step 3
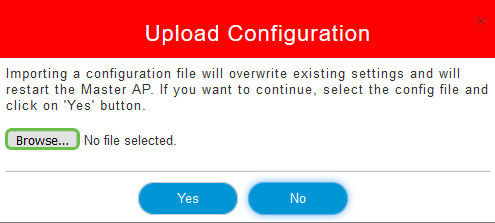
You will see a pop-up asking for a confirmation that you want to download the file. Click Yes.
Step 4
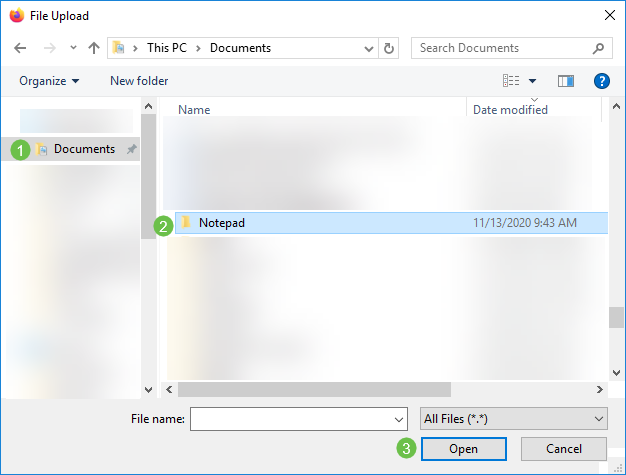
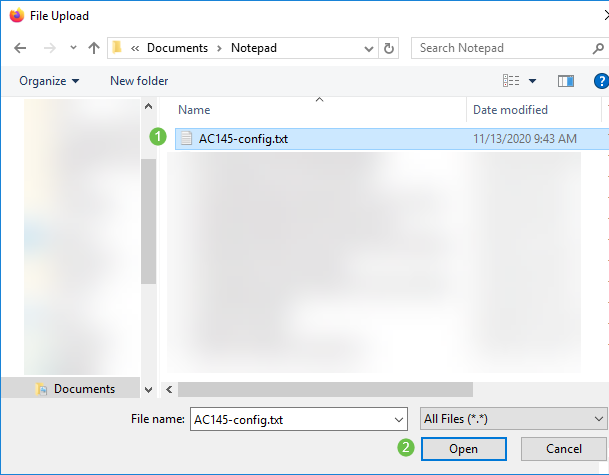
Navigate to the configuration file that you downloaded in the first section. Click Open.
Step 5
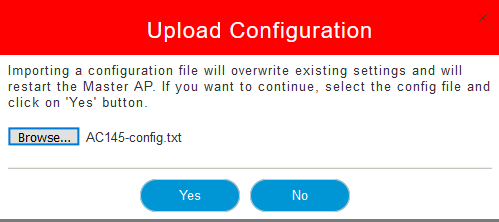
You will receive a pop-up asking for confirmation with a warning that importing a configuration file will overwrite the existing settings and will restart the Primary AP. Click Yes.
Step 6
You will receive updates at the top of the Web UI starting with the one shown below.

Once you see the System being reset, the configuration has been uploaded and the AP is rebooting. Be patient, this can take up to ten minutes.

Step 7
Once the reboot is complete, you will be asked to log back into the Primary AP. Enter your credentials and click OK.

Step 8
Click the Save icon.

Step 9
Click OK.

Step 10
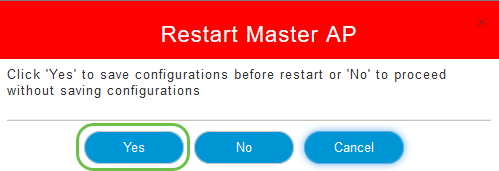
Click Yes to save configurations before restart. This will take up to 10 minutes.
Conclusion
There you go, you now have the skills to download and upload configuration files. We recommend you backup your configuration files regularly as a best practice.
For more articles on Cisco Business Wireless topics, click on any of the following: