Configure Simple Network Management Protocol in Cisco Business Wireless Access Point
Available Languages
Objective
The objective of this document is to show you how to configure Simple Network Management Protocol (SNMP) settings on your Cisco Business Wireless (CBW) Access Point (AP).
Applicable Devices | Software Version
- 140AC (Data Sheet) | 10.0.1.0 (Download latest)
- 145AC (Data Sheet) | 10.0.1.0 (Download latest)
- 240AC (Data Sheet) | 10.0.1.0 (Download latest)
Introduction
The CBW APs support the latest 802.11ac Wave 2 standard for higher performance, greater access, and higher-density networks. They deliver industry-leading performance with highly secure and reliable wireless connections, for a robust, mobile end-user experience.
SNMP is a popular network management protocol used for collecting information from all the devices in the network and configuring and managing these devices. You can configure both SNMP v2c and SNMP v3 access modes using the Master AP web interface. SNMPv2c is the community string-based administrative framework for SNMPv2. Community string is a type of password, which is transmitted in cleartext. SNMP v3 feature provides secure access to devices by authenticating and encrypting data packets over the network.
You can configure the following SNMP access modes for the Master AP:
- SNMP v2c only
- SNMP v3 only
- Both SNMP v2c and SNMP v3
- Neither SNMP v2c nor SNMP v3
Configure SNMP
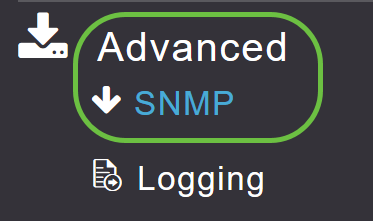
Step 1
Choose Advanced > SNMP.
Step 2
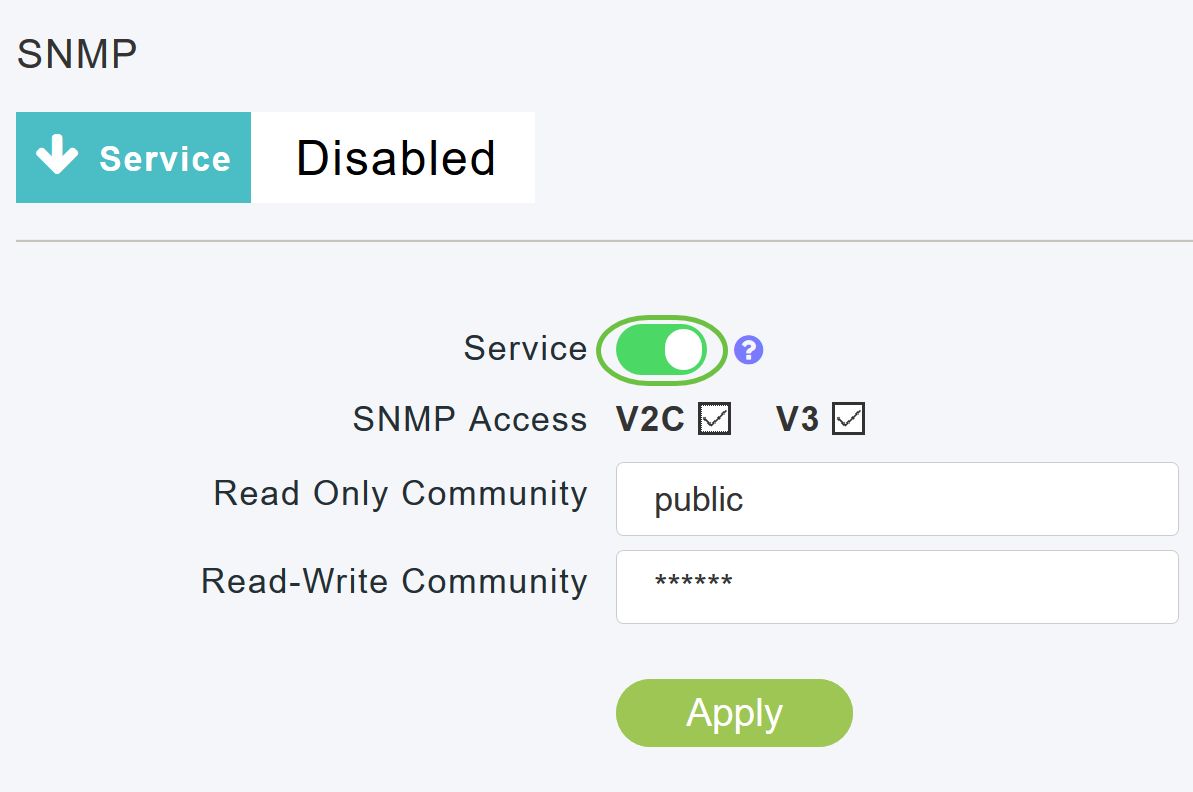
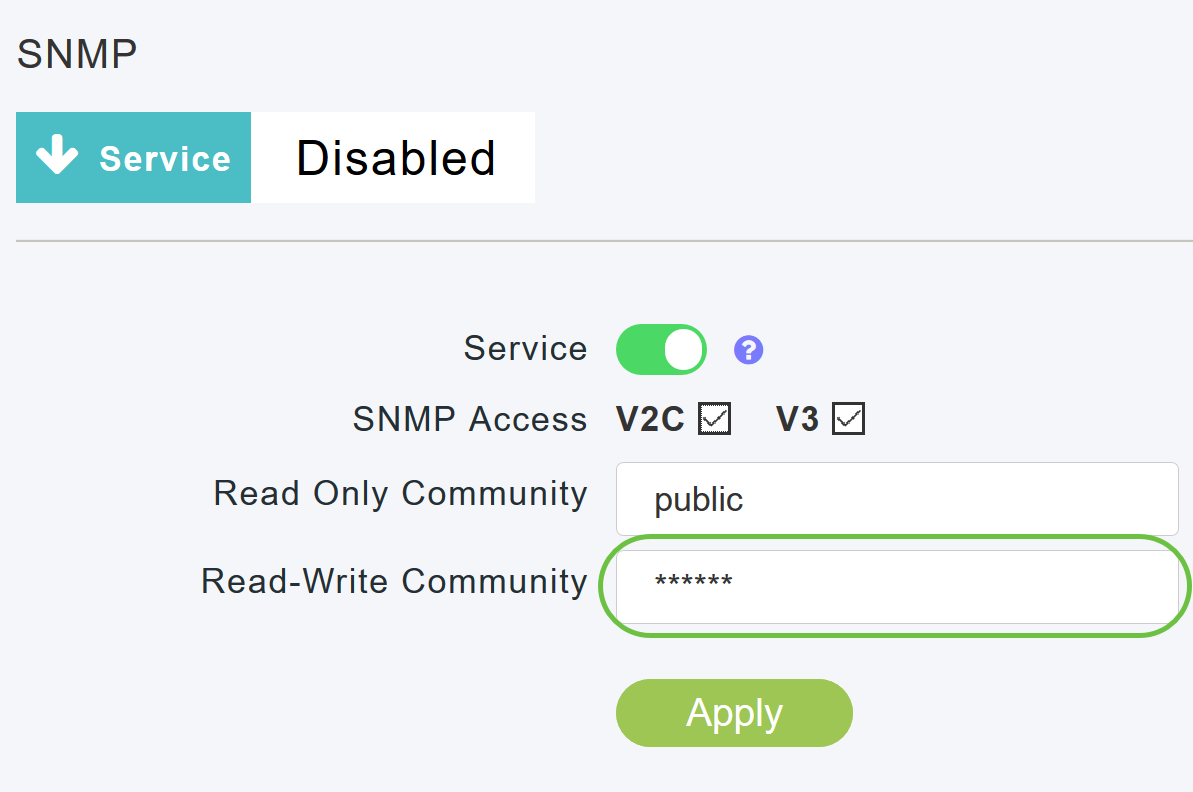
Enable SNMP service option for querying the configuration using MIB browser.
Step 3
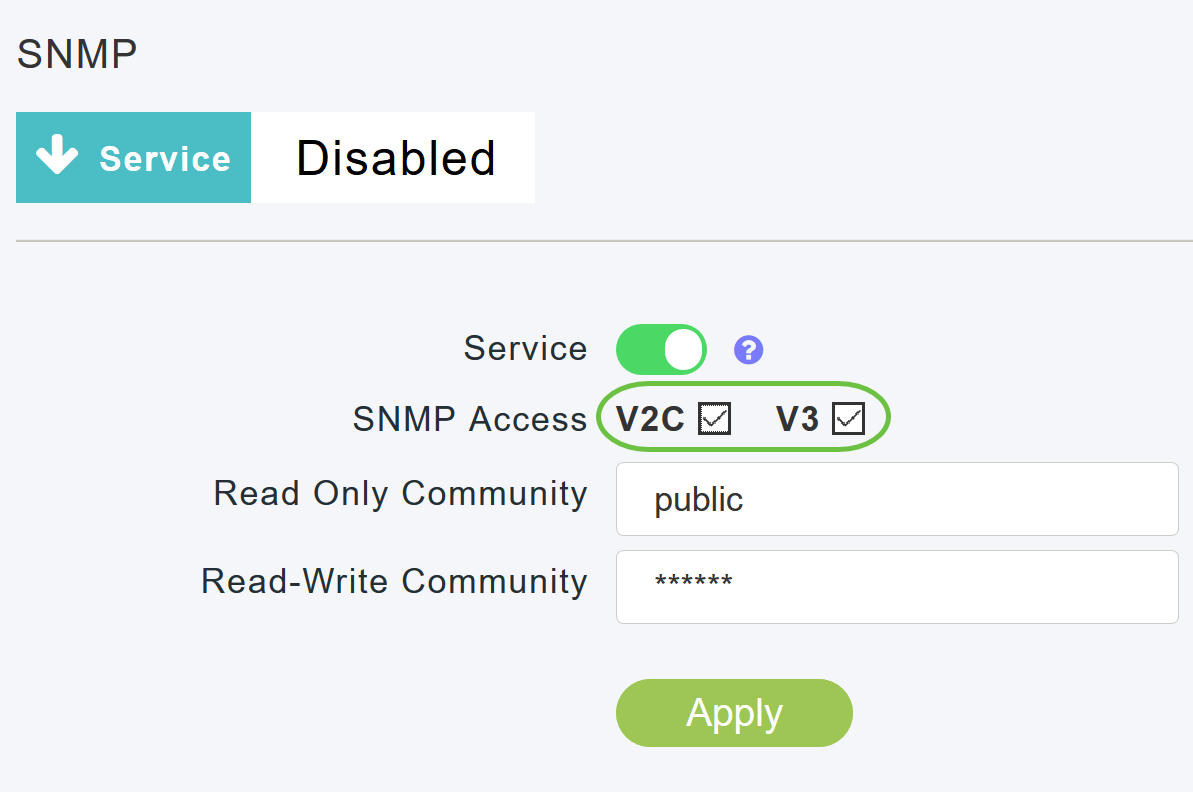
In the SNMP setup window, select the appropriate check box next to the SNMP Access to enable the desired SNMP mode.
The default mode is v2c (or by default, either both or neither of the SNMP access mode is selected).
The selected SNMP access mode is enabled.
Step 4
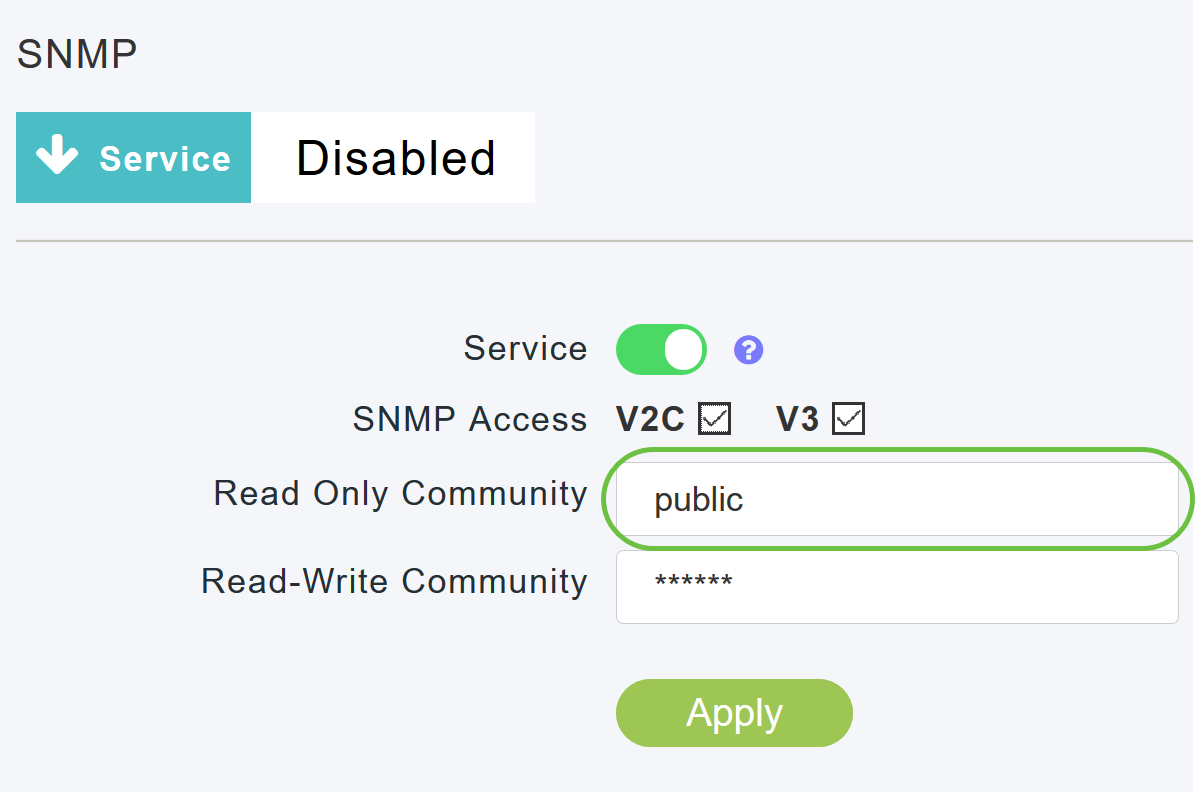
In the Read Only Community field, enter the desired community name. The default name is public.
Step 5
In the Read-Write Community field, enter the desired community name. The default name is private.
Step 6
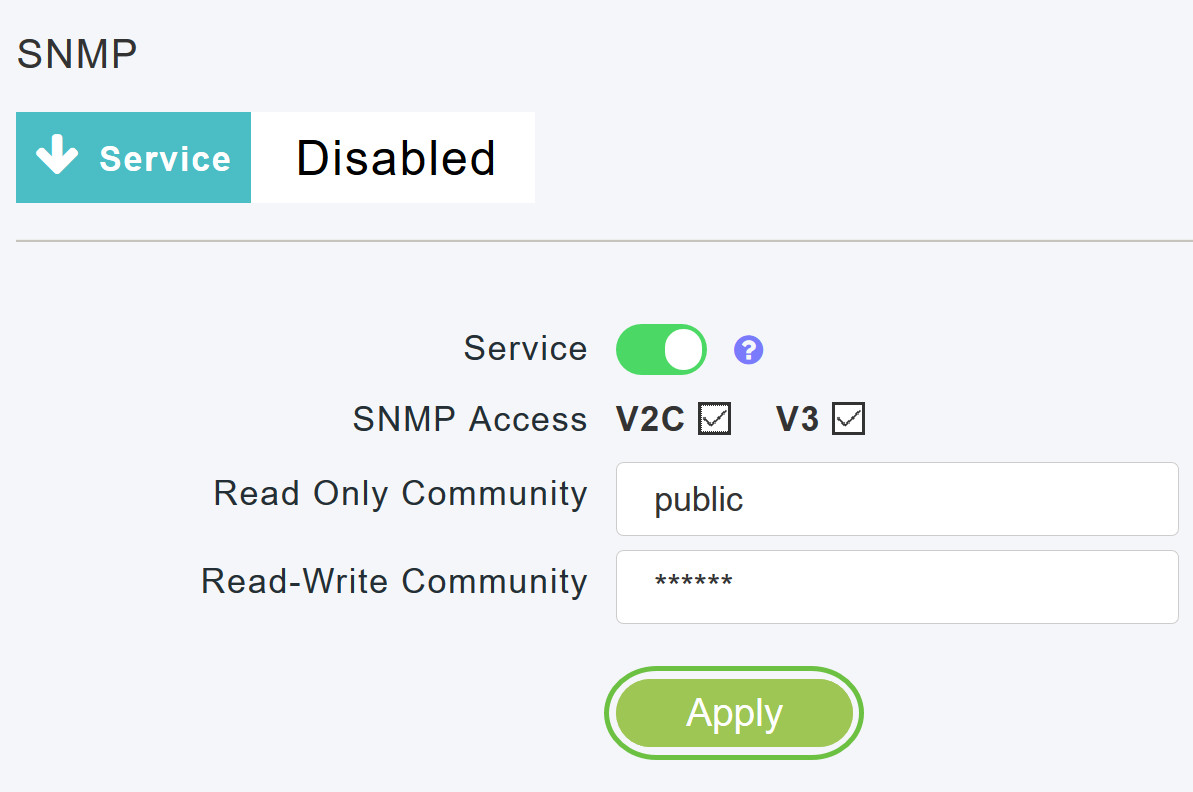
Click Apply.
Step 7
To configure SNMP Trap Receiver, click on Add New SNMP Trap Receiver. This tool receives, logs, and displays SNMP traps sent from network devices. The default setting is Disabled.

Step 8
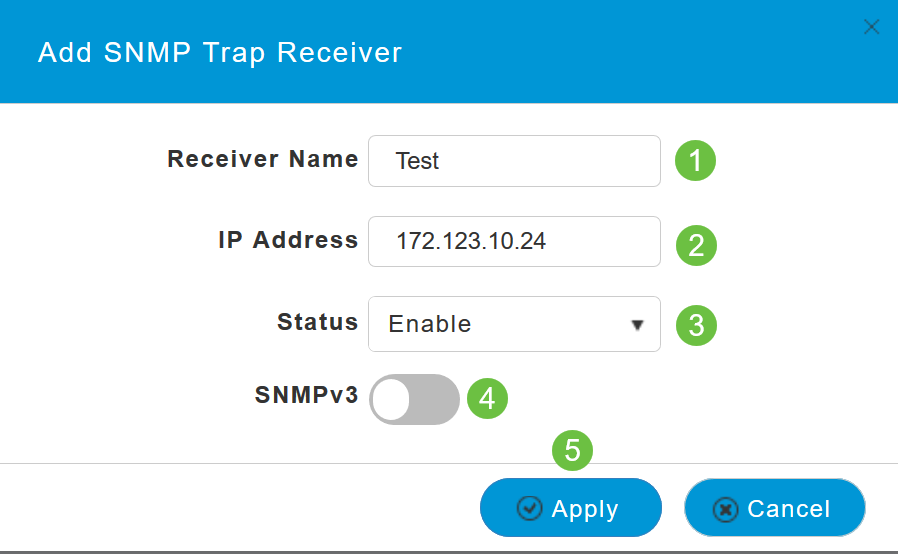
In the Add SNMP Trap Receiver window, configure the following:
- Receiver Name
- IP address of the server you wish to connect to
- Status
- Option to enable SNMPv3
Click Apply.
Add an SNMPv3 User
Step 1
Choose Advanced > SNMP.

Step 2
In the SNMP Setup window, under the SNMPv3 Users section, click the Add New SNMPv3 User button.

Step 3
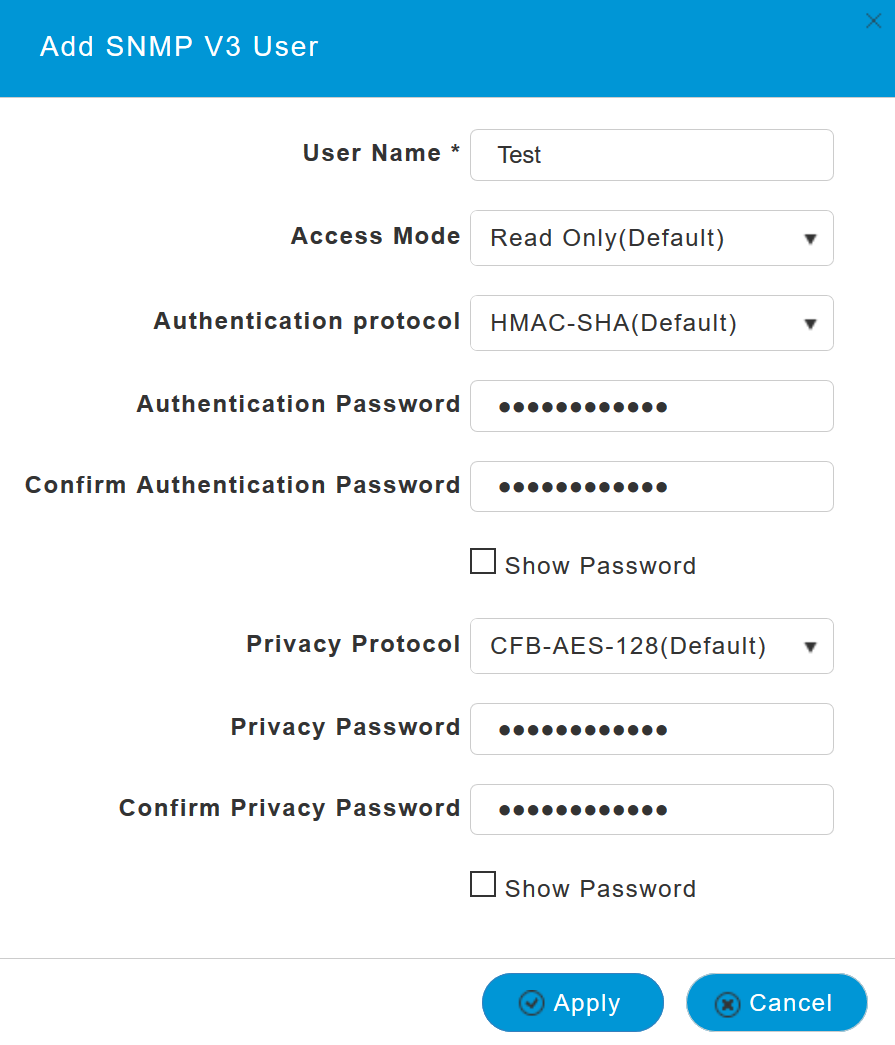
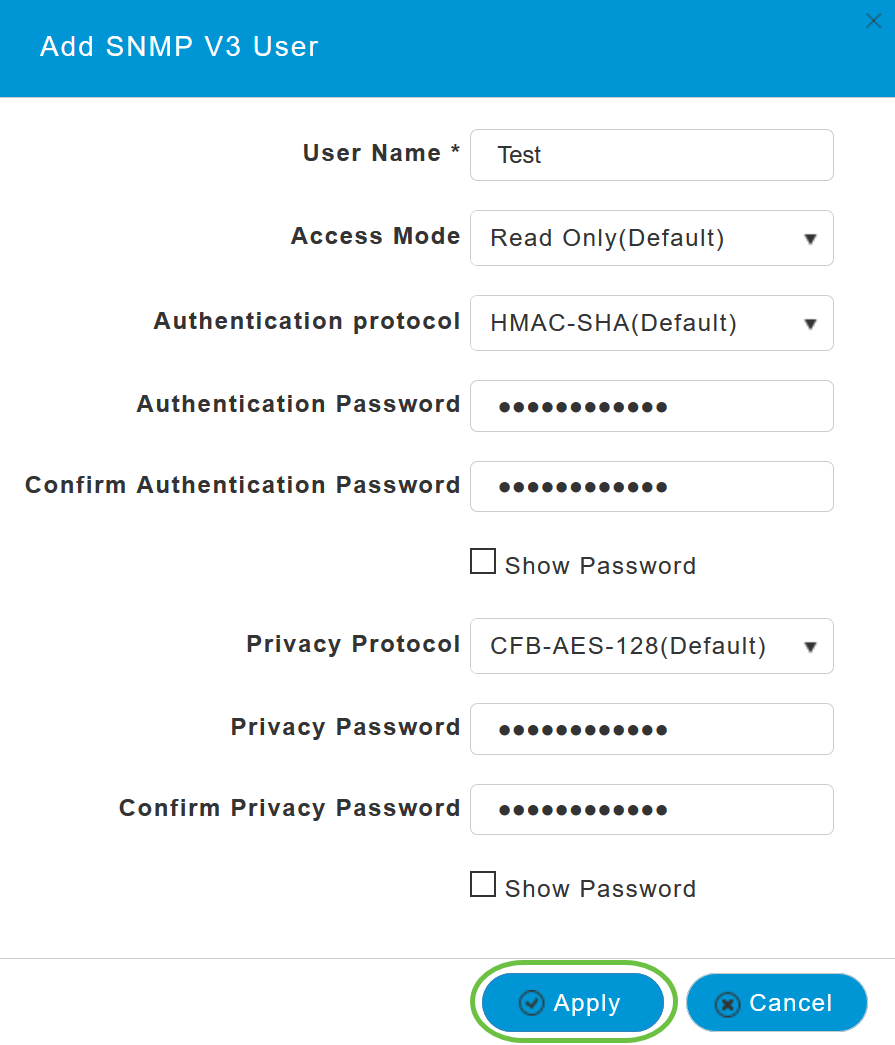
In the Add SNMP v3 User window, enter the following details:
- User Name - Enter the desired username for the new SNMPv3 user.
- Access Mode - From the drop-down list, choose one of the desired modes: Read Only or Read/Write. The default is Read Only.
- Authentication protocol - From the Authentication Protocol drop-down list, choose one of the options: HMAC-MD5, HMAC-SHA, or None. The default authentication protocol is HMAC-SHA.
- Authentication Password - Enter the desired authentication password. Use a minimum password length of 12-31 characters.
- Confirm Authentication Password - Confirm the authentication password specified above. You can select the Show Password checkbox to display the entries in the Authentication Password and the Confirm Authentication Password fields and verify if the characters match.
- Privacy Protocol - From the drop-down list, select one of the options: CBC-DES, CFB-AES-128, or None. The default privacy protocol is CFB-AES-128.
- Privacy Password - Enter the desired privacy password. Use a minimum password length of 12-31 characters.
- Confirm Privacy Password - Confirm the privacy password specified above. You can select the Show Password checkbox to display the entries in the Privacy Password and the Confirm Privacy Password fields and verify if the characters match.
Step 4
Click Apply to create a new SNMPv3 user.
The newly added SNMPv3 User appears in the SNMP V3 Users table on the SNMP Setup window.

You can add up to a maximum of 7 SNMPv3 users.
Delete SNMPv3 User
Step 1
Choose Advanced > SNMP.

Step 2
In the SNMP Setup, click the X icon in the row containing the SNMPv3 user you wish to delete.

Step 3
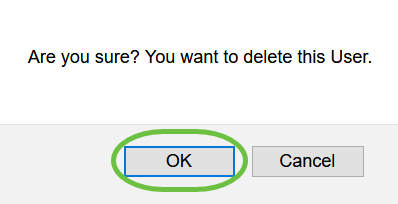
A pop-up window appears to confirm the action. Click OK.
The SNMPv3 Users table is refreshed and the deleted entry is removed from the table.
Conclusion
You are all set! You have now successfully configured SNMP in your CBW AP. To learn more, read the articles below and manage your network with ease.