Configure Management Interface in Cisco Business Wireless Access Point
Available Languages
Objective
The objective of this document is to show you how to configure management interface in Cisco Business Wireless (CBW) Access Point (AP). This includes the steps to upload, download configurations and the ways to reset the access point to factory default settings.
If you are unfamiliar with terms in this document, check out Cisco Business: Glossary of New Terms.
Applicable Devices | Firmware Version
- 140AC (Data Sheet) | 10.4.1.0 (Download latest)
- 141ACM (Data Sheet) | 10.4.1.0 (Download latest)
- 142ACM (Data Sheet) | 10.4.1.0 (Download latest)
- 143ACM (Data Sheet) | 10.4.1.0 (Download latest)
- 145AC (Data Sheet) | 10.4.1.0 (Download latest)
- 240AC (Data Sheet) | 10.4.1.0 (Download latest)
Introduction
If you are looking to configure the management interface in your CBW AP, you have come to the right place! The CBW APs support the latest 802.11ac Wave 2 standard for higher performance, greater access, and higher-density networks. They deliver industry-leading performance with highly secure and reliable wireless connections, for a robust, mobile end-user experience.
The Configure Management interface allows you to download or upload configurations in your CBW APs. If necessary, you can choose to reset the configurations of the access point to factory default settings.
If you are ready to configure management of your CBW AP, let’s get started!
Table of Contents
- Download and Upload Primary AP Configuration
- Export and Import Individual AP Configuration
- Reset to Factory Default
- Manual Reset
- Reset through the Web UI
Download and Upload Primary AP Configuration
Beginner Help
This toggled section highlights tips for beginners.
Logging In
Log into the Web User Interface (UI) of the Primary AP. To do this, open a web browser and enter https://ciscobusiness.cisco. You may receive a warning before proceeding. Enter your credentials.You can also access the Primary AP by entering https://[ipaddress] (of the Primary AP) into a web browser.
Tool Tips
If you have questions about a field in the user interface, check for a tool tip that looks like the
following: ![]()
Trouble locating the Expand Main Menu icon?
Navigate to the menu on the left-hand side of the screen, if you don’t see the menu button, click
this icon to open the side-bar menu.
Cisco Business App
These devices have companion apps that share some management features with the web user interface. Not all features in the Web user interface will be available in the App.
Frequently Asked Questions
If you still have unanswered questions, you can check our frequently asked questions document. FAQ
Access the Web User Interface (UI)
Log into the Primary AP. If you have any issues, check out the following tips:
- Make sure the correct Service Set Identifier (SSID) is selected. This is the name that you created for the wireless network.
- Disconnect any VPN for either the mobile app or on a laptop. You might even be connected to a VPN that your mobile service provider uses that you might not even know. For example, an Android (Pixel 3) phone with Google Fi as a service provider there is a built-in VPN that auto-connects without notification. This would need to be disabled to find the Primary AP.
- Log into the Primary AP with https://<IP address of the Primary AP.
- Once you do initial setup, be sure https:// is being used whether you are logging into ciscobusiness.cisco or by entering the IP address into your web browser. Depending on your settings, your computer may have auto-populated with http:// since that is what you used the very first time you logged in.
- To help with problems related to accessing the web UI or browser issues during the use of the AP, in the web browser (Firefox in this case) click on Open menu, go to Help > Troubleshooting Information and click on Refresh Firefox.
Step 1
At any time, you can export the current Primary AP configuration to a .TXT file format.
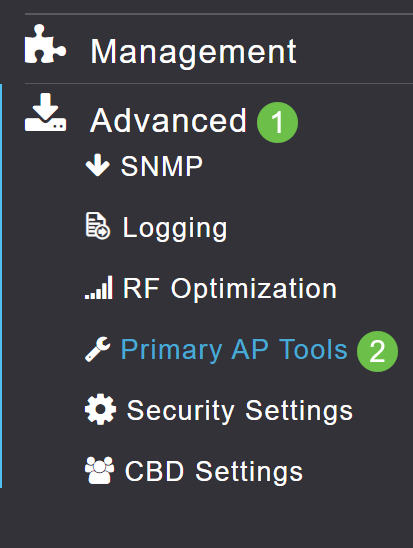
To download the current configuration, choose Advanced > Primary AP Tools.
Step 2
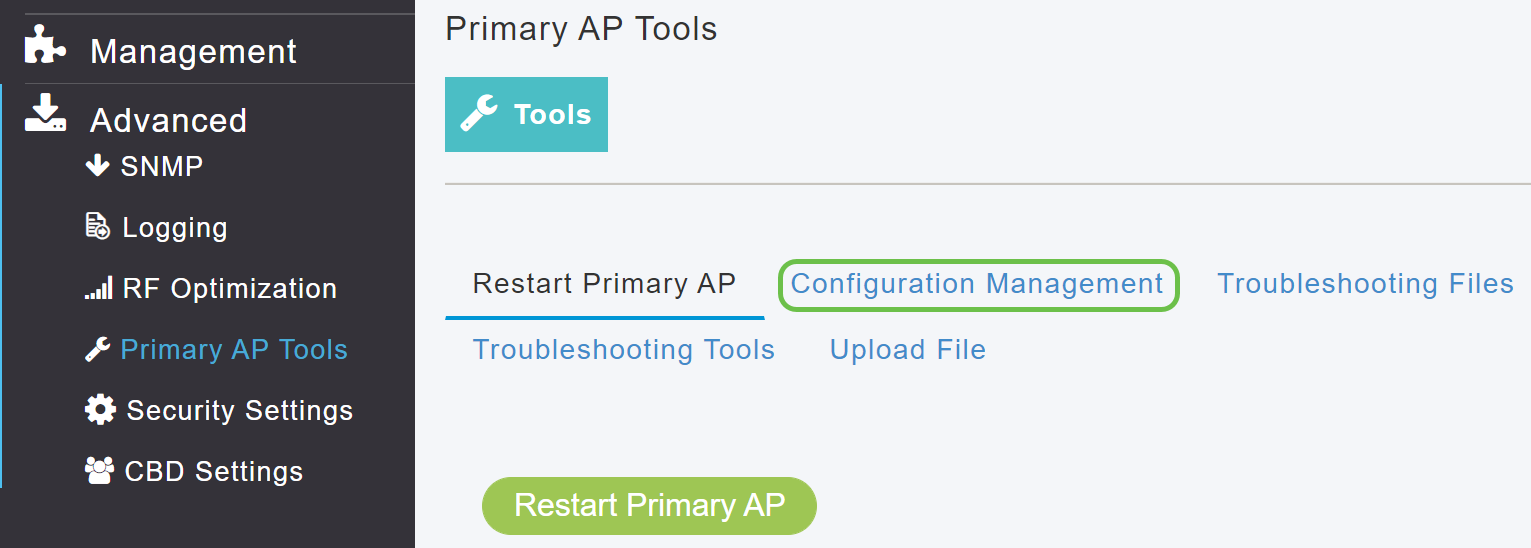
Navigate to Configuration Management tab.
Step 3
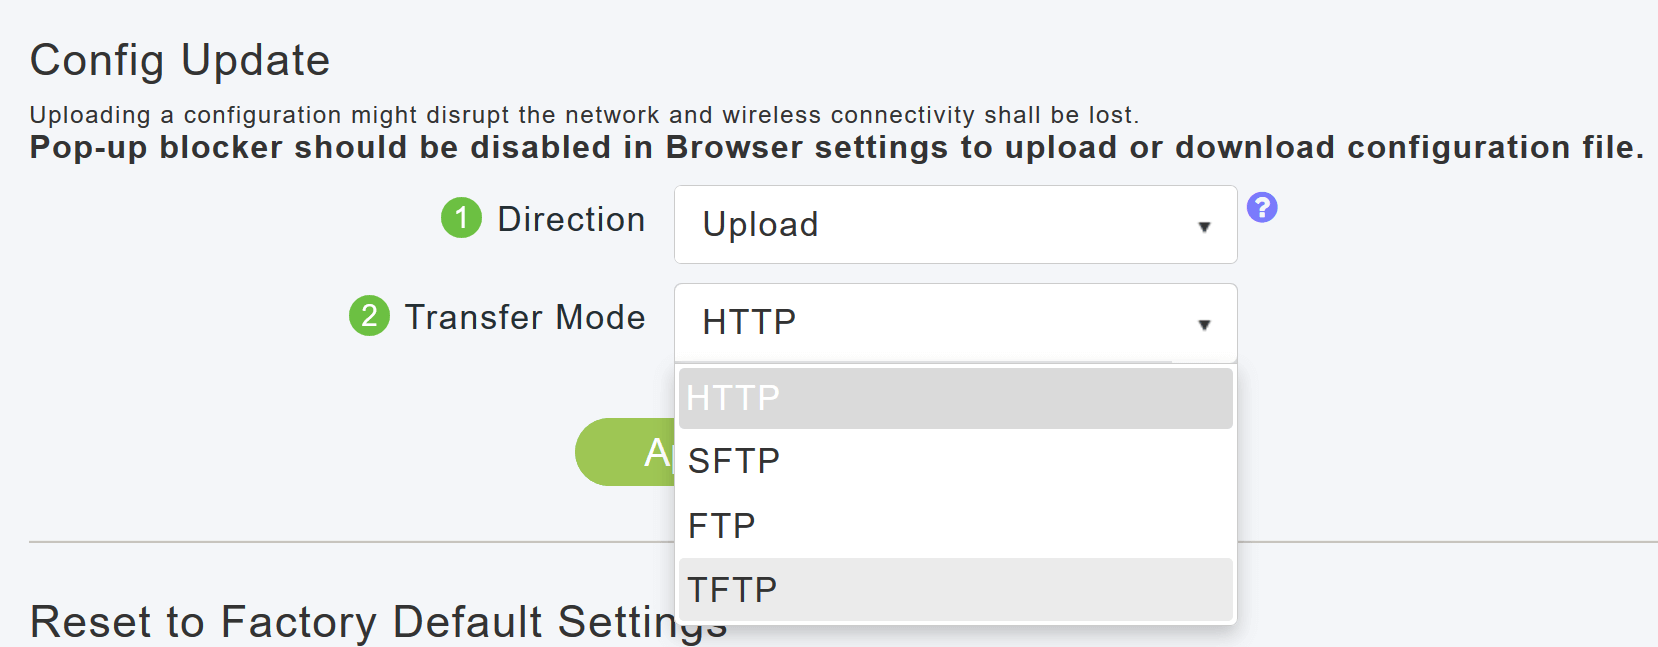
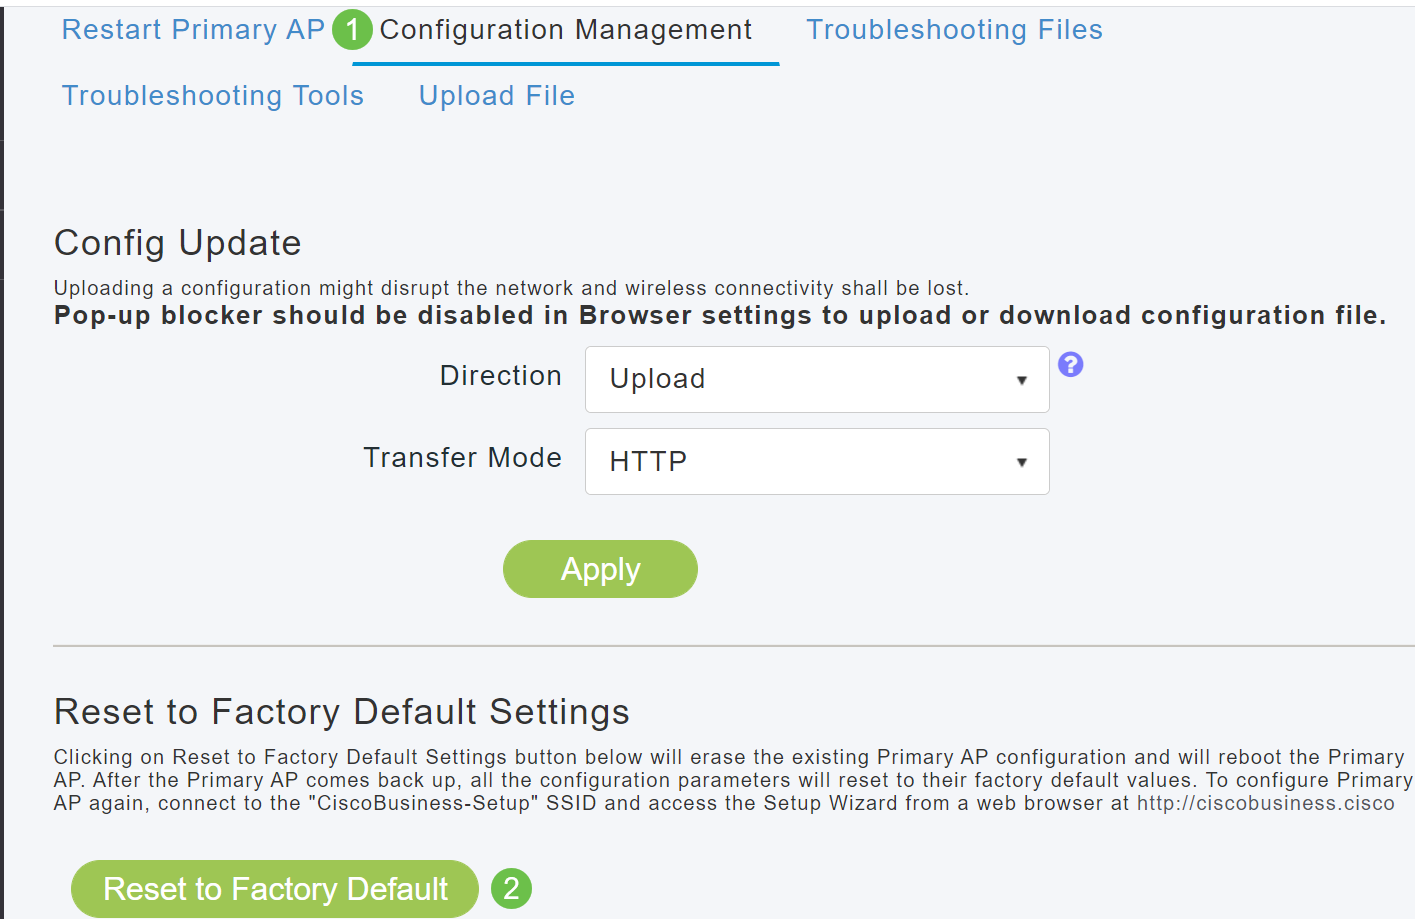
To download the configuration, in the Config Update section, set the Direction as Download and Transfer Mode as HTTP. Click Apply.

The configuration file is saved on to the device on which the Primary UI is being viewed. By default the file is saved as config.txt in your downloads folder.

Step 4
You can import configuration from a previously saved configuration file, which is in .TXT file format.
Under Configuration Managment, select Direction as Upload, and select the Transfer Mode from the drop-down menu.
Step 5
Click Apply.

You will see the following pop-window. Click Browse to choose the configuration file from your PC. Click Yes to proceed.
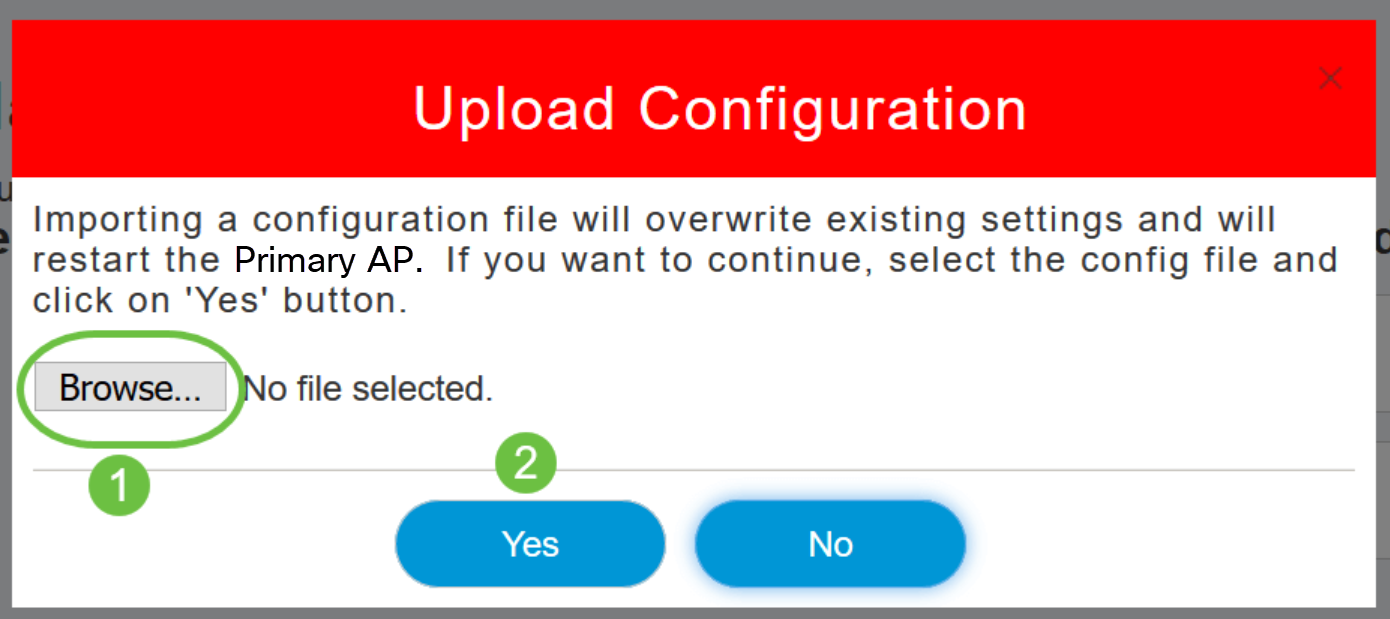
The import causes all Primary AP-capable APs in the network to reboot. When the APs come back online, the Primary AP election process happens and a Primary AP comes online with the new imported Primary AP configuration.
Export and Import Individual AP Configuration
You can export and import the configuration of individual APs in the network through the web UI of the Primary AP.
Step 1
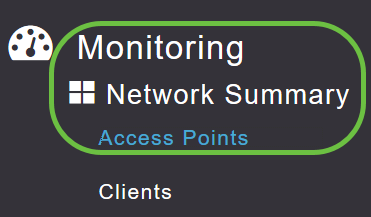
Navigate to Monitoring > Network Summary > Access Points.
Step 2
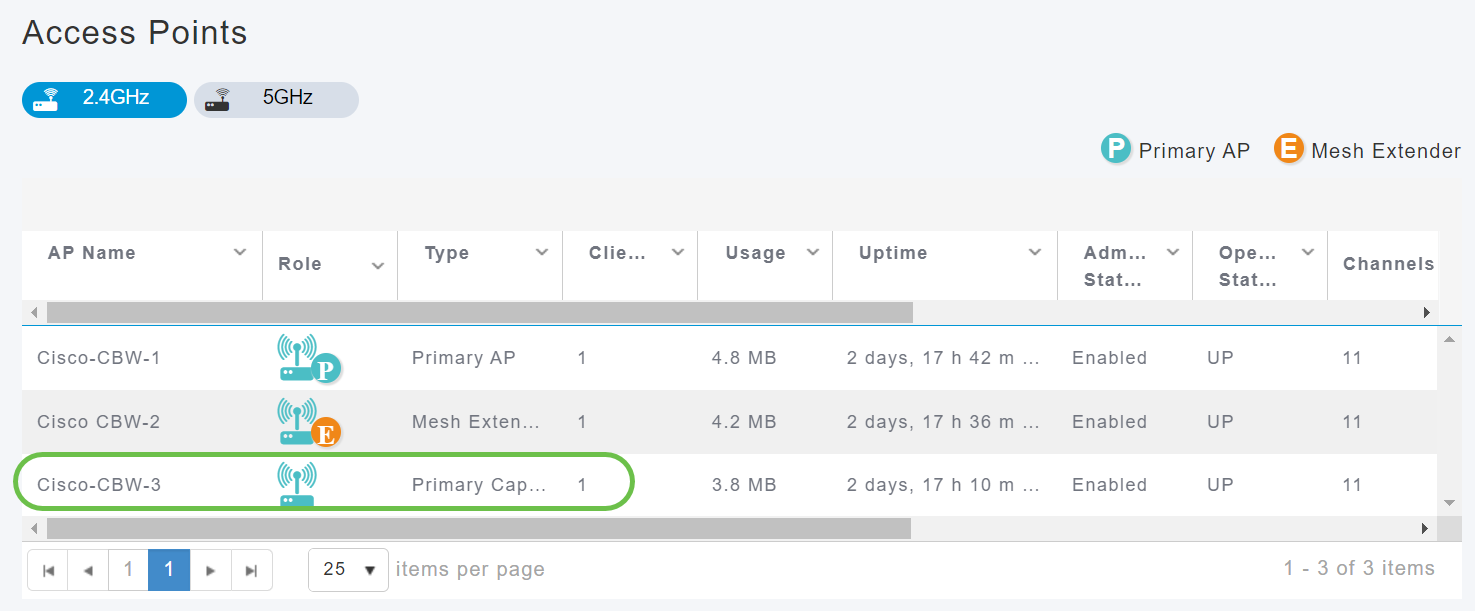
Select the AP.
Step 3
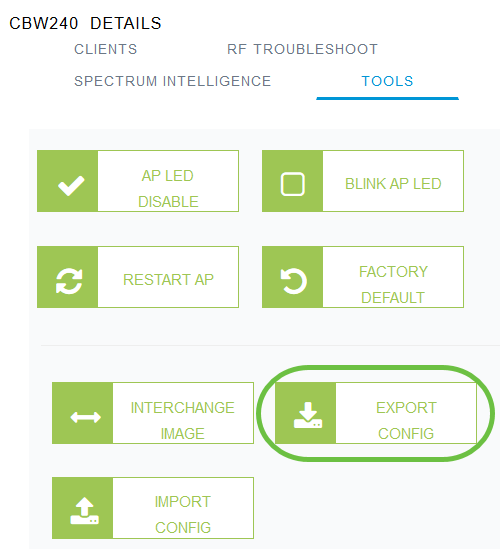
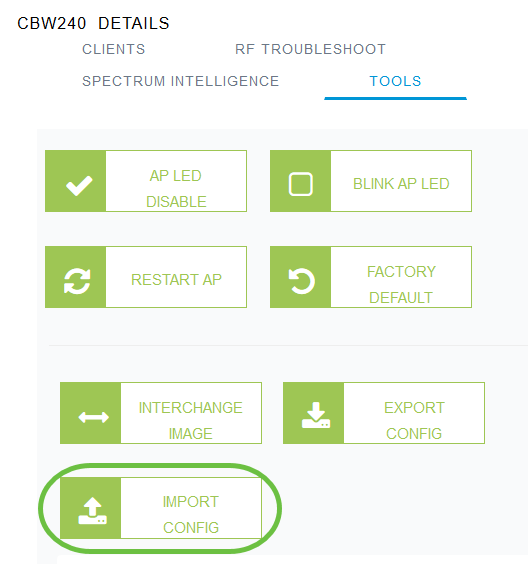
Scroll down to the AP details section and select the Tools tab.

Step 4
To export the configuration, click on the Export Config button.
Step 5
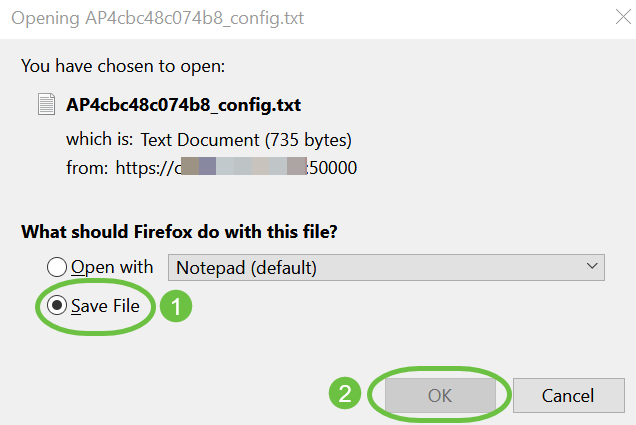
A pop-window appears. Choose Save File option and click OK. The configuration will be saved as a text (.txt) file in your downloads folder.
Step 6
To import the configuration, click on Import Config button.
Step 7
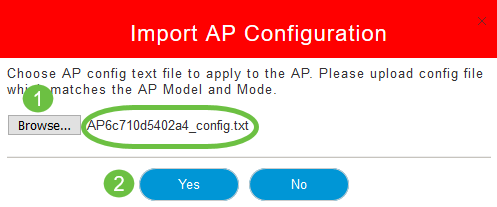
A pop-up window appears. Click on Browse... to choose the configuration file from your computer and click Yes.
Reset to Factory Default
Resetting the CBW AP to factory default settings, erases all configurations that have been set by the user, and restores the device to its original settings. A reset is recommended if most of the AP settings need to be reconfigured.
Manual Reset
Step 1
Hold the Mode button down. Turn on the Primary AP. Continue for 30 seconds.
Step 2
The LED on the AP will go through several patterns of flashing and then settle down to a flashing green. Once it reaches this state, release the button. For more details on this process, check out Reset to Factory Default.
Reset through the Web UI
The Primary AP, Primary-capable AP and mesh extenders can be reset to factory default using the web UI.
Step 1
To reset the Primary AP to factory default setting simply navigate to Advanced > Primary AP Tools and go to Configuration Management tab. Click on Reset to Factory Default.
This will only reset the Primary AP or the AP holding the Primary role. Some configuration settings like locations, bridge group names, radio settings are stored locally on the APs/mesh extenders. To reset these settings, you must individually reset the AP or mesh extender.
Step 2
To reset the Primary-capable AP or mesh extender, navigate to Monitoring > Network Summary > Access Points.

Step 3
Select a Non-Primary AP.

Step 4
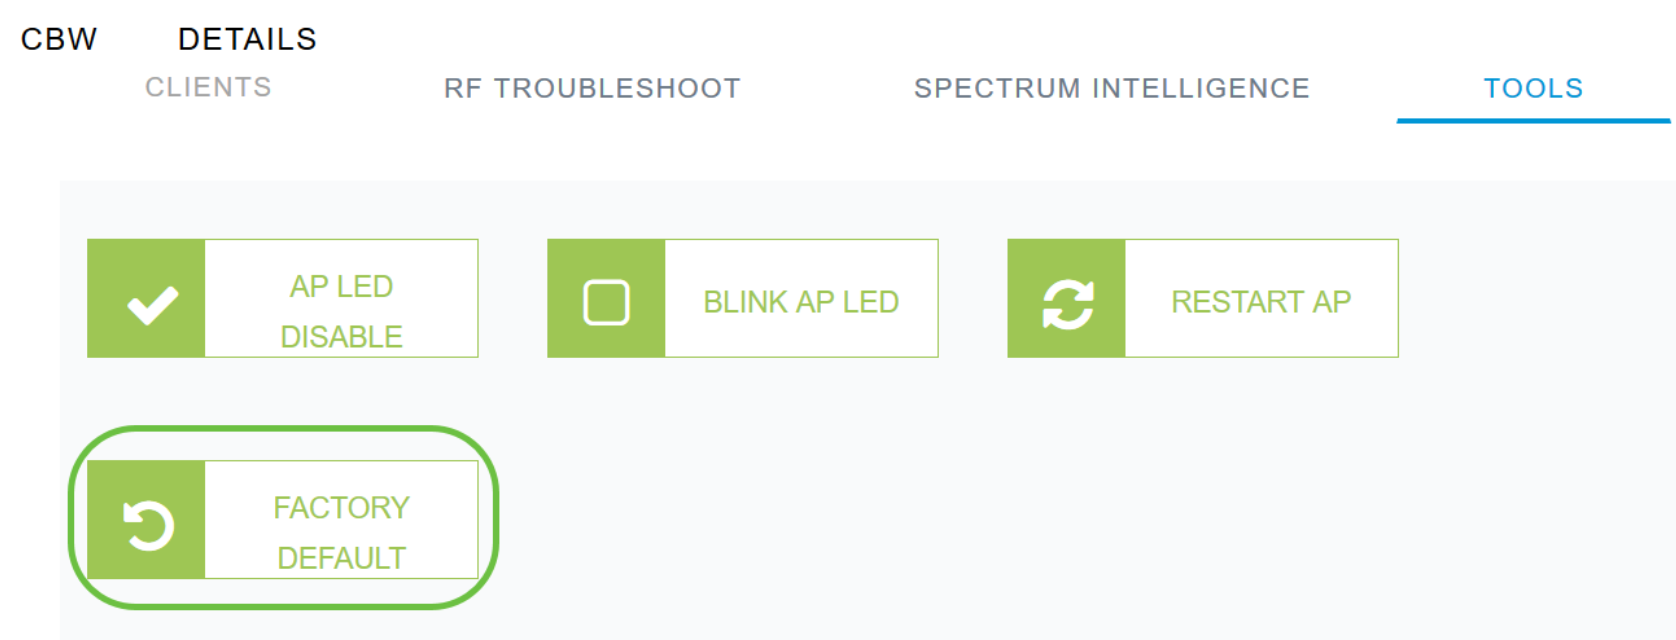
Scroll down to the AP details section and select the Tools tab.

Step 5
Click on the Factory Default button.
Conclusion
There you have it! You have now learned the steps to configure management of your CBW APs. For more advanced configurations, refer to the Cisco Business Wireless Access Point Administration Guide.
If you would like to know more, check out any of the following articles: