Application Profiling
Available Languages
Objective
This article illustrates the steps in configuring application profiling on CBW145AC. It will also review the benefits and a little context for beginners.
If you are unfamiliar with terms in this document, check out Cisco Business: Glossary of New Terms.
Applicable Devices | Software Version
- 140AC (Data Sheet) | 10.0.1.0 (Download latest)
- 141ACM (Data Sheet) | 10.0.1.0 (Download latest)
- 142ACM (Data Sheet) | 10.0.1.0 (Download latest)
- 143ACM (Data Sheet) | 10.0.1.0 (Download latest)
- 240AC (Data Sheet) | 10.0.1.0 (Download latest)
What should you know about application profiling?
Profiling is a subset of features that enable enacting organizational policy. It allows you the administrator to match and prioritize traffic types. Like rules make decisions about how to rank or drop the traffic. The Cisco Business Mesh Wireless system features client and application profiling. The act of accessing a network as a user begins with many exchanges of information, among that information is the type of traffic. Policy interrupts traffic flow to direct the path, much like a flow-chart. Other types of policy features include - guest access, access control lists and QOS. Each of those features have their own pros and cons.
What should I know about CBW Application Profiling?
Many wireless mesh solutions can omit features like application profiling. Were bandwidth unlimited this feature would have less use case. Back in the real world, we may need to dial in the settings about how to treat traffic types. The CBW series enables comprehensive control over many common types of applications. For example, managing throughput for streaming by services like Netflix.
Configuring Application Profiling
Beginner Help
This toggled section highlights tips for beginners.
Logging In
Log into the Web User Interface (UI) of the Primary AP. To do this, open a web browser and enter https://ciscobusiness.cisco.com You may receive a warning before proceeding. Enter your credentials.You can also access the Primary AP by entering https://[ipaddress] (of the Primary AP) into a web browser.
Tool Tips
If you have questions about a field in the user interface, check for a tool tip that looks like the
following: ![]()
Trouble locating the Expand Main Menu icon?
Navigate to the menu on the left-hand side of the screen, if you don’t see the menu button, click
this icon to open the side-bar menu.
Cisco Business App
These devices have companion apps that share some management features with the web user interface. Not all features in the Web user interface will be available in the App.
Frequently Asked Questions
If you still have unanswered questions, you can check our frequently asked questions document. FAQ
Step 1
Login to your Primary Access Point.
Step 2
Navigate to the menu on the left-hand side of the screen, if you don’t see the menu button 
Step 3
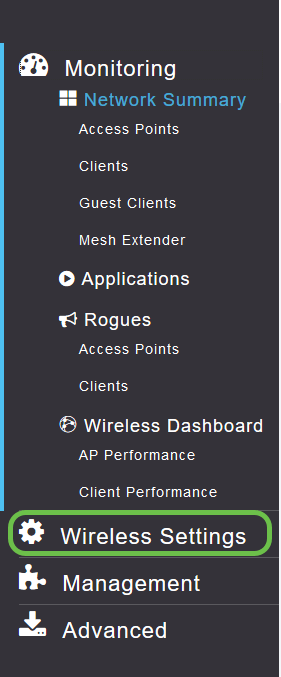
The Monitoring Menu loads by default when signing in to the device. You will need to instead click Wireless Settings.
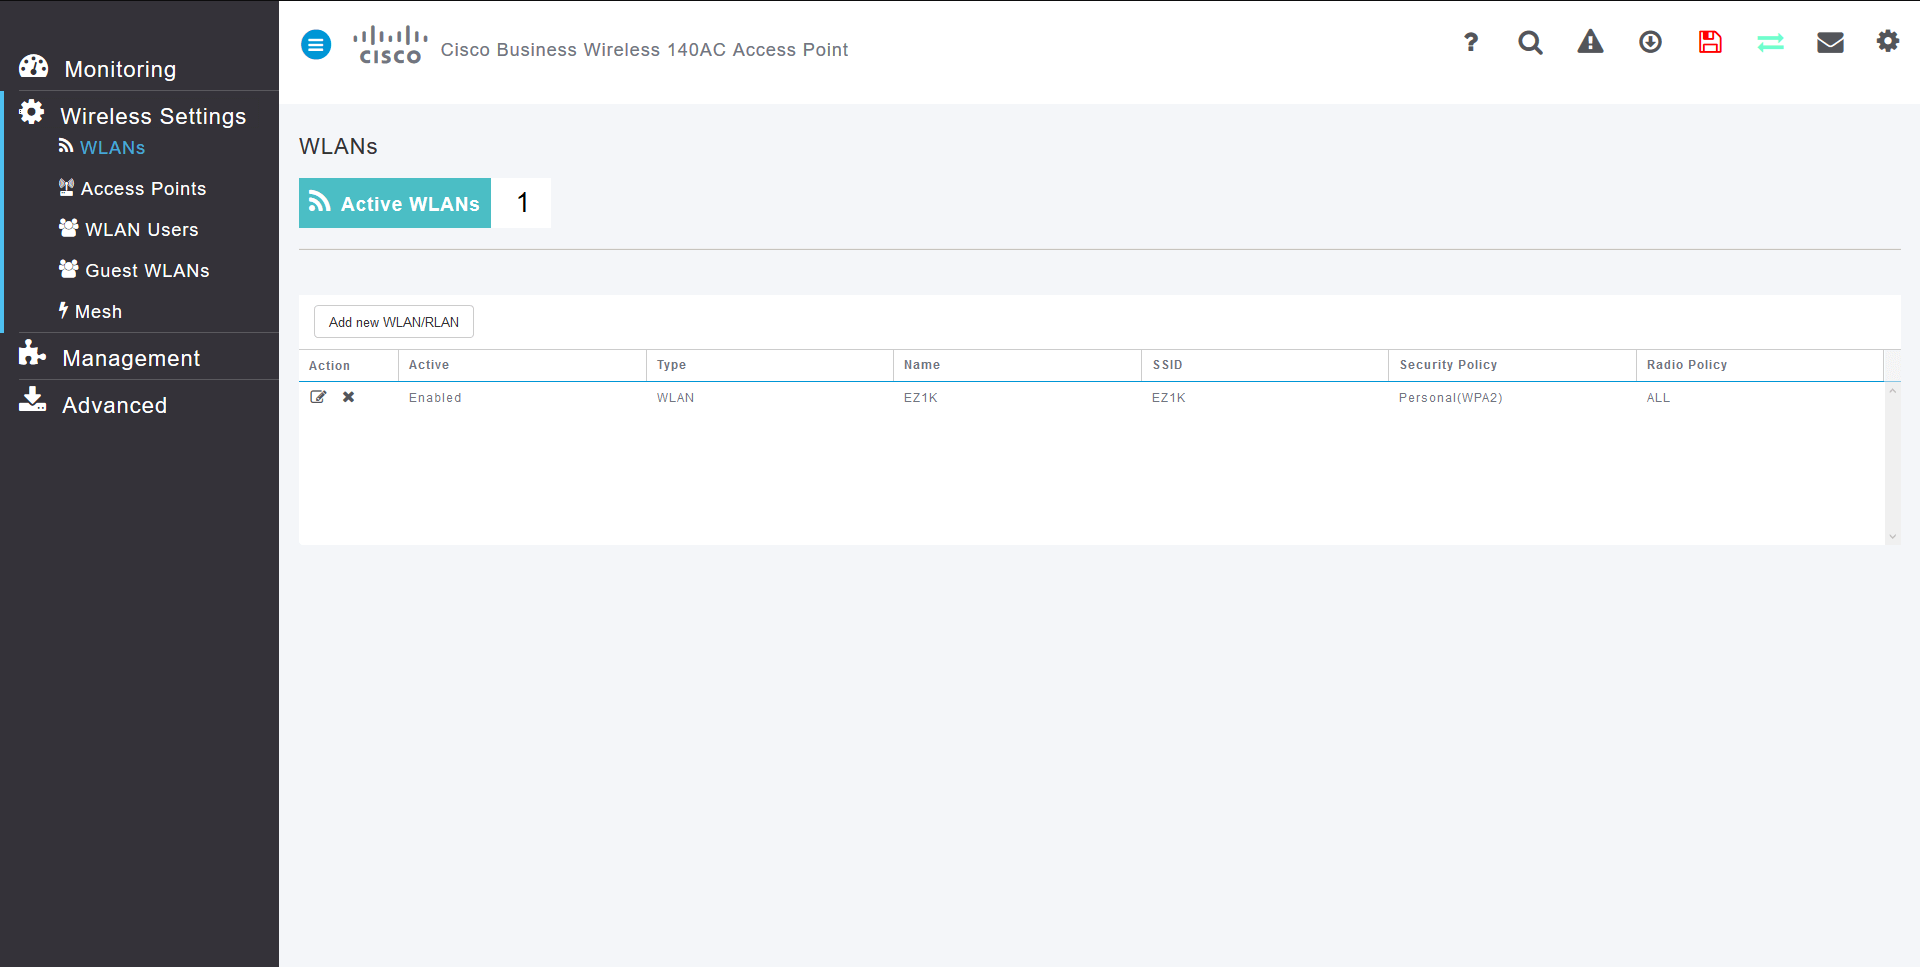
The below is similar to what you will see when your click the Wireless Settings link:
Step 4
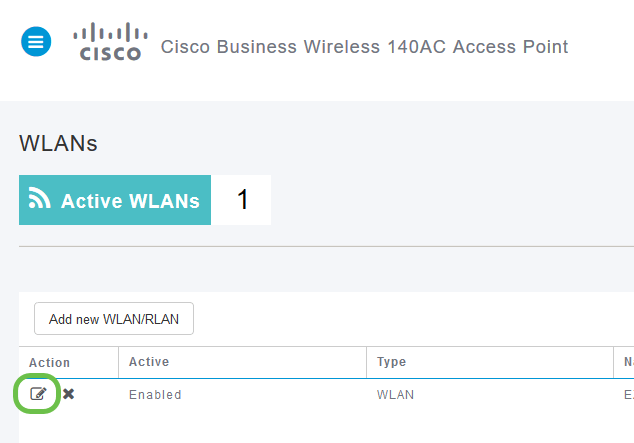
Click the Edit Icon to the left of the Wireless Local Area Network you wish to enable Application on.
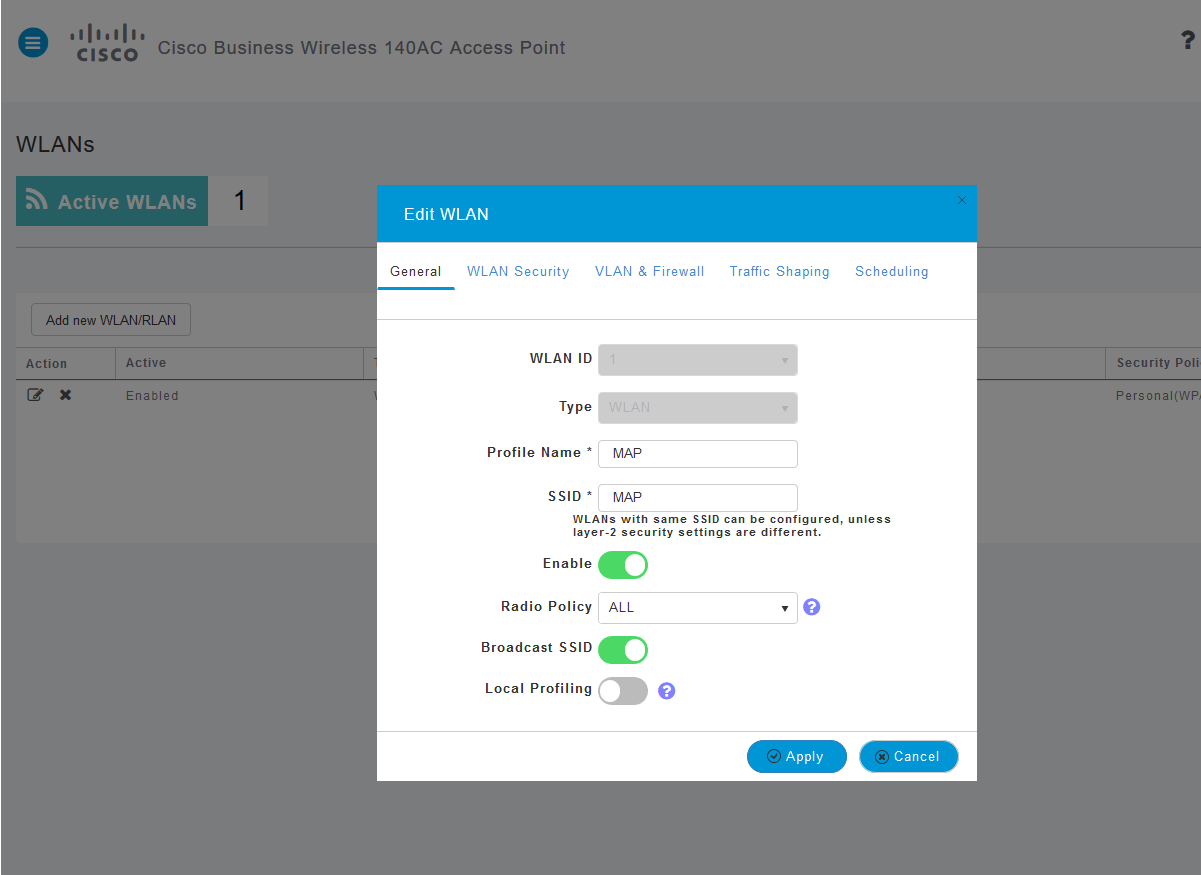
If your device was setup recently your Edit WLAN page may appear similar to the below:
Step 5
Navigate to the Traffic Shaping Tab by clicking on it.
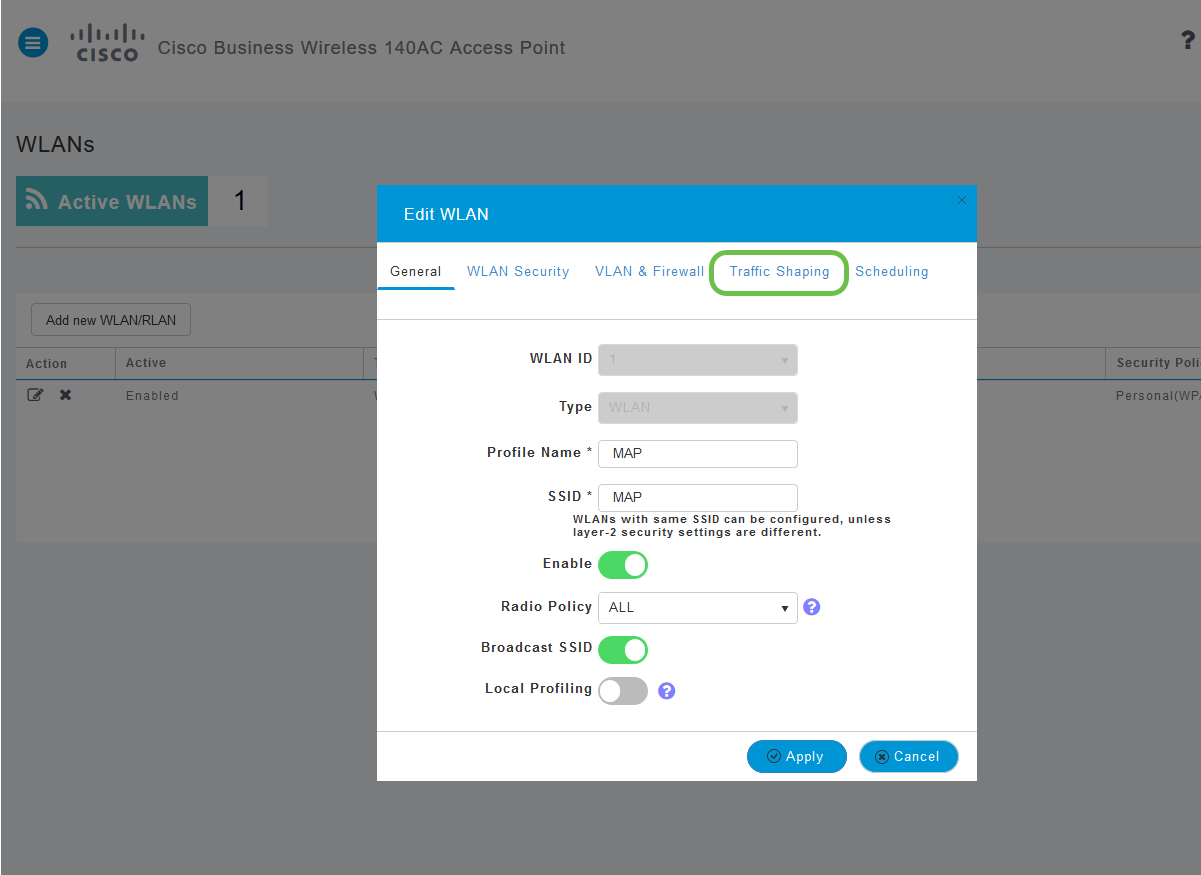
Your screen may appear as follows:
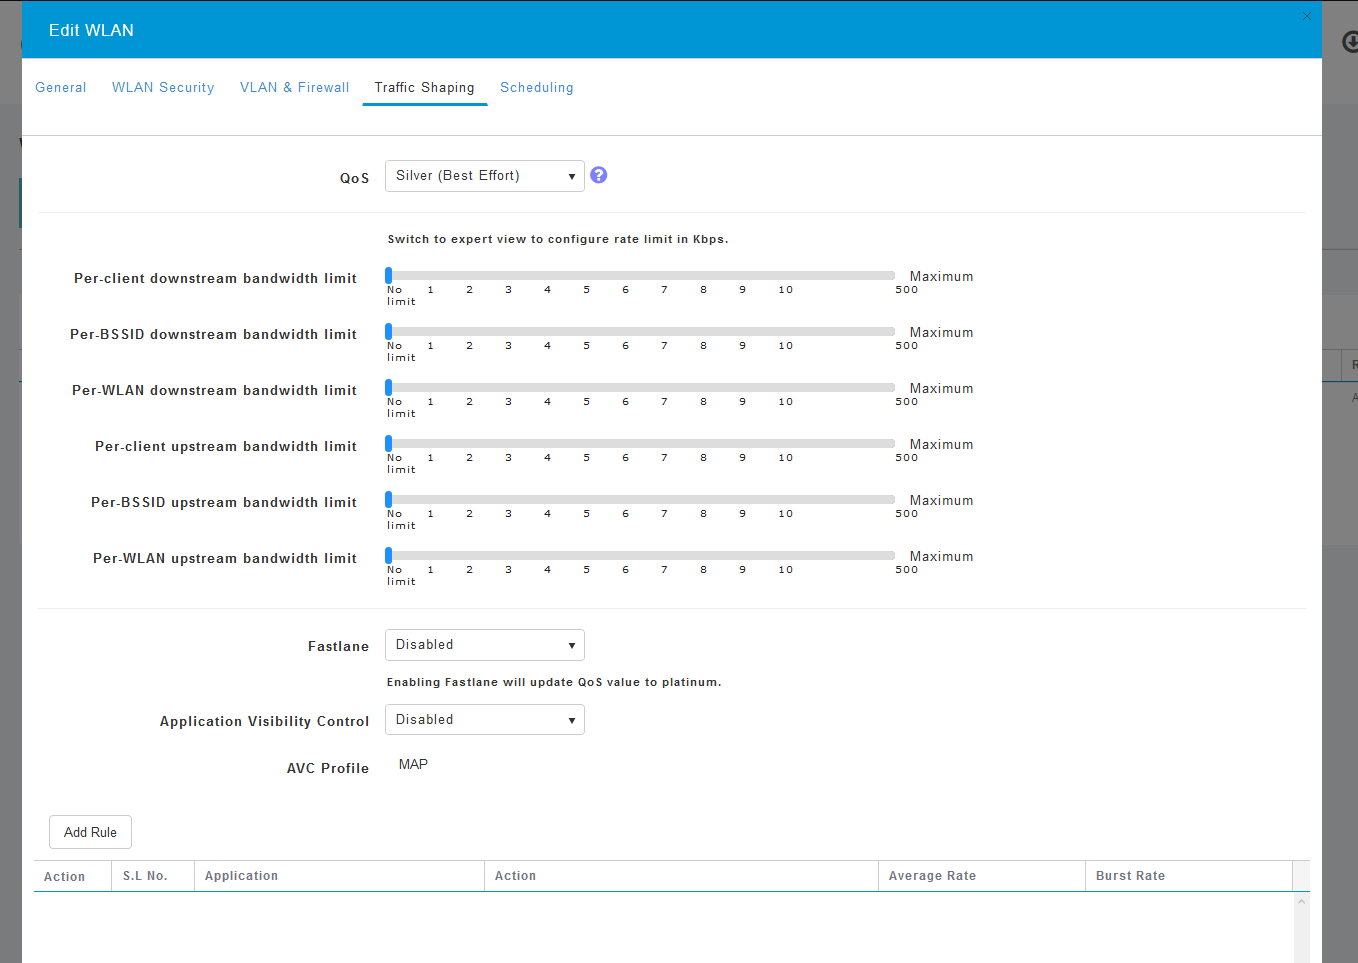
Step 6
Toward the bottom of the page, you will find the Application Visibility Control feature. This is disabled by default. Click the dropdown and select Enabled.
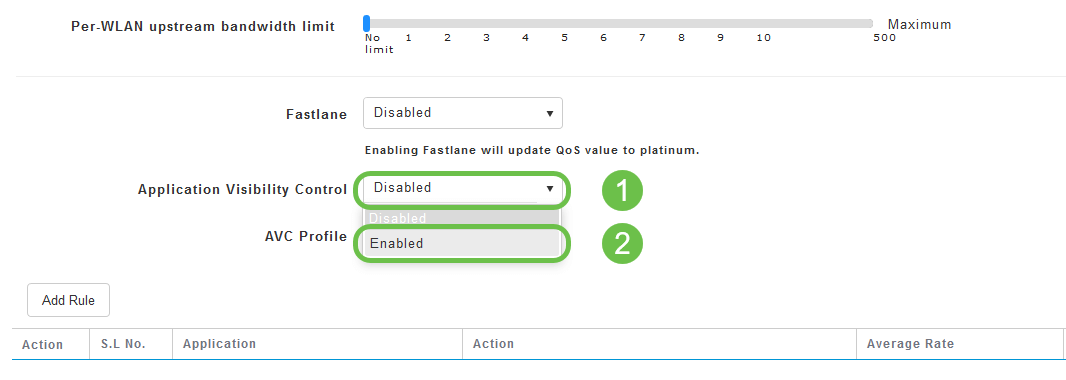
Step 7
Click the Apply button.

This setting must be enabled otherwise the feature will not function.
Step 8
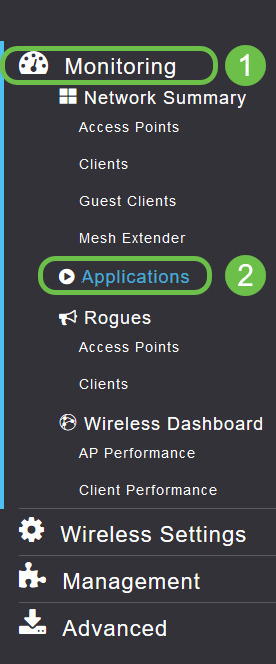
After clicking apply, click the cancel button to close the WLAN sub-menu. Then click the Monitoring menu on the left-hand menu bar. Once you are able, click the Application Menu Item.
If you’ve had no traffic to any source, your page will be blank as below:

This page will display the following information:
-
Application – includes many different types
-
Groups – Indicates the type of application group for easier sorting
-
Data Usage – The amount of data used by this service overall
-
Throughput – The amount of bandwidth used by the application
You can click on the tabs to sort from largest to smallest, which can help identify the largest consumers of network resources.
This feature is very powerful for managing your WLAN resources on a granular level. Below are some of the more common groups and application types. Your list is likely to include many more. Including the following:
Groups and Examples
-
Browsing
-
EX: Client specific, SSL
-
-
Email
-
EX: Outlook, Secure-pop3
-
-
Voice-and-video
-
EX: WebEx, Cisco Spark,
-
-
Business-and-Productivity-tools
-
EX: Microsoft Office 365,
-
-
Backup-and-storage
-
EX: Windows-Azure,
-
-
Consumer-Internet
-
iCloud, Google Drive
-
-
Social Networking
-
EX: Twitter, Facebook
-
-
Software Updates
-
EX: Google-Play, IOS
-
-
Instant Messaging
-
EX: Hangouts, Messages
-
Here is what the page will look like when populated:
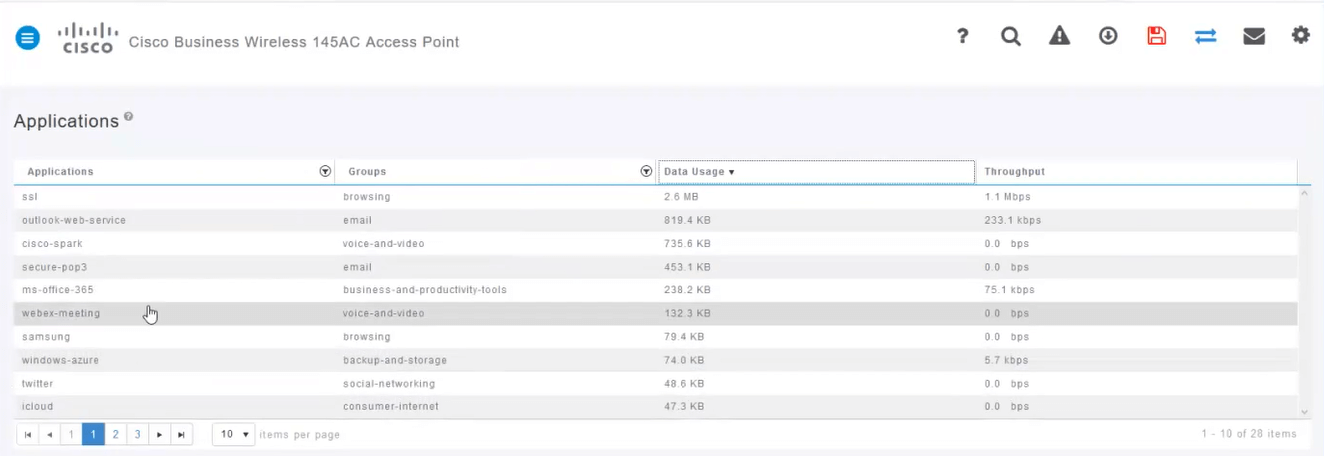
Each table heading is clickable for sorting – especially useful for Data Usage and Throughput fields.
Step 9
Click the row for the type of traffic you’d like to manage.
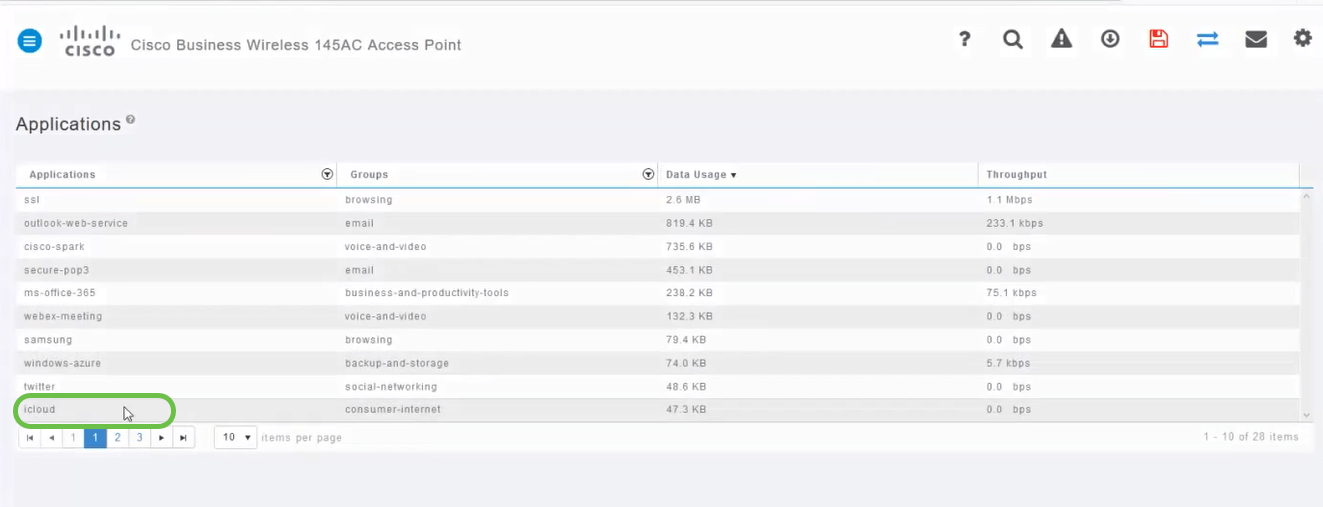
In the screenshots we’ve moved to a device that has traffic to manage.
Step 10
Click the Action drop-down box to select how you will treat that traffic type.
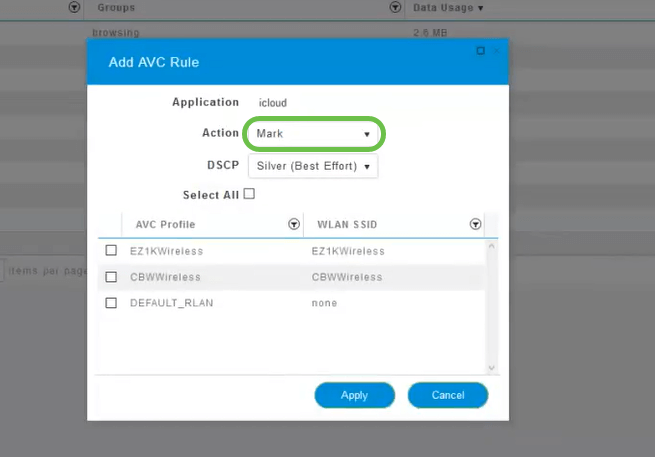
For the purposes of this article we’re leaving this option at Mark.
Action to take on traffic
-
Mark – Places the traffic type into one of Differentiated Services Code Point (DSCP) 3 tiers -governing how many resources are available to the application type
-
Drop – Do not do anything but discard the traffic
-
Rate Limit – Enables you to set the Average Rate, Burst Rate in Kbps
Step 11
Now click the DSCP field’s drop-down box to select from the following options.
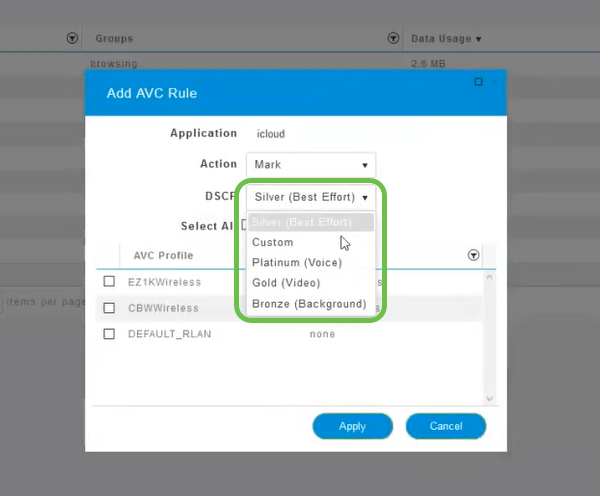
Below are the DSCP options for the traffic to be marked. These options progress from less resources to more resources available to the traffic type you are editing.
-
Bronze (Background) – Less
-
Silver (Best Effort)
-
Gold (Video)
-
Platinum (Voice) More
-
Custom – User set
As a web convention, traffic has migrated toward SSL browsing, which prevents you from seeing what's inside the packets as they move from your network into the WAN. As such, a large majority of web traffic will bet using SSL. Setting SSL traffic for a lower priority may affect your browsing experience.
Step 12
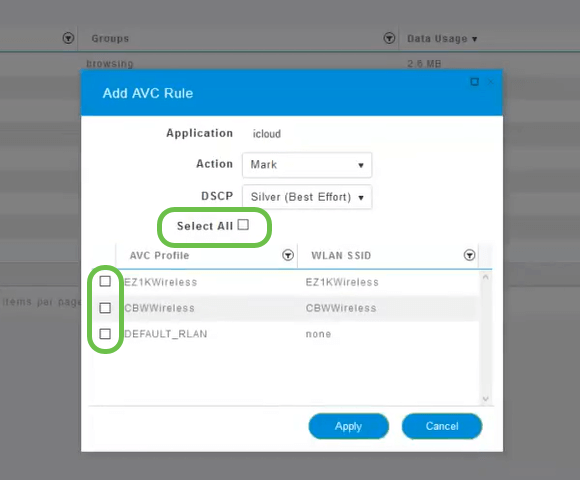
Now select the individual SSID you would like this policy to run. Or optionally click Select All.
Step 13
Now click the apply button to begin this policy.

Rounding out by Defining two basic use cases:
-
Guests/Users streaming a large amount of traffic preventing mission critical traffic from getting through. You can either raise the priority for Voice, lower the priority of Netflix traffic to improve things.
-
Large software updates downloading during office hours can be deprioritized or rate limited.
Conclusion
You did it. Application profiling is a very powerful tool that can be further enabled by also enabling Client Profiling as well.
If you are interested in learning more about mesh wireless, check out any of the following articles: