Create a Guest Network Via Web or Via App
Available Languages
Objective
The objective of this article is to create a guest network using the Web User Interface (UI) inside a Cisco Business Wireless (CBW) mesh network. If you would like to learn about the basics of Mesh Networking, check out Cisco Business: Welcome to Wireless Mesh Networking.
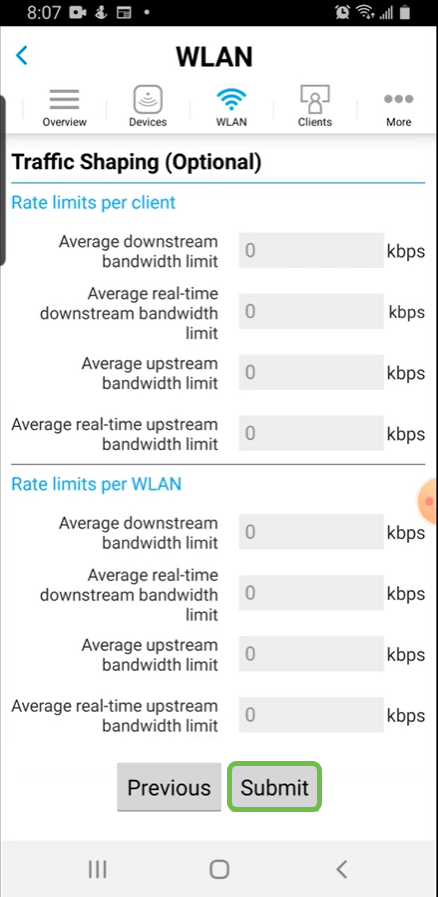
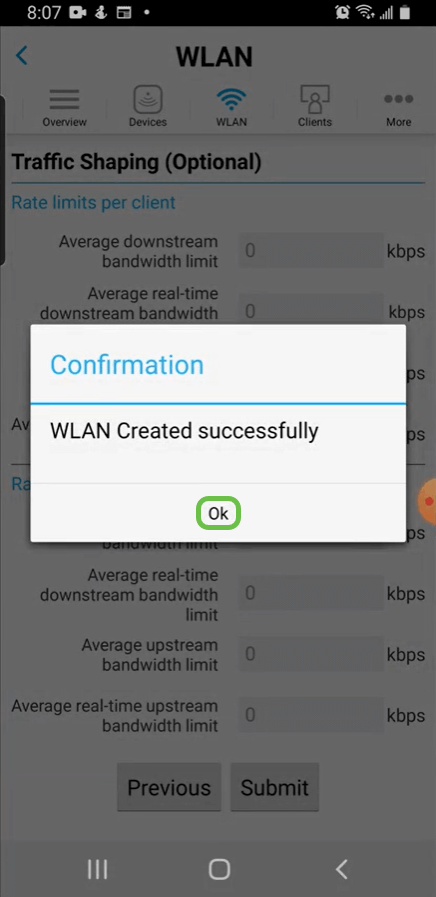
To create a guest network using a mobile device instead of the Web UI, click the toggle at the top of the article.
Applicable Devices | Firmware Version
- 140AC (Data Sheet) | 10.4.1.0 (Download latest)
- 145AC (Data Sheet) | 10.4.1.0 (Download latest)
- 240AC (Data Sheet) | 10.4.1.0 (Download latest)
Introduction
Cisco Business Wireless (CBW) Access Points (APs) are 802.11 a/b/g/n/ac (Wave 2) based, with internal antennas. These APs support the latest 802.11ac Wave 2 standard for higher performance, greater access, and higher-density networks. They deliver industry-leading performance with highly secure and reliable wireless connections, for a robust, mobile end-user experience.
The CBW access points can be used as traditional standalone devices or as part of a mesh network.
Are you looking to create guest access on your CBW network using the Web UI of the Primary Access Point (AP)? If you are, you have come to the right place. Keep reading!
Configuration Steps
Beginner Help
This toggled section highlights tips for beginners.
Logging In
Log into the Web User Interface (UI) of the Primary AP. To do this, open a web browser and enter https://ciscobusiness.cisco. You may receive a warning before proceeding. Enter your credentials.You can also access the Primary AP by entering https://[ipaddress] (of the Primary AP) into a web browser.
Tool Tips
If you have questions about a field in the user interface, check for a tool tip that looks like the
following: ![]()
Trouble locating the Expand Main Menu icon?
Navigate to the menu on the left-hand side of the screen, if you don’t see the menu button, click
this icon to open the side-bar menu.
Cisco Business App
These devices have companion apps that share some management features with the web user interface. Not all features in the Web user interface will be available in the App.
Frequently Asked Questions
If you still have unanswered questions, you can check our frequently asked questions document. FAQ
Step 1
Power up the Access Point if it isn’t already on. Check the status of the indicator lights. When the LED light is blinking green, proceed to the next step.
Booting up the access point will take about 8–10 minutes. The LED will blink green in multiple patterns, alternating rapidly through green, red, and amber before turning green again. There may be small variations in the LED color intensity and hue.
Step 2
Log into the Web UI of the Primary AP. Open a web browser and enter www.https://ciscobusiness.cisco. You may receive a warning before proceeding. Enter your credentials.
You can also access it by entering the IP address of the Primary AP into a web browser or you can use the Cisco Business Wireless app for minor configuration changes.
If you are unfamiliar with the terms used, check out Cisco Business: Glossary of New Terms.
Step 3
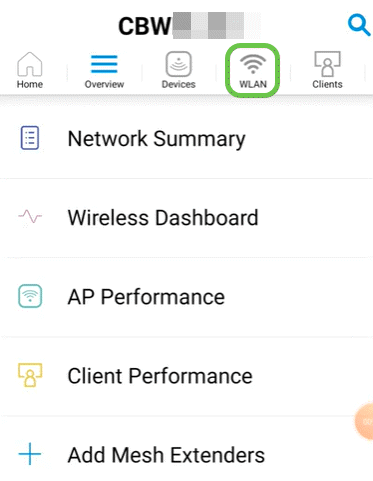
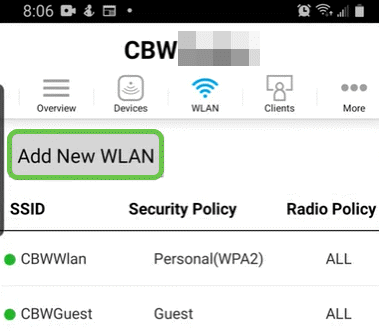
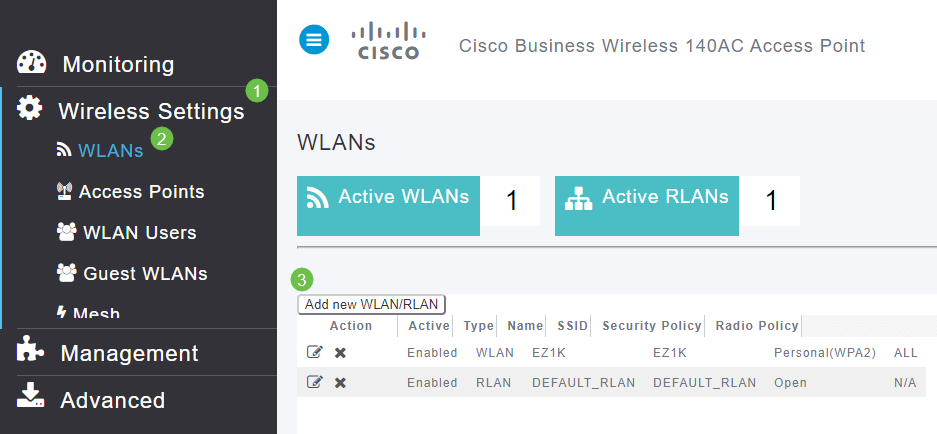
A Wireless Local Area Network (WLAN) can be created by navigating to Wireless Settings > WLANs. Then select Add new WLAN/RLAN.
Step 4
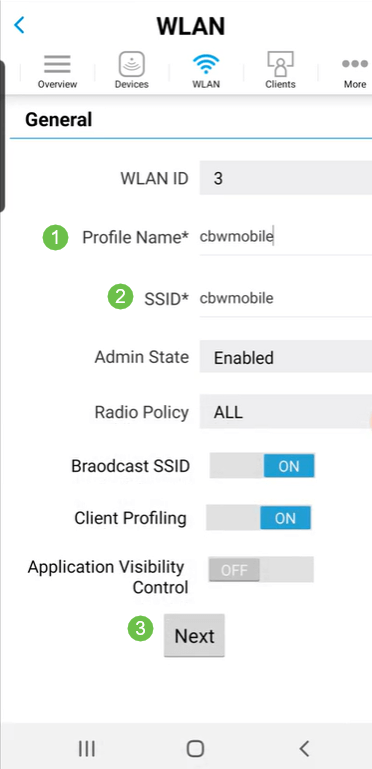
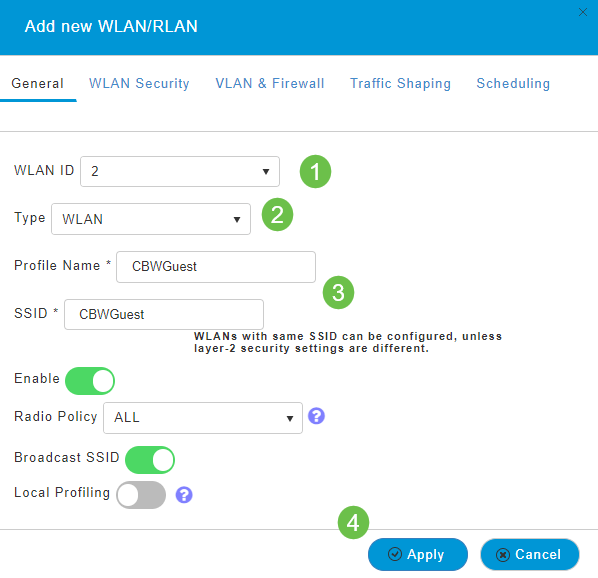
Under the General tab, enter the following information:
- WLAN ID – Select a number for the WLAN
- Type – Select WLAN
- Profile Name – When you enter a name, the SSID will auto-populate with the same name. The name must be unique and should not exceed 31 characters.
The following fields were left as default in this example, but explanations are listed in case you would like to configure them differently.
- SSID – The profile name also acts as the SSID. You can change this if you would like. The name must be unique and should not exceed 31 characters.
- Enable – This should be left enabled for the WLAN to work.
- Radio Policy – Typically you would want to leave this as All so that 2.4GHz and 5GHz clients can access the network.
- Broadcast SSID – Usually you would want the SSID to be discovered so you would want to leave this as Enabled.
- Local Profiling – You would only want to enable this option to view the Operating System that is running on the Client or to see the User name.
Click Apply.
Step 5
You will be taken to the WLAN Security tab. In this example, the following options were selected.
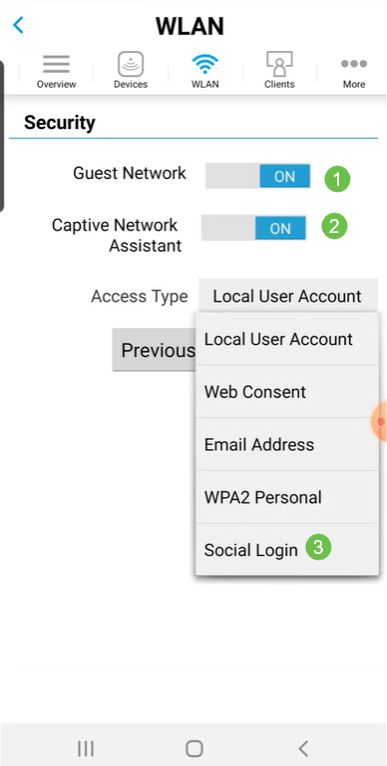
- Guest Network – Enable
- Captive Network Assistant – If you use Mac or IOS, you will probably want to enable this. This feature detects the presence of a captive portal by sending a web request on connecting to a wireless network. This request is directed to a Uniform Resource Locator (URL) for iPhone models and if a response is received, then the Internet access is assumed available and no further interaction is required. If no response is received, then the Internet access is assumed to be blocked by the captive portal and Apple’s Captive Network Assistant (CNA) auto-launches the pseudo-browser to request portal login in a controlled window. The CNA may break when redirecting to an Identity Services Engine (ISE) captive portal. The primary AP prevents this pseudo-browser from popping up.
- Captive Portal – This field is visible only when the Guest Network option is enabled. This is used to specify the type of web portal that can be used for authentication purposes. Select Internal Splash Page to use the default Cisco web-portal-based authentication. Choose External Splash Page if you will have captive portal authentication, using a web server outside your network. Also, specify the URL of the server in the Site URL field.
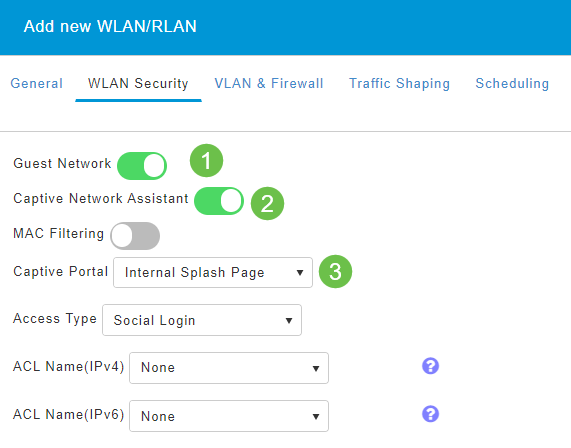
In this example, the Guest WLAN with an enabled Social login access type will be created. Once the user connects to this guest WLAN, they will be redirected to Cisco default login page where they can find the login buttons for Google and Facebook. The user can log in using their Google or Facebook account to obtain Internet access.
Step 6
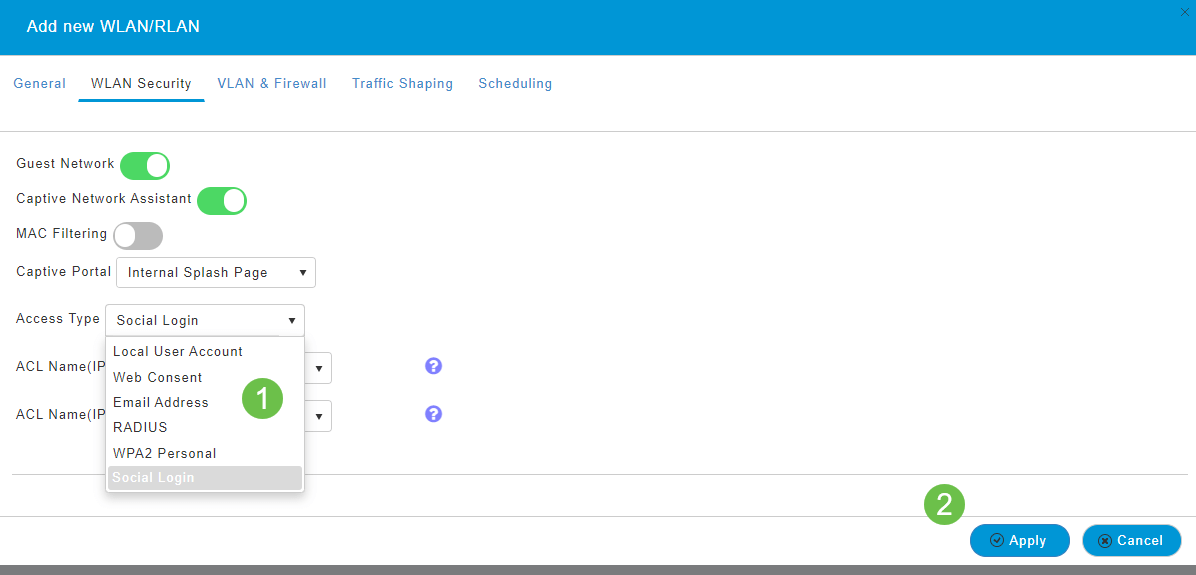
On this same tab, select an Access Type from the drop-down menu. In this example, Social Login was selected. This is the option that allows guests to use their Google or Facebook credentials to authenticate and get access to the network.
Other options for Access Type include:
- Local User Account – The default option. Choose this option to authenticate guests using the username and password which you can specify for guest users of this WLAN, under Wireless Settings > WLAN Users. This is an example of the default Internal Splash Page.
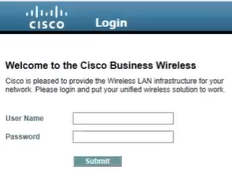
You can customize this by navigating to Wireless Settings > Guest WLANs. From here you can enter a Page Headline and Page Message. Click Apply. Click Preview.
- Web Consent – Allows guests access to the WLAN upon acceptance of displayed terms and conditions. Guest users can access the WLAN without entering a username and password.
- Email Address – Guest users will need to enter their email address to access the network.
- RADIUS – Use this with an external authentication server.
- WPA2 Personal – Wi-Fi Protected Access 2 with Pre-shared Key (PSK)
Click Apply.
Step 7
Be sure to save your configurations by clicking the Save icon on the top right panel of the Web UI screen.

Conclusion
That’s it! You have now created a guest network that is available on your CBW network. Your guests will appreciate the convenience.

