How to Log into the Web User Interface (UI) of a Cisco Business Switch
Available Languages
Objective
The objective of this document is to show you how to access the Web User Interface (UI) on a Cisco Business switch that is not on an existing network.
Introduction
One of the easiest ways to configure settings and make changes on a switch is by accessing its Web UI. The Web UI is also referred to as the web-based interface, web-based guidance, web-based utility, web configuration page, or web configuration utility.
Every switch listed below is a managed switch and comes with a Web UI. This type of interface, what you see on your screen, shows options for selection. You do not need to know any commands to navigate through these screens. The Web UI gives the administrator a tool that contains all of the possible features that can be changed to modify the performance of a switch. In addition, the Web UI can give access to a guest account allowing the user to view the settings without allowing any changes.
When setting up a new switch, Cisco Business recommends you do the configurations for the switch before connecting it to your network. This can help avoid potential issues and conflicts.
If you want to access the CLI of a switch that is already on a network, check out Access the CLI via PuTTY using a Console Connection on 300 and 500 Series Managed Switches.
When doing these configurations, you should not be connected to a Virtual Private Network (VPN) or the Internet.
Applicable Switches
- SF300
- SG300
- SF350
- SG350
- SG350X
- SG350XG
- SF500
- SG500
- SG500X
- SG500XG
- SF550
- SF550X
- SG550X
- SG550XG
- CBS220
- CBS250
- CBS350
Connect to the Switch
Since the switch isn't on a network, you can connect one end of an Ethernet cable to a numbered port on the switch and the other end to your computer. Make sure the switch has power. An adapter might be needed for the computer, depending on the model.
Determine the IP Address
To access the Web UI, you need to know the IP address of the switch. To keep it simple, proceed with one of the following options:
- If your Cisco Business switch is new, the default IP address is 192.168.1.254.
- If you can not remember the IP address or you do not have a special configuration, use an open paperclip to press the reset button on your switch for at least 10 seconds while it is powered on. This will reset the switch to default settings and the default IP address of 192.168.1.254.
- If you set a static IP address of the switch, you could enter that IP address instead of the default. This is not recommended as there may be conflicting configurations which may create issues in your existing network.
It’s important that the Ethernet adapter on the computer has an IP address from the same IP subnet as the Cisco Business switch that is connected. The address should be in the 192.168.1.2-192.168.1.253 range.
To check the IP address assigned to your system, open a command prompt, type ipconfig, and press enter. If the IP address is not in this range, you will need to temporarily change the IP address of your adapter.
On Windows, click start and type network connections. Select View network connections. Right click on Ethernet (Local Area Connection) and click Properties. Select Internet Protocol Version 4 (TCP/IPv4) and click Properties. Click the radio button for Use the following IP address. Enter an address between 192.168.1.2 and 192.168.1.253. Enter 255.255.255.0 in the Subnet Mask field. Click OK.
If you want to test that there is connectivity, you can go into terminal and enter ping 192.168.1.254. If you receive responses, you are set.
Access the Web UI of the Switch
Now that you know the IP address of the switch, and both devices are in the same subnet, you can access the Web UI.
Step 1
Open up a web browser.

If you do not see the web browser you wish to use, you can access it at the bottom left search bar on a Windows computer. Start typing in the name of the application and select it when listed as an option.

Step 2
Enter 192.168.1.254, or the static IP address if configured, and click Enter on your keyboard. This should open the Web UI, first displaying the log in screen.
When accessing a switch, this default IP address only applies in situations when the switch is not connected to a router and your computer is connected directly to the switch. If the switch is connected to a router, Dynamic Host Configuration Protocol (DHCP) will, by default, assign an IP address and it may be different.

Step 3
If you see a login screen, skip to Step 8.
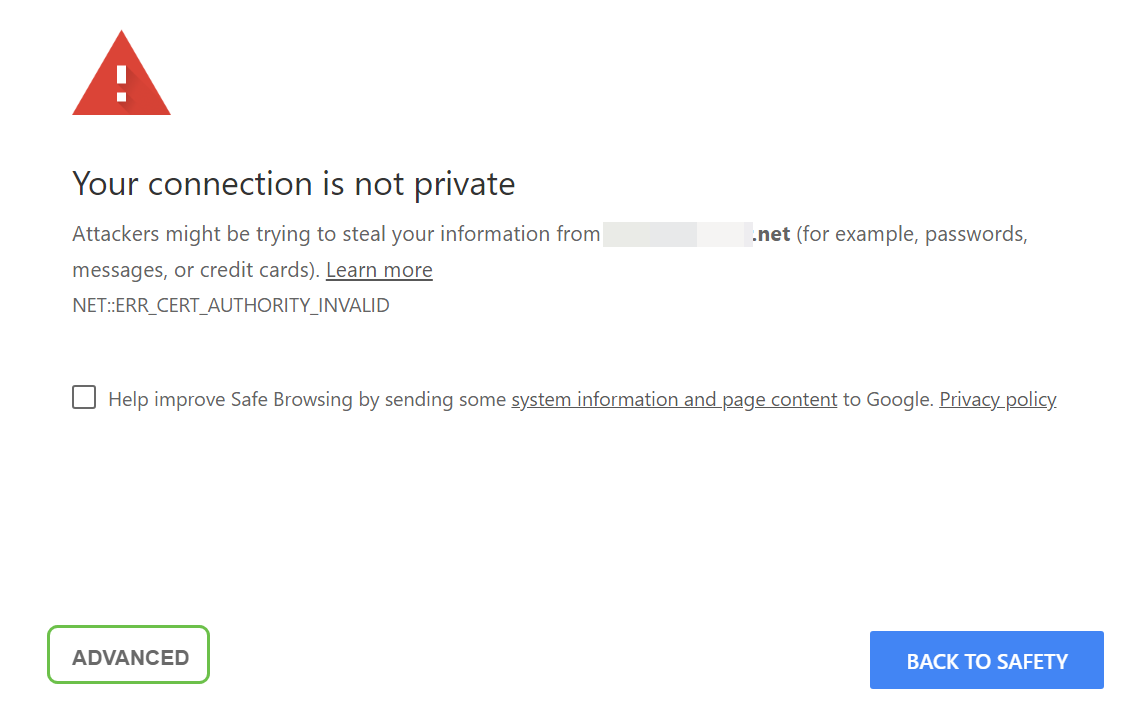
If you receive a warning that it is unsafe. This is because you don’t have a certificate registered for the switch. You can choose Proceed, Add Exception, or Advanced. This will vary by web browser.
If you have a pop-up blocker you will need to click to allow the pop-up before you can proceed. The notification usually appears at the top right of the screen.
In this example, Chrome was used for a web browser. This message appears, click Advanced.

Step 4
A new screen will open and you need to click on Proceed to (IP address used to access the switch) (unsafe).

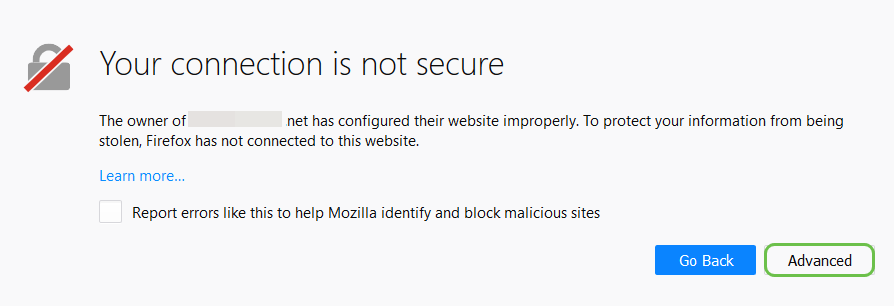
If you are using Firefox as a web browser, you would click Advanced.

Step 6
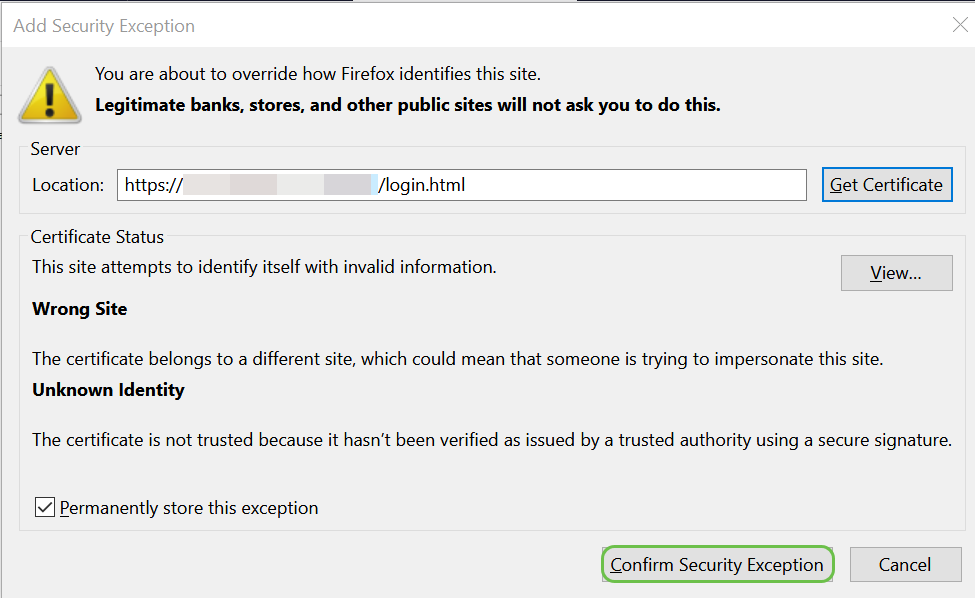
Click Add Exception.

Step 7
Click Confirm Security Exception.

Step 8
You then need to enter a username and password. The default credentials are cisco for both the username and password the first time. Older switches may use admin as the default username and password. It is highly recommended that you change the password to be more complex for security purposes.
If you are not seeing a login screen, check out the Troubleshooting Tips section below.

Running into issues? Try these troubleshooting tips!
If you have followed the steps, but have not gotten access to the Web UI, you may be on a different Local Area Network (LAN) subnet than the switch.
What is a LAN?
A LAN might be as big as several buildings or as small as a home. Everyone connected to the LAN is in the same physical location.
Typically in a LAN, the router uses DHCP to assign each device its own unique internal IP address. They follow one of these patterns:
- 10.0.0.0 /8 (10.x.x.x)
- 172.16.0.0 /12 (172.16.x.x - 172.31.x.x)
- 192.168.0.0 /16 (192.168.x.x)
These addresses are only visible inside a local area network, between devices, and are considered private from outside networks.
Many networks use a 192.168.1.x LAN subnet, but not all do. If you don’t have a connection to the switch, you won’t see the Web UI and you will most likely receive an error code. If this occurs, you need to make sure that your network is on the same subnet as your switch while you are doing configurations.
Since the switch IP address is set for the default of 192.168.1.254, you will have to go into your computer and set a static IP address that is in that same subnet in order to connect. The last octet, represented with an x in 192.168.1.x can be any number 2-253. In the unlikely scenario that you have a static IP address configured on your switch, you would need to be in the same subnet as the static IP. For more information on this subnets, read through IP Addressing and Subnetting for New Users.
Remember to follow these steps again to change the IP address of your computer back to using DHCP once you are done with configurations on the switch, before you connect back into the existing network.
Step 1
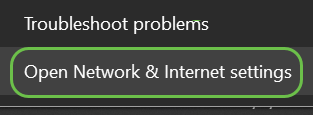
You can manually assign a local IP address to your computer so it is in the same network as the switch. In Windows, right-click on the computer icon on the bottom right of your screen.

Step 2
Select Open Network & Internet settings.

Step 2 (alternative option)
Click the window icon and then the gear icon on the bottom left of your screen.

Then select Network & Internet.

Step 3
Once you follow one of these options you will see a screen similar to this. Select Change adapter options.

Step 4
Right-click on the network you are using and choose Properties from the drop-down menu. This lets you see what IP is assigned and allows you to change the configuration.

Step 5
Select Internet Protocol Version 4 (TCP/IPv4). Click Properties.

Step 6
Enter a local IP address that is in the same subnet of the switch. In this example, 192.168.1.33 was entered. Click on the spaces in in the Subnet mask box and they will populate automatically. Click OK.

Step 7
Now your laptop should be able to communicate with your switch. Go back to the Access the Web UI of the Switch section of this article and follow the steps.
Further Troubleshooting
Other things to try if it is still not connecting:
- Enter the IP address of the switch using a different web browser, so instead of Chrome, you can use Firefox. If you do not have a second web browser, you can do a search and download one so that app is available to try.
- Try to enter the IP address with http:// before the IP address.
- Try to enter the IP address with https:// before the IP address.
- Perform a reboot for both the laptop and the switch
- Use the paperclip to do a factory reset on the switch in case that didn't work the first time.
Conclusion
You should now have access to the Web UI of the switch that includes a navigation pane down the left side. It contains a list of the top-level features of the switch.
The colors of this page may vary, as well as the top-level features, depending on the equipment and firmware version. The categories and options vary between switches.
This is an example of the navigation pane on an SG550 switch.

This is an example of the navigation pane on a CBS350 switch.

Click on the following links to view the a product page for each series of switches. Each one shows dozens of links to other articles on that equipment:
- 300 Series Managed Switches
- 350 Series Managed Switches
- 350X Series Stackable Managed Switches
- 500 Series Stackable Managed Switches
- 550X Series Stackable Managed Switches
- Cisco Business 220 Series Smart Switches
- Cisco Business 250 Series Smart Switches
- Cisco Business 350 Series Managed Switches
More information can be found in the following links:
- Best Practices for Setting Static IP Addresses on Cisco Business Hardware
- Access the Web-based Setup Page of Cisco VPN Router.
- Access the Web-based Utility of a WAP
- Access the Web-based Utility of a Cisco IP Phone
On Voice over IP (VoIP) phones, you need to log in as admin and advanced on the Web UI to be able to change many of the configurations.