Configuration of LAG on CBS 220 Series Switches
Available Languages
Objective
This article explains how to configure Link Aggregation Group (LAG) on the Cisco Business 220 Series Switches.
Introduction
A Link Aggregate Group (LAG) is used to link multiple ports together. LAGs multiply bandwidth, increase port flexibility, and provide link redundancy between two devices to optimize port usage. Link Aggregation Control Protocol (LACP) is part of an IEEE specification (802.3ad) that is used to bundle several physical ports to form a single logical channel.
Two types of LAGs are supported:
- Static - The ports in the LAG are manually configured. A LAG is static if LACP is disabled on it. The group of ports assigned to a static LAG are always active members.
- Dynamic - A LAG is dynamic if LACP is enabled on it. The group of ports assigned to dynamic LAG are candidate ports. LACP determines which candidate ports are active member ports.
Let’s get started!
Applicable Devices | Software Version
- CBS220 series (Data Sheet) | 2.0.0.17
Table of Contents
LAG Management
Step 1
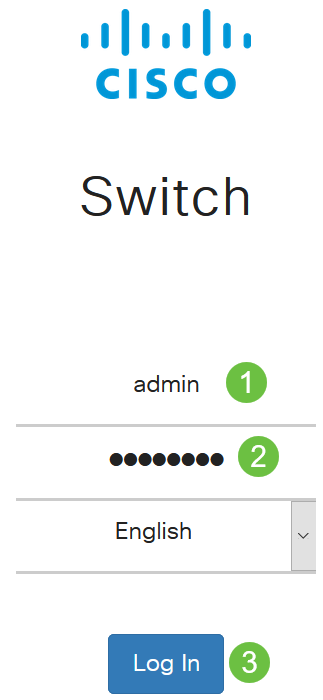
Log in to the web user interface (UI) of CBS220 switch.
Step 2
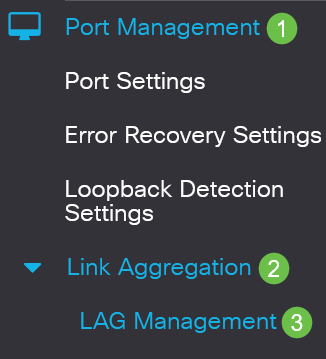
Choose Port Management > Link Aggregation > LAG Management.
Step 3
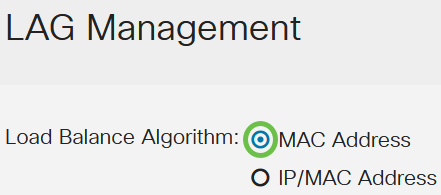
Select the radio button of the desired algorithm in the Load Balance Algorithm field. Load Balancing is a method that maximizes throughput on a network to optimize resource usage.
- MAC Address - Load balancing is performed based on the source and destination MAC addresses of all packets.
- IP / MAC Address - Load balancing is performed based on the source and destination IP addresses of IP packets and by the source and destination MAC addresses on non-IP packets.
Step 4
Click Apply.

Define Member Ports in a LAG
Step 1
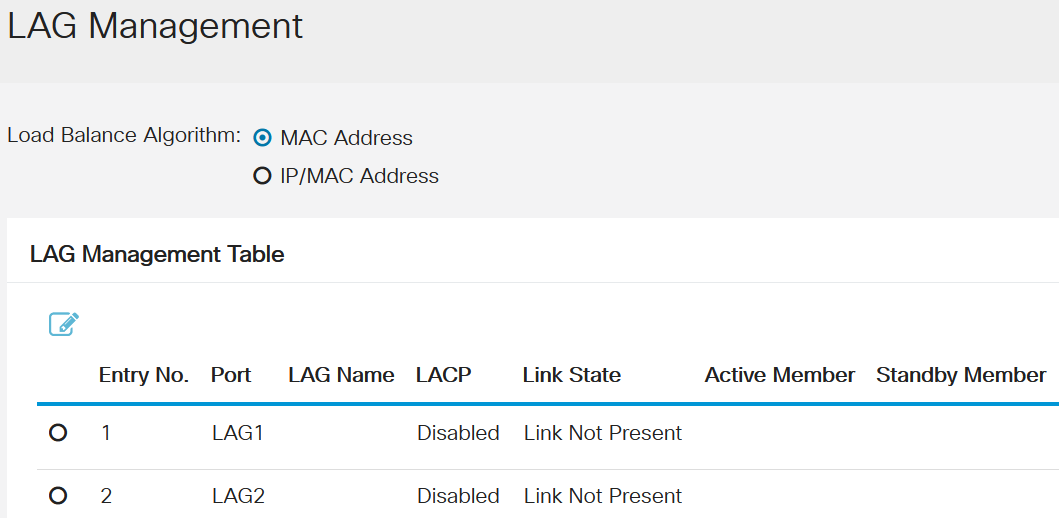
Log in to the web UI of the switch and choose Port Management > Link Aggregation > LAG Management. The LAG Management page opens.
Step 2
Select the LAG to be configured and click Edit.

Step 3
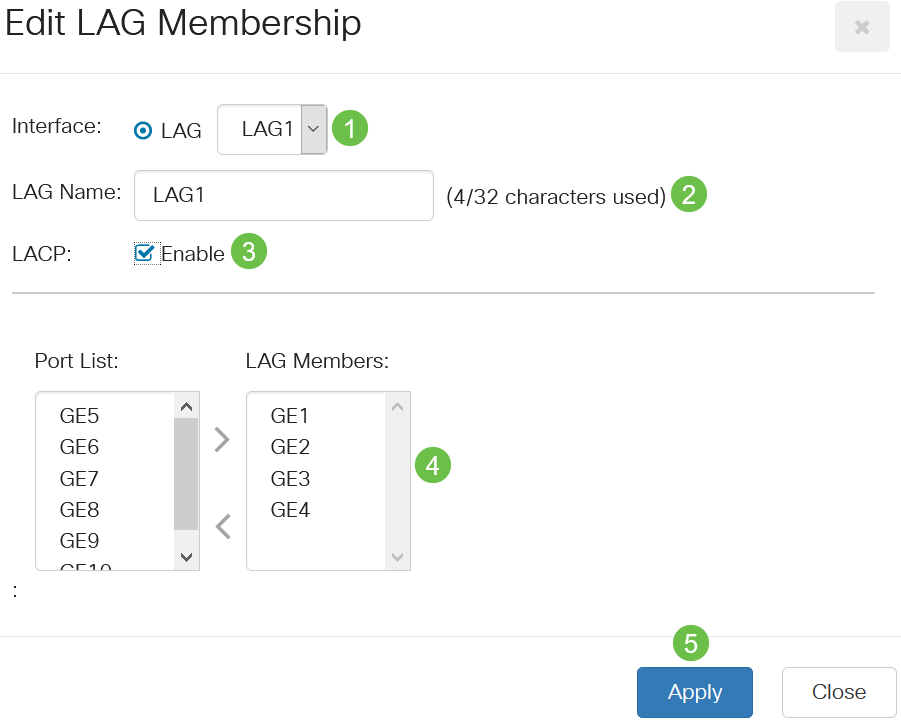
Enter the values for the following fields:
- LAG - From the LAG drop-down list choose the LAG you want to configure.
- LAG Name - Enter the LAG name or a comment.
- LACP - Select to enable LACP on the selected LAG. This makes it a dynamic LAG. This field can only be enabled after moving a port to the LAG in the next field.
- Port List - Move the ports that are assigned to the Port List LAGs to the LAG Members. Up to eight ports per static LAG can be assigned, and 16 ports can be assigned to a dynamic LAG.
Click Apply.
LAG Settings
Step 1
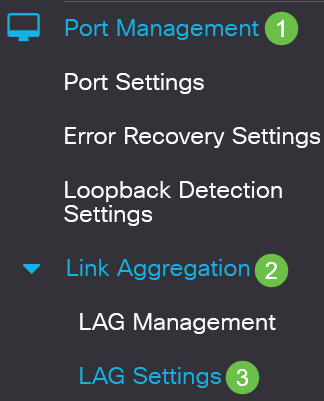
Choose Port Management > Link Aggregation > LAG Settings.
Step 2
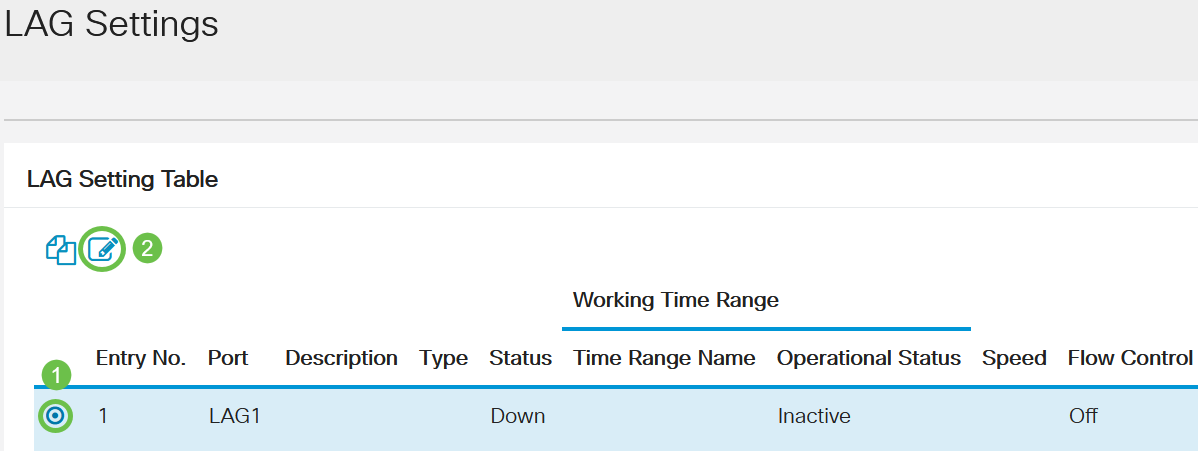
Select a LAG and click Edit.
Step 3
From the LAG drop-down list choose a LAG to configure.

Step 4
Enter a name for the LAG in the Description field.

Step 5
Click the radio button that corresponds to the desired LAG status in the Administrative Status field. The Operational Status field displays the current state of the LAG.
- Up - The LAG is up and operational.
- Down - The LAG is down and not operational.

Step 6
In the Time Range field, check the Enable checkbox to enable the time range during which the port is in up state. When the time range is not active, the port is in shutdown. If a time range is configured, it is effective only when the port is administratively up.

Step 7
(Optional) If Time Range was enabled in the previous step, select the profile that specifies the time range in the Time Range Name field. If a time range is not yet defined, click Edit to go to the Time Range page.

Time range needs to be enabled to select a time range name.
Step 8
Check the Enable checkbox in the Auto Negotiation field to enable or disable auto negotiation on the LAG. Auto negotiation is a protocol between two link partners that enables a LAG to advertise its transmission speed and flow control to its partner (the Flow Control default is disabled). The Operational Auto Negotiation field displays the auto-negotiation settings.

It is recommended to keep auto negotiation enabled on both sides of an aggregate link, or disabled on both sides, while ensuring that link speeds are identical.
Step 9
If Auto Negotiation is disabled in the previous step, select the Administrative Port Speed. The Operational Lag Speed displays the current speed at which the LAG is operating.
The available speeds are:
- 10M
- 100M
- 1000M
- 10G

The speed may vary depending on the model of your switch.
Step 10
In the Auto Advertisement Speed field, check the capabilities to be advertised by the LAG. The Operational Advertisement displays the administrative advertisement status. The LAG advertises its capabilities to its neighbor LAG to start the negotiation process. The options are:
- All Speed - All LAG speeds and both duplex modes are available.
- 10M - The LAG advertises a 10 Mbps speed and the mode is full duplex.
- 100M - The LAG advertises a 100 Mbps speed and the mode is full duplex.
- 1000M - The LAG advertises a 1000 Mbps speed and the mode is full duplex.
- 10/100M - The LAG advertises a 10/100 Mbps speed and the mode is full duplex.
- 10G - The LAG advertises a 10G speed and the mode is full duplex.

Step 11
Check the Enable checkbox in the Back Pressure field. Back Pressure mode is used with half duplex mode to slow down packet reception rate.

Step 12
Select one of the options in the Administrative Flow Control field. Flow control is a feature that allows the receiving device to send a signal to the sending device that it's congested. This tells the sending device to temporarily stop transmitting to help ease the congestion. The Operational Flow Control shows the current flow control setting.
The options are:
- Enable
- Disable
- Auto-Negotiation

Step 13
Check the checkbox to Enable Protected Port setting. The Protected Port feature provides Layer 2 isolation between interfaces (Ethernet ports and LAGs) that share the same VLAN with other interfaces.
Devices from protected ports are not allowed to communicate with each other even when they are in the same VLAN.

Step 14
Click Apply.

Link Aggregation Control Protocol (LACP)
Link Aggregation Control Protocol (LACP) is used to prioritize ports on a LAG. A dynamic LAG can have up to 16 ports of the same type but only 8 can be active at one time. When a LAG has more than 8 ports, the switch uses LACP port priority to determine which ports will become active.
To define the LACP settings, complete the following steps:
Step 1
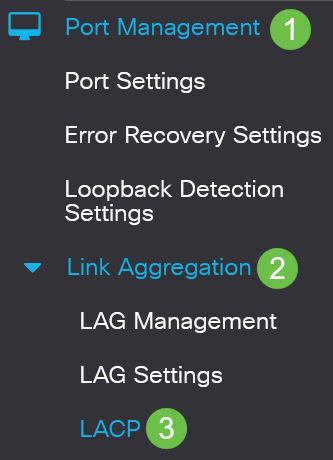
Log in to the web UI and choose Port Management > Link Aggregation > LACP.
Step 2
Enter a LACP priority in the LACP System Priority field. The LACP priority is used to determine which device controls port selection to the LAG. Devices with a lower value will have higher priority. If both switches have the same LACP priority, the switch with the lower MAC address will be given control of port selection.

Step 3
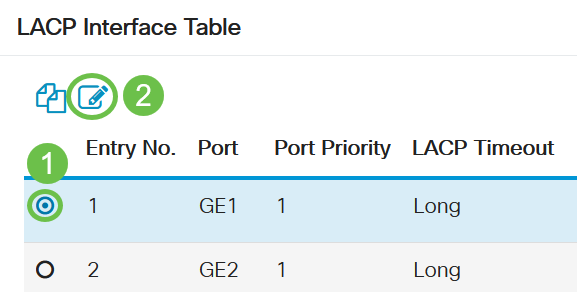
Select the port you want to edit and click Edit.
Step 4
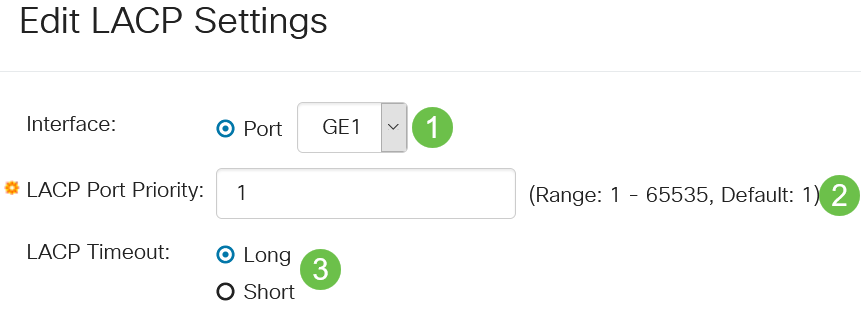
In the Edit LACP Settings dialog box, enter the values for the following fields:
- Port - Select the port number to which timeout and priority values are assigned.
- LACP Port Priority - Enter the LACP priority value for the port.
- LACP Timeout - This determines the interval at which LACP protocol data units (PDUs) are sent or received.
- Long - The interval between a sent or received LACP PDU and the next consecutive LACP PDU is long (30 seconds).
- Short - The interval between a sent or received LACP PDU and the next consecutive LACP PDU is short (1 second).
Step 5
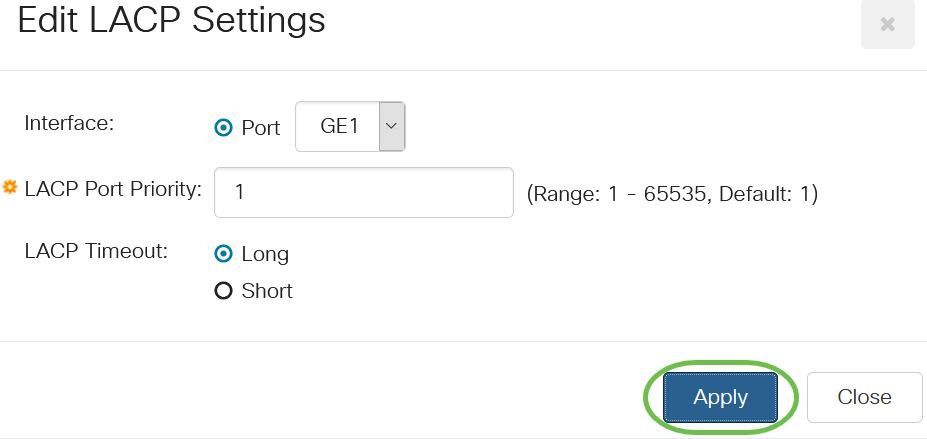
Click Apply.
Conclusion
You did it! You have successfully configured LAG on your CBS220 switch.
For more configurations, refer to the Cisco Business 220 Series Switches Administration Guide.
Contact Cisco
- Open a Support Case

- (Requires a Cisco Service Contract)
 Feedback