Configure CDP Settings on CBS 220 Series Switches
Available Languages
Objective
This article provides instructions on how to configure Cisco Discovery Protocol (CDP) settings on your CBS220 switch using the Graphical User Interface (GUI).
Introduction
The Cisco Discovery Protocol (CDP) is a protocol used by Cisco devices to share device information with other connected Cisco devices. This includes the type of device, firmware version, IP address, serial number, and other identifying information. CDP is enabled by default.
CDP settings can be adjusted globally or on an individual port basis. Let’s get started!
Applicable Devices | Software Version
- CBS220 series (Data Sheet) | 2.0.0.17
CDP Properties
Step 1
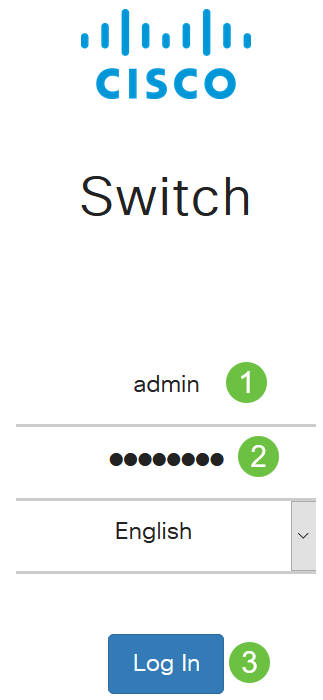
Log in to the CBS220 switch.
Step 2
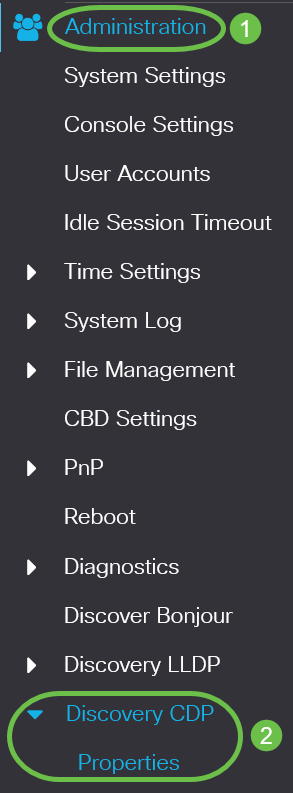
Choose Administration > Discovery CDP > Properties.
Step 3
In the CDP Status field, check the Enable checkbox to activate CDP on the switch.
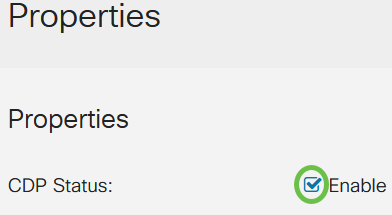
It is enabled by default.
Step 4
If CDP is not enabled, select a radio button corresponding to the action you want the switch to take when it receives a CDP packet. The options are:
- Bridging - Forwards the packet based on the VLAN.
- Filtering - Deletes the packet.
- Flooding - Forwards all CDP packets to all ports, excluding the port it originated from.

Step 5
In the CDP Voice VLAN Advertisement field, check the Enable checkbox to have the switch advertise the voice VLAN over CDP on all ports that have CDP enabled and are members of the voice VLAN.

Step 6
In the CDP Mandatory TLVs Validation field, check the Enable checkbox to discard incoming CDP packets that do not contain the mandatory TLV (type-length-value).

Step 7
In the CDP Version field, select a radio button to choose which version of CDP to use (Version 1 or Version 2).

Step 8
In the CDP Hold Time field, select a radio button to determine the amount of time CDP packets are held before being discarded. Select Use Default to use the default amount of time (180 seconds) or User Defined to specify a custom amount of time between 10 - 255 seconds.

Step 9
In the CDP Transmission Rate field, select a radio button to determine the transmission rate of CDP packets in seconds. Select Use Default to use the default amount of time (60 seconds) or User Defined to specify a custom amount of time between 5 - 254 seconds.

Step 10
In the Device ID Format field, select a radio button to determine the format of the device ID.

Step 11
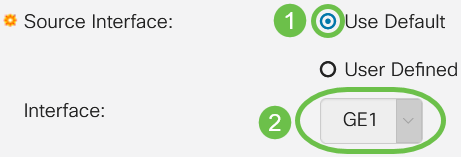
In the Source Interface field, select a radio button to determine what IP address will be used in the TLV field of outgoing CDP packets. Select Use Default to use the IP address of the outgoing interface, or User Defined to choose an interface (the selected interface’s IP address will be used) from the drop-down menu in the Interface field.
Step 12
In the Syslog Voice VLAN Mismatch field, check the Enable checkbox to send a syslog message when a voice VLAN mismatch is detected. A VLAN mismatch is when VLAN information in an incoming frame does not match the advertised capabilities of the local device.

Step 13
In the Syslog Native VLAN Mismatch field, check the Enable checkbox to send a syslog message when a native VLAN mismatch is detected.

Step 14
In the Syslog Duplex Mismatch field, check the Enable checkbox to send a syslog message when a duplex mismatch is detected.

Step 15
Click Apply. The CDP properties are defined.

CDP Port Settings
The Port Settings page allows you to enable/disable CDP per port. By setting these properties, it is possible to select the types of information to be provided to devices that support the protocol.
Step 1
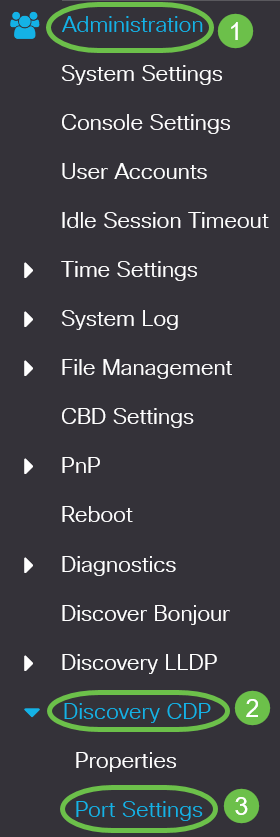
Click Administration > Discovery CDP > Port Settings.
Step 2
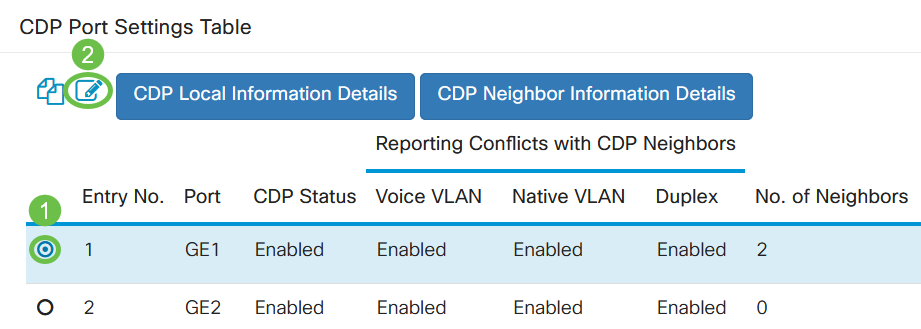
Select a port and click Edit.
Step 3
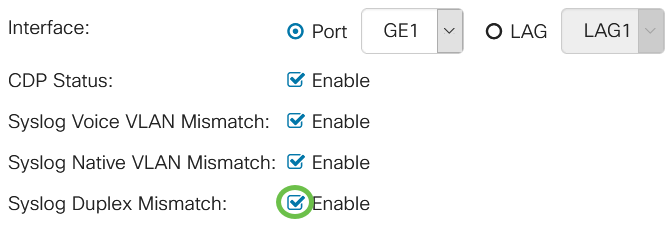
The Interface field displays the port selected in the CDP Interface Settings Table. You can use the Port and LAG drop-down lists to select another port and LAG to configure, respectively.

Step 4
In the CDP Status field, check the Enable checkbox to enable CDP on the port specified.

Step 5
In the Syslog Voice VLAN Mismatch field, check the Enable checkbox to send a syslog message when a voice VLAN mismatch is detected on the port specified. A VLAN mismatch is when VLAN information in an incoming frame does not match the advertised capabilities of the local device.

Step 6
In the Syslog Native VLAN Mismatch field, check the Enable checkbox to send a syslog message when a native VLAN mismatch is detected on the port specified.

Step 7
In the Syslog Duplex Mismatch field, check the Enable checkbox to send a syslog message when a duplex mismatch is detected on the port specified.
Step 8
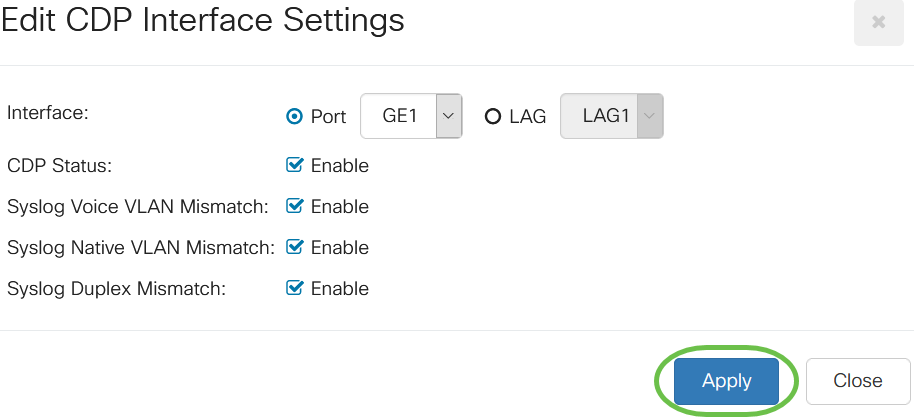
Click Apply. The changes will be applied to the port specified.
Step 9
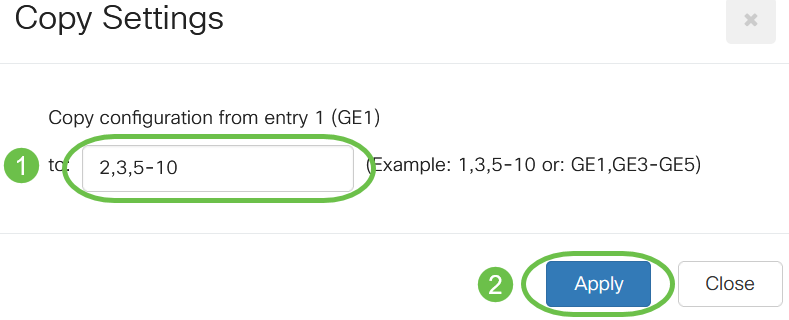
To quickly copy a port’s settings to another port or ports, select its radio button and click the Copy Settings icon. The Copy Settings window opens.

Step 10
In the text field, enter the port or ports (separated by commas) that you want to copy the specified port’s settings to. You can also enter a range of ports. Click Apply.
Conclusion
That’s it! You have successfully configured CDP settings either globally or on individual ports on your CBS220 switch.
For more configurations, refer to the Cisco Business 220 Series Switches Administration Guide.
Contact Cisco
- Open a Support Case

- (Requires a Cisco Service Contract)
 Feedback