Configure Access Port Multicast TV Virtual Local Area Network (VLAN) Membership on a Cisco Business 350 Series Switch
Available Languages
Objective
A Virtual Local Area Network (VLAN) allows you to logically segment a Local Area Network (LAN) into different broadcast domains. In scenarios where sensitive data may be broadcast on a network, VLANs can be created to enhance security by designating a broadcast to a specific VLAN. Only users that belong to a VLAN are able to access and manipulate the data on that VLAN. VLANs can also be used to enhance performance by reducing the need to send broadcasts and multicasts to unnecessary destinations.
Multicast TV VLANs enable multicast transmissions to subscribers who are not on the same data VLAN without replicating the multicast transmission frames for each subscriber VLAN. Subscribers who are not on the same data VLAN and are connected to the device with different VLAN ID membership can share the same multicast stream by joining the ports to the same Multicast VLAN ID.
The network port which is connected to the multicast server is statically configured as a member in the Multicast VLAN ID. By sending Internet Group Management Protocol (IGMP) messages, the network ports communicate with the Multicast server through subscribers and receive the Multicast streams from the Multicast server, while including the Multicast TV VLAN in the multicast packet header.
This article provides instructions on how to configure access ports to become a member of a Multicast VLAN on a switch.
If you are unfamiliar with terms in this document, check out Cisco Business: Glossary of New Terms.
- CBS350 (Data Sheet) | 3.0.0.69 (Download latest)
- CBS350-2X (Data Sheet) | 3.0.0.69 (Download latest)
- CBS350-4X (Data Sheet) | 3.0.0.69 (Download latest)
Configure Access Port Multicast VLAN Membership on the Switch
Map an Access Port to a Multicast VLAN
One or more IP Multicast address groups can be associated with the same Multicast TV VLAN. Any VLAN can be configured as a Multicast-TV VLAN. A Multicast VLAN has the following features:
- A port assigned to a Multicast-TV VLAN automatically joins the Multicast-TV VLAN.
- Packets passing through egress ports in the Multicast TV VLAN are untagged.
- The Frame Type parameter of the port is set to Admit All which allows untagged packets.
Follow the steps below to map a Multicast TV Group to a VLAN:
Step 1
Log in to the web-based utility and choose Advanced from the Display Mode drop-down list.

Step 2
Choose VLAN Management > Customer VLAN Groups > Port Multicast VLAN Membership.

Step 3
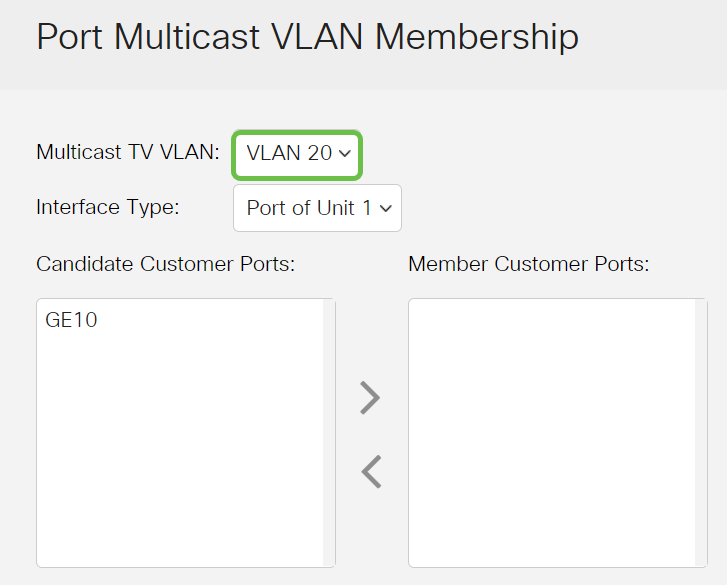
Choose a VLAN ID from the Multicast TV VLAN drop-down list.

To learn how to configure a VLAN on a switch, click here for instructions.
Step 4
Choose an interface type from the Interface Type drop-down list.

The options are:
- Unit — The unit ID of unit (active, member, or standby) in the stack and number of ports available in it will be displayed in the Candidate Access Ports area.
- LAG — The several ports of the switch are combined to form a single group called a Link Aggregation Group (LAG). If this option is chosen, the available LAGs will be displayed in the Candidate Access Ports area.
Step 5
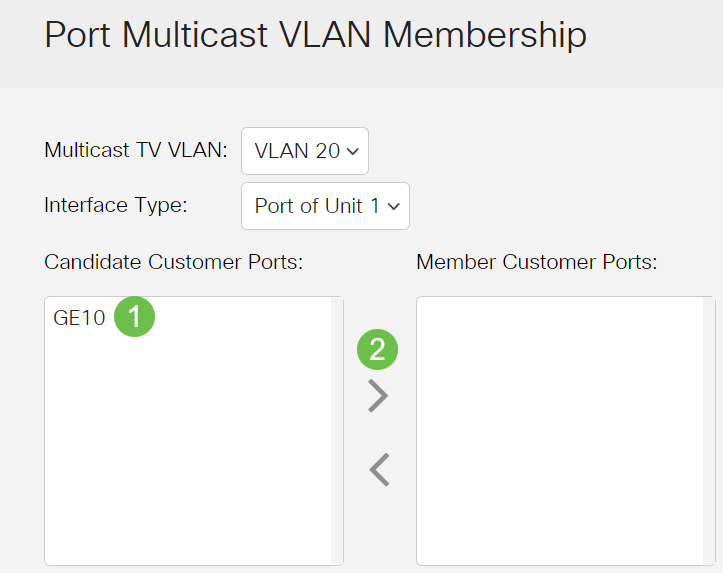
The Candidate Access Ports list contains all access ports configured on the device. Choose an interface then click the > button to move the ports to the Member Access Ports area.

Step 6
Click Apply to save the configured settings in the running configuration file.

Step 7 (Optional)
Click Save to save settings to the startup configuration file.

You should now have configured a port Multicast TV Group to VLAN.
Remove an Access Port from a Multicast VLAN
Step 1
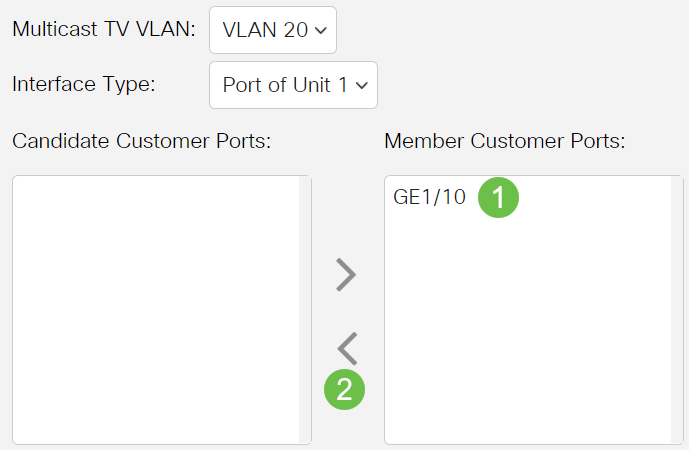
In Member Access Ports area, choose an interface then click the < button to move the ports back to the Candidate Access Ports area.

Step 2
Click Apply to save the settings to the running configuration file.

Step 3 (Optional)
Click Save to save settings to the startup configuration file.

You should now have configured an access port to a Multicast TV VLAN on your switch.
Looking for more information on VLANs for your Cisco Business Switches? Check out any of the following links for more information.
Revision History
| Revision | Publish Date | Comments |
|---|---|---|
1.0 |
26-Jan-2021 |
Initial Release |
Contact Cisco
- Open a Support Case

- (Requires a Cisco Service Contract)
 Feedback