TACACS+ Server Configuration on the Catalyst 1300 Switches
Available Languages
Objective
The objective of this article is to show you how to configure a TACACS+ server on the Catalyst 1300 switches.
Applicable Devices
- Catalyst 1300 series
Introduction
Terminal Access Controller Access Control System (TACACS+) is a Cisco proprietary protocol which provides authentication and authorization via username and password. The Catalyst 1300 switches can act as a TACACS+ client, where all the users connected can be authenticated and authorized in the network via a properly configured TACACS+ server.
Configure Default Parameters of a TACACS+ Server
This section explains how to configure the default parameters of a TACACS+ server. These parameters are used in the case that no other custom configuration for the server is used.
Step 1
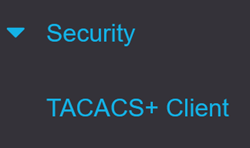
Log in to the web configuration utility and choose Security > TACACS+ Client. The TACACS+ Client page opens:
Step 2
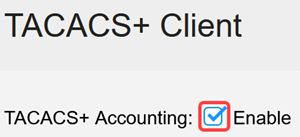
Enable TACACS+ Accounting if required.
Step 3
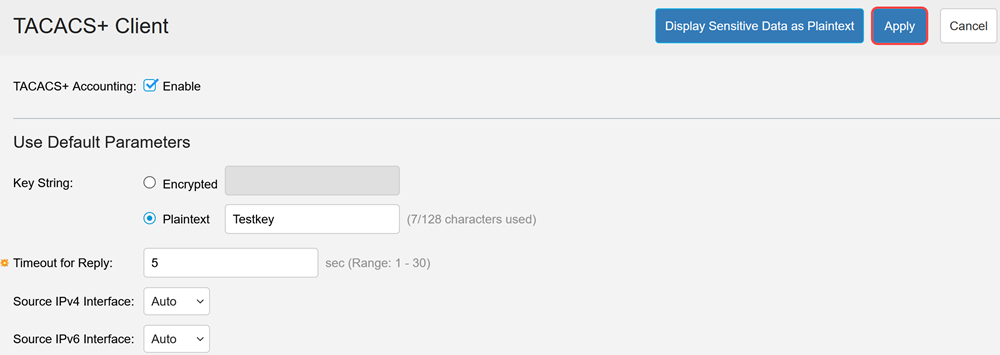
In the Key String field, choose how to enter the key. This key is used to exchange messages between the switch and TACACS+ servers. This is the default key string used. This key must be the same key configured on the TACACS+ server. If a TACAS+ server is added with a new key string, then the newly added key string takes precedence over the default key string. Click the radio button of one of the available options:
- Encrypted - This option lets you enter an encrypted key.
- Plaintext - This option lets you enter a key in plain text format.

Step 4
In the Timeout for Reply field, enter the time in seconds that should elapse before the connection between a TACACS+ server and the switch expires. If a value isn’t entered in the Add TACACS+ Server page for a specific server, the value is taken from this field.

Step 5
Select the device IPv4 source interface to be used in messages sent for communication with the TACACS+ server.

Step 6
Select the device IPv6 source interface to be used in messages sent for communication with the TACACS+ server.

If the Auto option is selected, the system takes the source IP address from the IP address defined on the outgoing interface.
Step 7
Click Apply to save the default parameters of the TACACS+ server.
Add a TACACS+ Server
This section explains how to add a TACACS+ server to a Catalyst 1300 series switch.
Step 1
Log in to the web configuration utility and choose Security > TACACS+ Client. The TACACS+ Client page opens:

Step 2
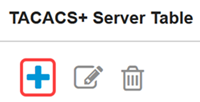
Click the plus icon under the TACACS+ Server Table. The Add a TACACS+ Server window appears:
Step 3
In the Server Definition field, choose how the server is defined. Click the radio button of one of the available options:
- By IP address - If this is selected, enter the IP address of the server in the Server IP Address/Name field.
- By name - This option lets you define the server with a fully qualified domain name (FQDN).

Step 4
Select the supported IP version of the source address: Version 6 or Version 4.

Step 5
If IPv6 is used, select the IPv6 address type. The options are:
- Link Local - The IPv6 address uniquely identifies hosts on a single network link. A link local address has a prefix of FE80, isn’t routable, and can be used for communication only on the local network. Only one link local address is supported. If a link local address exists on the interface, this entry replaces the address in the configuration.
- Global - The IPv6 address is a global Unicast IPV6 type that is visible and reachable from other networks.

Step 6
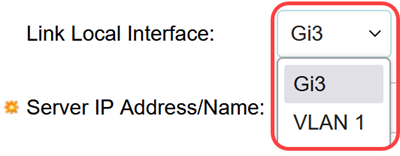
If IPv6 address type Link Local is selected, choose the link local interface from the list.
Step 7
In the Server IP Address/Name field, enter the IP address or the domain name of the TACACS+ server based on your choice in Step 3.

Step 8
In the Priority field, enter the desired priority for the server. If the switch cannot establish a session with the highest priority server, the switch tries the server with the next highest priority. Zero is considered the highest priority.

Step 9
In the Key String field, enter the encryption key between the TACACS+ server and the switch. This key must be the same key configured on the TACACS+ server. Click the radio button of one of the available options to enter this information:
- Use Default — This option uses the default parameter that was previously configured.
- User Defined (Encrypted) — This option lets you enter a new encrypted key.
- User Defined (Plaintext) — This option lets you enter a key in a plain text format.

Step 10
In the Timeout for Reply field, enter the time in seconds that should elapse before the connection between the server and the switch expires. Click the radio button of one of the available options:
- Use Default — This option uses the default parameter previously configured.
- User Defined — This options lets you enter a new value.

Step 11
In the Authentication IP Port field, enter the port number used to establish a TACACS+ session.

Step 12
(Optional)In the Single Connection field, check the Enable check box so the switch maintains a single open connection between the TACACS+ server and the switch. This option is more efficient since the switch does not open or close the connection for every TACACS+ operation. Instead, with a single connection, the switch can handle multiple TACACS+ operations.

Step 13
Click Apply to save.

Conclusion
Now you know how to configure the TACACS+ server on the Catalyst 1300 switches.
If you want to learn more about the Catalyst 1300 switches, navigate to the Cisco Catalyst 1300 Series device support page.
Revision History
| Revision | Publish Date | Comments |
|---|---|---|
1.0 |
27-Nov-2024 |
Initial Release |
Contact Cisco
- Open a Support Case

- (Requires a Cisco Service Contract)
 Feedback