Configure Internet Protocol Version 6 (IPv6) Static Routing on the RV132W or RV134W Router
Available Languages
Objective
Internet Protocol version 6 (IPv6) is a version of the Internet Protocol (IP) intended to succeed the IPv4 IP addressing scheme. In IPv6 mode, the Local Area Network (LAN) Dynamic Host Configuration Protocol (DHCP) server is enabled by default. It assigns IPv6 addresses from the configured address pool that use the IPv6 prefix assigned to the LAN. On the other hand, a static route is a predetermined path that a packet must take to reach a specific host or network. Some Internet Service Providers (ISPs) require static routes to build a routing table instead of using dynamic routing protocols. One of the advantages of using a static route is that static routes do not require Central Processing Unit (CPU) resources to exchange routing information with a peer router. Static routes can also be used to reach peer routers that do not support dynamic routing protocols.
This article aims to show you how to create an IPv6 Static route on your RV Series Router.
Applicable Devices
- RV132W
- RV134W
Software Version
- 1.0.0.17 – RV132W
- 1.0.0.24 – RV134W
Configure IPv6 Static Routing
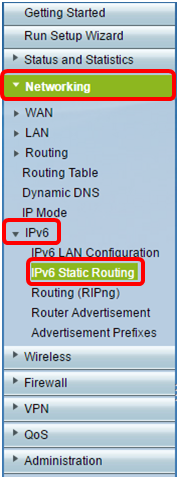
Step 1. Log in to the web-based utility and choose Networking > IPv6 > IPv6 Static Routing.

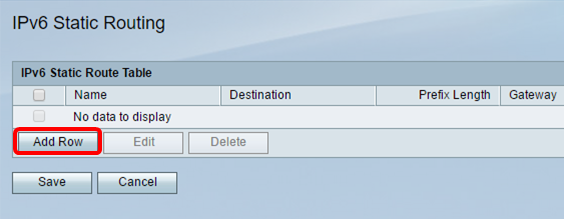
Step 2. In the IPv6 Static Route Table, click Add Row.

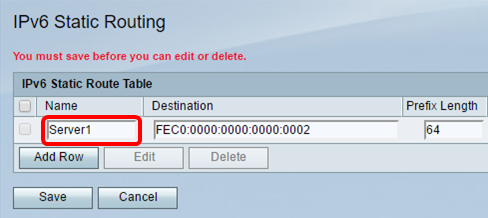
Step 3. Enter a name for the route on the Name field.
Note: In this example, the name is Server1.

Step 4. Enter the IPv6 address of the destination host or network of the route.
Note: In this example, the IPv6 address is FEC0:0000:0000:0000:0002.

Step 5. Enter the prefix value in bits in the Prefix Length field. This is the number of prefix bits in the IPv6 address that define the destination subnet. In this example, 64 is entered.

Step 6. Enter the IPv6 address of the gateway through which the destination host or network can be reached.
Note: In this example, the gateway address is FEC0:0000:0000:0000:0001.

Step 7. Choose the interface for the route from the drop-down menu. The options are:
- LAN – The LAN interface is the exit interface of the route.
- WAN – The WAN interface is the exit interface of the route.
- DSL – WAN – The DSL-WAN interface is the exit interface of the route.
Note: The options enumerated are the default settings. However, the interfaces on the router used on this article have been changed. In this example, VLAN 1 is chosen.
Step 8. Enter the priority of the route in the Metric field. Choose a value between 2 and 15. If multiple routes to the same destination exist, the route with the lowest metric is used.
Note: In this example, the metric is 3.

Step 9. Check the Active check box to activate the route. When a route is added in an inactive state, it is listed in the routing table but is not used by the device. Entering an inactive route is useful if the route is not available when you add the route. When the network becomes available, the route can then be enabled.

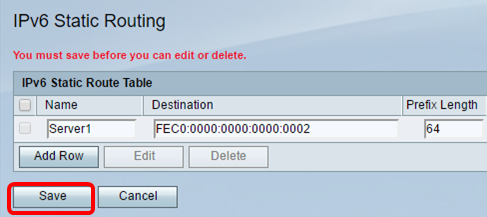
Step 10. Click Save.

You should now have successfully configured IPv6 static routing on your RV132W or RV134W Router.
 Feedback