Manage Schedules on the RV34x Series Router
Available Languages
Objective
Schedules are useful when managing certain features of the router. An administrator can assign a schedule to a rule or policy with a specific start and end time, and assign them to specific days of the week. This feature allows you to seamlessly activate and deactivate policies during any time of the day.
The objective of this document is to show you how to manage a schedule on the RV34x Series Router system configuration by adding, editing, and deleting a schedule.
Applicable Devices
- RV34x Series
Software Version
- 1.0.00.33
Configure A Schedule
Add a Schedule
Step 1. Log in to the web-based utility and choose System Configuration > Schedule.

Step 2. In the Schedule Table, click Add to create a schedule.

Step 3. In the Name field, create a unique name for the schedule. The name must not contain any spaces or special characters.
Note: For this example, ClientSchedule is used.

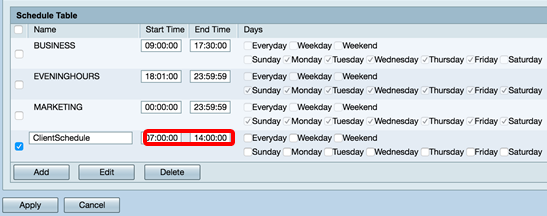
Step 4. Using Military Time, enter a specific start time and end time in the respective Start Time and End Time fields for the schedule to take effect.
Note: For this example, 07:00:00 and 14:00:00 are used.
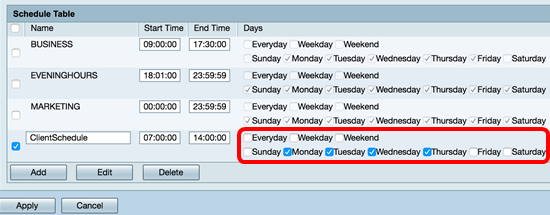
Step 5. Check the check boxes of the days you want the schedule to be active. You can choose Everyday, Weekday, or Weekend to quickly assign the schedule. Check boxes of the specific days of the week will automatically be checked. You can also choose specific days manually.
Note: For this example, Monday, Tuesday, Wednesday, and Thursday are checked.
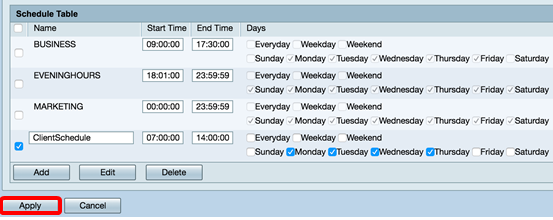
Step 6. Click Apply.
Step 7. (Optional) To save the configuration permanently, go to the Copy/Save Configuration page or click the  icon at the upper portion of the page.
You should now have successfully created or added a schedule.
Edit a Schedule
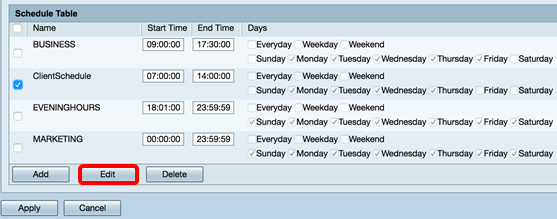
Step 1. Check the check box of the schedule you want to edit.
Note: For this example, ClientSchedule is used.
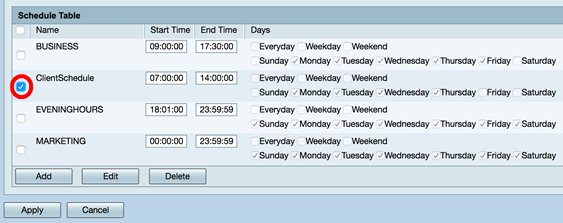
Step 2. Click Edit.
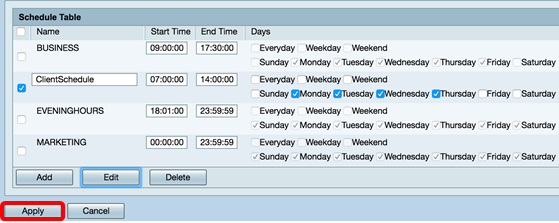
Step 3. Modify the fields you want to change.
Note: For this example, Friday is checked.

Step 4. Click Apply.
Step 5. (Optional) To save the configuration permanently, go to the Copy/Save Configuration page or click the  icon at the upper portion of the page.
You should now have successfully edited a schedule.
Delete a Schedule
Step 1. Check the check box of the schedule you want to delete.
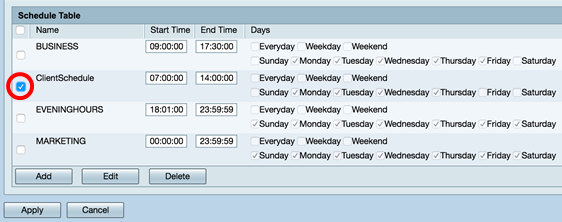
Step 2. Click Delete.
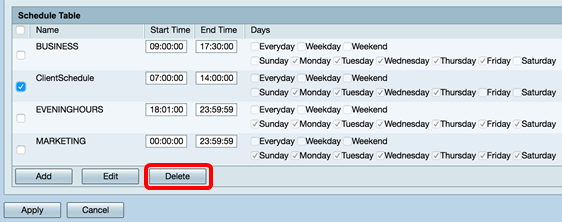
Step 3. A notification similar to the one below will appear to confirm your action. Click OK to continue. The schedule will be removed from the table.

Step 4. Click Apply.
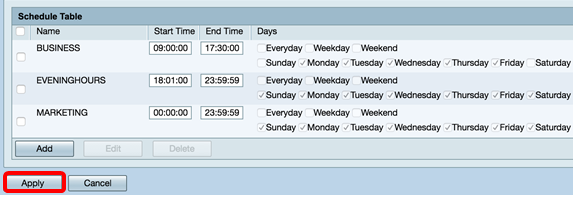
Step 5. (Optional) To save the configuration permanently, go to the Copy/Save Configuration page or click the  icon at the upper portion of the page.
You should now have successfully deleted a schedule.
 Feedback