Configure Dynamic Routing Information Protocol (RIP) on an RV132W and RV134W Router
Available Languages
Objective
Routing Information Protocol (RIP) is an Interior Gateway Protocol (IGP) that is commonly used in internal networks. It prevents routing loops by limiting the number of hops allowed on a path from source to destination. RIP allows a hop count of 15, before considering the destination unreachable. By default, RIP sends updates every 30 seconds. Being one of the oldest routing protocols, RIP is typically used in networks that use legacy devices.
This article aims to show you how to configure RIP on an RV132W or RV134W Router.
Applicable Devices
- RV132W
- RV134W
Software Version
- 1.0.0.17 — RV132W
- 1.0.0.21 — RV134W
Configure RIP
Step 1. Log in to the web-based utility and click Networking > Routing > RIP.

Step 2. In the RIP Basic Settings area, click On for RIP Status.

Step 3. Choose the RIP Version by choosing the appropriate radio button.
The options are:
- RIPv1 — a classful routing protocol that does not support Variable Length Subnet Masking (VLSM). RIPv1 uses a broadcast address to send advertisements.
- RIPv2 — a classless routing protocol that supports VLSM. RIPv2 uses 224.0.0.9 for periodic multicasts.
- Default (receive RIPv1/v2, send RIPv1) — receives RIPv1 and v2 updates but sends out RIPv1 updates only.
Note: In this example, RIP Version is left at its Default (receive RIPv1/v2, send RIPv1) setting.
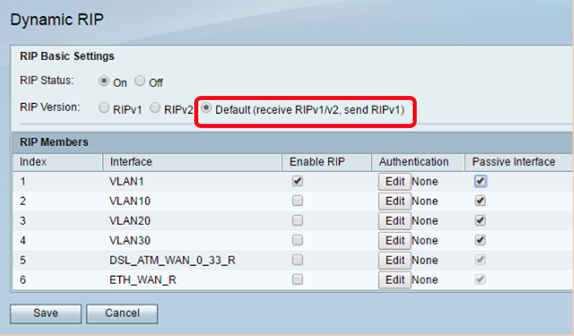
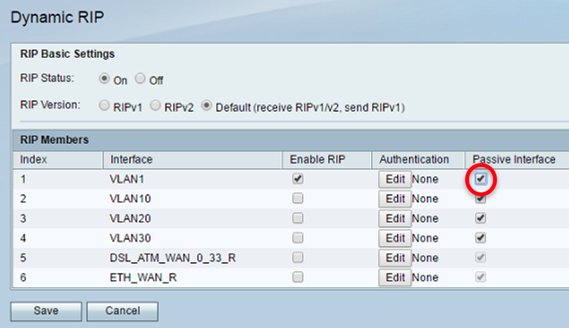
Step 4. (Optional) In the RIP Members area, check the check box under Enable RIP on any of the available interfaces.
Note: In this example, RIP is enabled only on VLAN1.

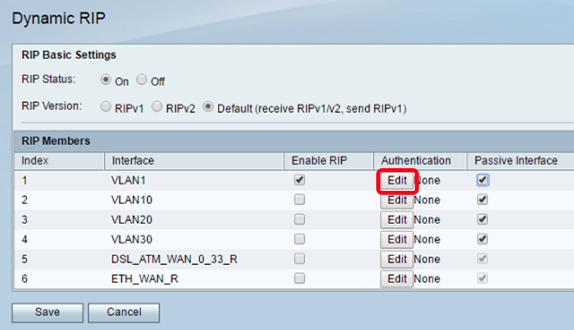
Step 5. (Optional) Under Authentication, click Edit to implement RIP authentication settings for an interface.
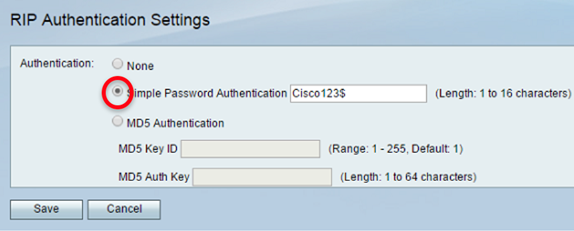
Step 6. Choose the Authentication type by clicking the corresponding radio button and then enter the password.
The options are:
- None — Choose this option to disable authentication.
- Simple Password Authentication — choose this option to implement simple password authentication. You need to enter the password in the password field. A password of 1 to 16 characters can be used with this setting.
- MD5 Authentication — choose this option to use the MD5 authentication method.
- MD5 Key ID — Enter a value from 1 to 255. The default value is 1.
- MD5 Auth Key — Enter the MD5 authentication key. This can be 1 to 64 characters in length.
Note: In this example, Simple Password Authentication is chosen.
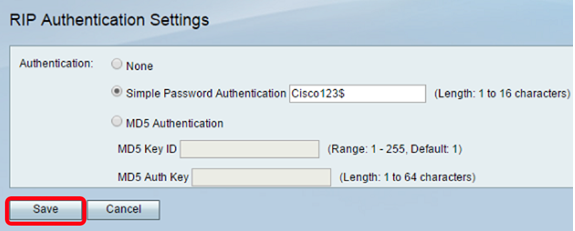
Step 7. Click Save.
Step 8. (Optional) Under Passive Interface, check the check box that corresponds to the appropriate interface. This stops incoming and outgoing updates.
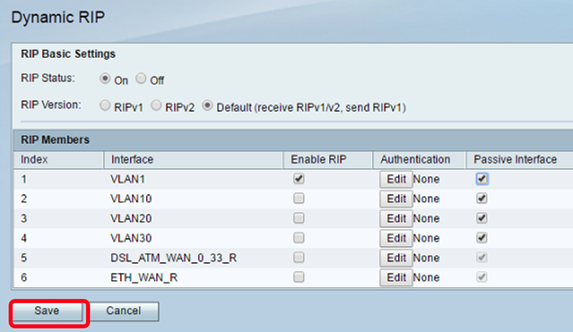
Step 9. Click Save.
You should now have successfully configured RIP on your RV132W or RV134W Router.
 Feedback