Configuration of Captive Portal on the RV130W
Available Languages
Objective
Captive portal turns a web browser into an authentication device. The web page requires user interaction or authentication in order to grant network access to the user. Captive portals are commonly used at Wi-Fi hotspots to regulate access to the network through a password and username system.
The objective of this document is to show you how to configure captive portal on the RV130W.
Applicable Devices
• RV130W
Add a Captive Portal Profile
Step 1. Log in to the web configuration utility and choose Wireless > Captive Portal > Portal Profile. The Portal Profile page opens:
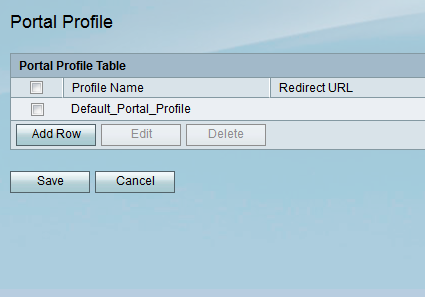
Step 2. Click Add Row to add a new captive portal profile.

A new page of portal profile settings appears:
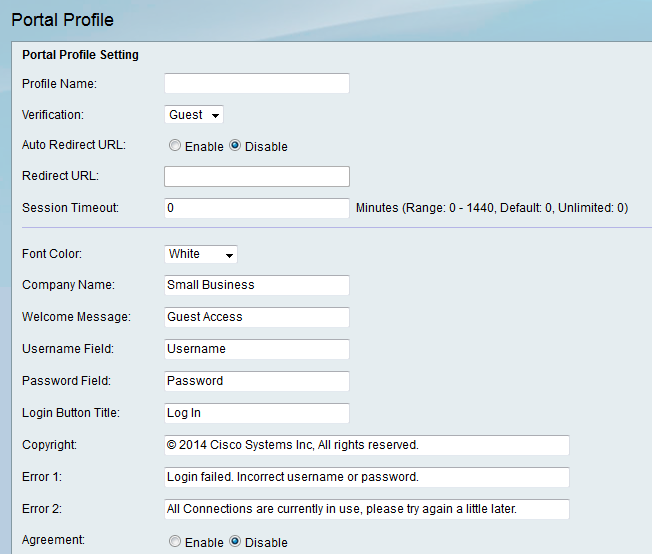
Step 3. In the Profile Name field, enter a name for the captive portal profile.

Step 4. From the Verification drop-down list, select the method of authentication used to verify clients.

The available options are defined as follows:
• Guest — Client does not need to be authenticated by a database.
• Local — Device uses a local database to authenticate clients.
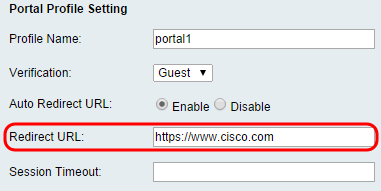
Step 5. In the Auto Redirect URL field, Click the Enable radio button to redirect clients to a specified web address when they log into the captive portal. If you do not want this feature, choose Disable and skip to Step 7.

Step 6. If you chose to enable Auto Redirect URL in Step 5, In the Redirect URL field, enter the address for the web page you would like client to be redirected to.
Step 7. In the Session Timeout field, enter the time, in minutes, that a client is allowed to stay connected before they are logged out and re-authentication is required. Entering a value of 0 allows the client to stay connected for an unlimited time period.

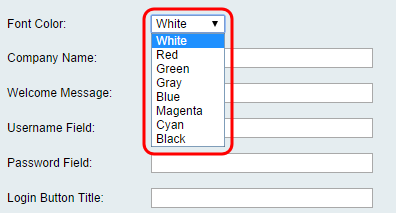
Step 8. Choose a color for the text on the captive portal page from the Font Color drop-down list.
Step 9. In the Company Name field, enter the company name to be shown on the captive portal page.

Step 10. In the Welcome Message field, enter the message that is shown when a client is successfully connected.
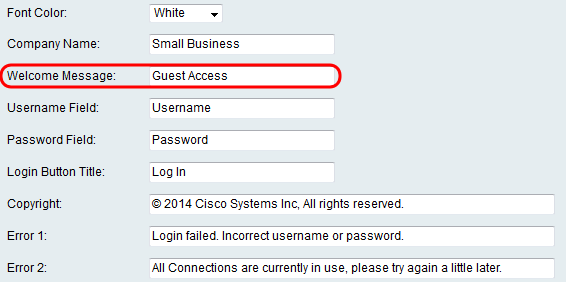
Step 11. In the Username field and the Password field, Enter the text that is shown next to these fields when they are displayed on the captive portal page.

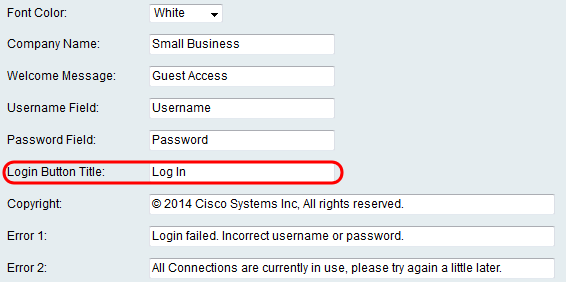
Step 12. In the Login Button Title field, enter the text to be displayed on the login button of the captive portal page.
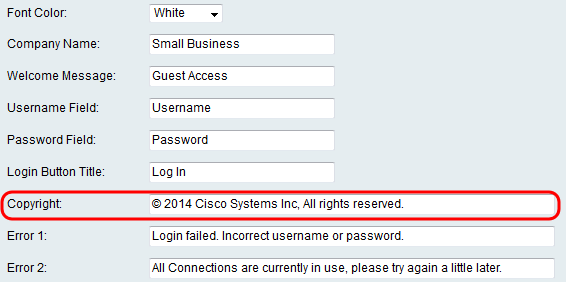
Step 13. In the Copyright field, enter a copyright to be shown at the bottom of the captive portal page.
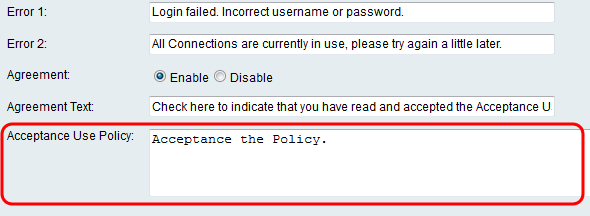
Step 14. Enter error messages to be shown in the Error 1 and Error 2 fields. Error 1 is for failed authentication due to invalid username or password. Error 2 is for when the network is busy and all connections are being used.

Step 15. In the Agreement field, Click the Enable radio button to require clients to read and agree to an acceptance policy prior to connecting. If you do not want this feature, choose Disable and skip to Step 18.

Step 16. If you chose to enable an agreement policy in Step 15, enter the text in the Agreement Text field that will appear next to the agreement check box on the captive portal page.
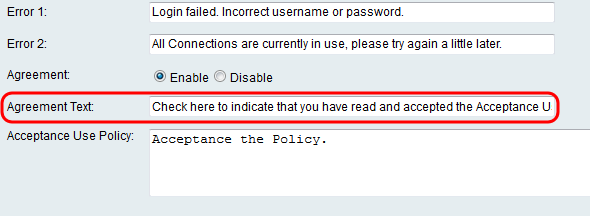
Step 17. If you chose to enable an agreement policy in Step 15, enter in the Acceptance Use Policy field the text that will be displayed as the use policy on the captive portal page.
Step 18. If you wish to change the background image or logo that is displayed on the captive portal page, click Browse to select an image from your computer. When you are ready to add the item to the device, click Upload for the corresponding item.

Step 19. Click Save to save your newly created captive portal profile.
Step 20. You will be redirected to the main Portal Profile page. Your new profile should be listed in the Portal Profile Table. Click Save to keep the profile saved onto your device.

Add User Accounts
User accounts with a username and password must exist for captive portal to function. Only clients with a user account stored in the device will be able to log in on the captive portal page and access the network.
Step 1. Navigate to Wireless > Captive Portal > User Account in the web configuration utility. The User Account page appears:
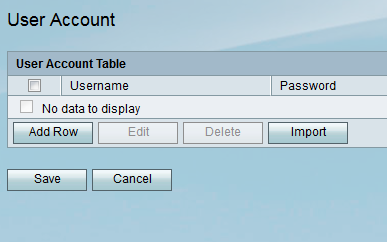
Step 2. Click Add Row to add a new user account to the User Account Table.

Step 3. Enter a name for the user in the Username field.

Step 4. Enter a password for the user account in the Password field. Enter the same password again in the Verify Password field.

Step 5. Enter the time (in minutes) that the specific user will be allowed access to the network before needing to log in again in the Access Time (Minutes) field. Entering 0 will grant the user unlimited access.

Step 6. Click Save to save the new user account.
Applying a Captive Portal Profile to a Wireless Connection
In order to use a newly created portal profile, you must follow the steps below to apply the captive portal to one of the SSIDs of the device.
Step 1. Navigate to Wireless > Basic Settings in the web configuration utility. The Basic Settings page appears:

Step 2. Check the check box next to the SSID you wish to apply the profile to and click Edit.

Step 3. Check the Enable check box for Captive Portal, and select the profile you would like to use from the Portal Profile drop-down list.

Note: If guest verification is used on the portal profile, a VLAN other than 1 must be chosen from the VLAN drop-down list. Please refer to VLAN Membership on RV130 and RV130W if you need help creating a new VLAN.
Step 4. Click Save to save your changes.
Note: You must reboot your device afterwards to ensure that captive portal is applied to your network.
 Feedback