Email Settings on the RV130 and RV130W
Available Languages
Objective
The RV130 and RV130W can be configured to send emails to your account notifying you of important information regarding the device, such as error logs and firmware updates. The information can be configured to be sent at specified intervals and for specific types of network events.
The objective of this document is to show you how to edit the E-mail Settings on the R130 and RV130W VPN routers.
Applicable Devices
• RV130
• RV130W
Software Version
• 1.0.1.3
Configure Email Settings
Step 1. Log in to the web configuration utility and choose Administration > Logging > E-mail Settings. The E-mail Settings page opens:

Step 2. In the New Firmware E-mail Alert field, check the Enable check box to allow the device to send email alerts when new firmware is automatically detected and/or installed.

Note: To fully configure new firmware e-mail alerts, automatic firmware upgrade settings must also be configured. Refer to Firmware/Language Upgrade on the RV130 and RV130W using the Web Interface for more information.
Step 3. Check the Enable check box in the E-mail Logs field to enable E-mail logs. E-mail logs is a feature that sends an e-mail to specified addresses whenever a defined event occurs on your device.

Note: In order to enable e-mail logs, the log settings must be configured first. Refer to Configure Log Settings on the RV130 and RV130W for more information.
Step 4. (Optional) The Minimum Email Log Severity field displays the least significant event that can trigger a log message to be sent. Clicking the Configure Severity button will take you to the Log Settings page. From here, you may adjust the minimum severity and other log settings.

Step 5. If you chose to enable e-mail logs in Step 3, choose how frequently you would like the logs to be sent from the Unit drop-down list Otherwise, skip this step.

The available options are defined as follows:
• Never — Never sends logs. If this is chosen, skip to Step 8.
• Hourly — Sends logs once every hour. If this is chosen, skip to Step 8.
• Daily — Sends logs at the same time every day. If this is chosen, skip to Step 7.
• Weekly — Sends logs once a week.
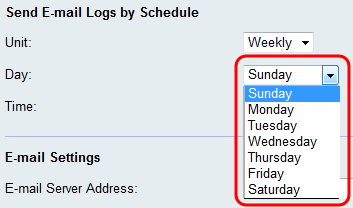
Step 6. If Weekly is chosen in Step 5, choose the day of the week you would like the logs to be sent on from the Day drop-down list. Otherwise you may skip this step.

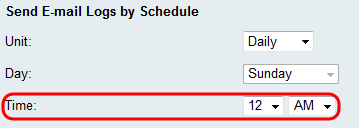
Step 7. If either Daily or Weekly is chosen in Step 5, choose the time of day you would like the logs to be sent at from the Time drop-down lists. Otherwise you may skip this step.

Step 8. In the E-Mail Server Address field, enter either an IP address or domain name for the e-mail server of the recipient accounts.

Step 9. In the E-mail Server Port field, enter the port number for the SMTP server to connect to.

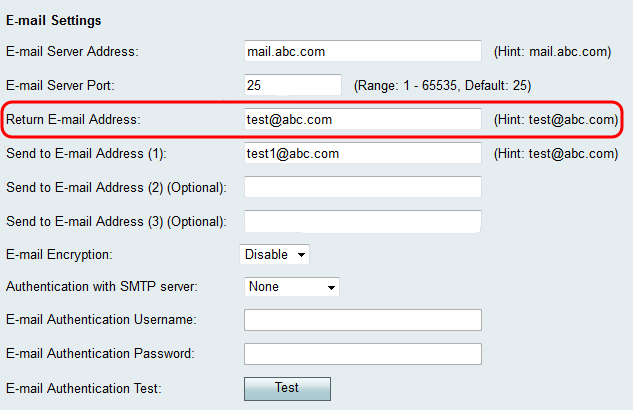
Step 10. In the Return E-mail Address field, enter an e-mail address to receive returned emails. If the email is not able to be successfully delivered, it will be sent to the return address.

Step 11. In the Send to E-mail Address (1) field, enter an e-mail address that will receive the logs. If you would like the logs to be sent to additional e-mail addresses, enter e-mail addresses in the Send to E-mail Address (2) (Optional) and/or Send to E-mail Address (3) (Optional) fields.

Step 12. In the E-mail Encryption drop-down list, choose the desired method of encryption. TLS is the recommended option.

The available options are defined as follows:
• Disable — E-mail encryption is disabled.
• SSL — Secure Socket Layer Encryption Protocol encrypts e-mails being sent, protecting and securing the data.
• TLS — Transport Layer Security Encryption Protocol is the successor to SSL with added security enhancements, and is the current industry standard.
Step 13. In the Authentication with SMTP server drop-down list, choose the method of authentication that corresponds with SMTP server you are using.

The available options are defined as follows:
• None — Disables authentication with the SMTP server.
• LOGIN — Uses a username and password to authenticate users.
• PLAIN — Similar to LOGIN but includes support for authorization identities to be used by admins. It is recommended to choose PLAIN over LOGIN if you are unsure of which to choose for the specific application.
• CRAM-MD5 — In CRAM-MD5 authentication, the server first sends a challenge string to the client and a response is received from the client as a string. This has added security over LOGIN and PLAIN. Authorization identities are not supported.
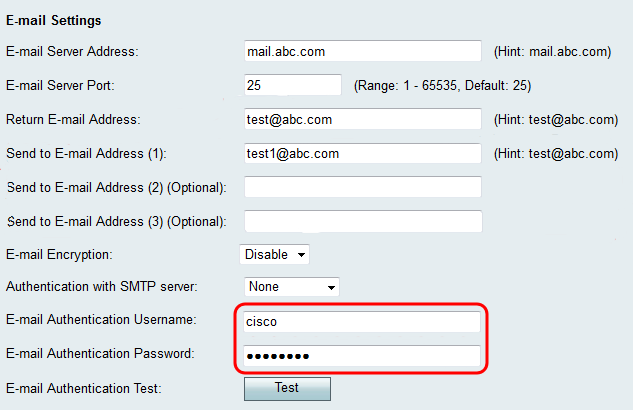
Step 14. If you chose a method of authentication with the SMTP server in Step 13, enter your username in the E-mail Authentication Username field and password in the E-mail Authentication Password field. If None was chosen in Step 13, you may skip this step.

Step 15. Click the Test button in the E-mail Authentication Test field to confirm the connection with the SMTP.

Step 16. Click Save to save the changes.
Revision History
| Revision | Publish Date | Comments |
|---|---|---|
1.0 |
12-Dec-2018 |
Initial Release |
 Feedback