VLAN Membership on RV130 and RV130W
Available Languages
Objective
A VLAN is a group of devices that are configured to act as a single network. Devices on a VLAN do not need to be located on the same LAN. Access ports are typically untagged, meaning only one VLAN passes through the interface. According to the 802.1Q standard, adding VLAN identification tags to a frame is required if you want to identify different VLANs. If you want multiple VLANs to pass through a switch interface, those VLANs need to be tagged by configuring a trunk port on a Cisco switch. Excluded ports are not identified as a member of the VLAN.
The objective of this document is to show you how to add VLANs on the RV130 and RV130W.
Applicable Devices
• RV130
• RV130W
VLAN Membership Settings
Step 1. Use the router configuration utility to choose Networking > LAN > VLAN Membership. The VLAN Membership page opens:

Step 2. In the VLAN Membership page, click Add Row to add a VLAN.

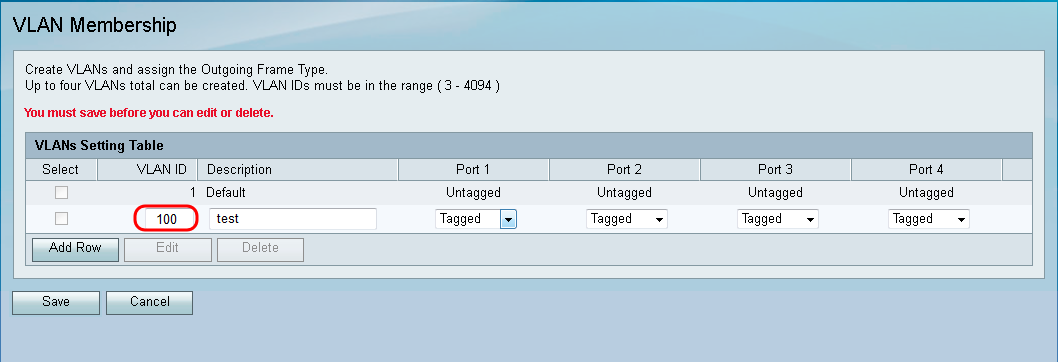
Step 3. Enter a VLAN ID for the new VLAN in the VLAN ID field. The ID must be in the range (3- 4094).

Step 4. Enter a description for the new VLAN in the Description field.

Step 5. Choose the type for each port from the corresponding drop-down list.

The available options are defined as follows:
• Tagged — Specifies that the association between a given VLAN and the port is tagged. The ingress traffic on this port will be forwarded to the given VLAN based on the information present on the tag in the frame. Egress traffic on this port will have the VLAN tag preserved when association is tagged.
• Untagged — Specifies that the association between a given VLAN and the port is untagged. Egress Traffic from this VLAN port is also untagged. When your port is untagged, the ingress traffic coming into this port is forwarded to the VLAN’s untagged association with the port.
• Excluded — Specifies that there is no association between the given VLAN and port. Neither ingress nor egress traffic will be allowed from this port.
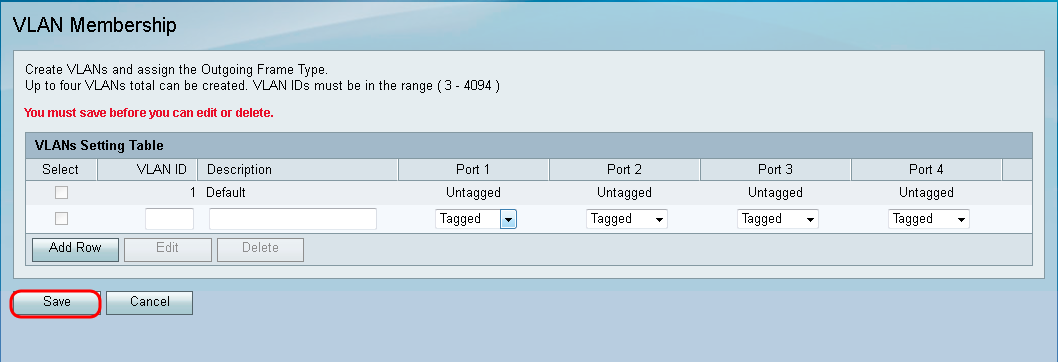
Step 6. Click Save to save the changes.

Revision History
| Revision | Publish Date | Comments |
|---|---|---|
1.0 |
12-Dec-2018 |
Initial Release |
 Feedback