Bandwidth Priority Configuration on the RV110W VPN Firewall
Available Languages
Objective
The bandwidth of the traffic that flows from the secure network (LAN) to the insecure network (WAN) can be shaped if Bandwidth Profiles are used. You can use a bandwidth profile to limit the outbound and inbound traffic. This prevents the consumption of all the bandwidth of the Internet link by the LAN users. To control bandwidth usage you can give priority to certain services. This ensures that important traffic is sent before less important traffic.
The article explains how to configure bandwidth profiles on the RV110W VPN Firewall.
Applicable Device
• RV110W
Software Version
• 1.2.0.9
Configure Bandwidth Priority
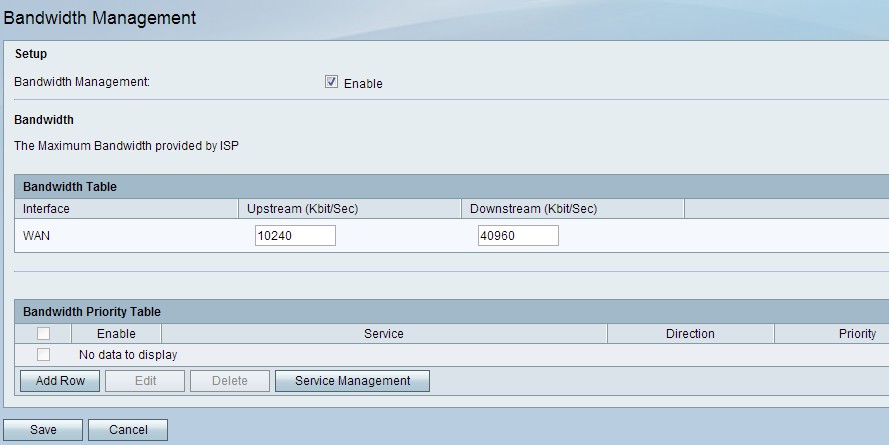
Step 1. Log in to the web configuration utility and choose QoS > Bandwidth Management. The Bandwidth Management page opens:

Step 2. Check the Enable check box in the Bandwidth Management field to enable Bandwidth Management.
Step 3. Enter the desired upstream bandwidth in Kbit/Sec. Upstream is the bandwidth size used to send data to the Internet.
Step 4. Enter the desired downstream bandwidth in Kbit/Sec. Downstream is the bandwidth size used to receive data from the Internet.

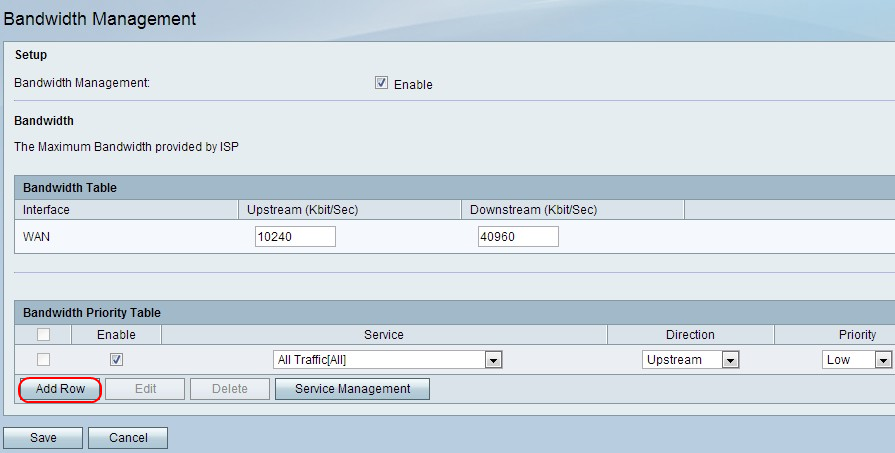
Step 5. Click Add row to configure bandwidth priority.
Step 6. Check the Enable check box to enable the bandwidth priority.
Step 7. Choose a service to prioritize from the Service drop-down list.
Note: In order to add a new service definition, click Service Management. This is used to define a new service to utilize for the firewall and QoS definitions. Please refer to the Service Management section for more info.
Step 8. Choose the direction of traffic to prioritize from the Direction drop-down list. This option determines what traffic the bandwidth priority is applied to.
Step 9. Choose the priority for the service chosen from Priority drop-down list.

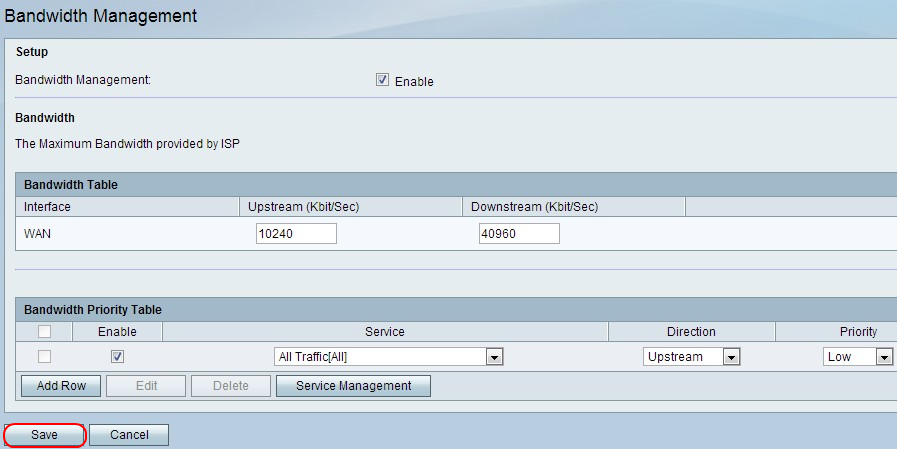
Step 10. Click Save to apply the settings.
Step 11. (Optional) To edit a bandwidth priority, check the check box of the bandwidth priority, click Edit, edit the desired fields, and click Save.
Step 12. (Optional) To delete a bandwidth priority, check the check box of the bandwidth priority, click Delete and click Save.
Service Management
The Service Management feature is used to create and customize the services for which firewall rules can be applied. Once the service gets defined, it appears in the Service Management Table.
Step 1. Click Add Row to add a new service.

Step 2. In the Service Name field, enter the desired service name. This identifies the service.

Step 3. In the Protocol field, choose the protocol from the drop-down list that the service utilizes.
• TCP — This mode allows error free transmission of data. Through the use of flow control, all data is ensured to be delivered and all unsent packets are resent.
• UDP — This mode is faster than TCP, but does not provide flow control. Primary uses of UDP include streaming of video, voice, gaming or other live applications where flow control is not practical.
• TCP & UDP — This mode allows for the use of both TCP and UDP.
• ICMP — This mode allows for control protocol. This protocol is not designed to carry application data; instead it relays information about the status of the network. The ping utility uses this protocol.
Step 4. In the Start Port field, enter the first TCP or UDP port that the service uses.
Step 5. In the End Port field, enter the last TCP or UDP port that the service uses.
Step 6. Click Save to apply the settings.
Step 7. (Optional) In order to edit a protocol, check the check box of the desired service, click Edit, edit the desired fields, and click Save.
Step 8. (Optional) In order to delete a protocol, check the check box of the desired service, click Delete, and click Save.
 Feedback