Basic Setup Wizard on RV32x VPN Router Series
Available Languages
Objective
The Basic Setup Wizard is a convenient and simple guided method of setting up initial configurations of the RV32x router series.
This document outlines and describes the Basic Setup Wizard, which can be used to change the WAN ports or configure the Internet connection of VPN Routers.
Applicable Devices
• RV320 Dual WAN VPN Router
• RV325 Gigabit Dual WAN VPN Router
Software Version
• v1.1.0.09
Basic Setup Wizard
Step 1. Log in to the Router Configuration Utility and choose Wizard. The Wizard page opens:

Step 2. Click the Launch Now button underneath the Basic Setup area to commence the Basic Setup Wizard. The Basic Setup Installation Wizard dialog-box appears.
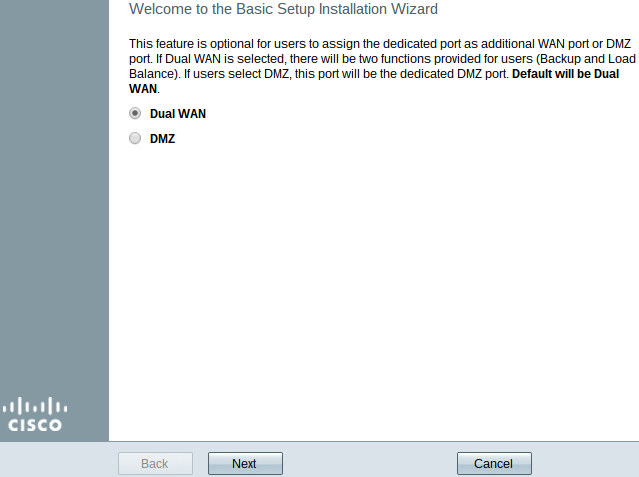
Step 3. Click the Dual WAN or DMZ radio button to continue the wizard for their respective settings. This decides how the dedicated port on the device is used: as an additional Wide Area Network (WAN) or Demilitarize Zone (DMZ) port.
• Dual WAN — Dual WAN is a useful and cost effective way to have network redundancy. Two different Internet Service Providers (ISPs) can be connected to the router. This assures that if one fails, the other is likely to continue to serve you. It gives the router two different WAN links to outside providers or networks.
• DMZ — A Demilitarized Zone is a logical subnetwork that contains the hosts, usually servers, that offer external services such as email, DNS, and FTP. The hosts that offer external services are more vulnerable to attacks from an untrusted zone, which is usually the Internet. A DMZ offers high security to the hosts connected to LAN in the given network. It is a good way to add more security to your network by separating your private network from your public network.
Step 4. Click Next to continue the wizard. The Host and Domain page opens:
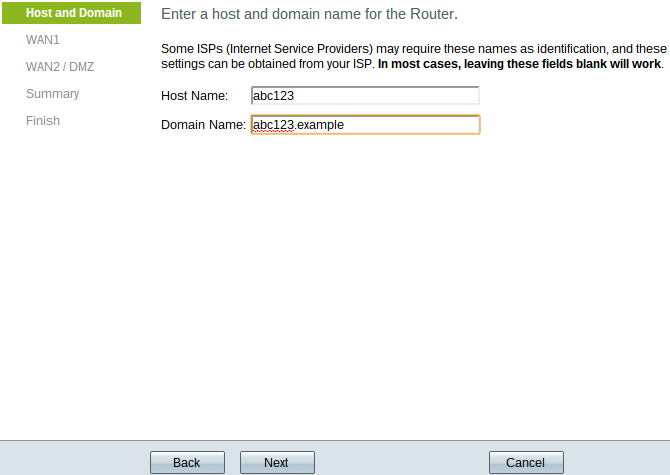
Step 5. Enter a host name for the router in the Host Name field.
Step 6. Enter a domain name for the router in the Domain Name field.
Step 7. Click Next to continue the wizard. The WAN1 page opens:
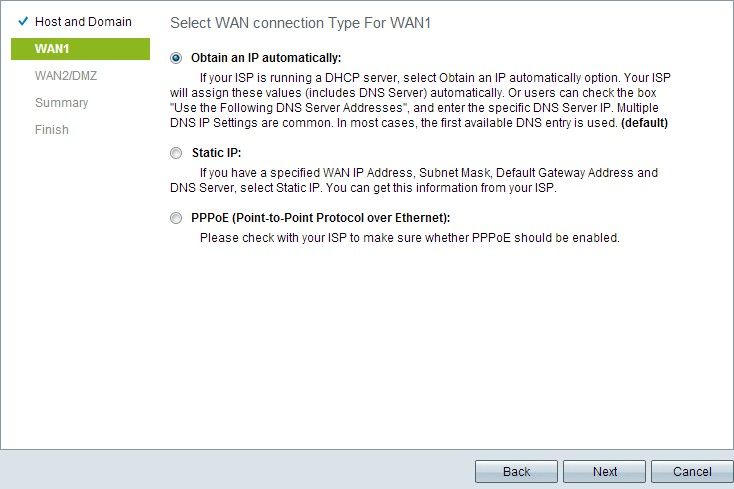
Step 8. Click the desired radio button to select a WAN connection type for WAN1 and click Next to continue the wizard. Based on which radio button was clicked, a new page opens:
• Obtain an IP Automatically — Assigns IP address automatically. This is the default.
• Static IP — Allows you to assign a static IP address.
• PPPoE (Point-to-Point Protocol over Ethernet) — Network protocol that offers a more secure data transmission. It provides an password authentication method of assigning IP addresses to client systems by the ISP.
Step 9. Based on your actions from Step 3 of Basic Setup Wizard, advance to the section titled Dual WAN or DMZ.
Obtain an IP Automatically for WAN1
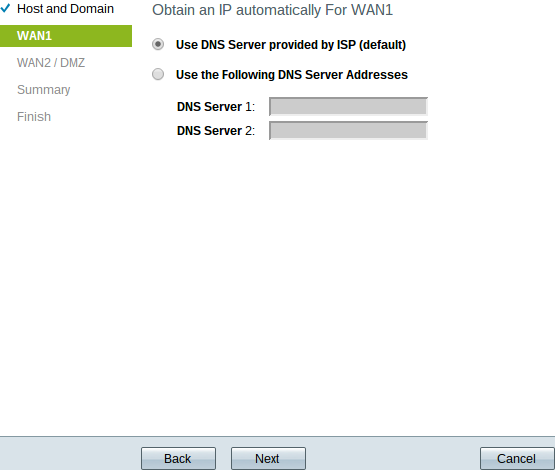
Step 1. Click the desired radio button to select the type of the Domain Name System (DNS) servers to use.
• Use DNS Server provided by ISP (default) — DNS servers from the ISP to resolve domain names into IP addresses.

• Use the Following DNS server Addresses — Used to input your own IP addresses for DNS servers. Enter the desired DNS server IP addresses to use in the DNS Server 1 and DNS Server 2 fields.
Step 2. Click Next to continue the wizard.
Static IP for WAN1
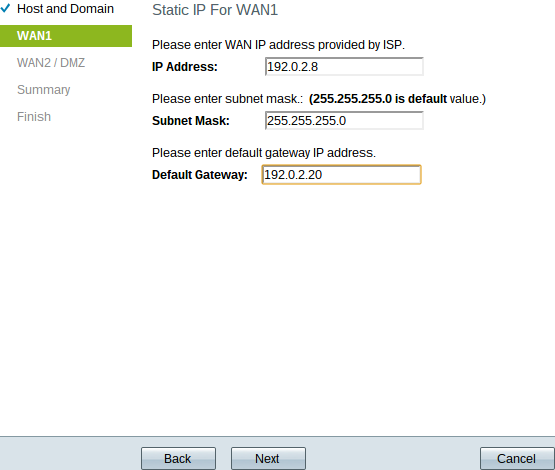
Step 1. Enter the WAN IP address in the IP Address field.
Step 2. Enter the corresponding subnet mask for the WAN IP address in the Subnet Mask field.
Step 3. Enter the default gateway IP address in the Default Gateway field. The default gateway address is the IP address of a device which receives communication from other devices on the same network that are trying to communicate outside of their own local network.
Step 4. Click Next to continue the wizard.
PPPoE (Point-to-Point Protocol over Ethernet) for WAN1
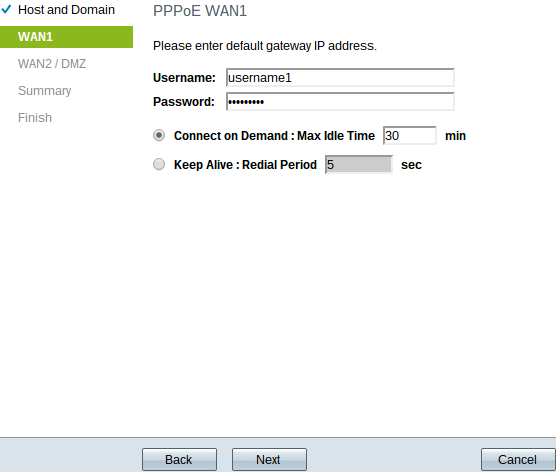
Step 1. Enter the username and password in the Username field and the Password field. These are usually given out by your ISP.
Step 2. Click the Connect on Demand radio button or the Keep Alive radio button to enter max idle time and redial period.
• Connect on Demand: Max Idle Time — Enter the time, in minutes, before the connection is disconnected due to inactivity in the Max Idle Time field. The default time provided is 30 minutes.
• Keep Alive: Redial Period — Enter the redial period in the Redial Period field. This time must be in seconds. The time period is the amount of time the device waits to reconnect if the connection was lost. The default time provided is 5 seconds.
Step 3. Click Next to continue the wizard.
Dual WAN
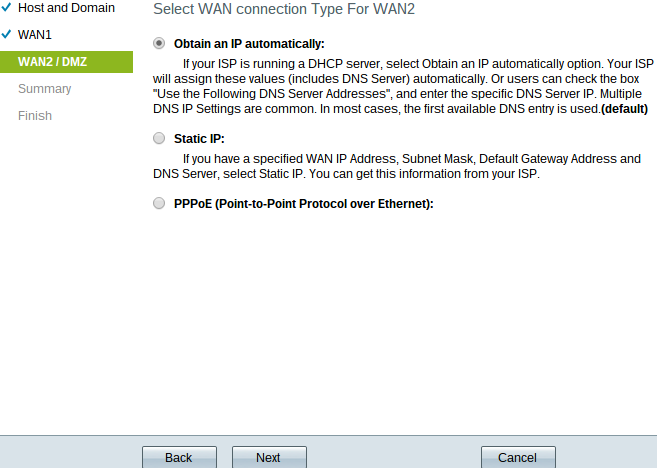
Step 1. Click the desired radio button to select a WAN connection type for WAN2 and click Next to continue the wizard. Based on which radio button was clicked a new page opens:
• Obtain an IP Automatically — Assigns IP address automatically. This is the default.
• Static IP — Allows you to assign a static IP address.
• PPPoE (Point-to-Point Protocol over Ethernet) — Network protocol that offers a more secure data transmission. It provides an password authentication method of assigning IP addresses to client systems by the ISP.

The Summary page displays an overview of the settings you have just configured in order to review the settings before you submit them.
Step 2. Click Submit to finish configuring the router.
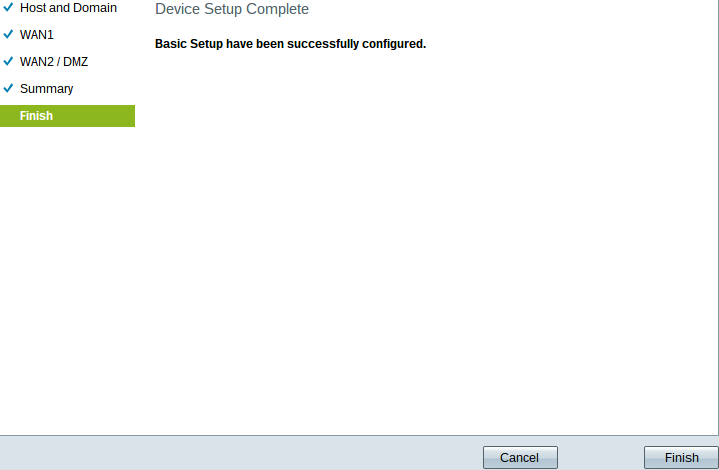
Step 3. Click Finish to finalize the wizard.
DMZ

In this case, the settings involve only DMZ as was determined in Step 3 of the Basic Setup Wizard.
Step 1. Enter the DMZ IP address to use in the IP address field.
Step 2. Enter the subnet mask associated with the DMZ IP address in the Subnet Mask field.
Step 3. Click Next to continue the wizard. The Summary page opens.
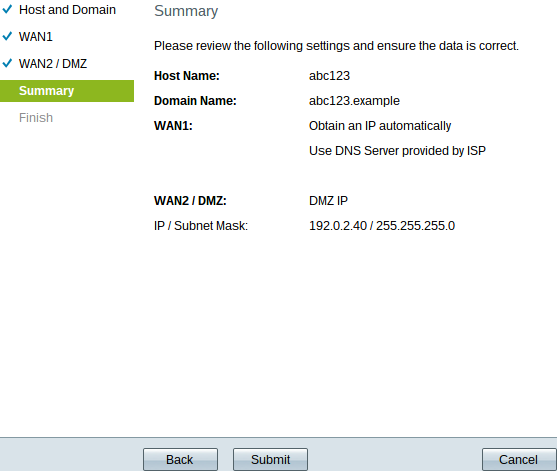
The Summary page displays an overview of the settings you have just configured to review before you submission.
Step 4. Click Submit to finish the configuration of the router.
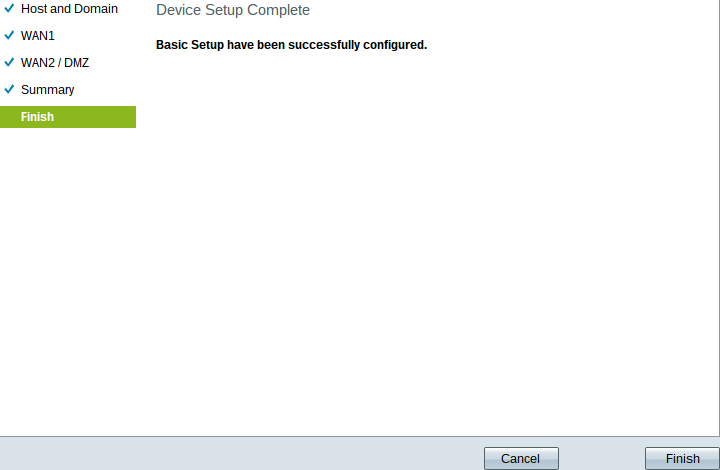
Step 5. Click Finish to finalize the wizard.
 Feedback