Configure One-to-One Network Address Translation (NAT) on RV320 and RV325 VPN Router Series
Available Languages
Objective
One-to-One NAT is the process that maps one internal private IP address to one external public IP address. This helps to protect the private IP addresses from any malicious attack or discovery as the private IP addresses are kept hidden. On RV32x Series VPN Routers, you can map a single private IP address (LAN IP address) to a single public IP address (WAN IP address), or a range of private IP addresses to a range of public IP addresses.
The objective of this document is to show you how to configure one to one NAT on RV32x Series VPN Routers.
Applicable Devices
• RV320 Dual WAN VPN Router
• RV325 Gigabit Dual WAN VPN Router
Software Version
• v1.1.0.09
One-to-One NAT Configuration
Enable NAT
Step 1. Log in to the web configuration utility and choose Setup > One-to-One NAT. The One-to-One NAT page opens:
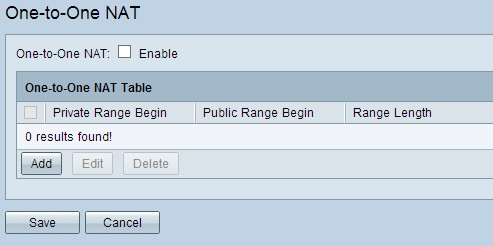
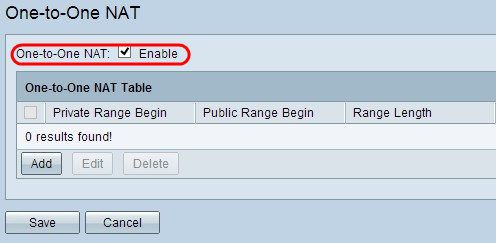
Step 2. Check the Enable check box in the One-to-One NAT field to enable One-to-One NAT.
Add One-to-One NAT
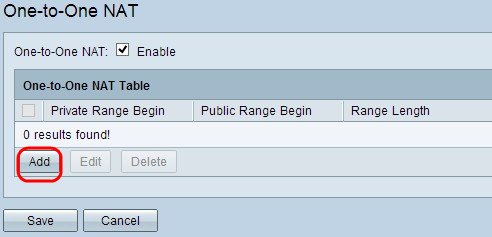
Step 1. Click Add to add a new entry.
Step 2. Enter the starting IP address of the private IP address range which you want to map to public IP addresses in the Private Range Begin field.
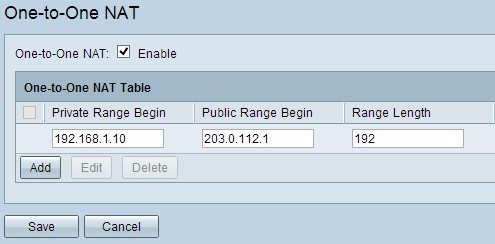
Note: Be careful when you enter a private IP address as you cannot use the management IP address of the router. The Management IP address is used to directly connect with the device.
Step 3. Enter the starting IP address of the public IP address range which the Internet Service Provider (ISP) provides you in the Public Range Begin field.
Note: Be careful to enter the public IP address so that it does not include the WAN IP address of the router.
Step 4. Enter the length of the range in the Range Length field, this counts the number of IP addresses to map. The maximum range length is 256.
Step 5. Click Save to save the settings.
Edit One-to-One NAT
Step 1. To edit any field, check the check box beside the specific One-to-One NAT to select the entry.
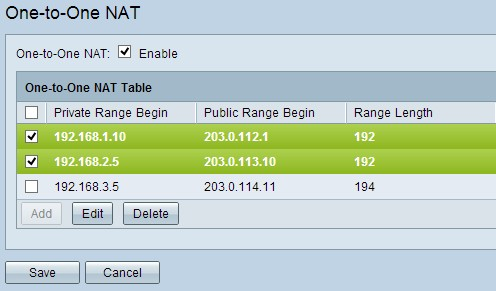
Step 2. Click Edit.
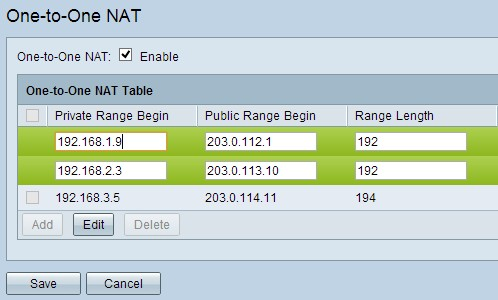
Step 3. Change the necessary fields to edit the specific One-to-One NAT.
Step 4. Click Save to save the settings.
Delete One-to-One NAT
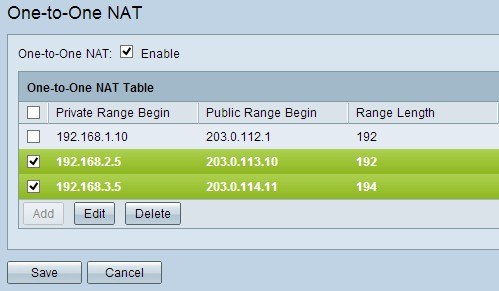
Step 1. To delete any One-to-One NAT, check the check box beside the specific One-to-One NAT to select the entry.
Step 2. Click Delete.
Step 3. Click Save to save the settings.
 Feedback