Routing Settings on the RV110W
Available Languages
Objective
The RV110W sends data traffic along different paths in a network through the act of routing. Paths can connect devices to other devices on the same or different network or to the Internet. This article explains how to configure routing settings on the RV110W.
Applicable Devices
• RV110W
Steps of Procedure
Step 1. Use the web configuration utility to choose Networking > Routing.

Step 2. To the right of Operating Mode, click the Gateway radio button to set the RV110W to act as a router and to connect the network to the Internet, or click the Router radio button to set the RV110W to act only as a router.
Note: If you choose Gateway, skip to Step 6.
Step 3. To the right of RIP, check the Enable checkbox to allow the Routing Information Protocol (RIP) to automatically adapt the network when changes occur in the network layout.
Step 4. To the right of RIP Send Packet Version, click the RIPv1 radio button to send RIPv1 packets which are only compatible with RIPv1 networks, or click the RIPv2 radio button to send RIPv2 packets which are compatible with RIPv1 and RIPv2 networks.
Step 5. To the right of RIP Recv Packet Version, click the RIPv1 radio button to receive RIPv1 packets, or click the RIPv2 radio button to receive RIPv2 and RIPv2 packets.
Step 6. From the Route Entries drop-down menu, choose an unused route number to make a direct path to a destination network.

Step 7. In the Enter Route Name field, enter a name for the route.

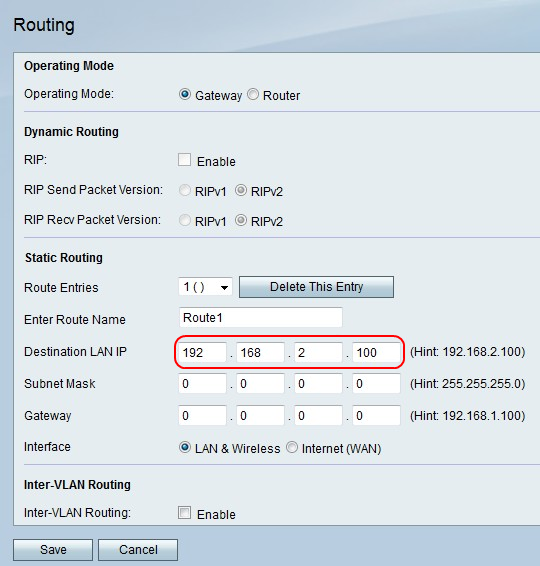
Step 8. In the Destination LAN IP field, enter an IP address to which the direct path connects.

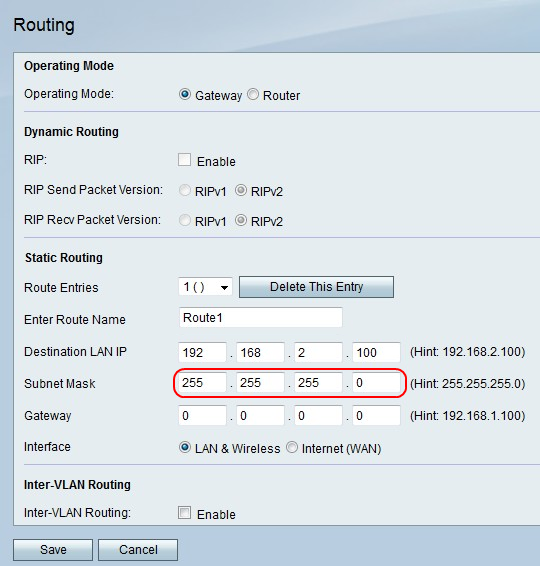
Step 9. In the Subnet Mask field, enter the subnet mask for the destination LAN IP address.

Step 10. In the Gateway field, enter the gateway IP address for the direct path.
Step 11. To the right of Interface, click the LAN & Wireless radio button to direct packets to a LAN and wireless network, or click the Internet (WAN) to direct packets to the Internet.
Step 12. To the right of Inter-VLAN Routing, check the Enable checkbox to send packets with the VLAN.
Step 13. Click Save to save changes or Cancel to discard them.
 Feedback