Basic Wireless Settings on RV110W
Available Languages
Objective
With the the web configuration utility, an user can change various wireless settings on the RV110W so that the router runs at its optimum performance. This article explains how to configure basic wireless settings on the RV110W.
Applicable Devices
- RV110W
Steps of Procedure
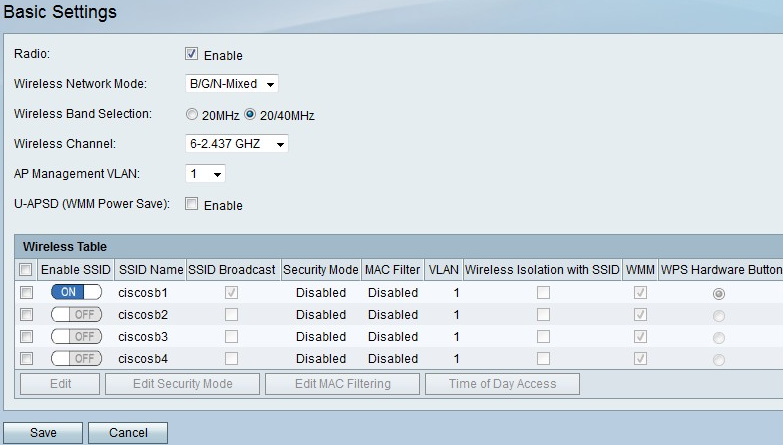
Step 1. Use the web configuration utility to choose Wireless > Basic Settings. The Basic Setting page opens.

Step 2. To the right of Radio, check the Enable checkbox to enable wireless networks.
Step 3. From the Wireless Network Mode drop-down field, choose a wireless network mode.
- B/G/N-Mixed — This option allows Wireless-N, Wireless-B, and Wireless-G devices to connect to the network.
- B Only — This option only allows Wireless-B devices connect to the network.
- G Only — This option only allows Wireless-G devices connect to the network.
- N Only — This option only allows Wireless-N devices connect to the network.
- B/G-Mixed — This option allows Wireless-B and Wireless-G devices to connect to the network.
- G/N-Mixed — This option allows Wireless-G and Wireless-N devices to connect to the network.
Step 4. If you choose B/G/N-Mixed, N-Only, or G/N-Mixed, click either the 20MHz radio button or the 20/40MHz radio button to set the wireless bandwidth.
Step 5. From the Wireless Channel drop-down menu, choose a channel to which to connect.
Step 6. From the AP Management VLAN drop-down menu, choose a VLAN ID to which to connect.
Step 7. To the right of U-APSD (WMM Power Save), check the Enable checkbox to enable the Unscheduled Automatic Power Save Delivery (U-APSD) (or WMM Power Save) to conserve power.
Step 8. Click Save to save changes or Cancel to discard them.
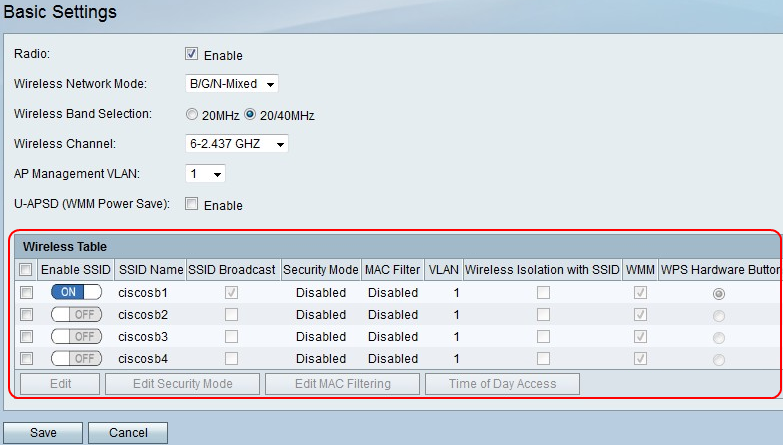
Wireless Table

Step 1. Check the checkbox in the first column of the Service Set Identifier (SSID) that you want to edit.
Step 2. Click Edit to edit SSID properties.
Step 3. In the Enable SSID column, click On/Off icon to enable an SSID.
Step 4. In the SSID Broadcast column, check the check box to broadcast the SSID to other wireless devices.
Step 5. From the VLAN drop-down menu, choose a VLAN ID that the network associates with.
Step 6. In the Wireless Isolation with SSID column, check the checkbox to wirelessly isolate the SSID.
Step 7. In the WMM column, check the checkbox to enable Wi-Fi Multimedia (WMM).
Step 8. In the WPS Hardware Button column, click the radio button to map the WPS button on the front of the casing for the RV110W to the network.
Step 9. Click Save to save changes or Cancel to discard them.
 Feedback